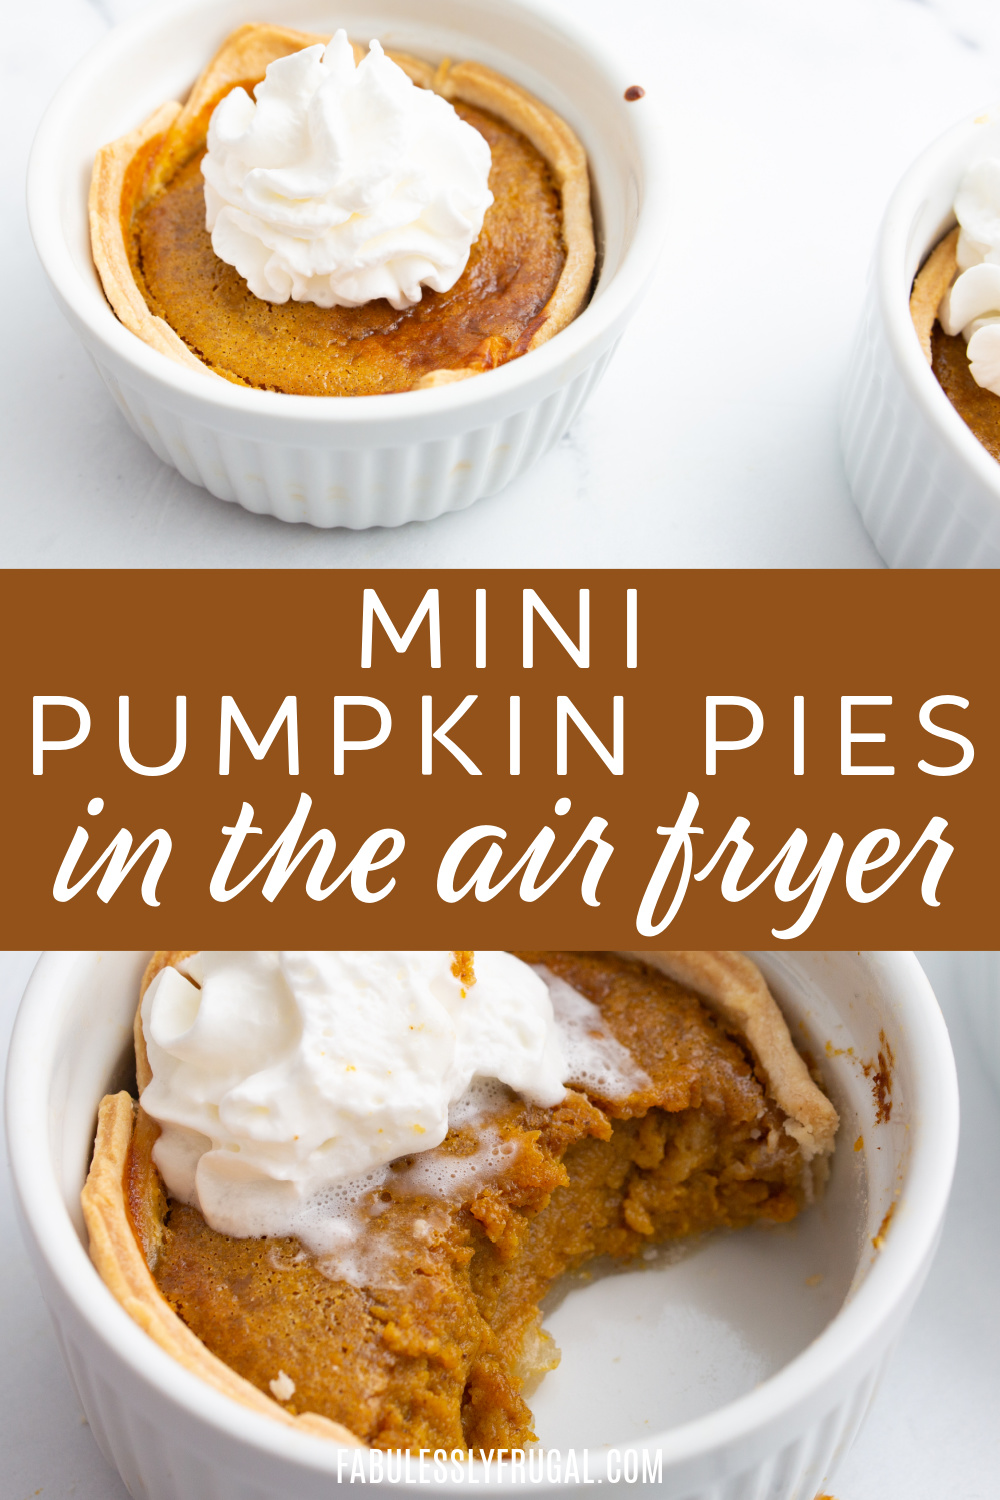
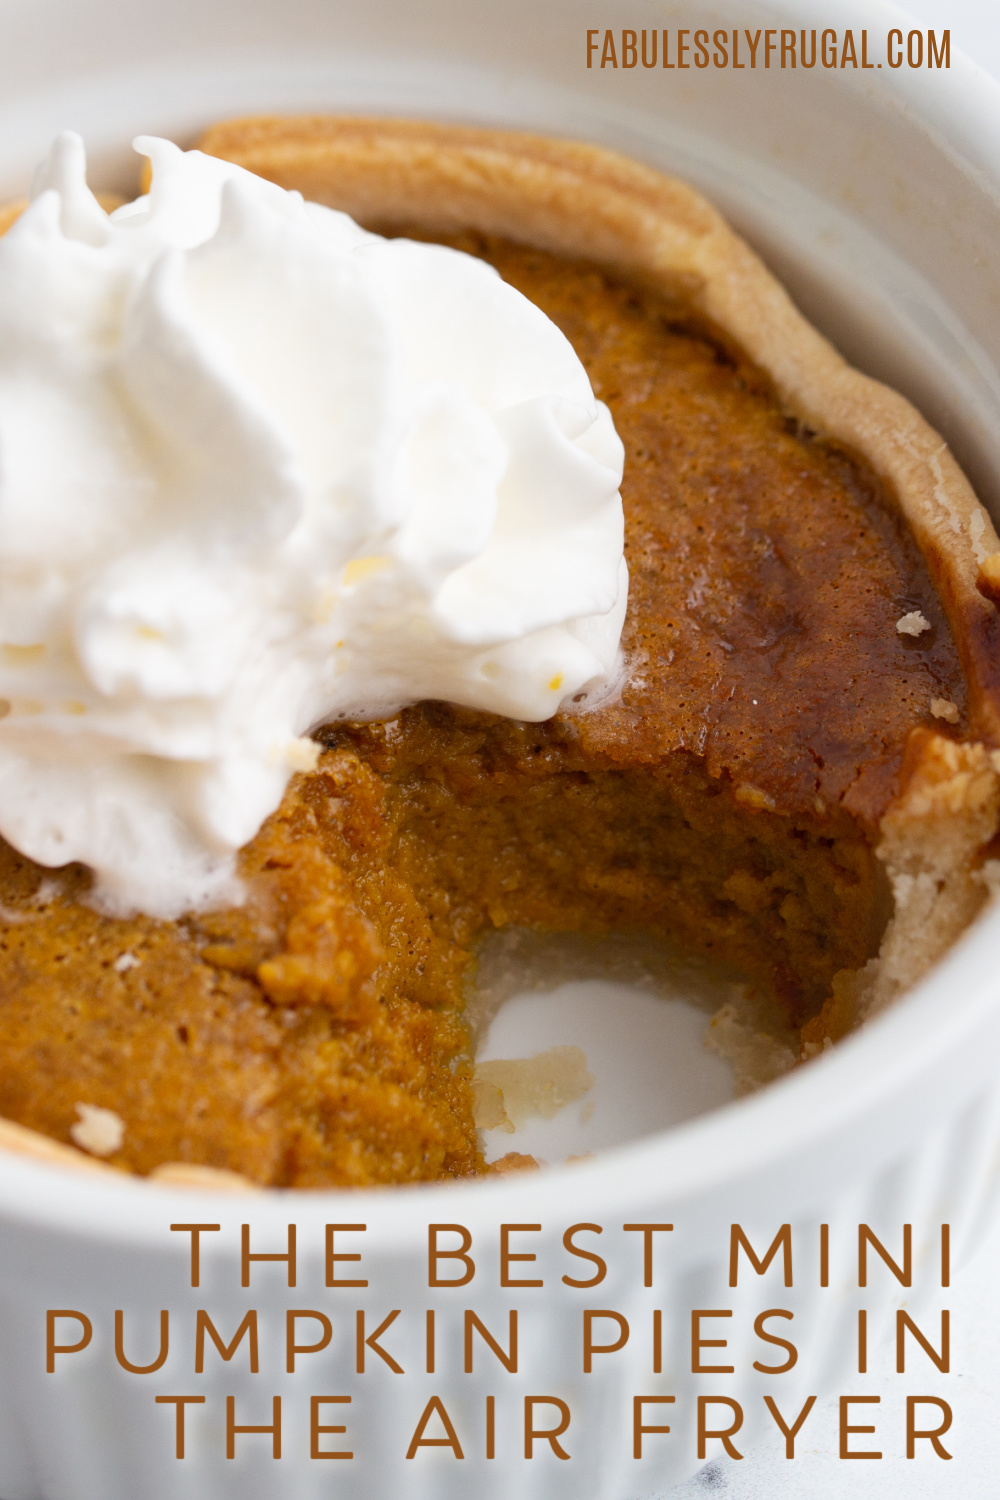
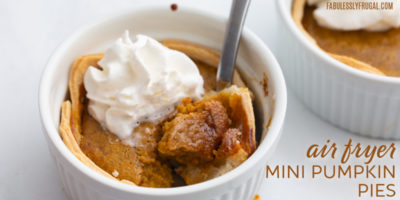
Mini Pumpkin Pies
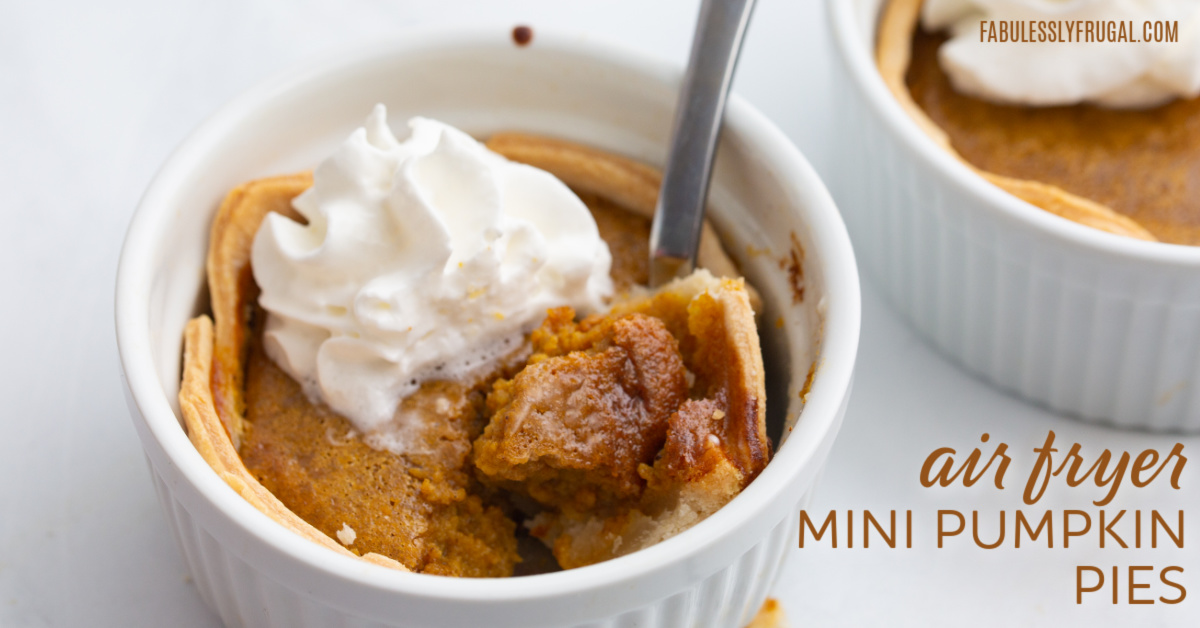
Some of the things I love about the holidays are the sweets, treats, and all the tasty recipes like this mini pumpkin pie recipe. Who knew you could make mini pumpkin pies right in your air fryer!?
Well, now you do! And there is no turning back now. This simple dessert recipe will be one you want to save, and maybe even share with your friends.
They are the best to serve at parties or brunches with friends and family. You can also find 5 more air fryer dessert recipes that your family will love in my video!
Ingredients and Supplies Needed to Make Mini Pumpkin Pies for the Holiday:
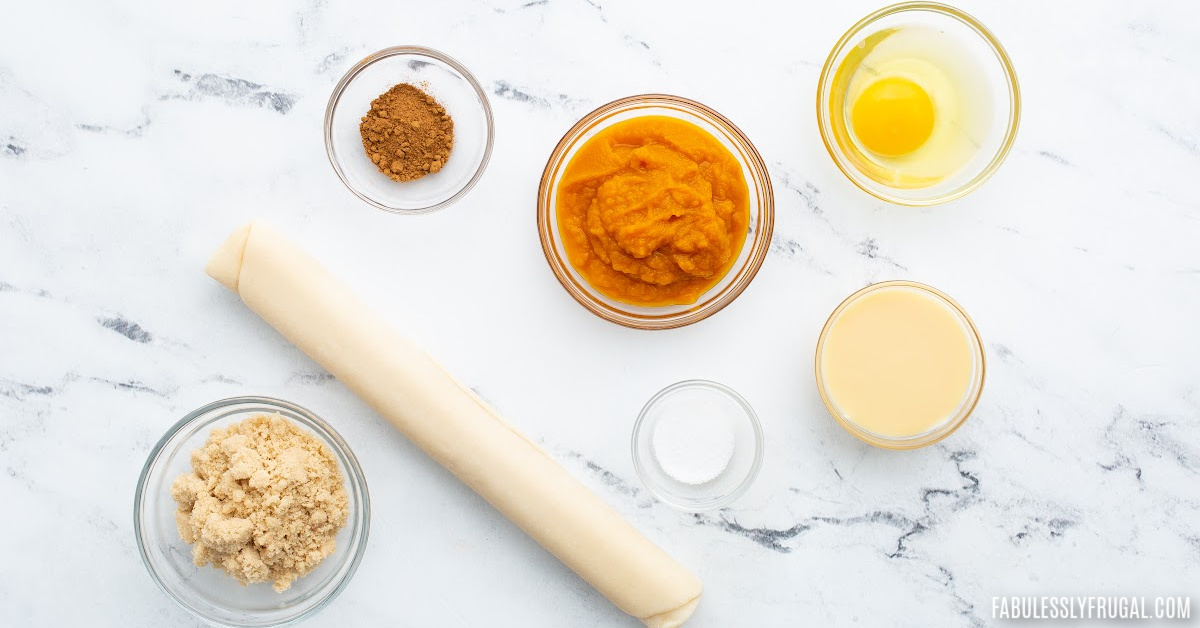
Ingredients:
- Premade pie crust (I like using the Pillsbury pie crust)
- Pumpkin puree
- Condensed milk
- Brown sugar
- Pumpkin spice blend
- Salt
- Egg
- Whipped cream (optional – but who wouldn’t want it! Haha)
Supplies:
- Small mixing bowl
- Whisk
- Ramekin or silicone muffin liner
- Nonstick cooking spray or Oil sprayer
- Air fryer (Cosori Pro II works wonderfully for these mini pumpkin pies)
- Instant read thermometer (optional, but helpful)
Get all my favorite tools for the air fryer on my Amazon store page.
How Will I Know if My Pumpkin Pies are Done?
To know that the pumpkin pies are done, give them a little shake and see if they jiggle much or at all.
If they are done, you should see very little jiggling and the crust will become a nice, slightly golden brown color.
You can also use an Instant read thermometer to check the internal temperature and see if the pie has reached 175F or 79C.
Can I Use Frozen Pie Crust?
No, for this recipe you will want to make sure that your pie crust has defrosted and come to room temperature.
This will ensure that you are able to form the dough to the shape needed to create the mini pie shells, as well as make sure the pie crust is cooked through all the way without overcooking the pumpkin pie filling.
How Do I Store Mini Pumpkin Pies?
Once the pies are done baking and have come to room temperature then you can either serve them or save them for later.
If you would like to keep the pies for later, simply keep them in an airtight container, preferably not stacked, and in the fridge for 3-5 days.
How to Make Mini Pumpkin Pies in the Air Fryer:
Step 1: Create the Pie Filling
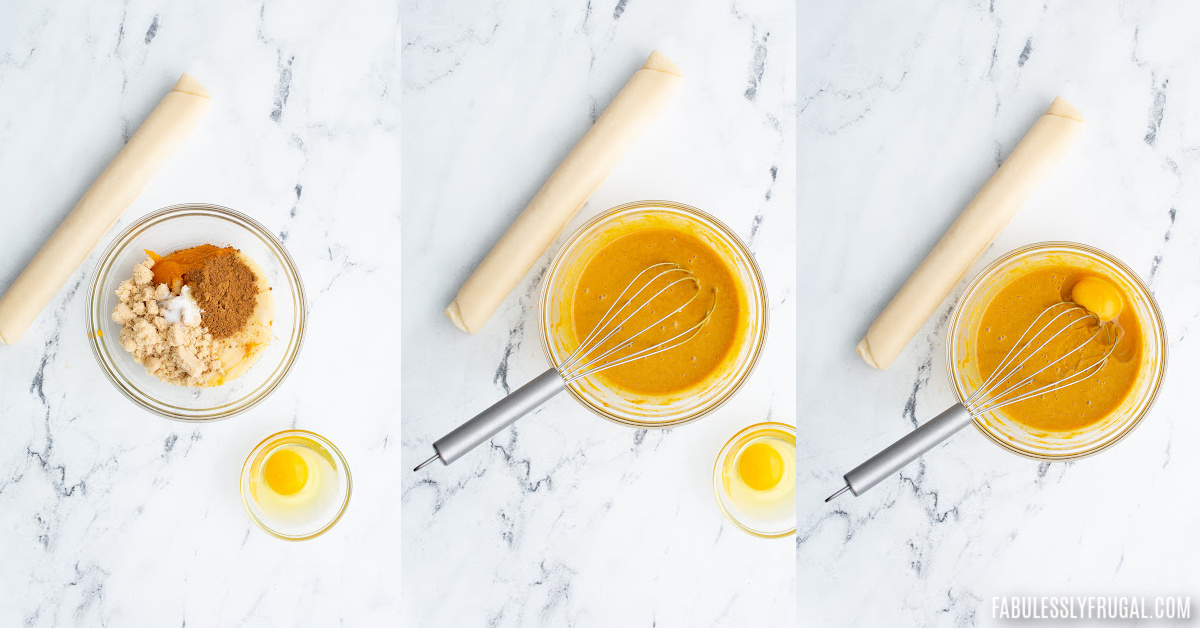
Start by mixing together the pumpkin puree, condensed milk, brown sugar, pumpkin spice, and salt in a medium mixing bowl.
Whisk it all together until it is well combined and has no lumps, and then set it aside.
Step 2: Shape the Pie Crust
Using the premade pie dough, lay it out on a flat lightly floured surface or a silicone cookie sheet.
Then use either the bigger side of the muffin liner or ramekin (whichever you choose to use) and place it on the dough as many times as it will fit, pressing it into the dough to create the shape for the crust.
You should be able to get 8-12 mini pie crusts by the time you are done.
Step 3: Prepare the Pie Shells
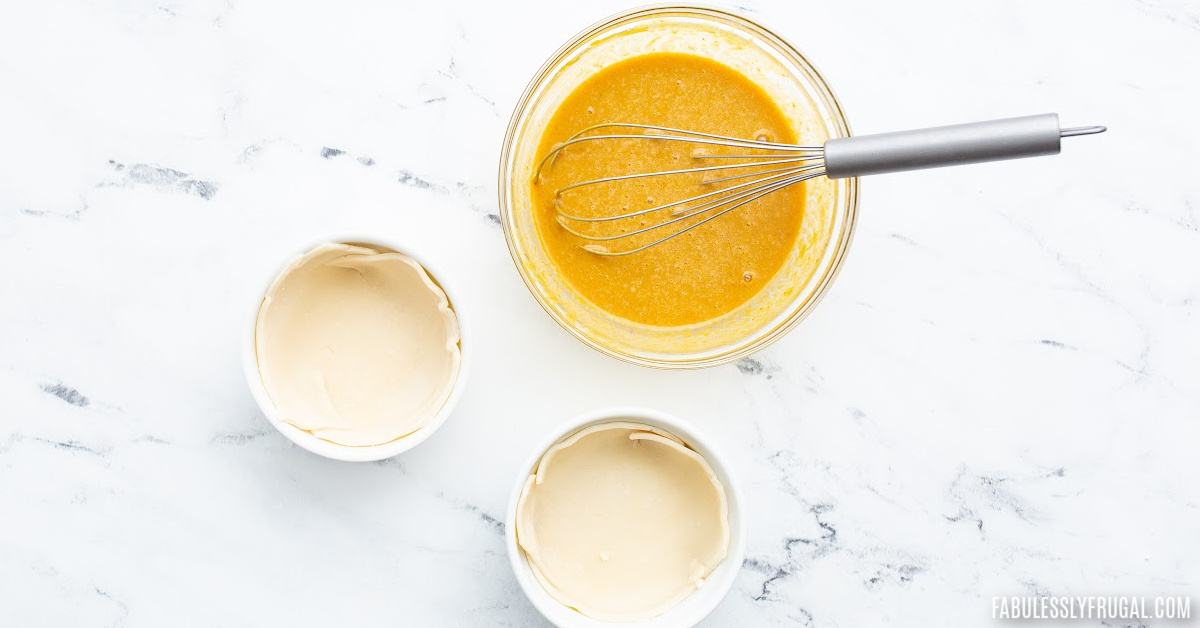
Now, place the pie dough cutouts into either the muffin liner or the ramekin, and try your best to press it into the lightly greased dish on the sides.
Do not stretch the dough. If you need to, cut the dough in order to make it fit the shape of the dish.
Step 4: Fill the Pie Crust
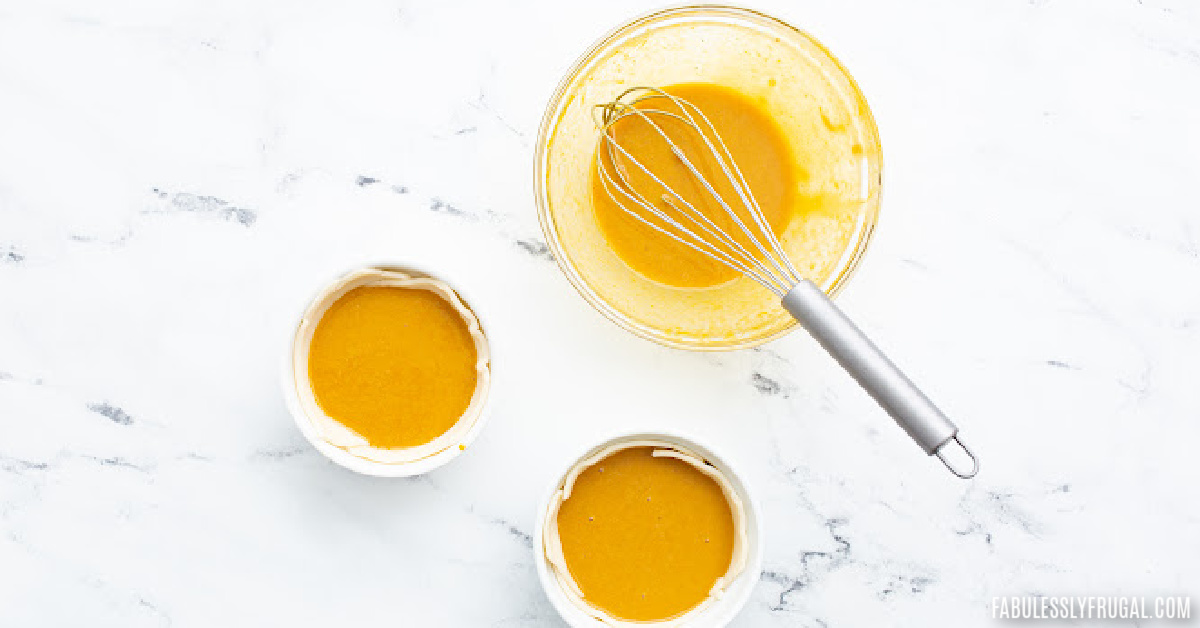
After you have the crust set up in the dishes, pour about 1 – 1 ½ tablespoons of the pumpkin pie filling into each of the mini pie crusts.
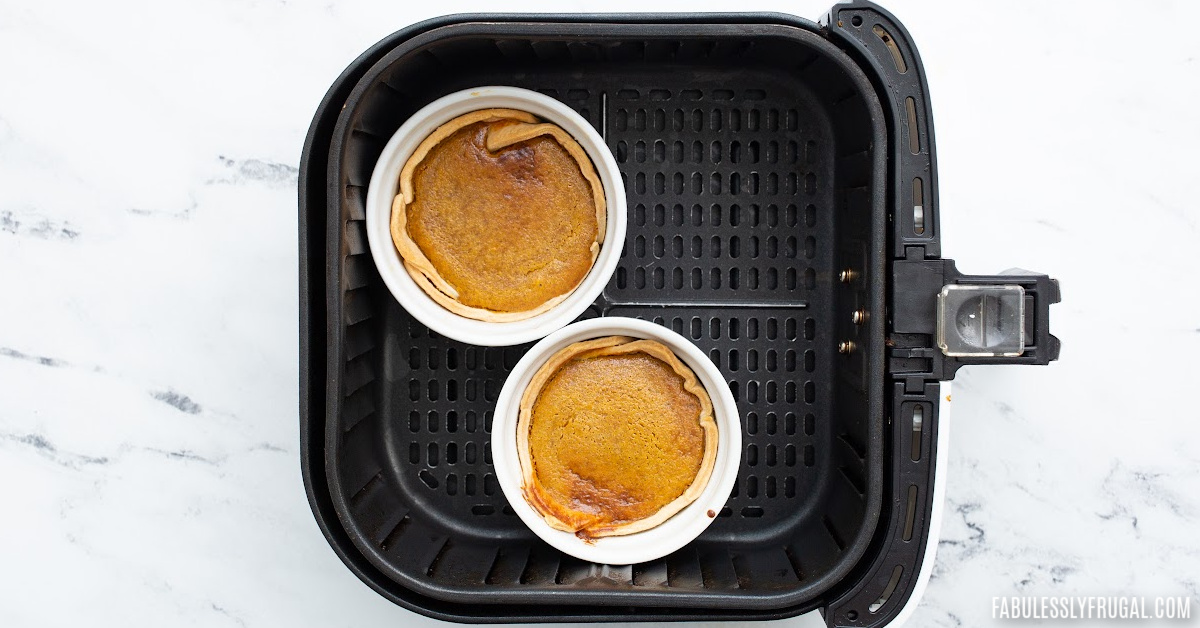
Step 5: Cook the Pies

When the pies are all assembled, place them carefully into the bottom of the air fryer basket, leaving a little space between them.
I can get about 7-8 of them in the 5.8qt air fryer basket just for reference. But you will most likely have to work in batches.
Then turn the air fryer on at 330F or 165C for 5-8 minutes or until they are mostly set up or reach an internal temperature of 175F or 79C.
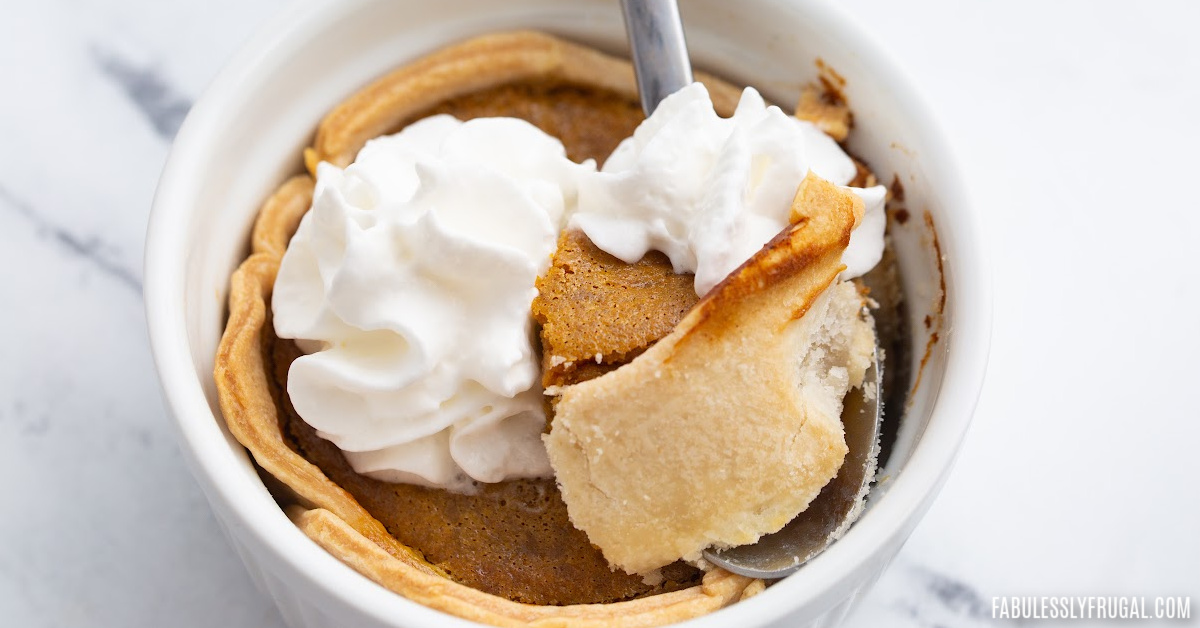
Step 6: Let the Pies Rest
Once the pies are done baking in the air fryer, allow them to set out and rest for at least 20 minutes to let them finish setting up completely.
Then carefully remove them from the liners and serve them with some whipped cream and top them with some pumpkin spice blend or ground cinnamon.
Time to Get Baking – Desserts to Make in the Air Fryer
The air fryer is awesome for making some delicious savory dishes, but that doesn’t have to be it! Give our tasty sweets and dessert recipes a try and let us know what you think.
Air Fryer Desserts:
- 4 Ingredient Thumbprint Cookies
- Air Fryer Apple Cinnamon Buns
- Candied Nuts in the Air Fryer
- The EASIEST 2 Ingredient Donuts in the Air Fryer!
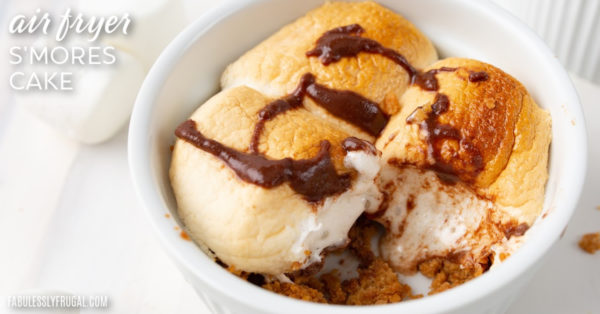
- Gooey Mini S’mores Pies in the Air Fryer
Final Thoughts
If you are looking for a simple, delicious, sweet snack or dessert to serve, this is the perfect one! I love how straightforward the recipe is and made simply with the prepared pie dough.
But, if I am being honest, there is a good chance I’ll be eating more than one of these delicious mini pies because they are just that good!
Keep the Desserts Coming!
Air fryer tips and tricks
- Air Fryer 101
- Learn these common Air Fryer Mistakes!
- All about the Best and Worst Air Fryer Accessories
- How to Clean Your Air Fryer
- How to Cook Any Recipe in the Air Fryer
- FREE Download → Air Fryer Tips & Temps
- Air Fryer Buying Guide
Watch Fabulessly Frugal YouTube Channel for Air Fryer Recipes
Mini Pumpkin Pies
Equipment
- Medium mixing bowl
- Ramiken or silicone muffin liner
- Nonstick cooking spray or oil sprayer
Ingredients
- 9 in Pie crust Room temperature, not frozen
- ½ cup Pumpkin puree
- ¼ cup Condensed milk
- ¼ cup Brown sugar
- 1 tsp Pumpkin spice pie blend
- ¼ tsp Salt
- 1 Egg
- Whipped cream Optional for topping
Instructions
- In a small-medium mixing bowl, whisk together the pumpkin puree, condensed milk, brown sugar, pumpkin spice, and salt. Add in the egg and whisk into smooth and even mixture. Set aside.
- Unroll the pie dough onto a silicone baking sheet. With the top of a silicone muffin liner (the larger circle), gently press into the pie dough. Depending on how hard you pressed, you can either remove each mini pie crust from the larger pie crust, or cut around it with a knife. Repeat until you no longer have dough to work with. You can reform/reroll the dough and get additional pie crusts. I've been able to get anywhere from 9-12 mini pie crusts.
- Gently press the mini pie dough into a light sprayed (with oil) silicone muffin liner. It will cover roughly half of the liner. Do not stretch the pie crust. If desired, use a fork to pleat the edges of the crust. Although this is entirely for looks and will still look and taste great if you decide to not.
- Add about 1 tbsp or more of the pumpkin pie filling into each mini pie crust.
- Place the mini pies in the air fryer basket. I can fit about 7 or 8 in my 5.8qt air fryer basket.
- Air fry at 330 °F for 7-8 minutes, or until the crust is golden to your liking. Let the pies sit in the warm air fryer basket for a couple of minutes, then remove them and let them sit for an additional 20 minutes or so to fully set.
- Serve the mini pumpkin pies warm or cold. Gently remove the mini pumpkin pies from the liners and top with whipping cream and a sprinkle of pumpkin spice blend or cinnamon.
Recipe Notes
Nutrition
Recipe Adapted From: Ahead of Thyme
Keep up to date on our newest air fryer recipes!
Follow Fabulessly Frugal on Instagram | Facebook | Pinterest | YouTube
Trending Recipes

Comments & Reviews
Leave a Review/Reply
More Related Recipes


Trending Recipes
- Recipes
- DIY
- Deals
- Blog


Popular
Recommended
About Us

At Fabulessly Frugal, our goal is to help you live HEALTHY, WEALTHY, and WISE! My team and I work hard to bring you the best, online deals, clean eating, DIY's, freezer meal recipes, and more! I LOVE coaching and inspiring people to improve their health in my fitness challenge! You should also check out my favorite cleanse! Learn more about me and the rest of my team.

Copyright © 2008–2025
Fabulessly Frugal: A Coupon Blog Sharing Gift Ideas, Amazon Deals, Printable Coupons, DIY, How to Extreme Coupon, and Make Ahead Meals. All rights reserved
What size remains did you use for your mini pumpkin pie reciepe?
Thank you karen
Hi Karen, either 6oz or 8oz ramekin will work fine. Just keep an eye on your pies and pull them out once they are done.