DIY Paper-wrapped Pumpkins
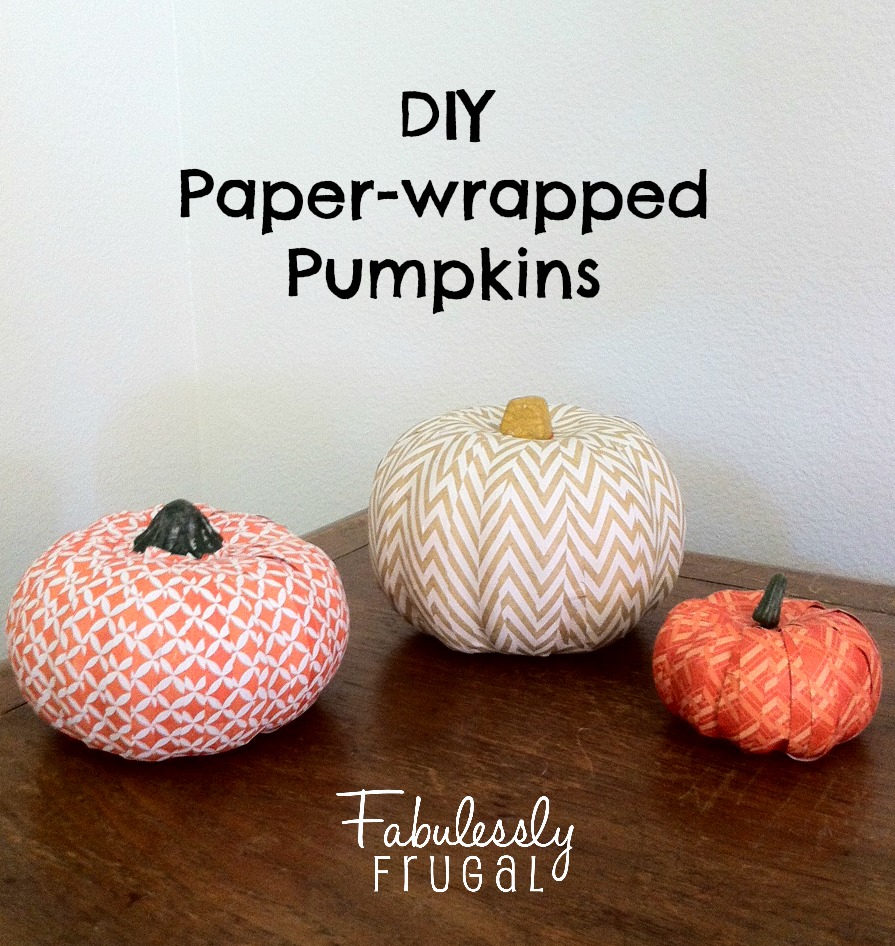 One of my favorite things about fall is, of course, pumpkins! They are the best to decorate with because they can be used along with both Halloween and Thanksgiving decor, so there is no need to pack them away after 3 to 4 weeks. These scrapbook paper-covered pumpkins are so fun, and so versatile. You can pick paper that matches your style. You can also make a black one to mix in during Halloween if you wanted. So many options! Let’s get started!
The Supplies:
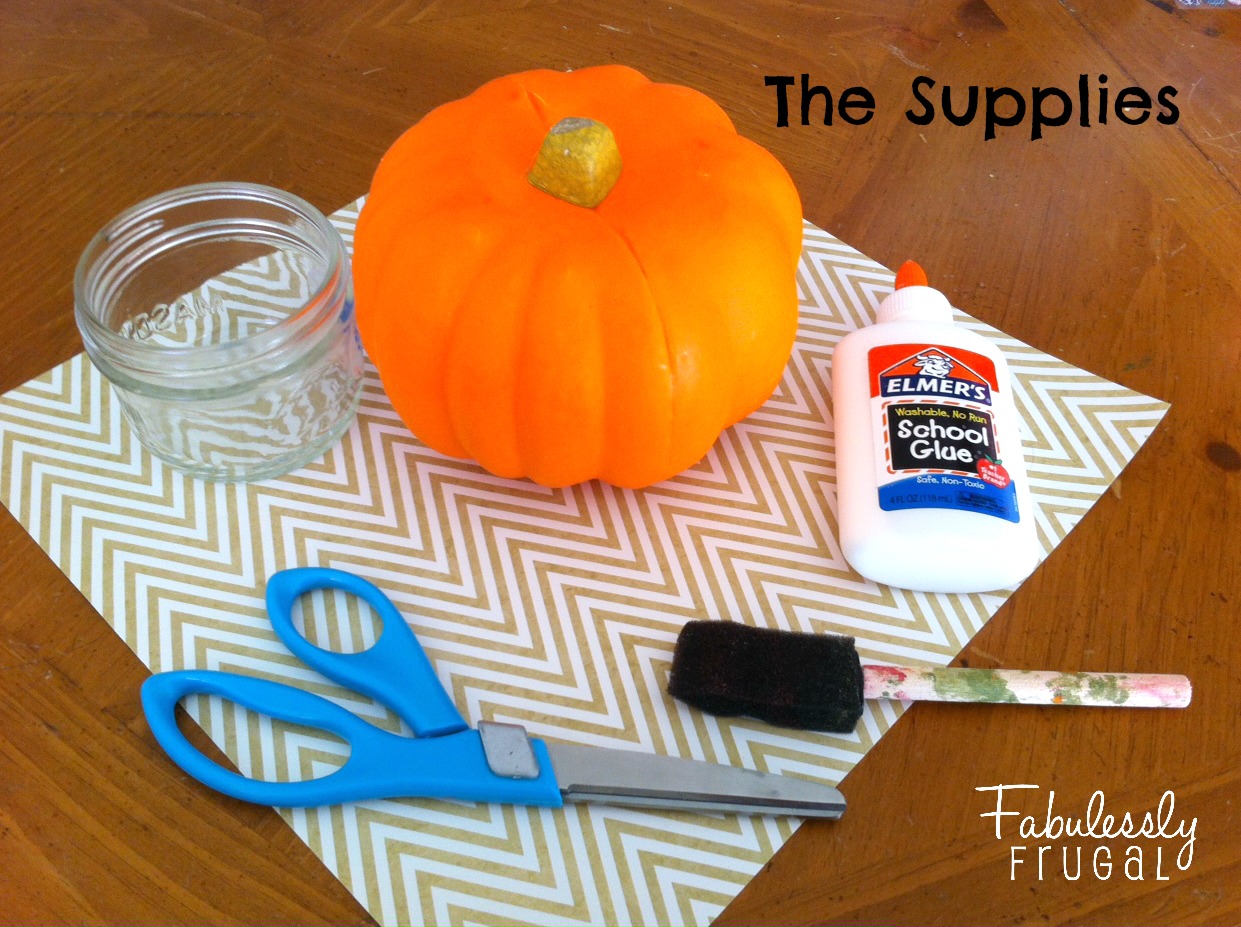
- Styrofoam or plastic pumpkins
- scrapbook paper of your choice
- scissors
- Elmer’s glue, water, and container for mixing (or Mod Podge)
- sponge brush
- cardboard
The Instructions:
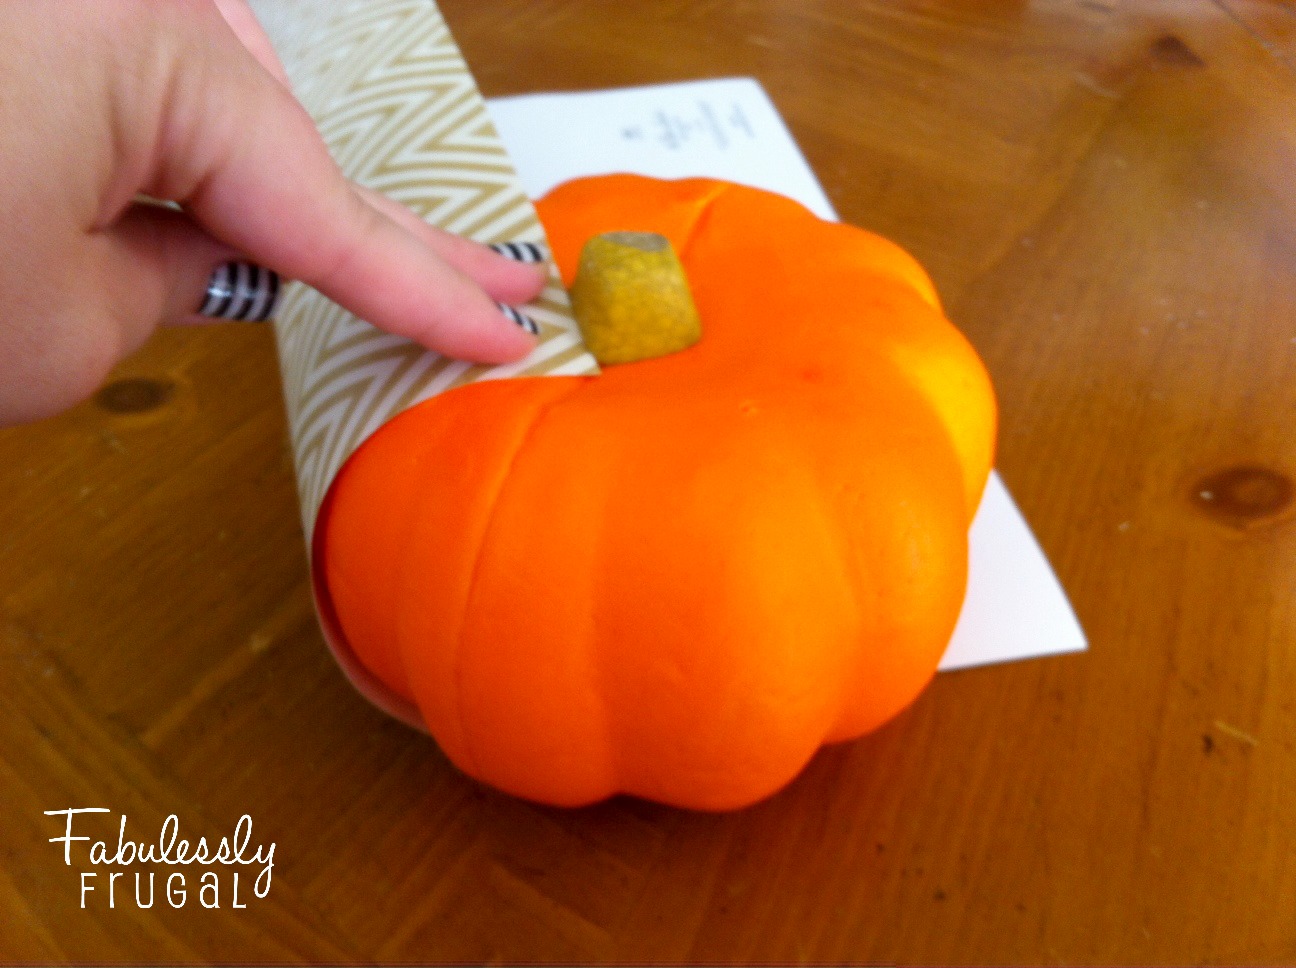 Start by dry-fitting the scrapbook paper to your pumpkin. Align it with the stem, and see how long it needs to be to wrap around to the bottom part of the pumpkin. Cut the paper across at that point. Doing this will help make sure your pieces of paper are long enough to cover the whole side of the pumpkin.
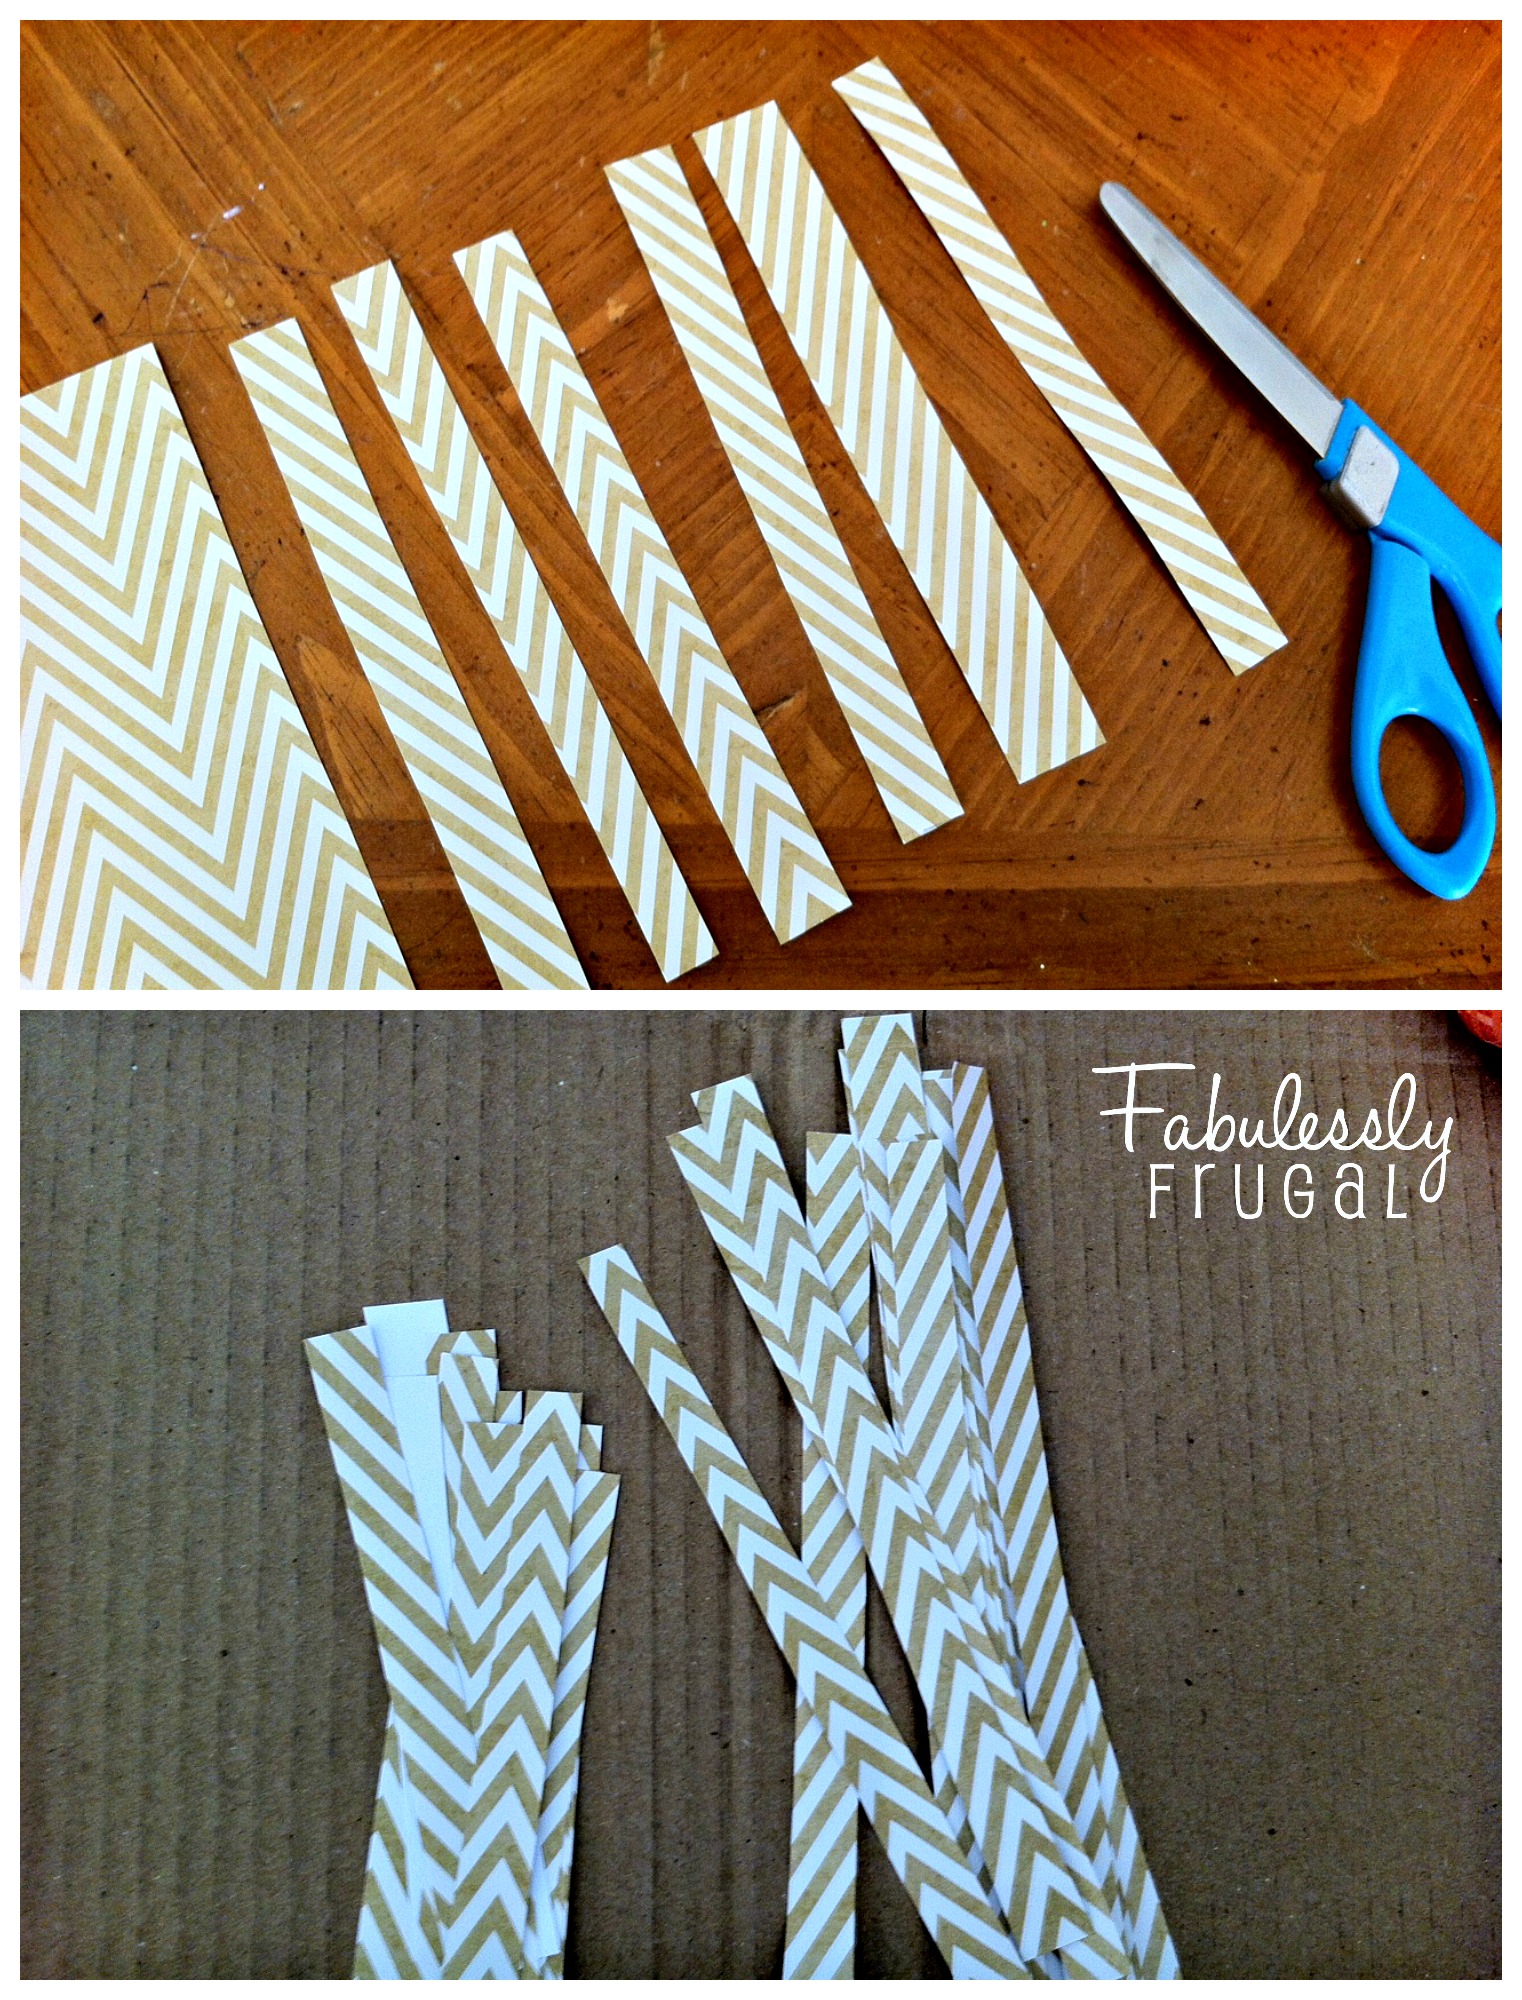 Next, cut strips of varying thickness from the two sections of paper (the one long enough to cover the side of the pumpkin, and the piece that was left over). Then you should have some long and some short strips, some thick and some thin – a big variety.
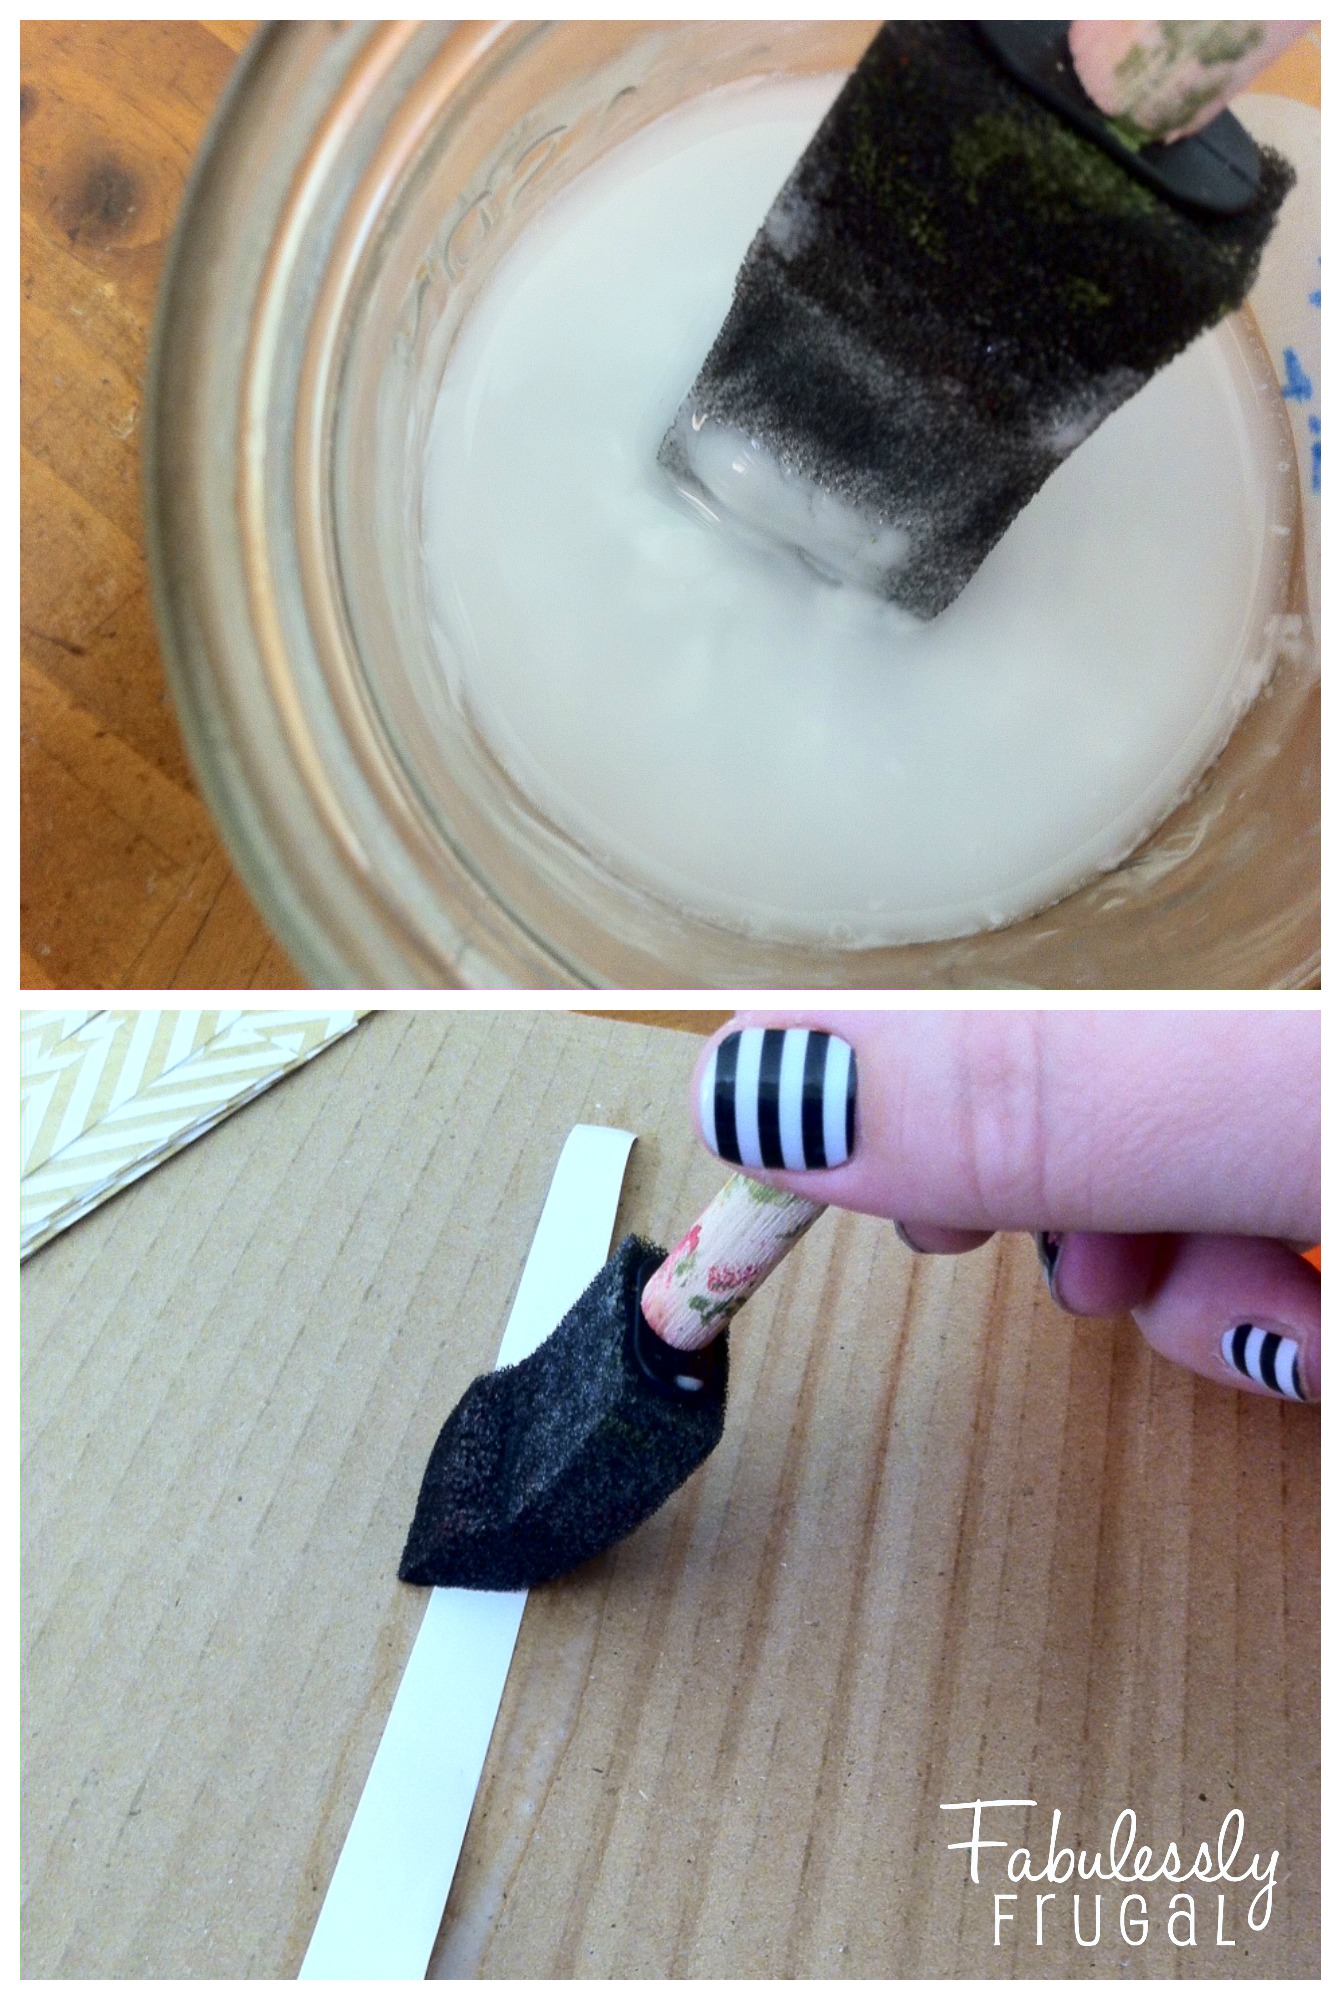 Next prep your homemade Mod Podge by pouring equal parts of Elmer’s glue and water in a small container and stirring until it is well mixed (or get out your store bought Mod Podge). Then, on top of your cardboard surface, paint the back of the scrapbook paper strips with the glue mixture.
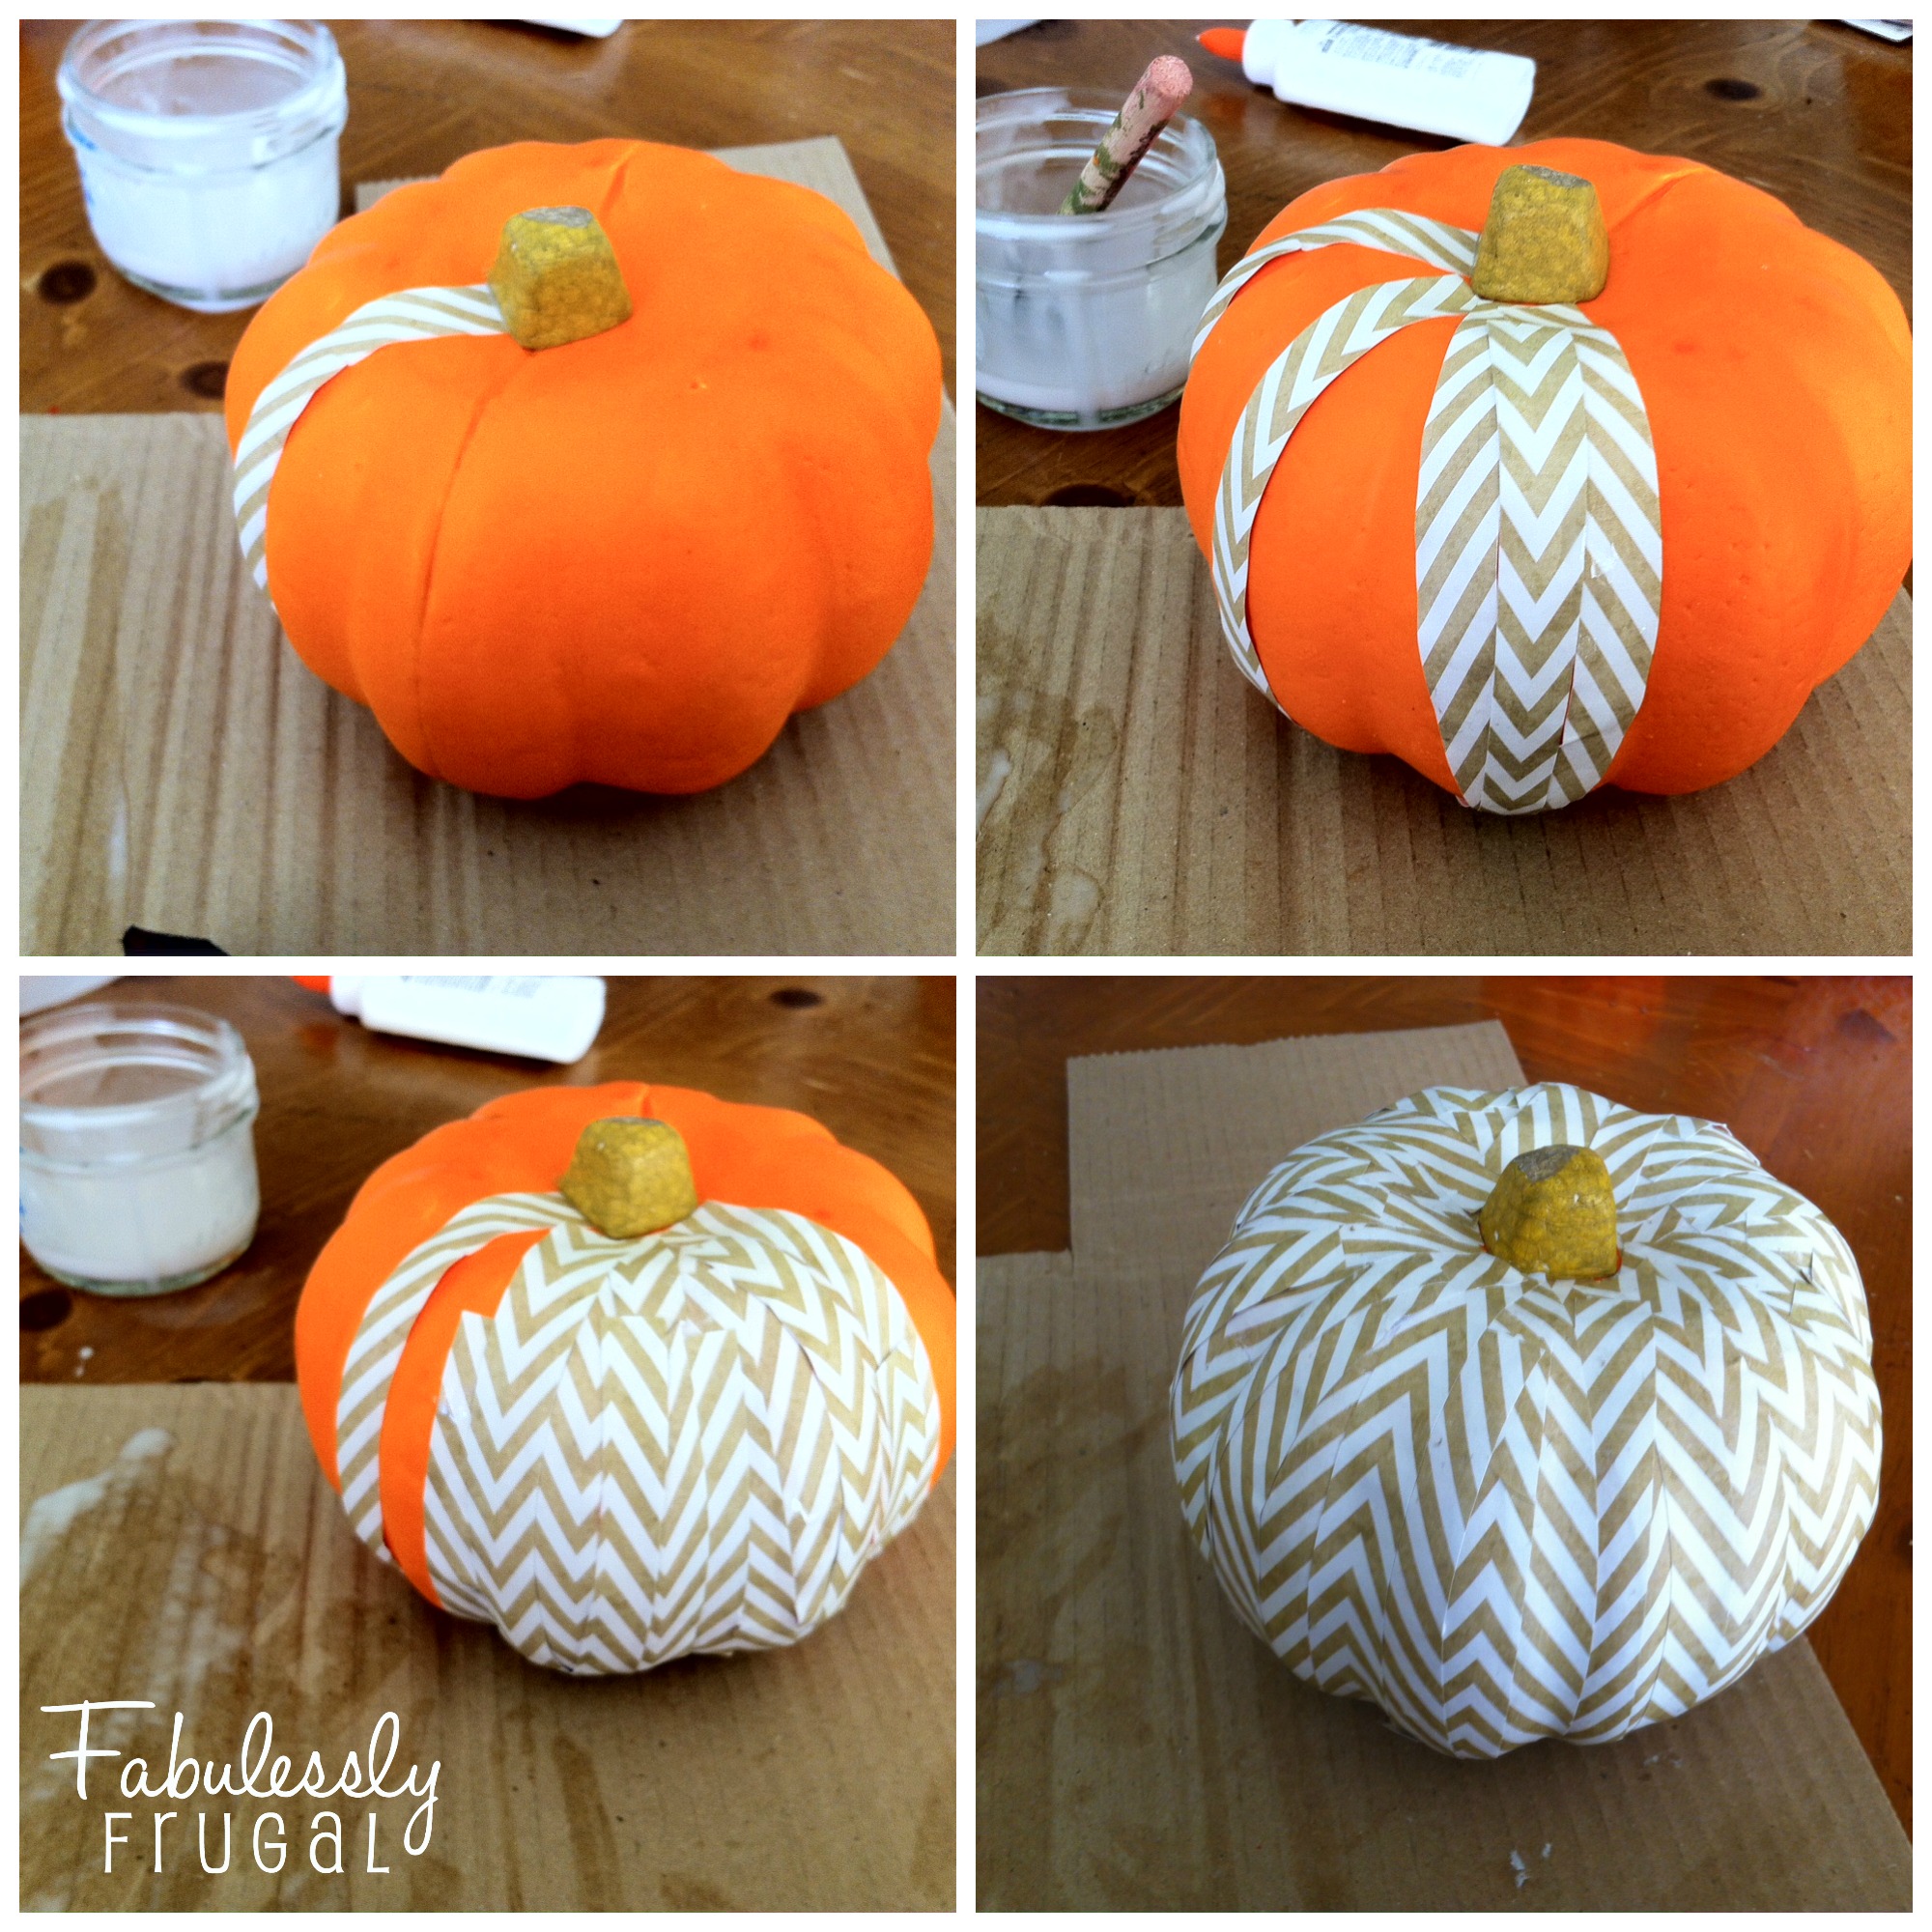 Now for the creative part…I was surprised to find it pretty easy to match up the tan and white lines of the print of my paper. You have to work with the curves and indents of the pumpkin shape, but that is where it helps to have short and long strips. The long pieces cover from top to bottom of the pumpkin, and the short pieces can fill in the gaps on the sides. You can see in the third pumpkin picture above how a short piece is still showing before I covered that section with another long strip. Once the glue softens the paper a bit, it can be manipulated to fit the way you need it to. It does not have to be perfect to look great!
There you have it! Easy enough, right? Make as many as you want for a fun pumpkin patch on your table top or shelves. Have fun with this!
Trending Diys

More Related Diys


Trending DIY Projects
- DIY
- Recipes
- Deals
- Blog


Report a Problem
Please select the problem you are facing with this deal:
- Price Increased
- Price Decreased
- No longer available
- Expired
- Link doesn't work
- Suggestion
- Compliment
- Other
Add more details:
Thank you for your feedback. We really appreciate it.
Enter your email address if you would like
to receive a follow up.
Please Try Again
Thanks for providing the email address.
We will reach out to you as soon as possible.


Popular
Recommended
About Us

At Fabulessly Frugal, our goal is to help you live HEALTHY, WEALTHY, and WISE! My team and I work hard to bring you the best, online deals, clean eating, DIY's, freezer meal recipes, and more! I LOVE coaching and inspiring people to improve their health in my fitness challenge! You should also check out my favorite cleanse! Learn more about me and the rest of my team.

Copyright © 2008–2026
Fabulessly Frugal: A Coupon Blog Sharing Gift Ideas, Amazon Deals, Printable Coupons, DIY, How to Extreme Coupon, and Make Ahead Meals. All rights reserved