The Best Peppermint Sugar Scrub Recipe (Easy Gift)
DIY Peppermint Sugar Scrub
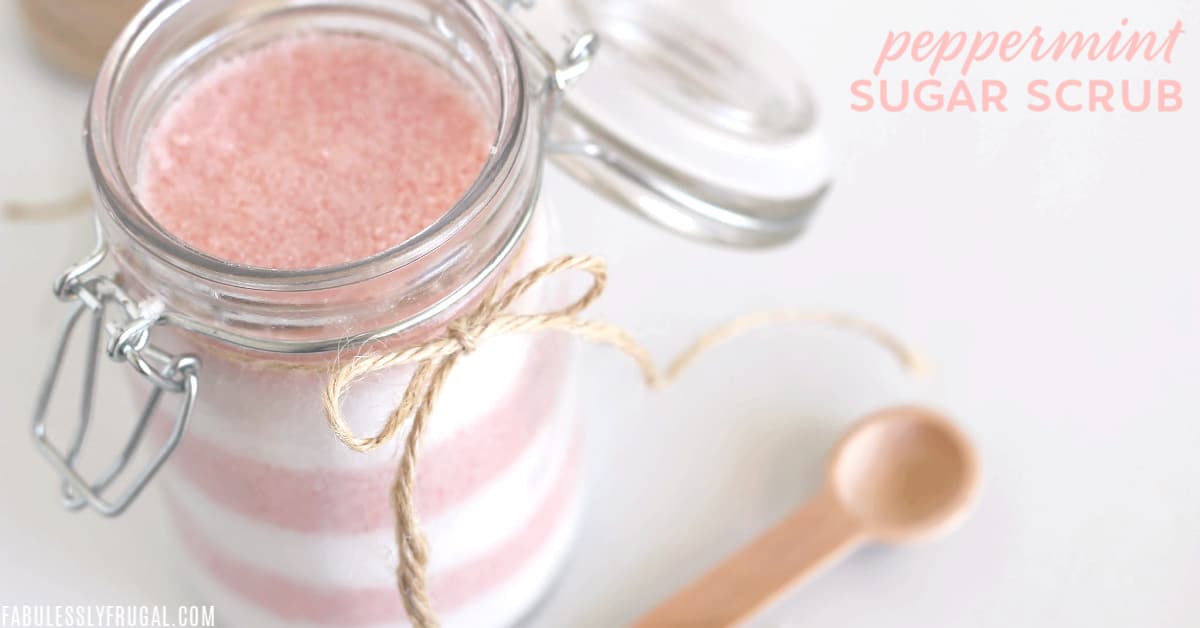
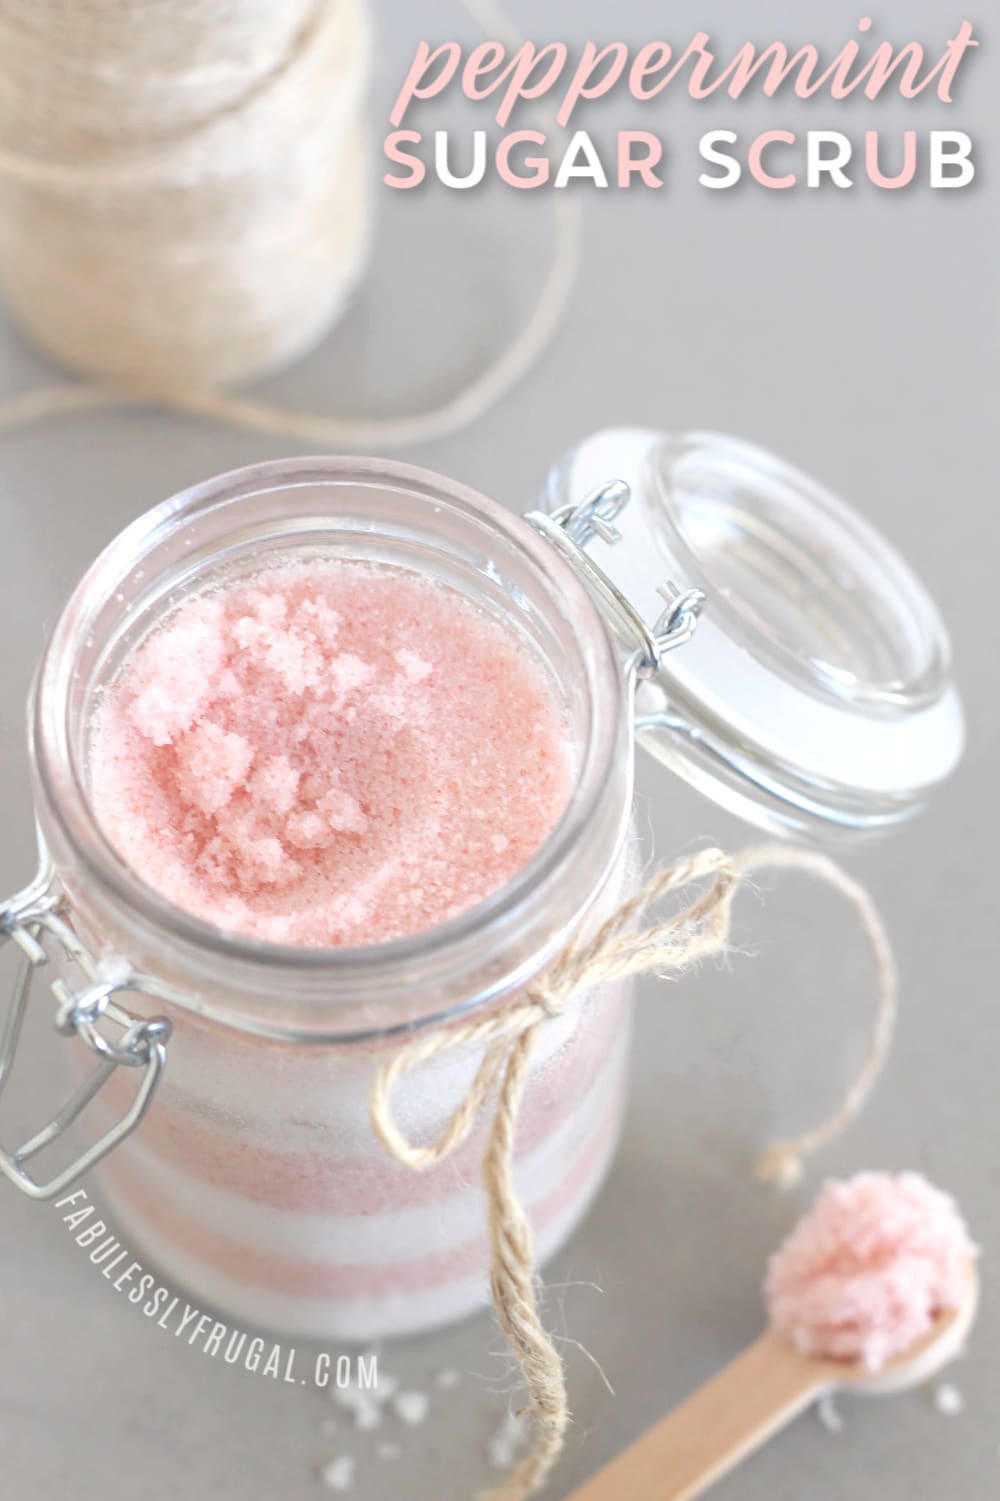
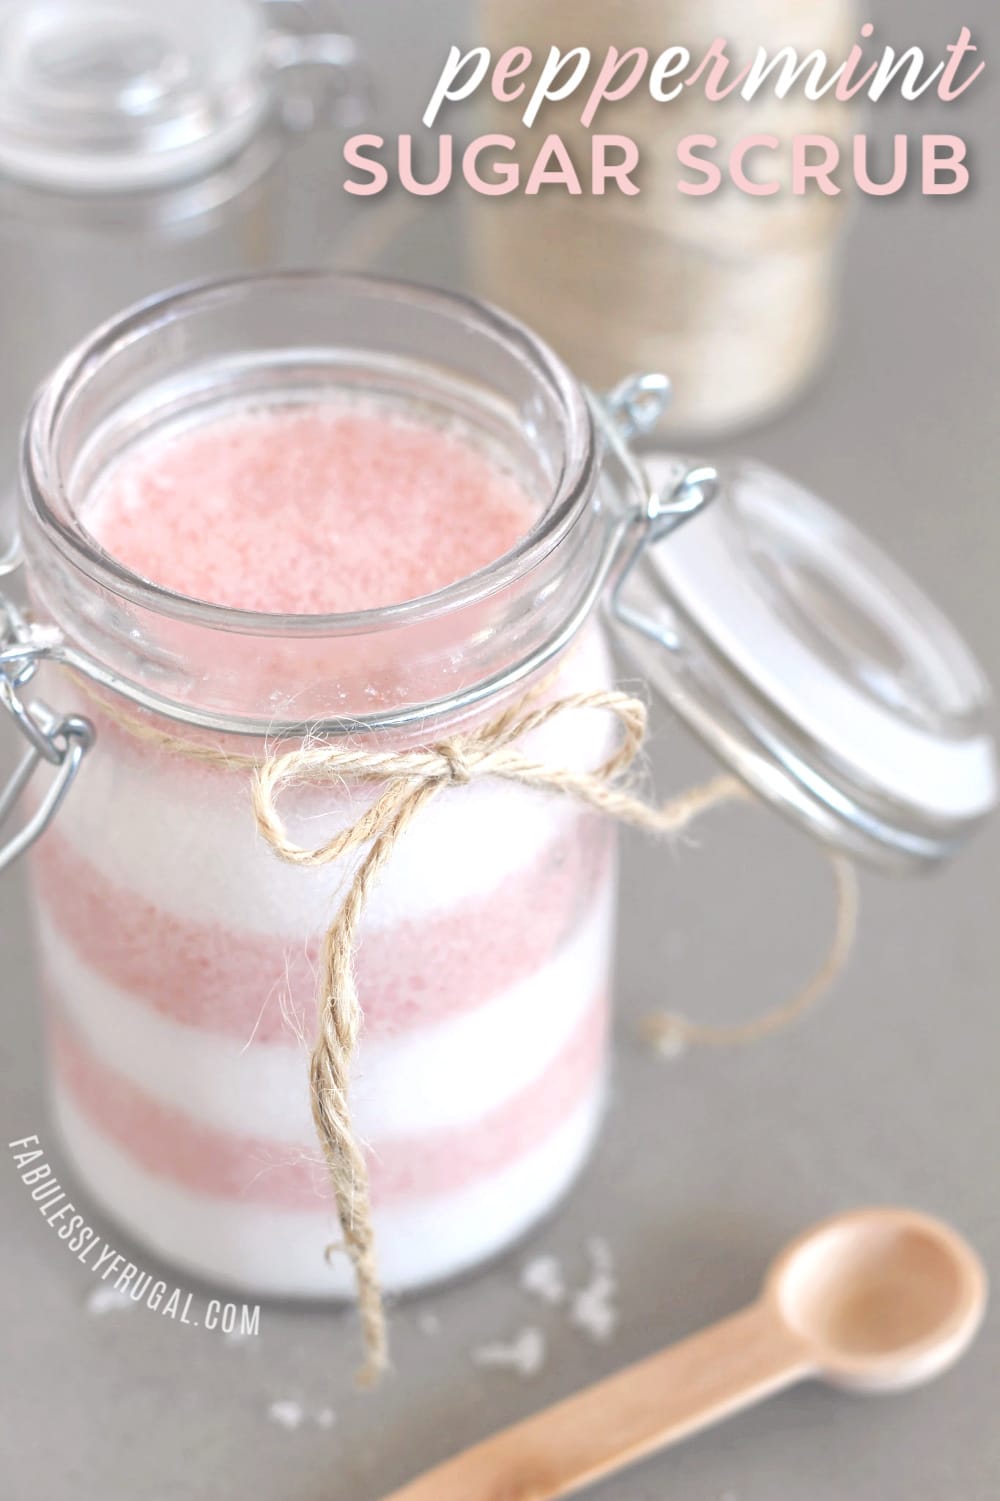
Make This Pretty Candy Cane Peppermint Sugar Scrub
Looking for an easy gift idea that doesn’t involve sugar expanding your waistline? This DIY peppermint sugar scrub recipe does use sugar, but in the best possible way—it pampers your skin instead of your sweet tooth!
This layered candy cane sugar scrub is:
- Festive and beautiful in the jar (hello, candy-cane stripes!)
- Easy and budget-friendly to make at home
- Soothing and exfoliating for dry winter skin
- Perfect for gifting to friends, teachers, neighbors, or as a stocking stuffer
You can mix up a batch in just a few minutes, customize the color, and package it in cute jars with ribbon or twine. It’s a fun and economical holiday project for kids and adults alike.
Why You’ll Love This Peppermint Sugar Scrub
If you’ve never tried a sugar scrub before, now is the time! A good sugar scrub helps gently buff away dry, flaky skin while adding moisture back in at the same time. This peppermint sugar scrub feels amazing on your legs, arms, hands, and feet—basically anywhere that needs a little extra love.
And the best part? You can make it yourself in minutes and for cheap. Most of the ingredients are pantry staples or easy to find online or at your local store. Once you see how simple it is, you’ll be whipping up extra jars to keep on hand for last-minute gifts.
Benefits of a Peppermint Sugar Scrub
When you combine granulated sugar with a lightweight oil, you get a simple scrub that can:
- Exfoliate dry, dead skin so your skin feels smoother and softer
- Help your moisturizer absorb better after you rinse and pat dry
- Add a little spa-like self-care to your routine with the refreshing peppermint scent
Many dermatology and skincare experts recommend gentle sugar scrubs for the body to help remove dead skin cells and support softer, smoother skin when used in moderation.
Always avoid using coarse scrubs on your face or on broken, irritated, or sunburned skin, and patch-test if you have sensitive skin.

Peppermint Sugar Scrub Ingredients & Supplies
Here’s what you’ll need to make this peppermint sugar scrub recipe:
Ingredients
- 2 cups granulated sugar (white sugar works best for the candy cane look)
- 1/2–3/4 cup fractionated coconut oil or sweet almond oil (add slowly until you reach your preferred texture)
- 4–8 drops peppermint essential oil (skin-safe, cosmetic-grade)
- 1–2 drops red food coloring (optional, for the pink “candy cane” stripe)
Coconut oil is especially nice because it’s lightweight and moisturizing, but almond oil also works well if that’s what you have on hand.
Supplies
- Medium mixing bowl and spoon or spatula
- Measuring cups and spoons
- Jars or containers with lids – small mason jars are perfect
- Small funnel or spoon for filling jars
- Optional: twine, ribbon, and a small wooden spoon for gifting
How to Make This Peppermint Sugar Scrub Recipe
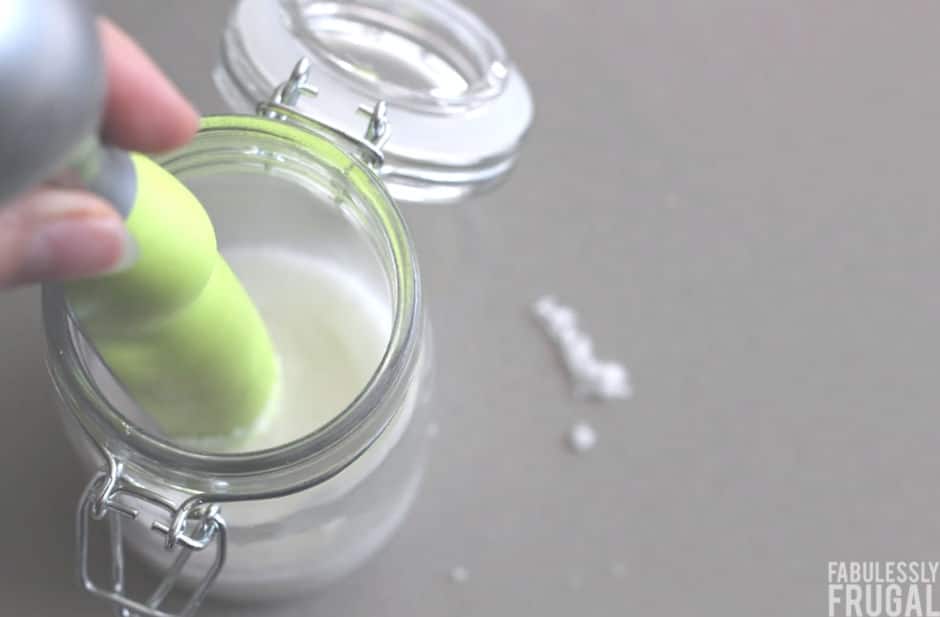
- Add the sugar to a bowl. Start with 2 cups of white sugar in a medium mixing bowl.
- Slowly add the oil. Pour in the fractionated coconut oil (or almond oil) a little at a time, stirring as you go, until the mixture feels like damp, fluffy sand. It should hold together when squeezed but not be dripping with oil.
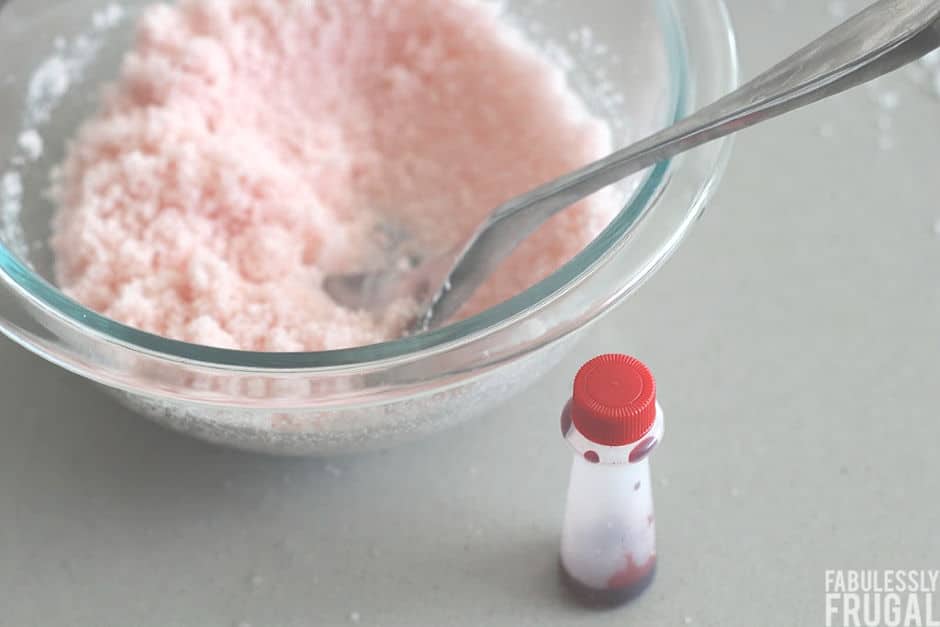
- Stir in the peppermint essential oil. Add 4–8 drops, depending on how strong you want the scent. Stir well so it’s evenly distributed.
Coloring Your Candy Cane Sugar Scrub
To get that fun candy cane look, you’ll split the mixture into two bowls:
- Divide the scrub in half. Spoon about half of the scrub into a second bowl.
- Color one half. Add 1–2 drops of red food coloring to one bowl and stir until the color is evenly distributed. You’re going for a soft pink rather than bright red.
Tip: If you keep the coloring very light (just 1–2 drops), you won’t need to worry about it staining your skin.
Natural Coloring Options
If you prefer to skip traditional food coloring, you can experiment with more natural tints:
- A tiny splash of red fruit juice (pomegranate, raspberry, or cranberry)
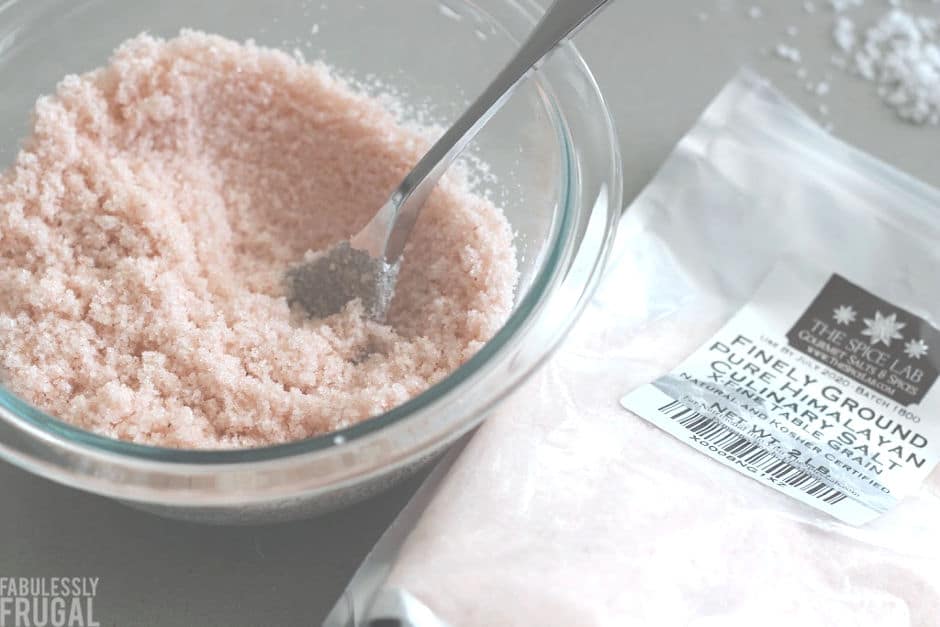
- Natural red food coloring made from dried hibiscus flowers steeped in a bit of hot water and cooled
- Using part pink Himalayan salt mixed with sugar for a softer, natural pink tone
Just keep the added liquid to a minimum so your scrub doesn’t get too runny, and always consider how any natural color might affect the scent or shelf life.
Choosing a Container for Your Scrub
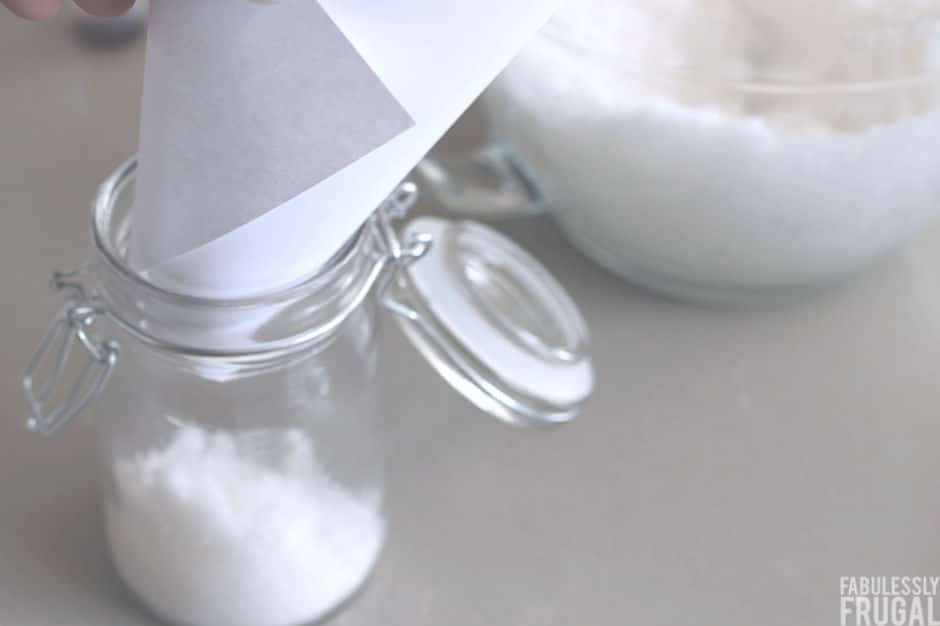
Once both your white and pink mixtures are ready, it’s time to layer them into jars. You can use small mason jars, glass flip-top jars, or sturdy plastic containers.
When choosing a container, think about:
- Where you’ll use it: Glass looks beautiful but can be slippery in the shower, so handle with care.
- Water exposure: A lid that seals well will help keep water out of the jar.
- Gift presentation: Simple jars can look gorgeous with a little ribbon, twine, and a tag.
How to Layer Your Scrub for a Candy Cane Look
To get those clean candy cane stripes:
- Add a white layer first. Spoon some of the white scrub into the bottom of your jar and gently press it down with the back of a spoon or the handle of an ice cream scoop.
- Add a pink layer. Spoon a layer of the pink scrub on top and pack it down gently.
- Repeat. Continue alternating white and pink layers, keeping them roughly the same thickness for a pretty striped effect.
How much you use for each layer will depend on the size and shape of your jar, so just eyeball it and have fun with it.
How to Use & Store Your Peppermint Sugar Scrub
This peppermint sugar scrub is slightly drier than some oil-heavy scrubs, which helps it hold its layers well and makes it feel nicely exfoliating without being overly greasy.
How to Use
- Scoop a small amount of scrub out of the jar with a clean spoon or dry fingers.
- Gently massage onto damp skin in circular motions.
- Rinse thoroughly with warm water and pat dry.
- Follow with your favorite body lotion or moisturizer.
Use 1–3 times per week on the body as part of your self-care routine. Skip using it on your face, sensitive areas, or any broken or irritated skin.
How to Store
- Keep the jar tightly sealed when not in use.
- Store in a cool, dry place away from direct sunlight.
- Try to avoid getting water directly into the jar to help it last longer.
Easy Gifting Ideas
This peppermint sugar scrub recipe makes such a fun homemade gift—especially around Christmas. Here are a few simple ways to dress it up for gifting:
- Tie twine or ribbon around the jar and tuck in a mini wooden spoon.
- Attach a printable tag with the name of the scrub and simple use instructions.
- Bundle it with DIY bath bombs or a cozy pair of socks for a complete spa-themed gift.
Homemade scrubs make thoughtful gifts for friends, sisters, moms, teachers, and neighbors—all without a lot of cost or fuss.
Want more DIY recipes, deals, and easy gift ideas? Sign up for our email list here so you never miss a new post.
DIY Peppermint Sugar Scrub FAQs
How long does this peppermint sugar scrub last?
Because this recipe is oil- and sugar-based with no added water, it can typically last several weeks to a few months when stored in a cool, dry place with the lid tightly sealed. If you ever notice an off smell, odd texture, or mold, discard the scrub and make a fresh batch.
Can I use this peppermint sugar scrub on my face?
No, this scrub is best for the body only. Granulated sugar can be too abrasive for the delicate skin on your face. Use it on legs, arms, hands, and feet, and avoid broken or irritated skin.
What type of oil works best in sugar scrub?
Fractionated coconut oil is a popular choice because it stays liquid and feels light on the skin. Sweet almond oil, jojoba oil, or grapeseed oil can also work well. Choose a mild, skin-friendly oil with little to no scent so the peppermint aroma can shine.
Can I make this sugar scrub without food coloring?
Absolutely! Leaving the scrub all white works just as well and still smells amazing. The pink stripes are just for fun. You can also experiment with very small amounts of natural colorings if you prefer.
Is peppermint essential oil safe for everyone?
Many people enjoy peppermint essential oil in body products, but everyone’s skin is different. Use only a small amount, and avoid this scrub on children, during pregnancy, or on very sensitive skin unless you’ve checked with a healthcare provider. Always patch-test first if you’re unsure.
More DIY Ideas You’ll Love
The Best Peppermint Sugar Scrub Recipe (Easy Gift)

Ingredients
- 2 cups granulated sugar, divided
- about ¼ cup almond oil or fractionated coconut oil, divided
- about 5 drops doTERRA Peppermint Essential Oil
- 2 drops red food coloring (or raspberry juice)
Instructions
- Place the sugar in a medium bowl, slowly add the oil to the sugar until the mixture is soft, but not too oily. Then add 4 or 5 drops of doTERRA pure therapeutic grade peppermint essential oil, add more or less depending on your preference.
- Transfer half of the sugar mixture to a separate bowl. Mix 1 or 2 drops of red food coloring into the sugar in one of the bowls. Now you have one white mixture and one pink! (See blog post for natural coloring options.)
- Alternate the colors in a jar or container, trying to keep each layer about the same height. Use an ice cream scoop handle or something similar to gently pack down each layer. Note that the amount you use for each of your layers, will vary depending on the size and shape of your container.
- To use: Scoop out a small amount and use your fingers to scrub it on your damp or wet skin in circular motions. Rinse.
- Should last up to 3 months if kept in a well sealed container and scooped with a clean utensil or hands.
Trending Diys


Comments
Leave a Reply
More Related Diys


Trending DIY Projects
- DIY
- Recipes
- Deals
- Blog


Report a Problem
Please select the problem you are facing with this deal:
- Price Increased
- Price Decreased
- No longer available
- Expired
- Link doesn't work
- Suggestion
- Compliment
- Other
Add more details:
Thank you for your feedback. We really appreciate it.
Enter your email address if you would like
to receive a follow up.
Please Try Again
Thanks for providing the email address.
We will reach out to you as soon as possible.


Popular
Recommended
About Us

At Fabulessly Frugal, our goal is to help you live HEALTHY, WEALTHY, and WISE! My team and I work hard to bring you the best, online deals, clean eating, DIY's, freezer meal recipes, and more! I LOVE coaching and inspiring people to improve their health in my fitness challenge! You should also check out my favorite cleanse! Learn more about me and the rest of my team.

Copyright © 2008–2026
Fabulessly Frugal: A Coupon Blog Sharing Gift Ideas, Amazon Deals, Printable Coupons, DIY, How to Extreme Coupon, and Make Ahead Meals. All rights reserved
At the chance of appearing lame, I’ll post a comment. Normal coconut oil works too!
That is not lame! Thanks for the tip, Joy.