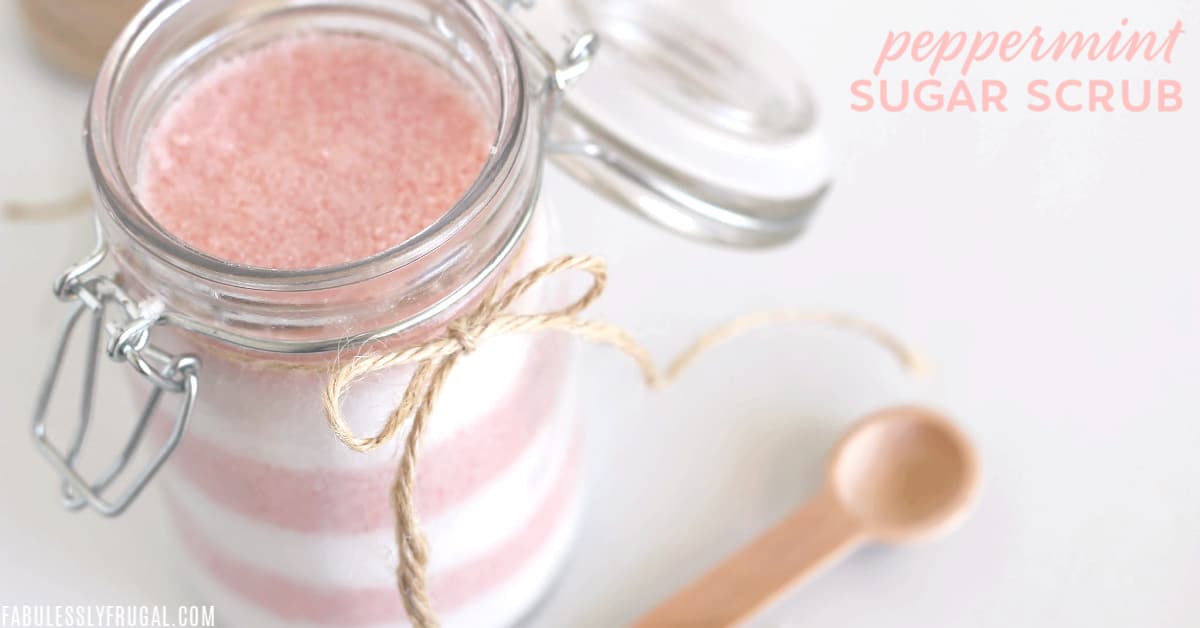
DIY Peppermint Sugar Scrub Recipe
Looking for an easy gift idea that doesn’t involve sugar expanding your waistline? This DIY peppermint sugar scrub recipe DOES involve sugar, but it’s used in a way that will pamper you without packing on the calories!
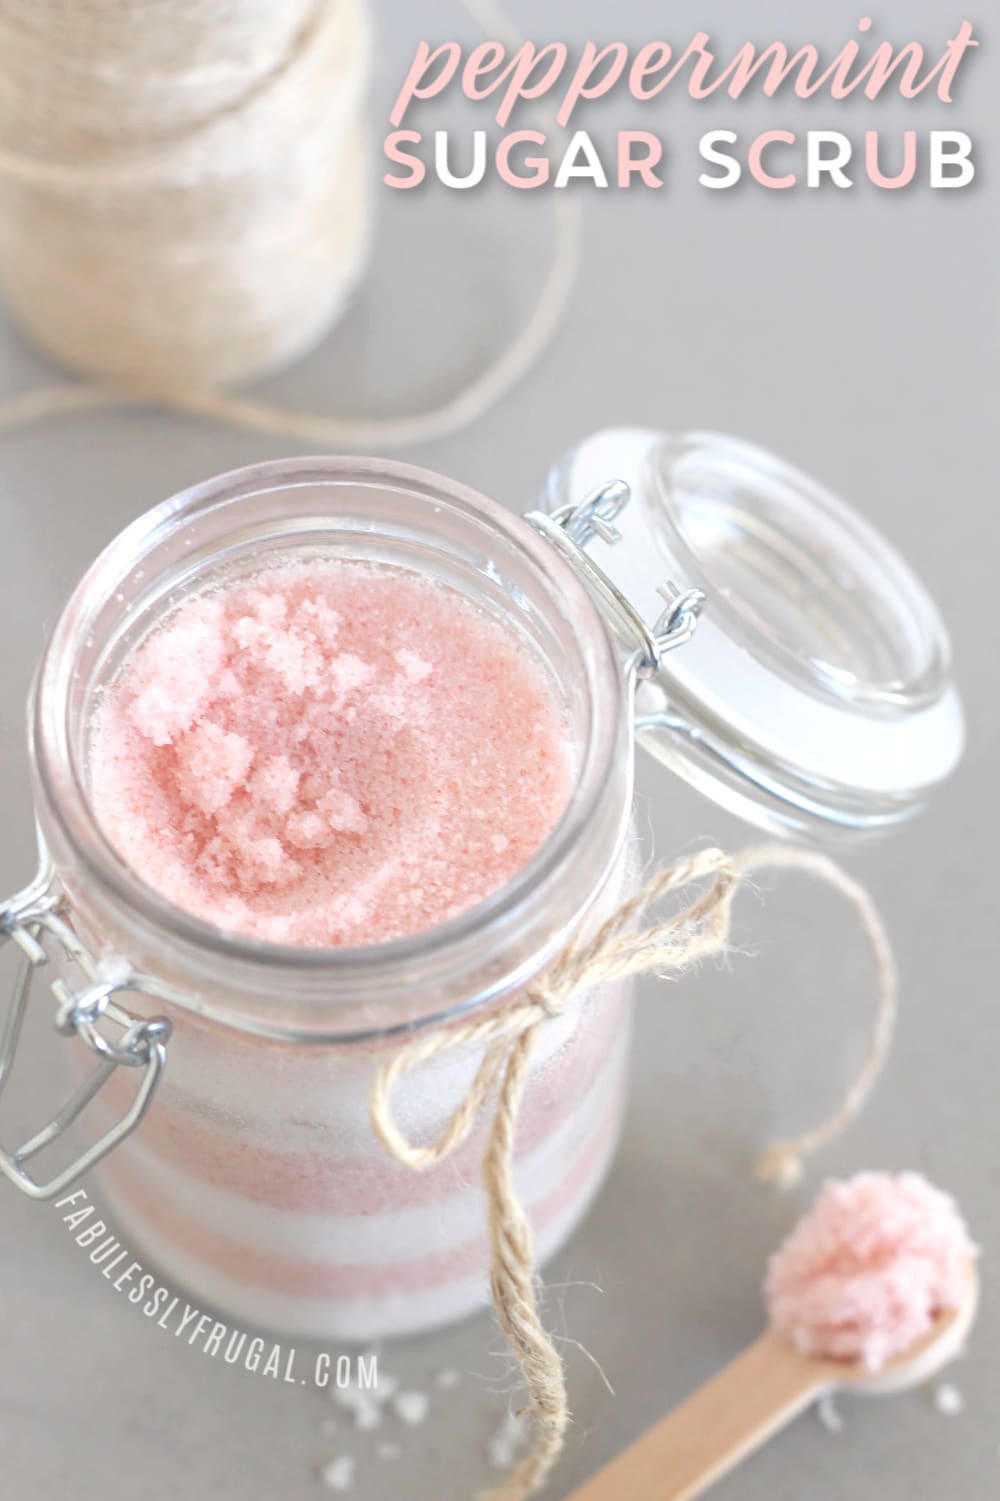
Plus it’s pretty to look at (it looks a bit like a candy cane), smells fantastic, and will make your skin feel INCREDIBLY soft, smooth, and silky (ooh la la).
Homemade Peppermint Scrub Recipe
If you have never tried a sugar scrub, NOW is the time! A good sugar scrub will totally exfoliate and moisturize your skin, and this homemade peppermint scrub will feel great on your legs, arms, shoulders, neck, and well, basically everywhere!
The best part is, you can make it yourself and for cheap too! We’re going to show you how to make this AWESOME DIY peppermint sugar scrub in no time at all, and we’ll show you how to make it look nice too.
If you want, you can even whip up a batch and make some to give away as a fun gift in a cute jar. Wrap some twine or ribbon around it and include a cute little wooden spoon!
I’m planning to give homemade body scrubs to my friends, sisters, and mom for Christmas this year! An easy, cute, and useful gift! While I’m at it, I’m going to make some more for myself too!
PS – If you want to give them a super awesome gift, package this scrub with some DIY bath bombs!

Ingredients
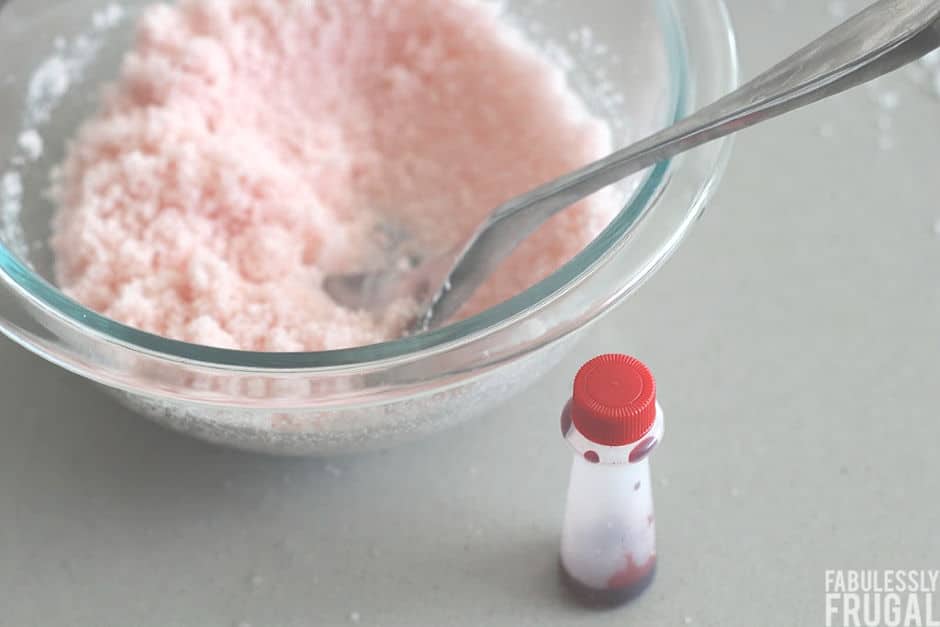
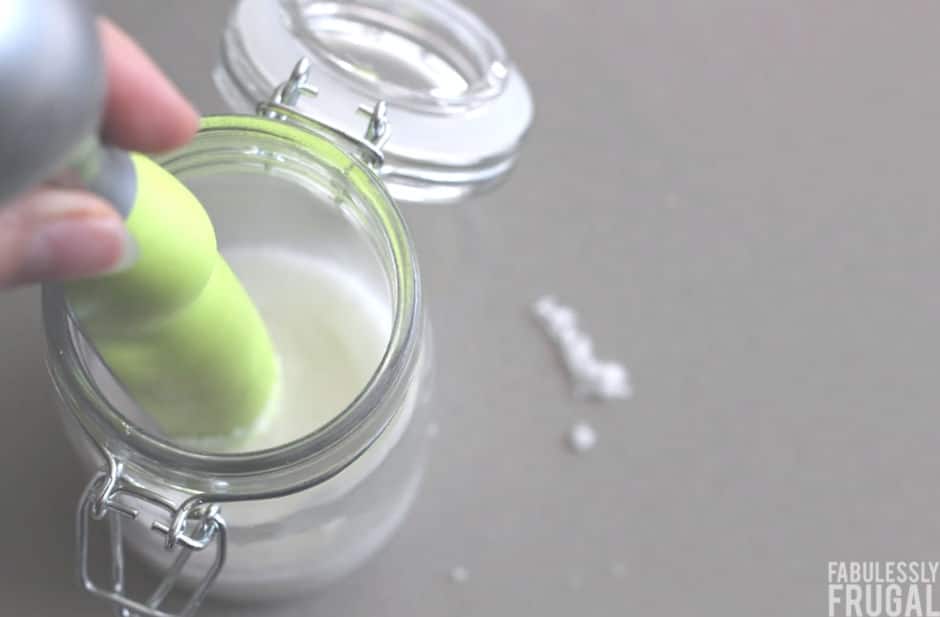
You can use fractionated coconut oil or almond oil for this recipe (I use fractionated coconut oil). Coconut oil is such a nice addition – it is very moisturizing! Just add it slowly to the sugar until the mixture is soft, but not too oily. Then add 4 or 5 drops of pure therapeutic grade peppermint essential oil.
If you want to learn more about the essential oils we use and recommend, read this essential oils blog post, and email us at cathy at fabulessly frugal dot com!
Coloring Your Candy Cane Sugar Scrub
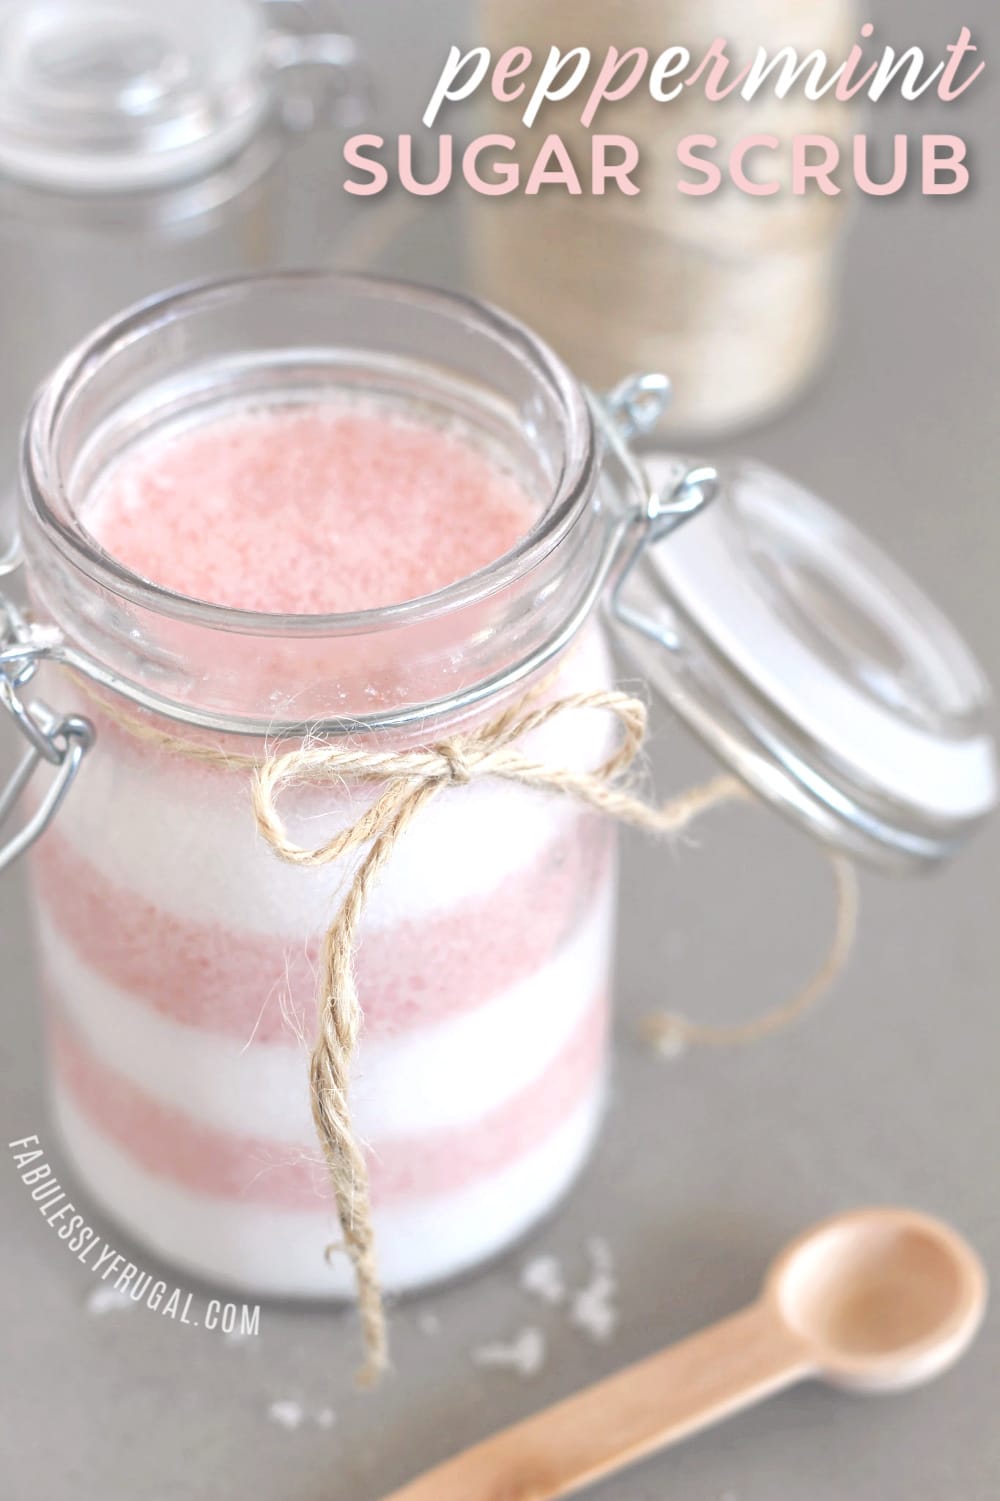
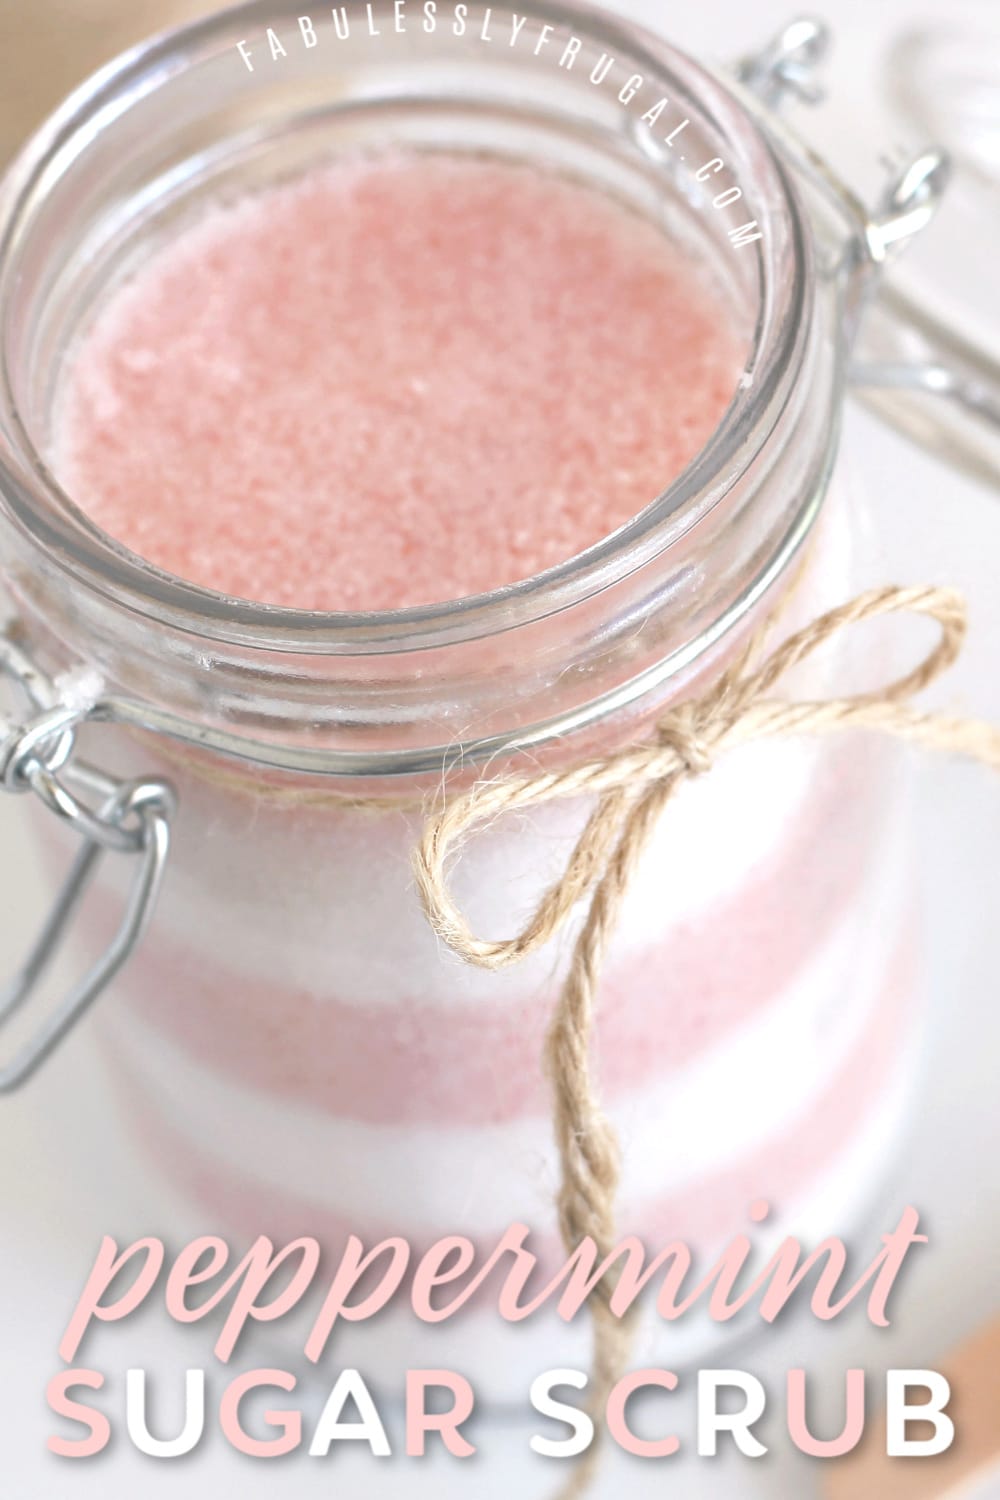
Split the sugar mixture in half so you can have two colors. There are lots of different ways to color the sugar for the candy cane layered look. You can add 1 or 2 drops of red food coloring for a nice pink color.
Note: If you keep it to no more than the 2 drops, you won’t need to worry about the coloring staining your skin.
Natural Coloring Options
Natural coloring options for this peppermint sugar scrub recipe could include red-colored fruit juice, like pomegranate or juice from raspberries. You can also get a natural red food coloring from dried hibiscus flowers steeped in a bit of hot water until cooled. Cranberries and beets might also be possibilities.
Note that you don’t want any smells that will overpower the peppermint. Also, consider that some natural food coloring may go bad sooner than other options.
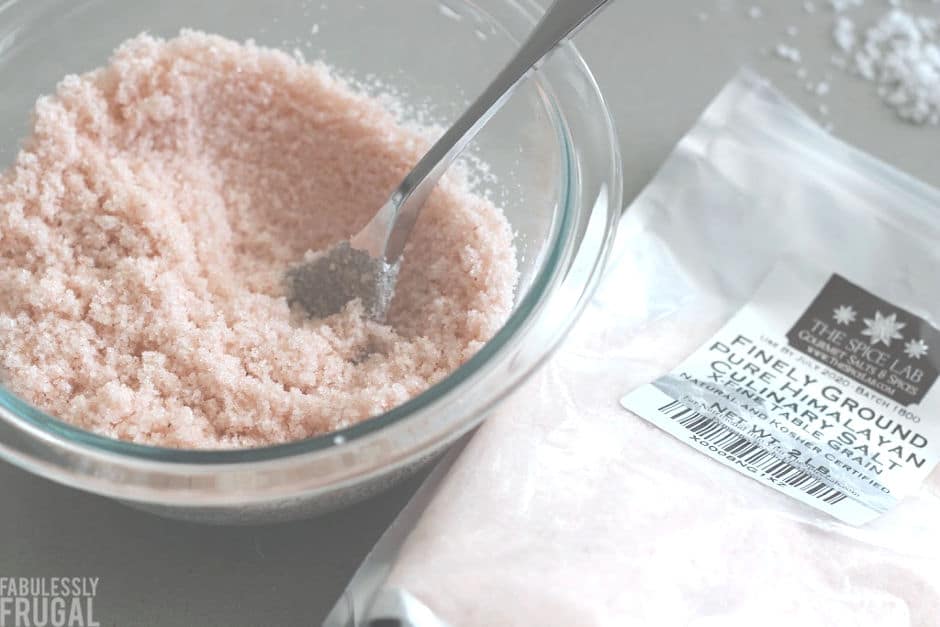
Using half sugar and half pink Himalayan salt is an option too (I bought mine online). The color isn’t quite as bright as the food coloring, but it is a nice natural option you can try (see photo above).
Picking a Container for Your Scrub
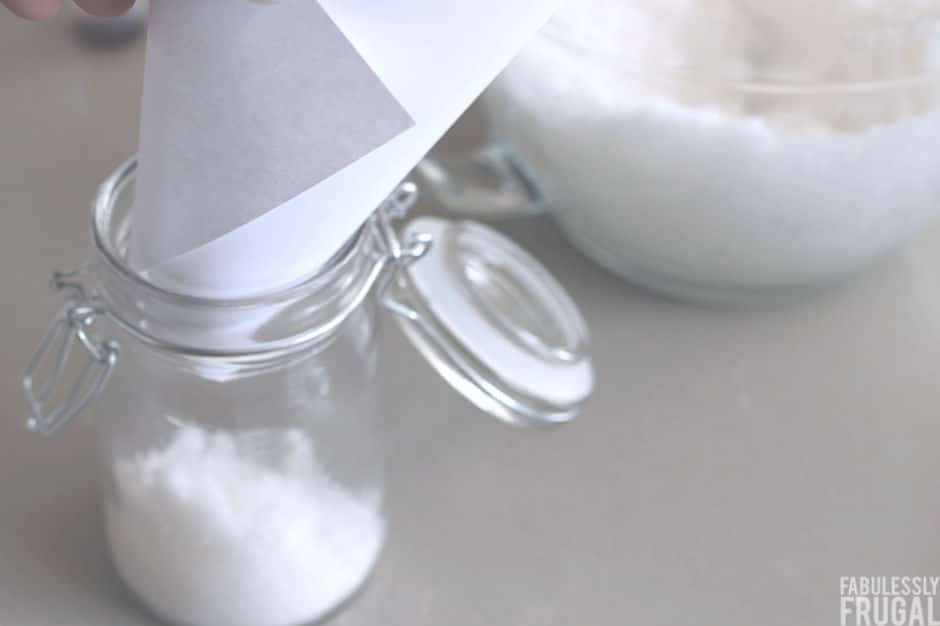
Once you’ve got your white sugar mixture and your colored mixture ready to go, you can start layering them into a jar or container.
When choosing between sugar scrub containers, consider where you will store it and if you need it to be waterproof, shatterproof, etc. I like glass containers, so I need to be extra careful not to drop it if it gets slippery.
Look around your home and see what you have that might work – you can find some great jars at craft stores and online too!
How to Layer Your Scrub Nicely
Use an ice cream scoop handle or something similar to gently pack down each layer of your peppermint sugar scrub recipe. Alternate the colors and try to keep each layer about the same height for the desired candy cane look.
Note: The amount you use for each of your layers will vary depending on the size and shape of your container.
Enjoy Your DIY Peppermint Sugar Scrub Recipe
This peppermint scrub is a bit drier than other sugar scrub recipes. It is not overly oily and it holds the different colored layers quite well. It’s very exfoliating, but also moisturizing. Plus, it looks so cute!
Like I said before, this is a really great homemade gift you can give to your friends and family during the holidays. They’ll love how personal and unique it is, and once they try it out they’ll love it even more! To make it look really nice, make sure to wrap some twine or ribbon around it and include a cute little wooden spoon!
More DIY Ideas You’ll Love:
- Lavender Coconut Salt Scrub
- All Natural Face Peel
- All Natural Facial Toner
- All Natural Hair Mask
- All Natural After Sun Spray
This sugar scrub recipe is slightly adapted from The Idea Room. I found the red food coloring alternatives here.
DIY Peppermint Sugar Scrub Recipe

Ingredients
- 2 cups granulated sugar, divided
- about ¼ cup almond oil or fractionated coconut oil, divided
- about 5 drops doTERRA Peppermint Essential Oil
- 2 drops red food coloring (or raspberry juice)
Instructions
- Place the sugar in a medium bowl, slowly add the oil to the sugar until the mixture is soft, but not too oily. Then add 4 or 5 drops of doTERRA pure therapeutic grade peppermint essential oil, add more or less depending on your preference.
- Transfer half of the sugar mixture to a separate bowl. Mix 1 or 2 drops of red food coloring into the sugar in one of the bowls. Now you have one white mixture and one pink! (See blog post for natural coloring options.)
- Alternate the colors in a jar or container, trying to keep each layer about the same height. Use an ice cream scoop handle or something similar to gently pack down each layer. Note that the amount you use for each of your layers, will vary depending on the size and shape of your container.
- To use: Scoop out a small amount and use your fingers to scrub it on your damp or wet skin in circular motions. Rinse.
- Should last up to 3 months if kept in a well sealed container and scooped with a clean utensil or hands.
Trending Diys


Comments
Leave a Reply
More Related Diys


Trending DIY Projects
- DIY
- Recipes
- Deals
- Blog


Report a Problem
Please select the problem you are facing with this deal:
- Price Increased
- Price Decreased
- No longer available
- Expired
- Link doesn't work
- Suggestion
- Compliment
- Other
Add more details:
Thank you for your feedback. We really appreciate it.
Enter your email address if you would like
to receive a follow up.
Please Try Again
Thanks for providing the email address.
We will reach out to you as soon as possible.


Popular
Recommended
About Us

At Fabulessly Frugal, our goal is to help you live HEALTHY, WEALTHY, and WISE! My team and I work hard to bring you the best, online deals, clean eating, DIY's, freezer meal recipes, and more! I LOVE coaching and inspiring people to improve their health in my fitness challenge! You should also check out my favorite cleanse! Learn more about me and the rest of my team.

Copyright © 2008–2025
Fabulessly Frugal: A Coupon Blog Sharing Gift Ideas, Amazon Deals, Printable Coupons, DIY, How to Extreme Coupon, and Make Ahead Meals. All rights reserved
At the chance of appearing lame, I’ll post a comment. Normal coconut oil works too!
That is not lame! Thanks for the tip, Joy.