DIY Floating Witch Hats Tutorial
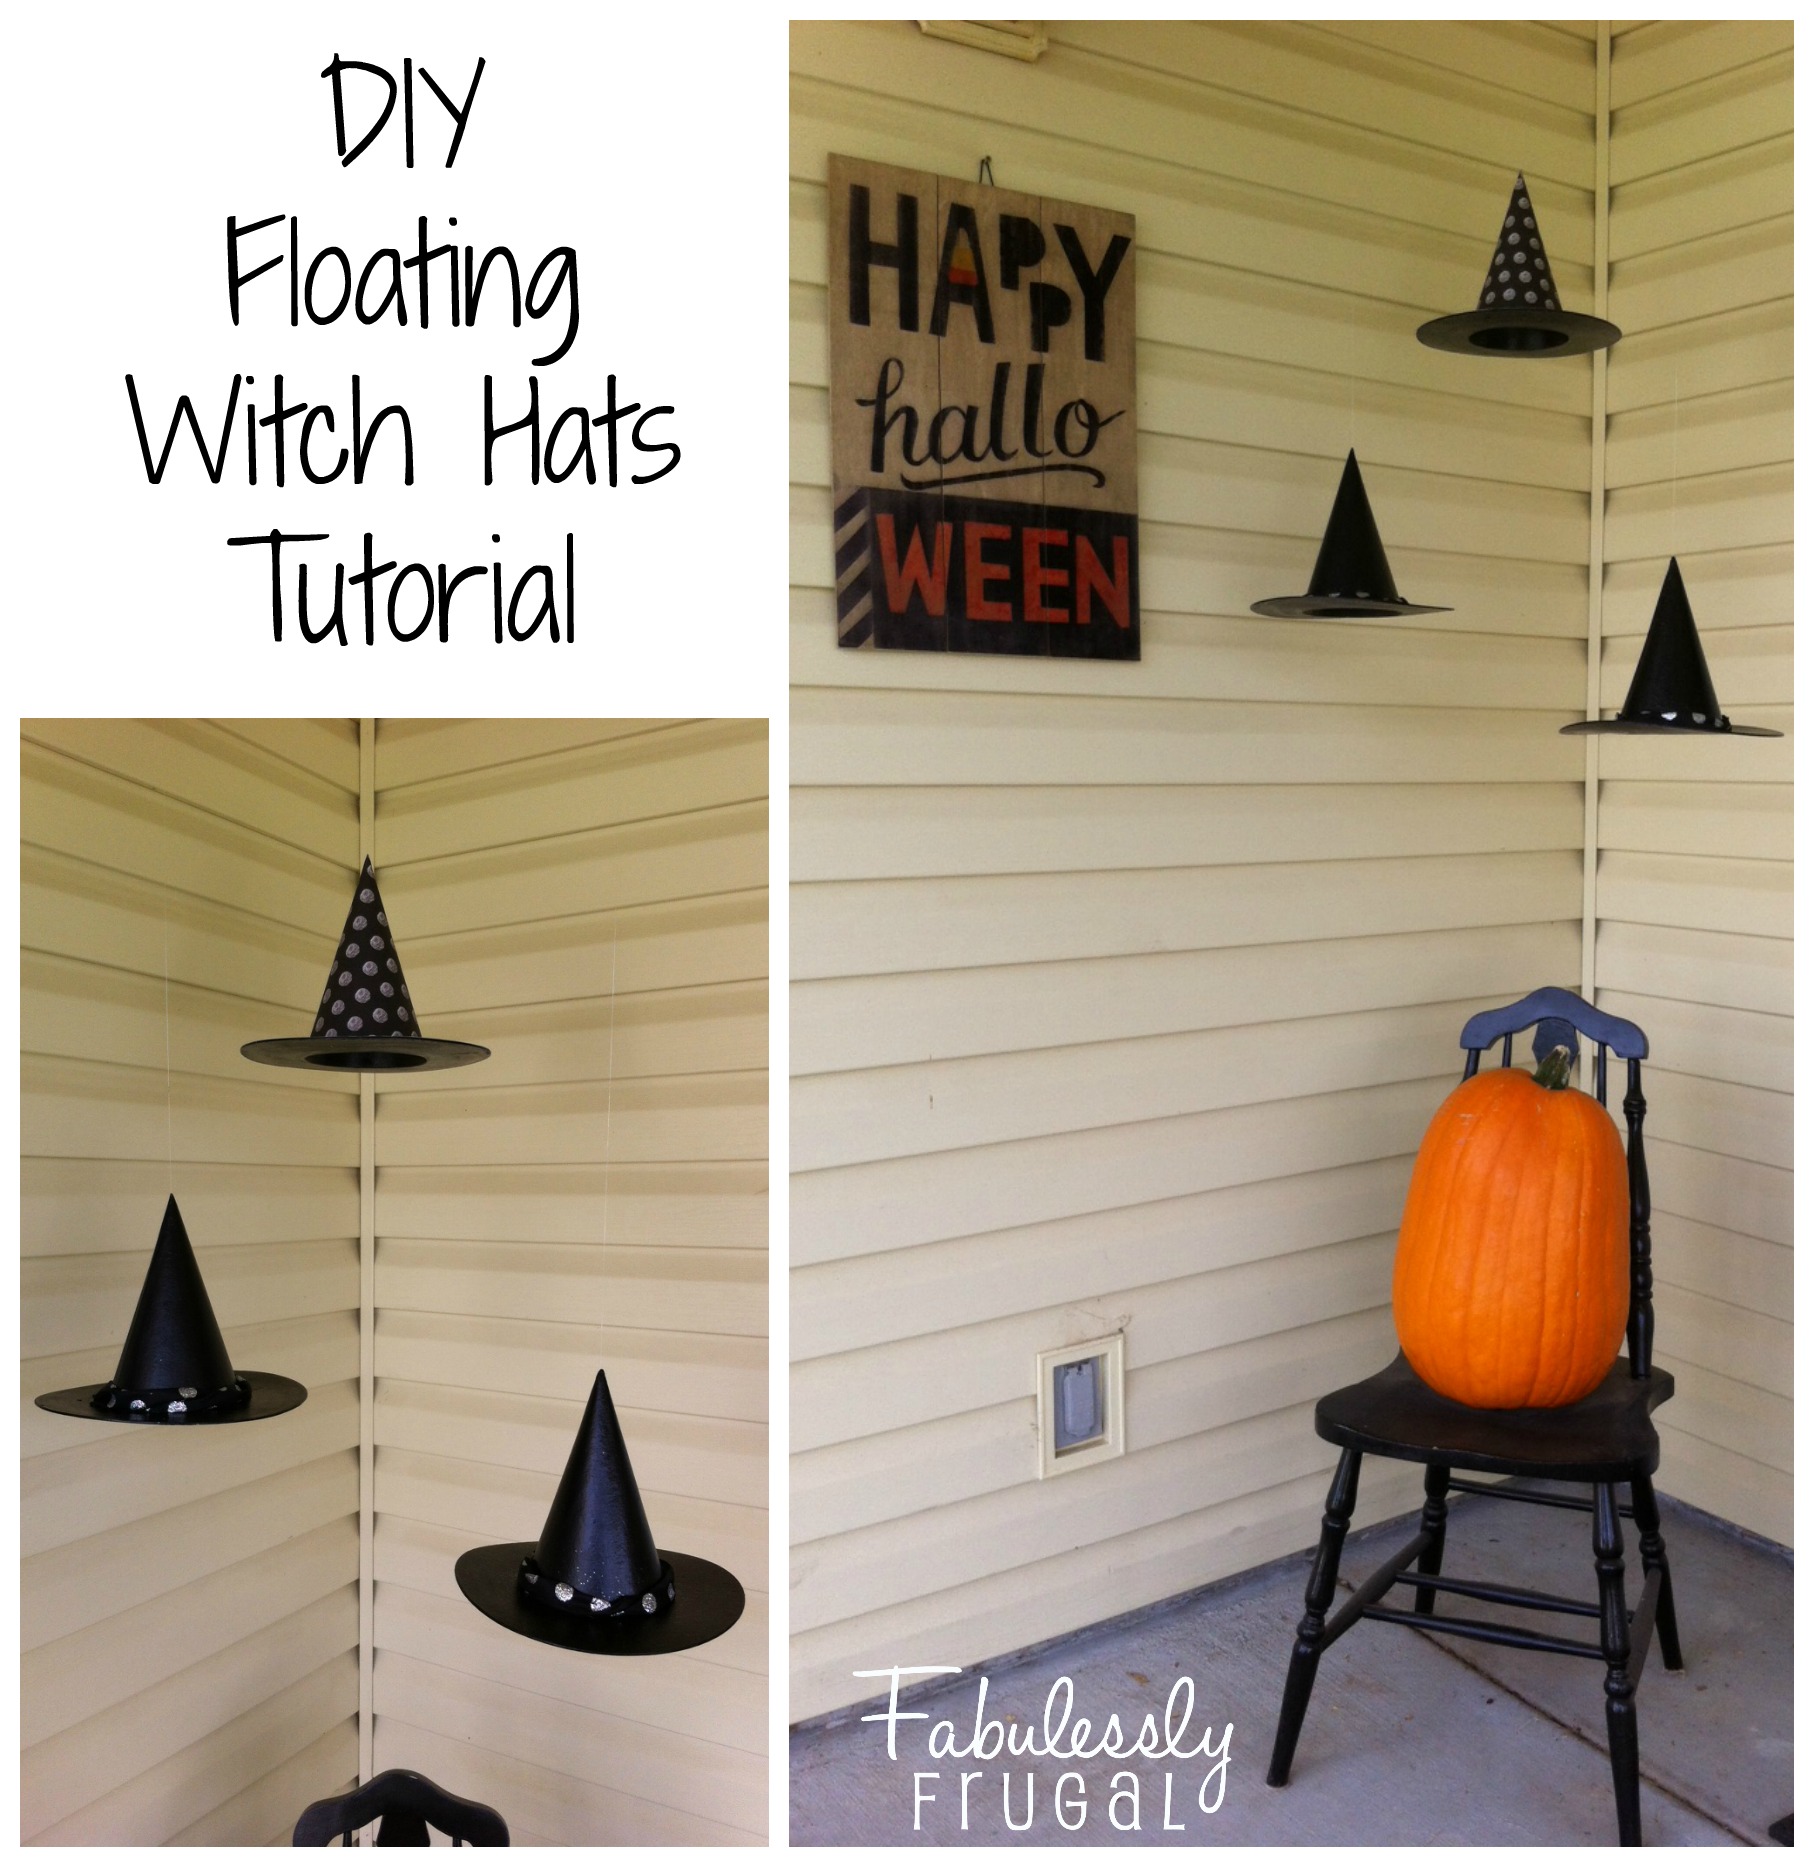 Halloween is fast approaching, but there is still time to dress up your porch before the trick-or-treaters come around. These floating witch hats make a fun, festive, and slight spooky decoration. They are simple to make. I think you will have fun trying out your own.
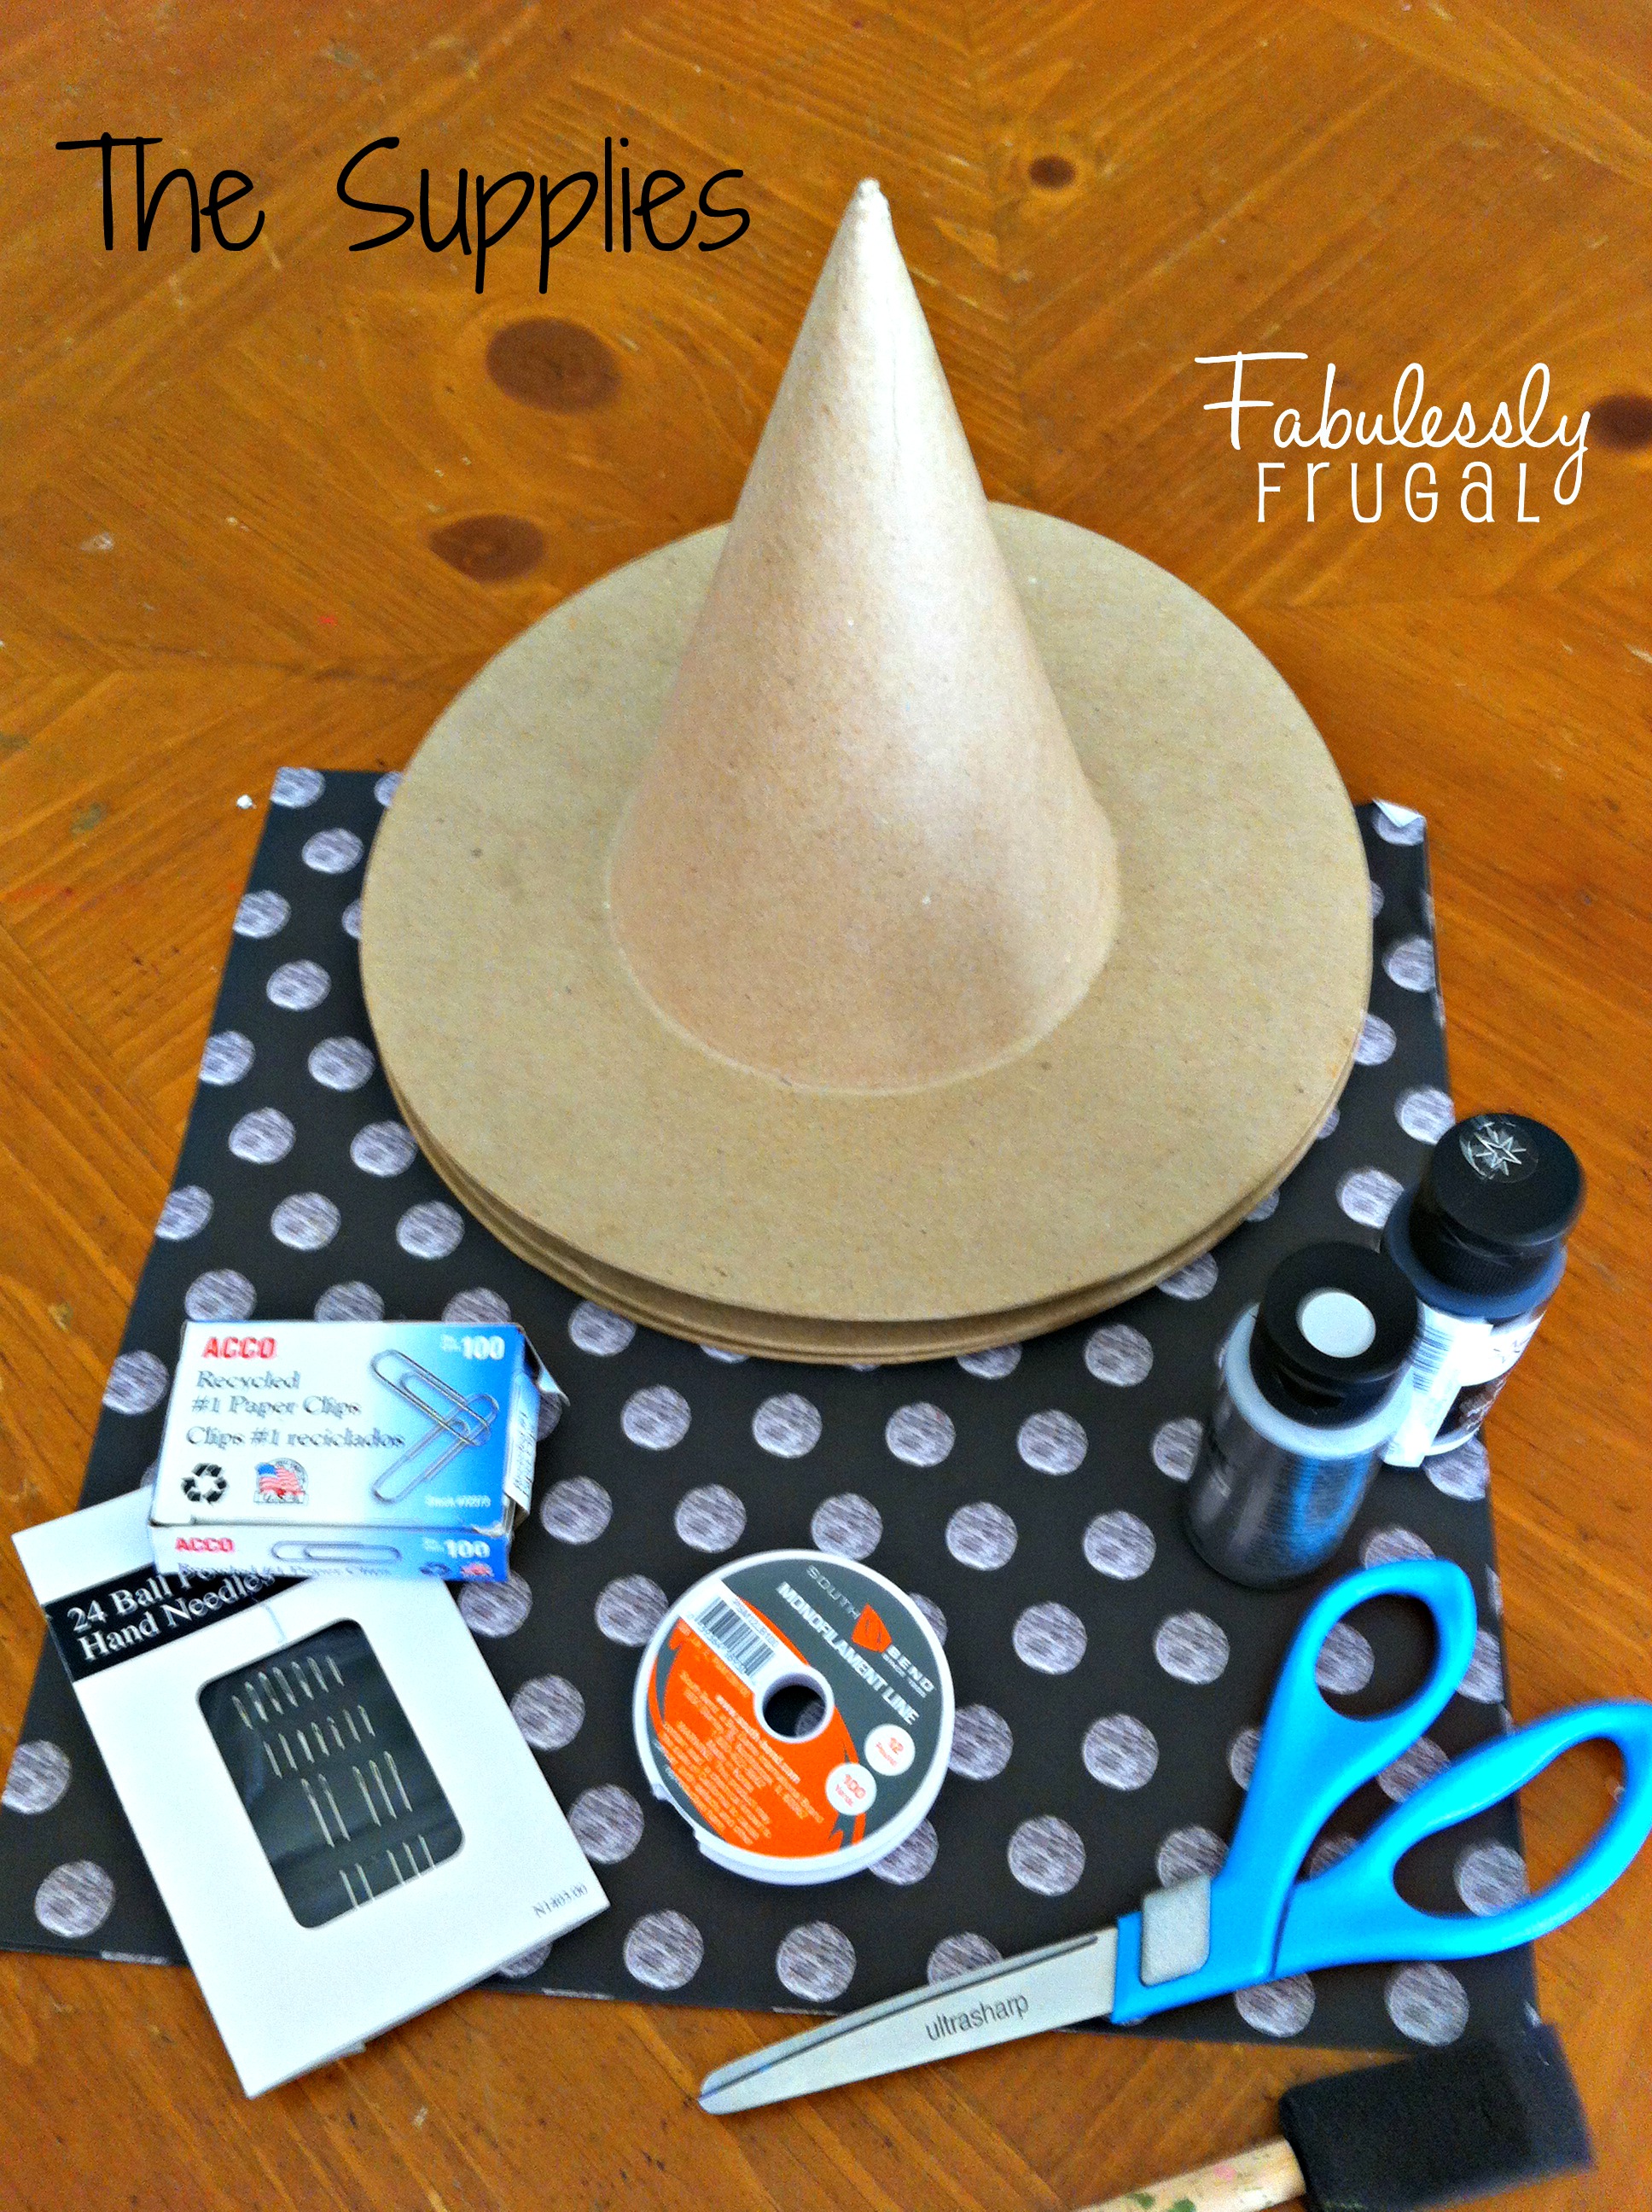
The Supplies:
- 3 paper mache witch hats (available at Joann Fabrics and other craft stores)
- scrapbook paper (I used black and white polka dots)
- scissors
- black acrylic craft paint
- 2 sponge paintbrushes
- pencil
- Elmer’s glue (or Mod Podge)
- fishing line
- paper clips
- large hand needle
- ribbon (optional)
- hot glue gun (optional)
The Instructions:
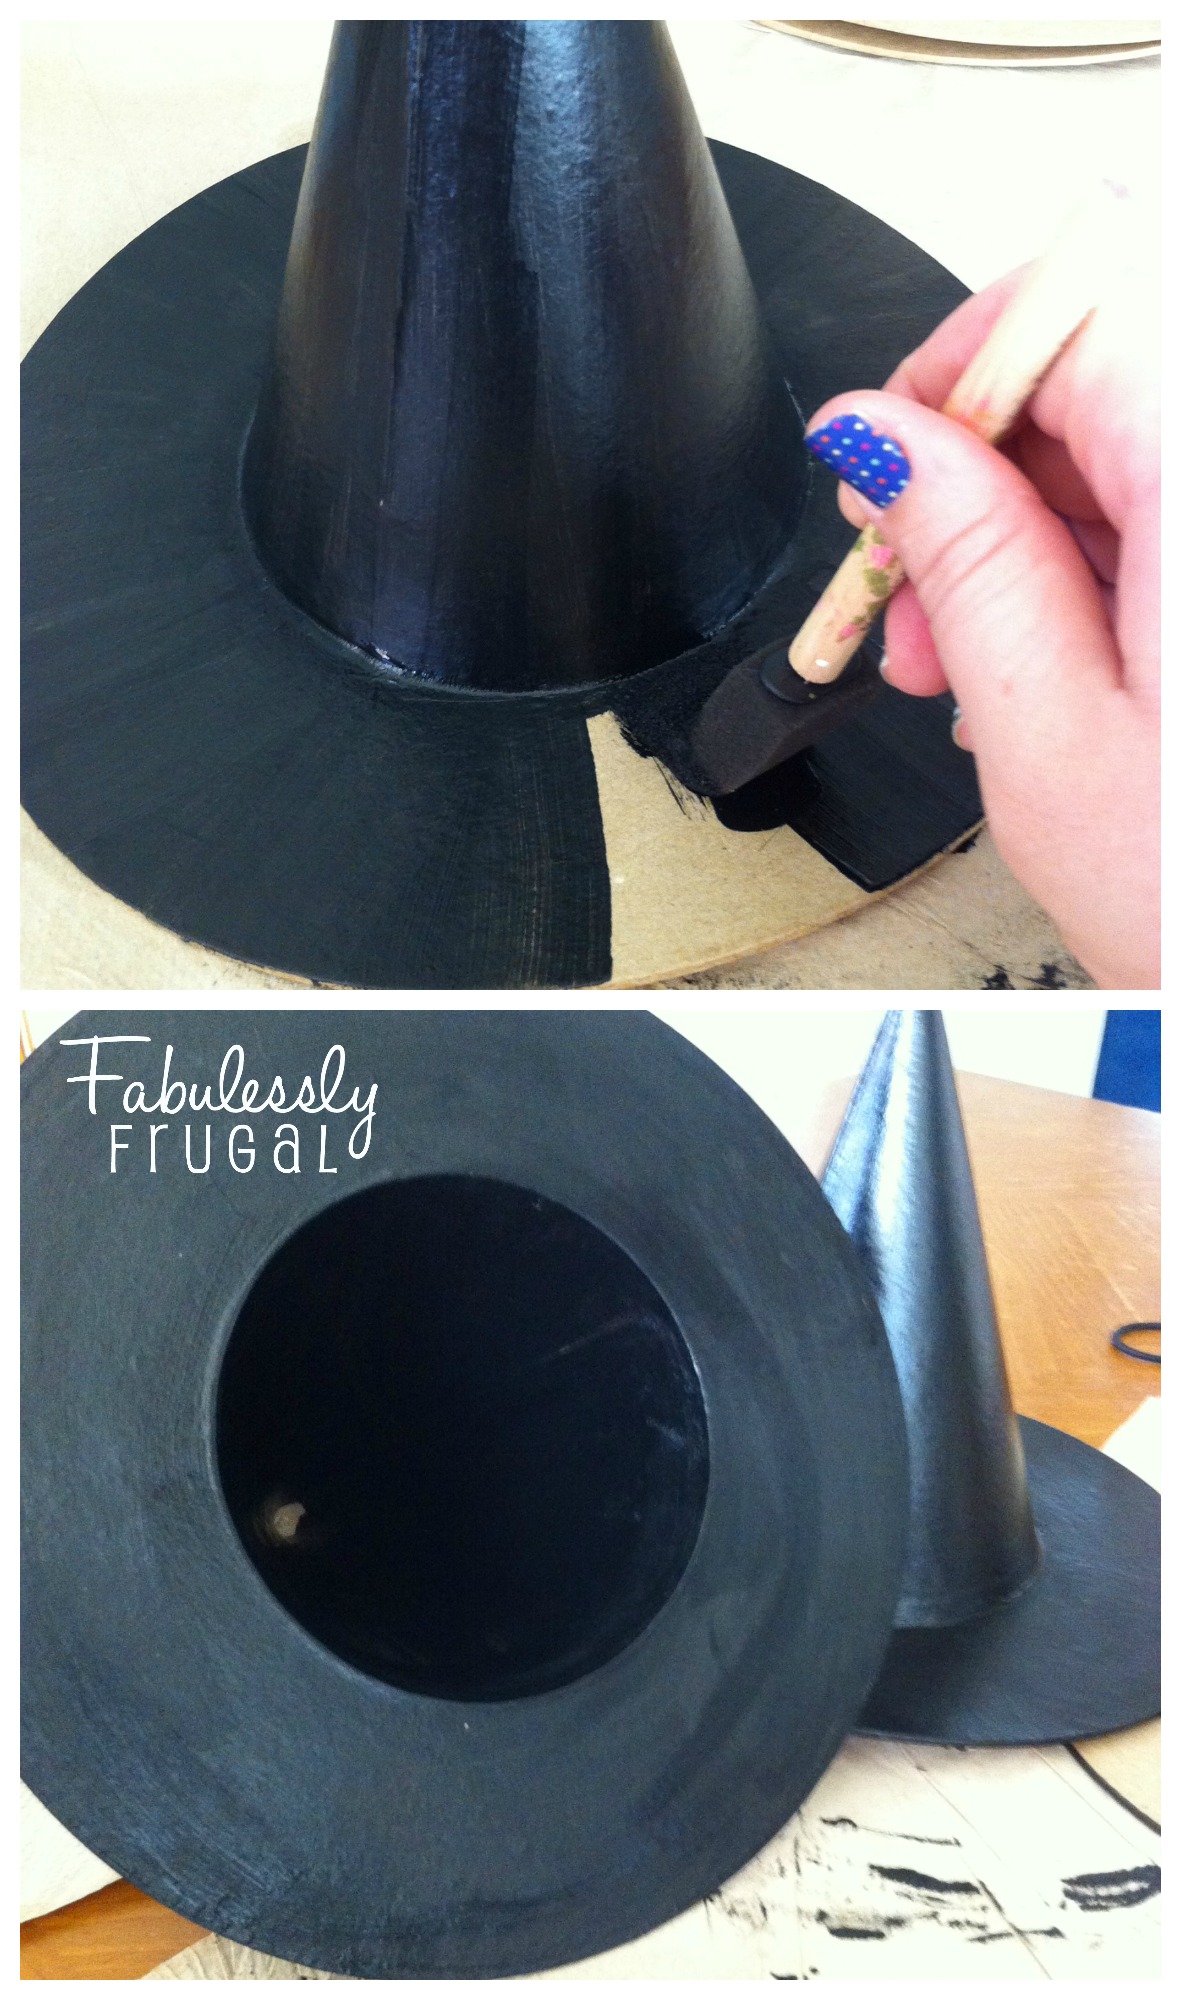
Start by laying out some newspaper or other proective surface and paint the tops of the witch hats with the black paint. After giving them a few minutes to dry, turn them over and paint under the brim and the inside. Allow them to dry completely. Note: the hat that will be covered in scrapbook paper does not need to be entirely painted, just covering the edges and inside will do.
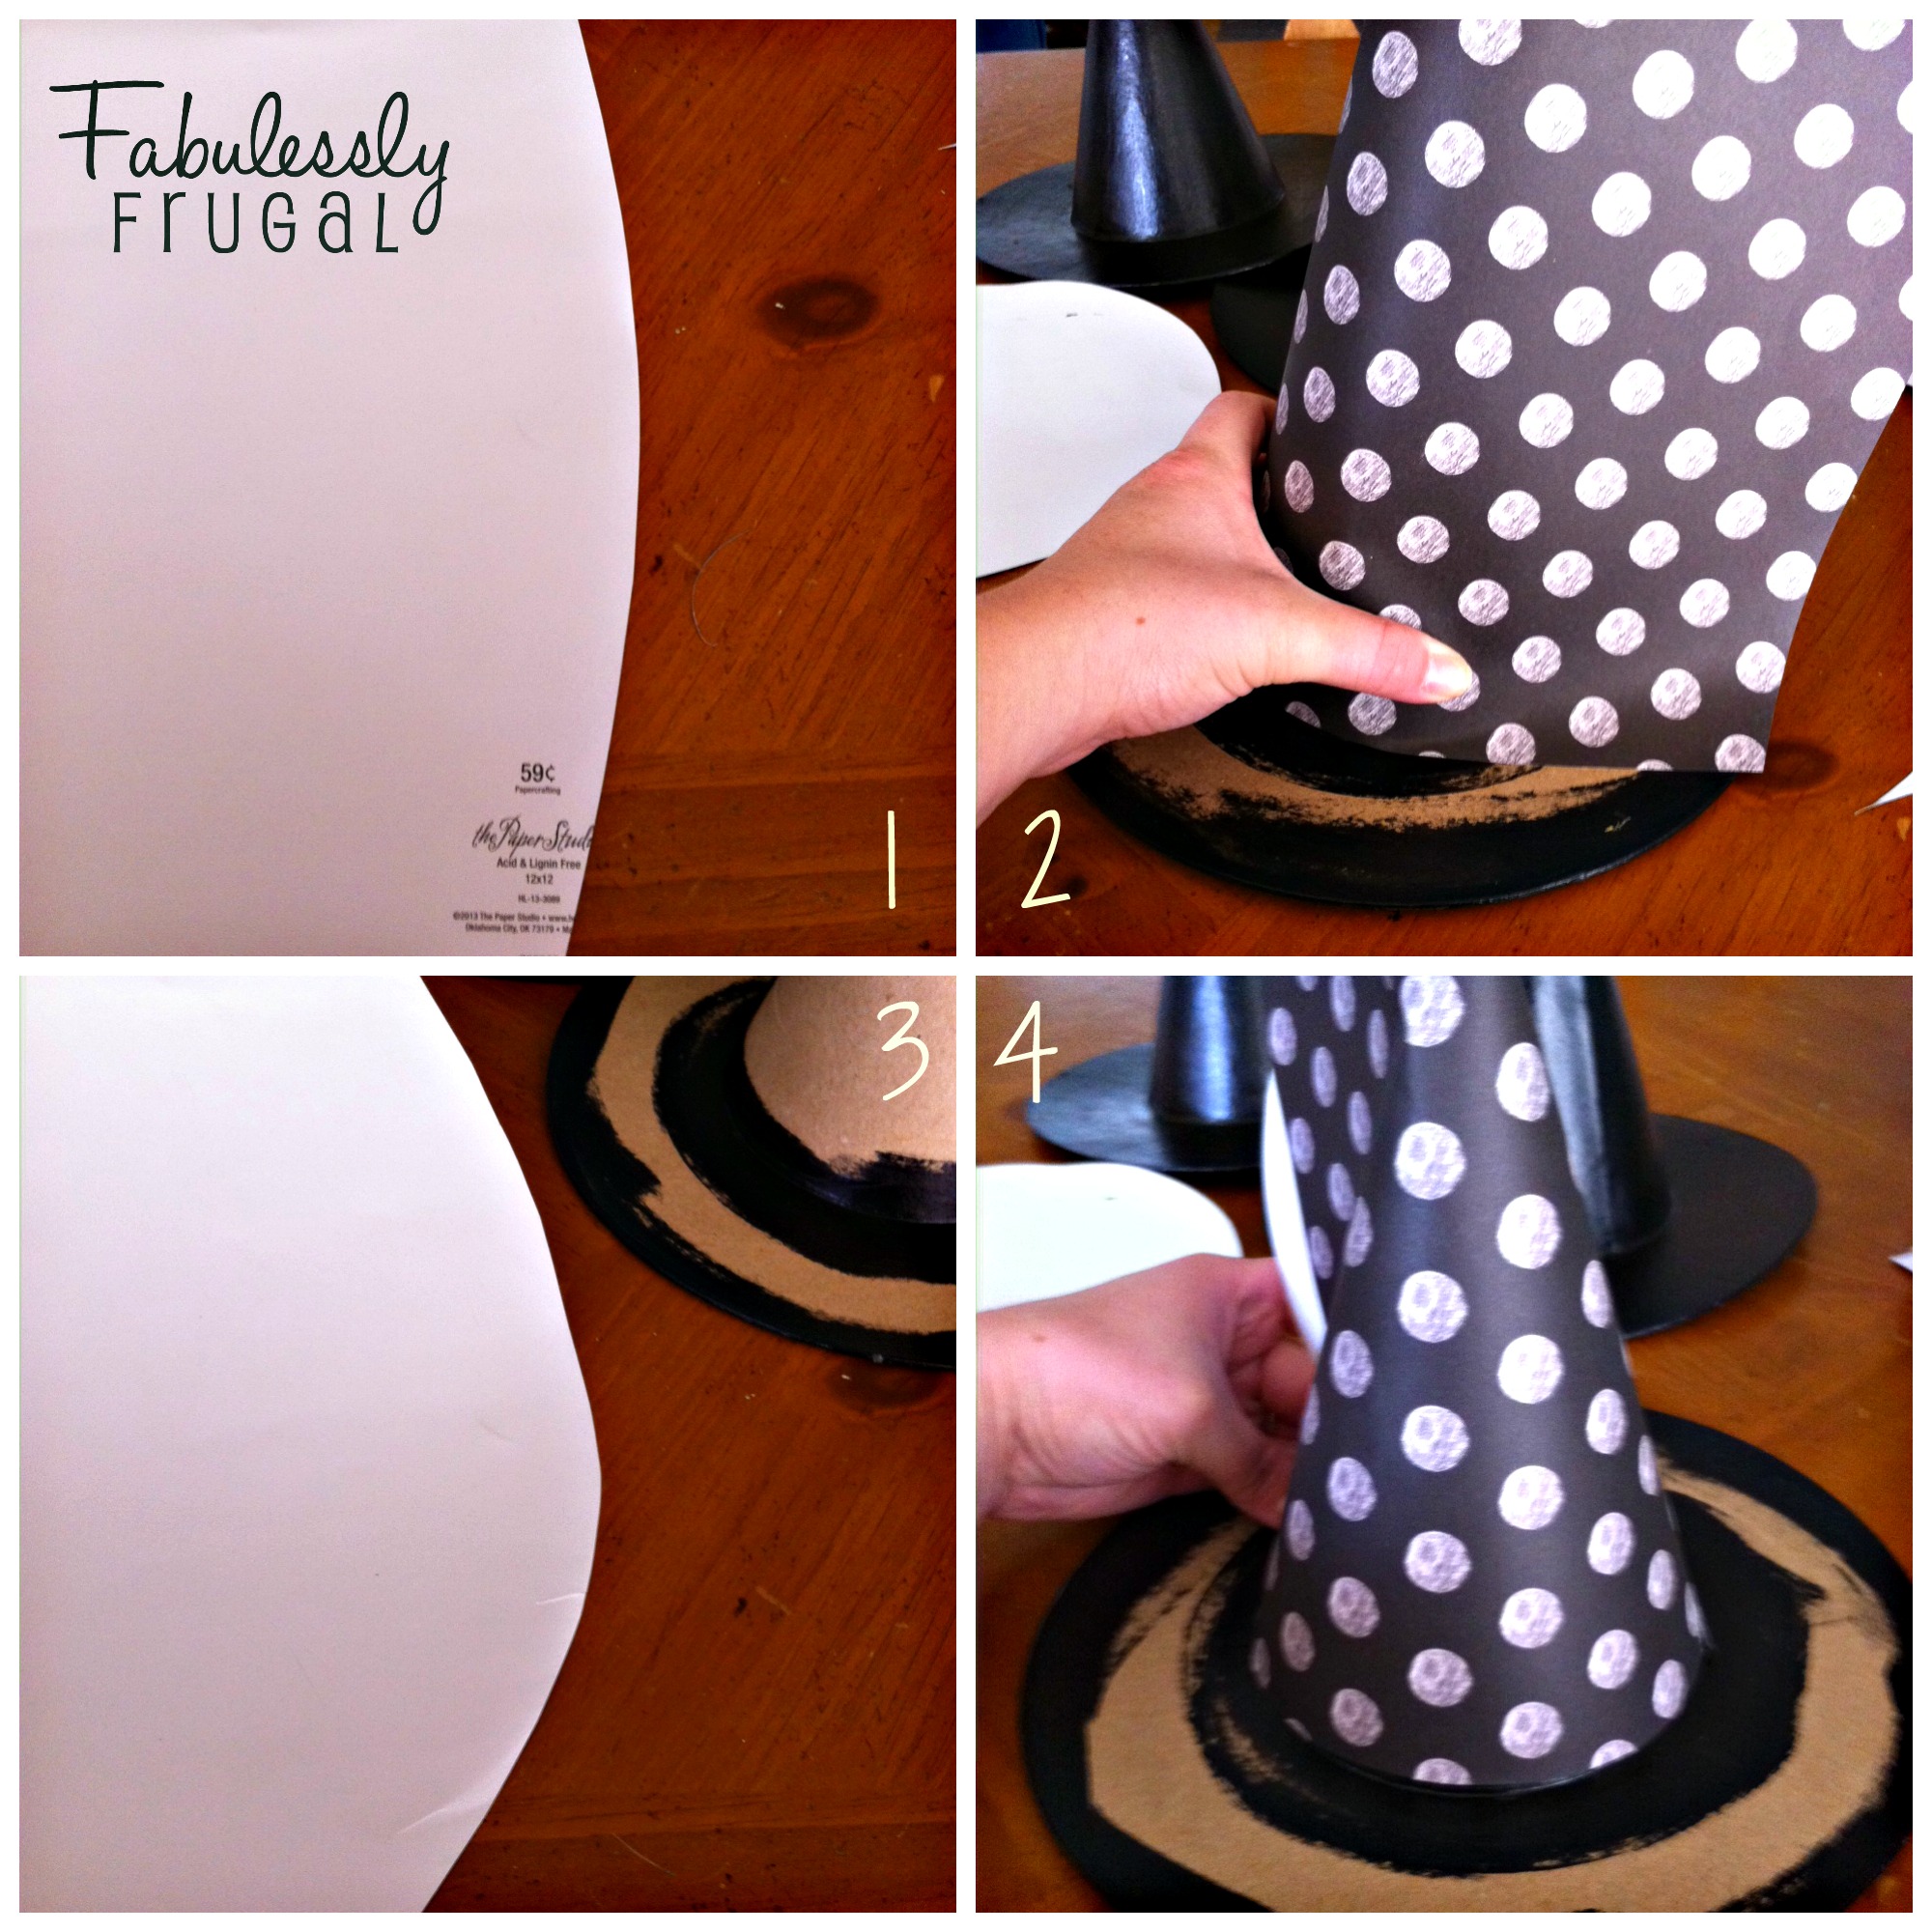
Take one of the pieces of scrapbook paper and cut one side with a slight curve. Hold the paper up the the witch hat with the curved side facing down. This will give you an idea of how much more you need to trim along that curve for the paper to wrap snugly around the hat. Trim the excess of the curved portion and test again.
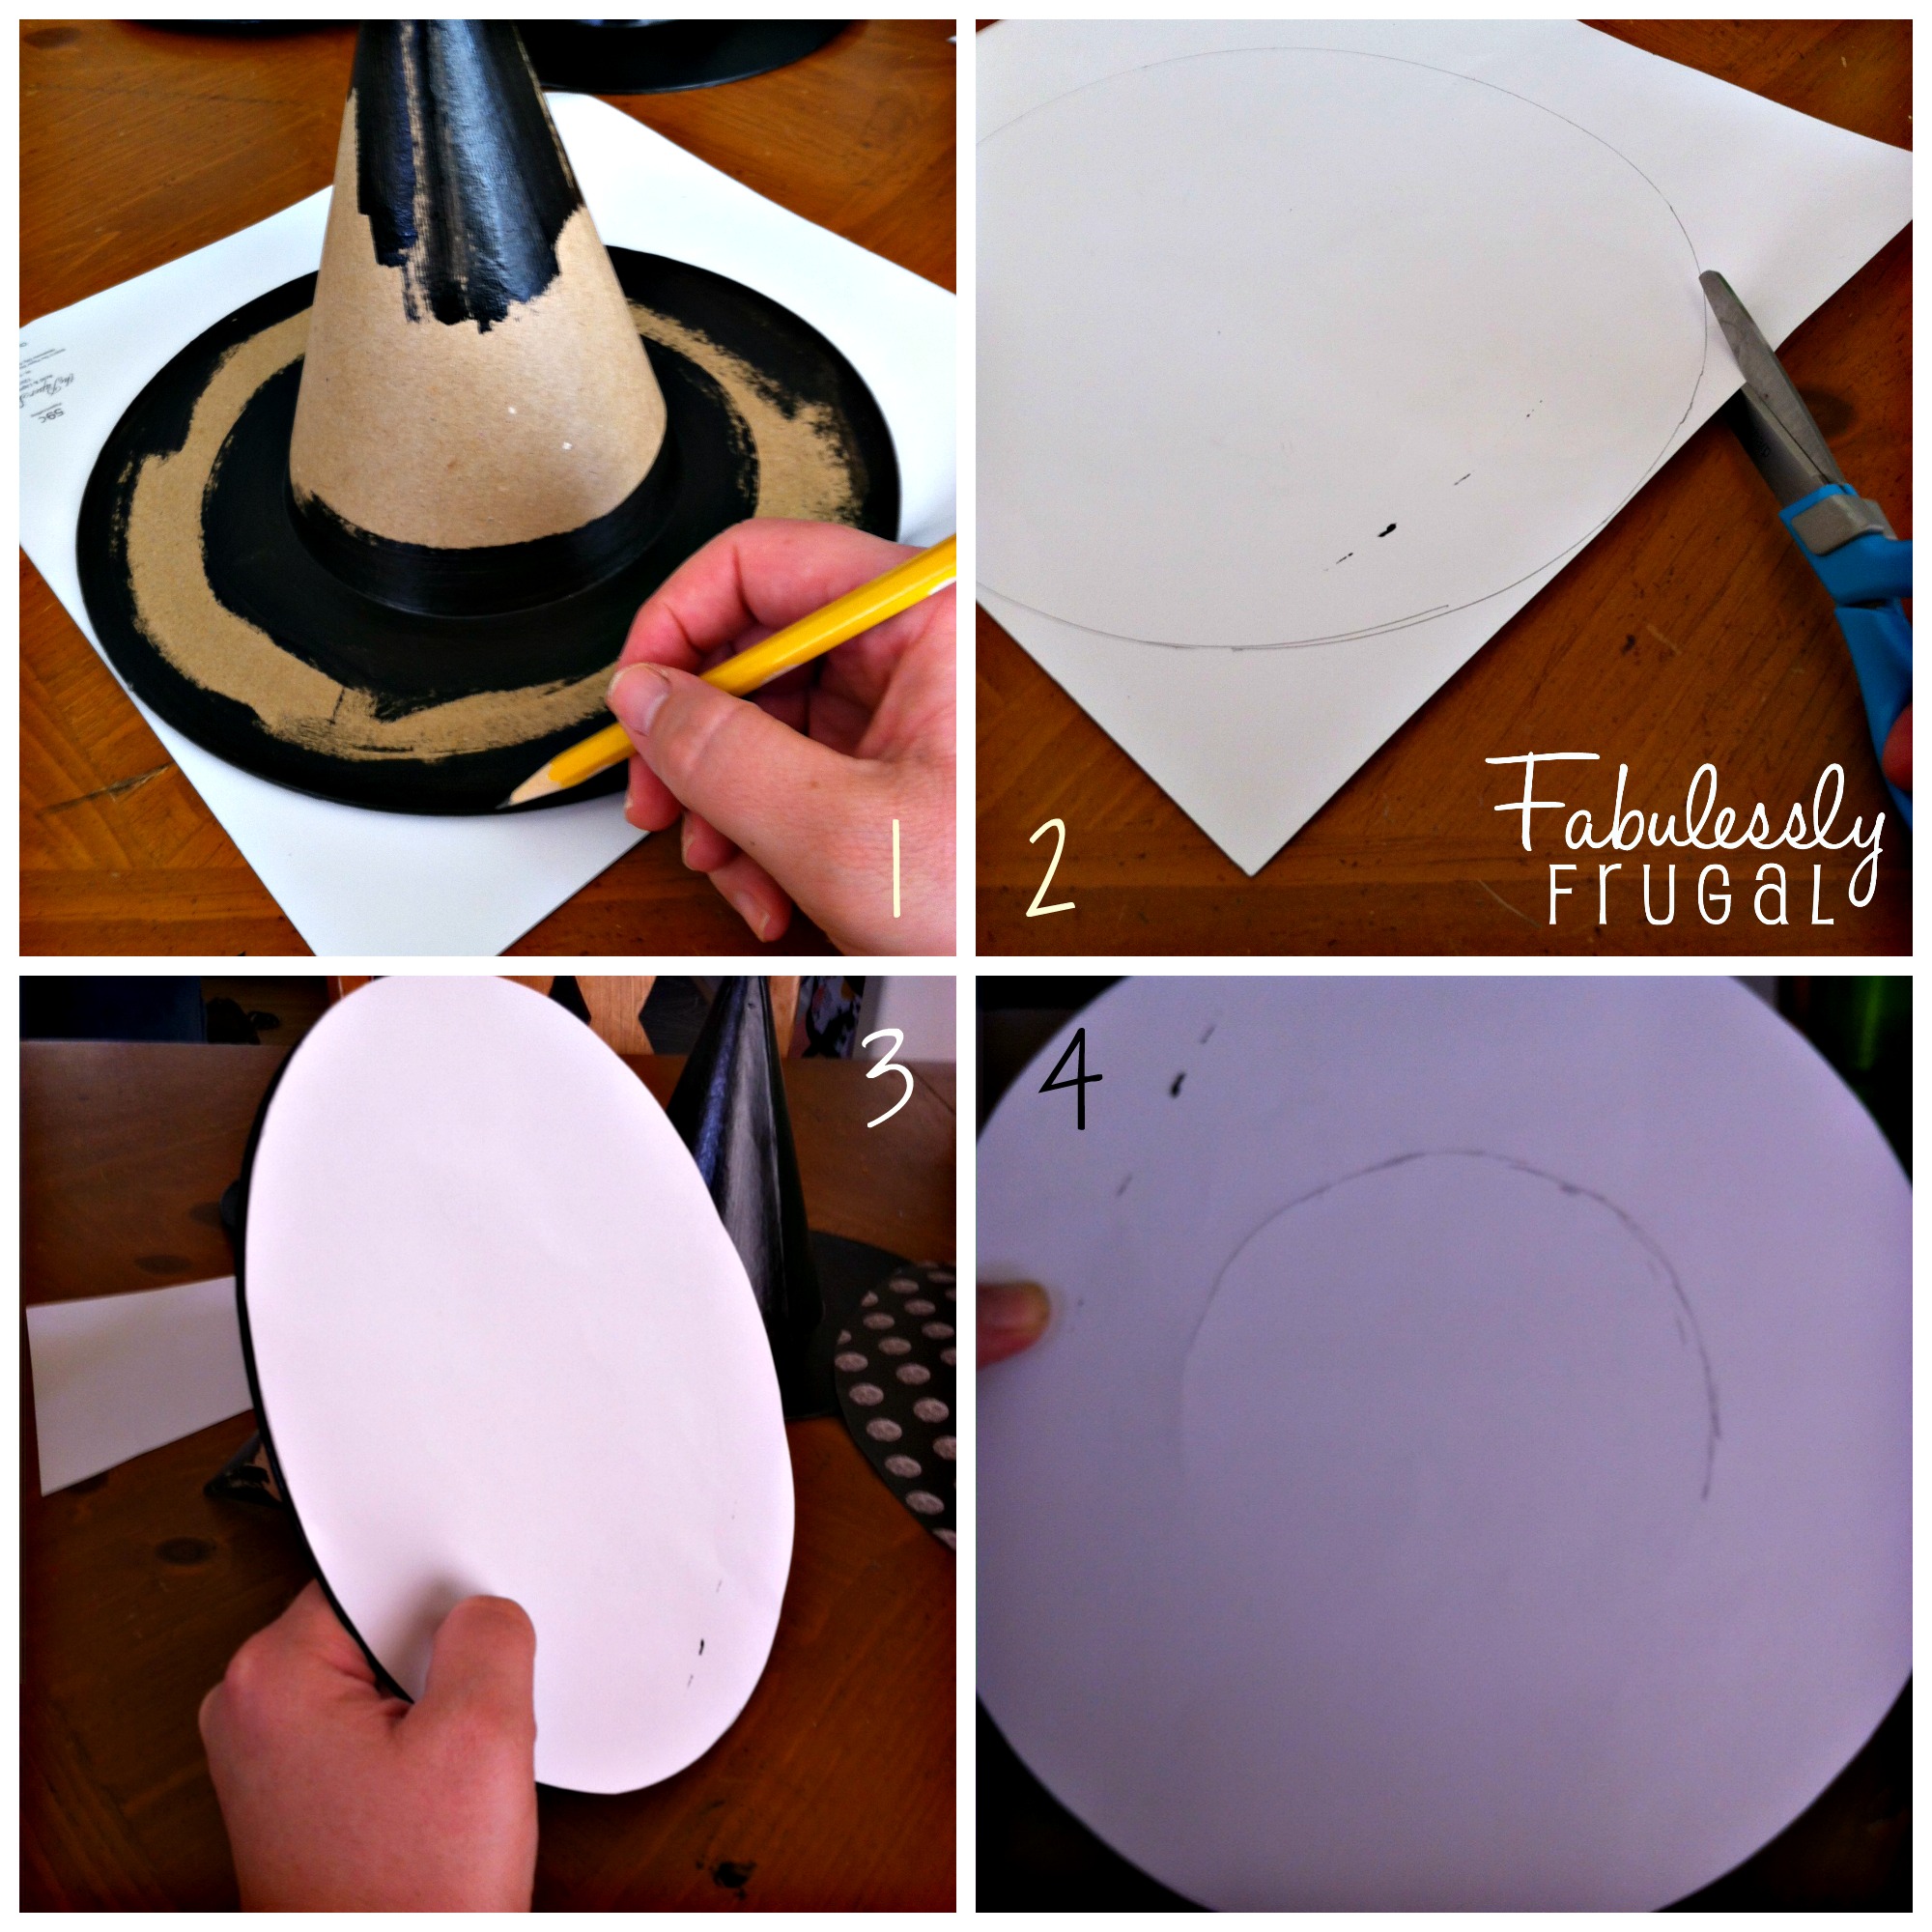
Next, place the hat flat on the back side of the other piece of scrapbook paper. Trace the circle and cut along the line. Then, hold the cut circle up to the open side of the hat. By putting a little pressure on the edge with your finger, you should be able to see a little indent of where the hat brim ends. Trace along that indent to mark where the hat opening begins.
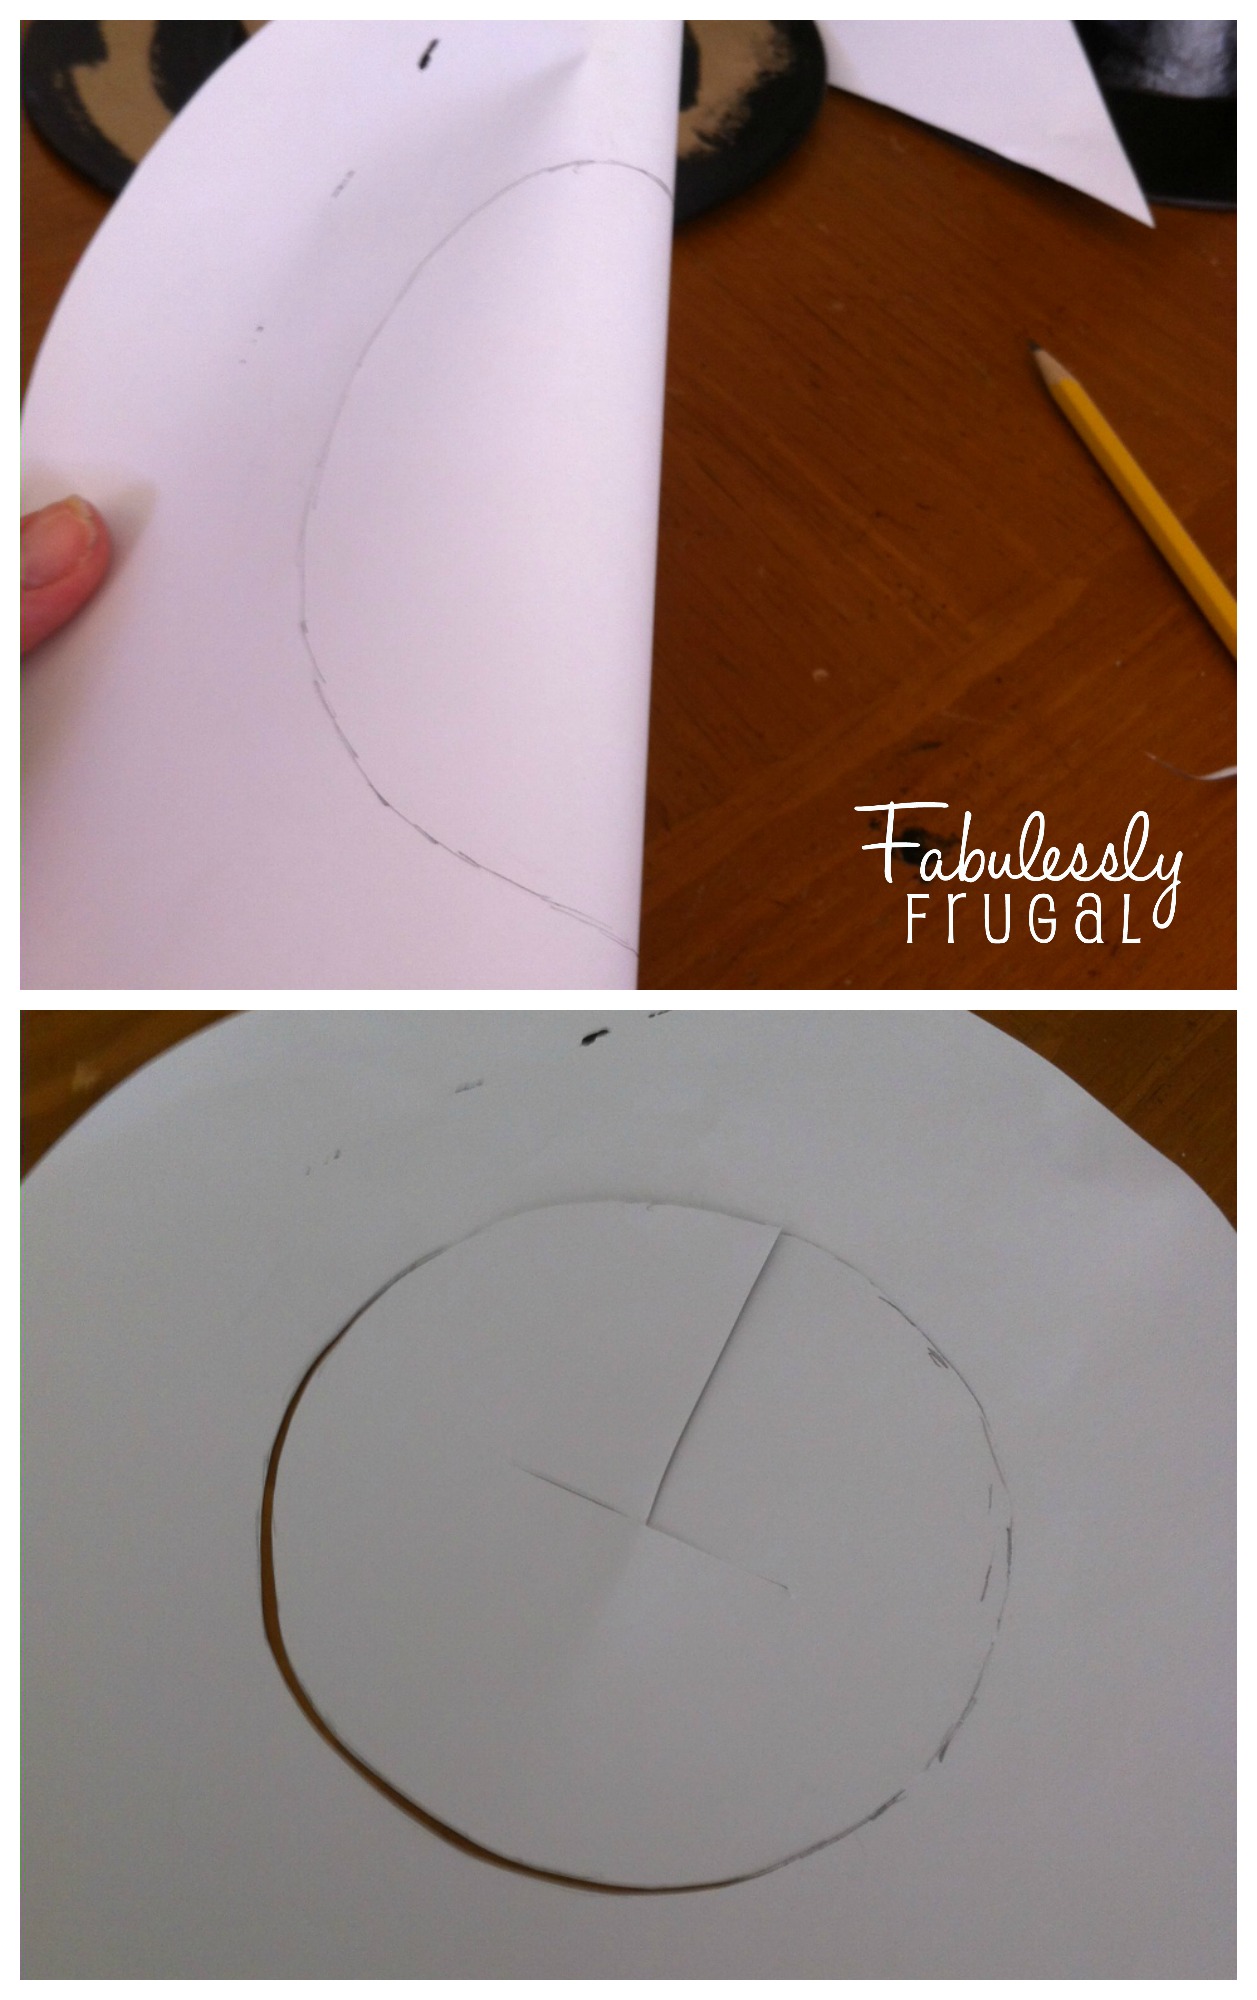
Fold the paper in half and cut through the center. Follow along the penciled line to cut an opening in the middle of the circle.
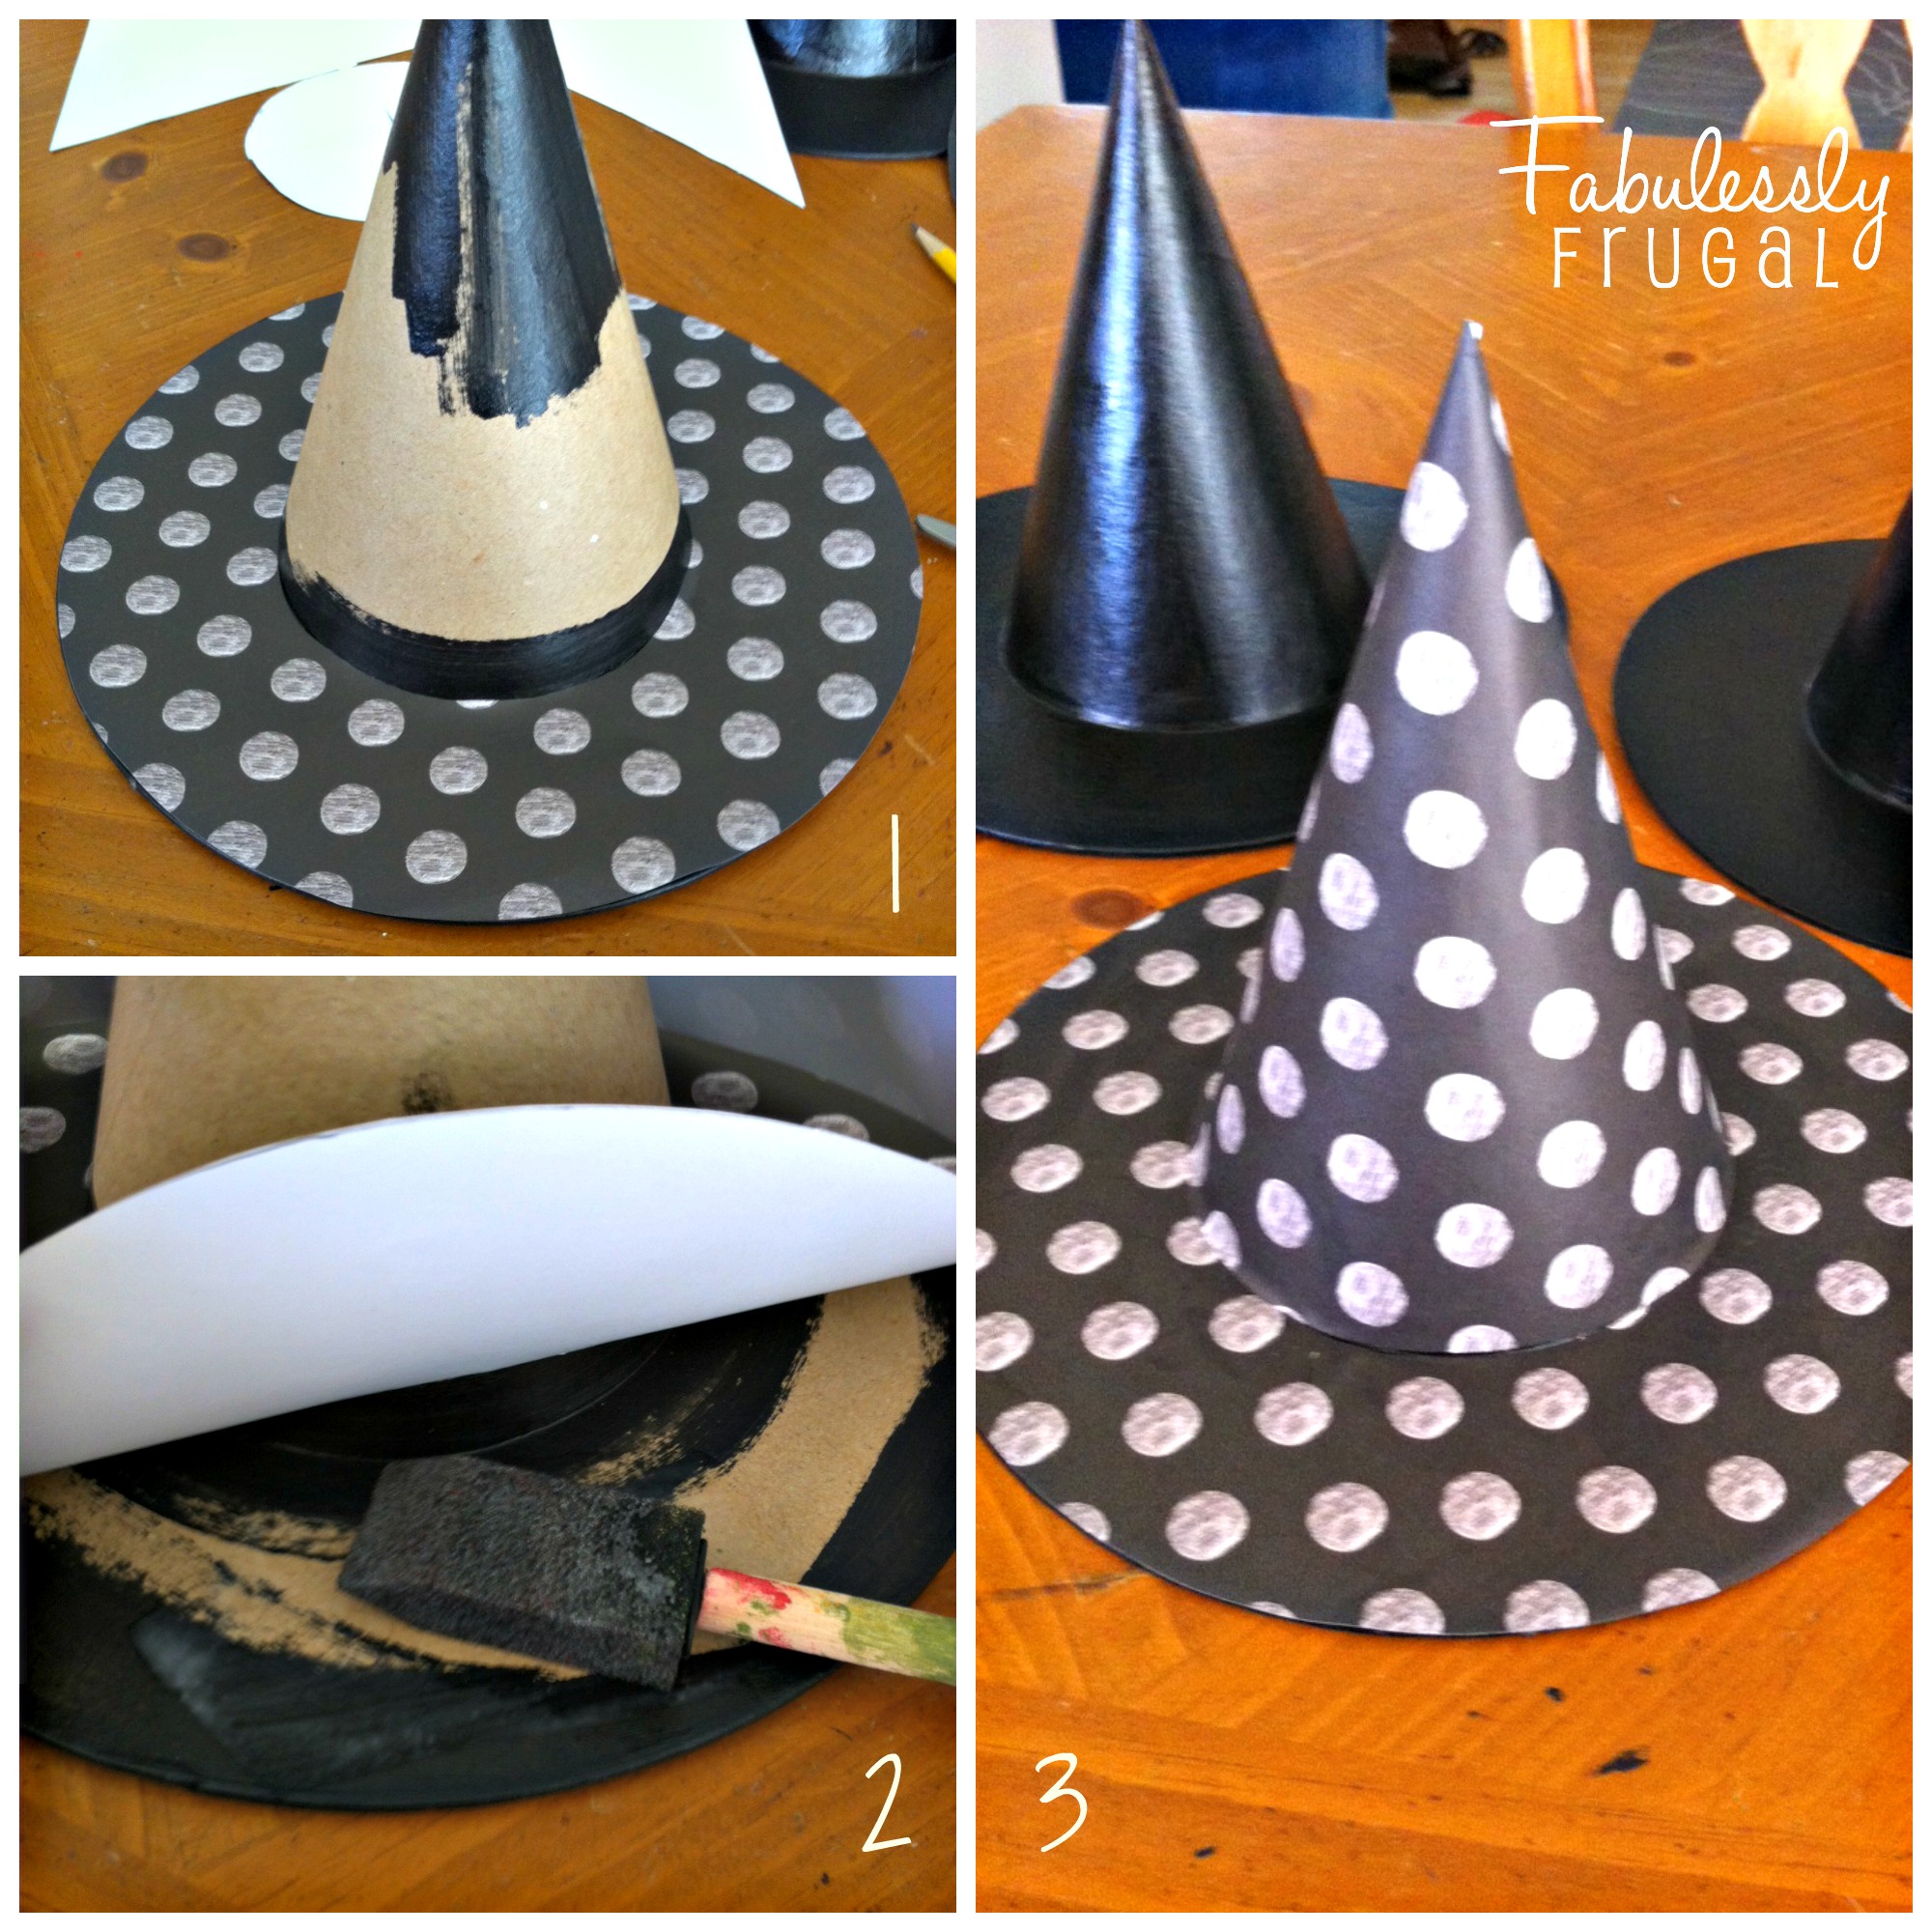
Place the circular paper on the brim of the hat to make sure it is a good fit. Trim any areas that may need to be trimmed. Use a sponge brush and glue mixed with a little water (or Mod Podge) and paint the brim with the adhesive. Press down firmly to be sure there are no air bubbles. Paint adhesive to the back side of the paper that was cut for the tall part of the hat and place it on firmly as well.
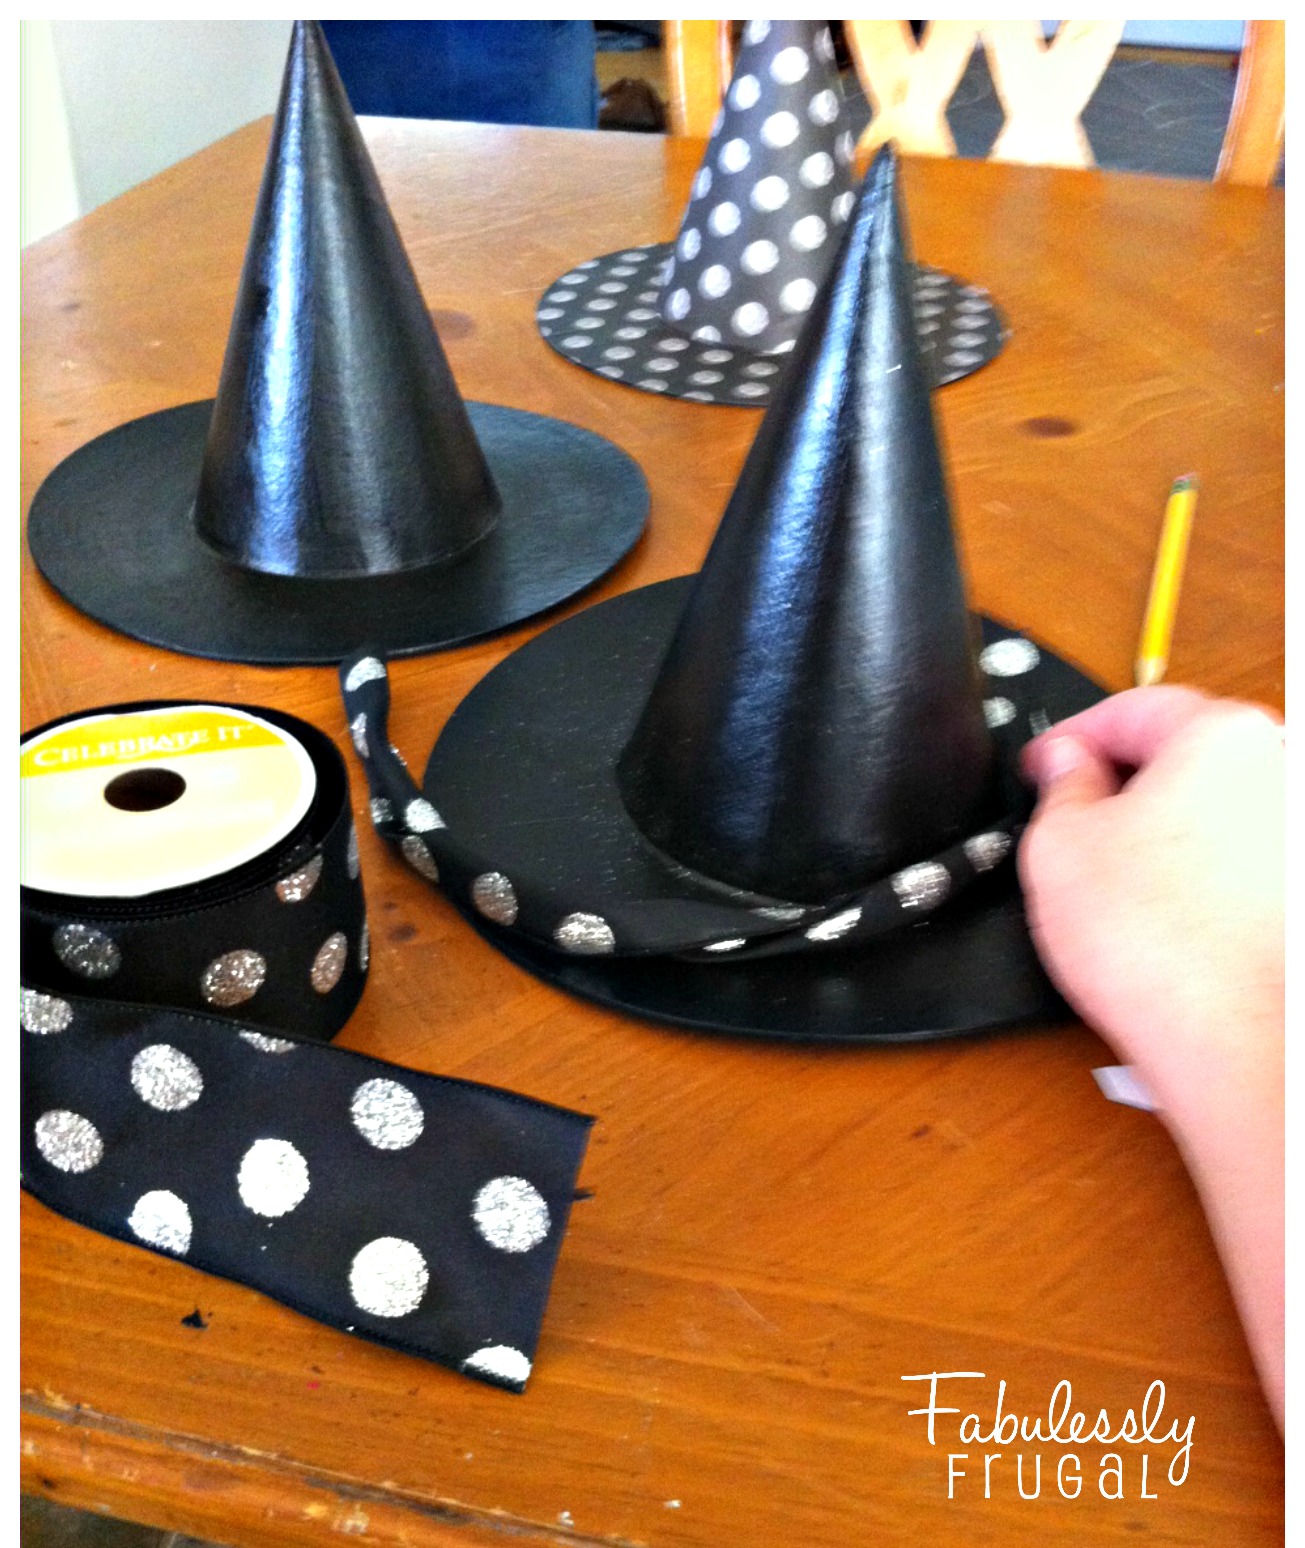
If you would like to decorate the hats that are not covered in paper, use some ribbon and wrap it around the base of the hat. Use hot glue to secure it into place.
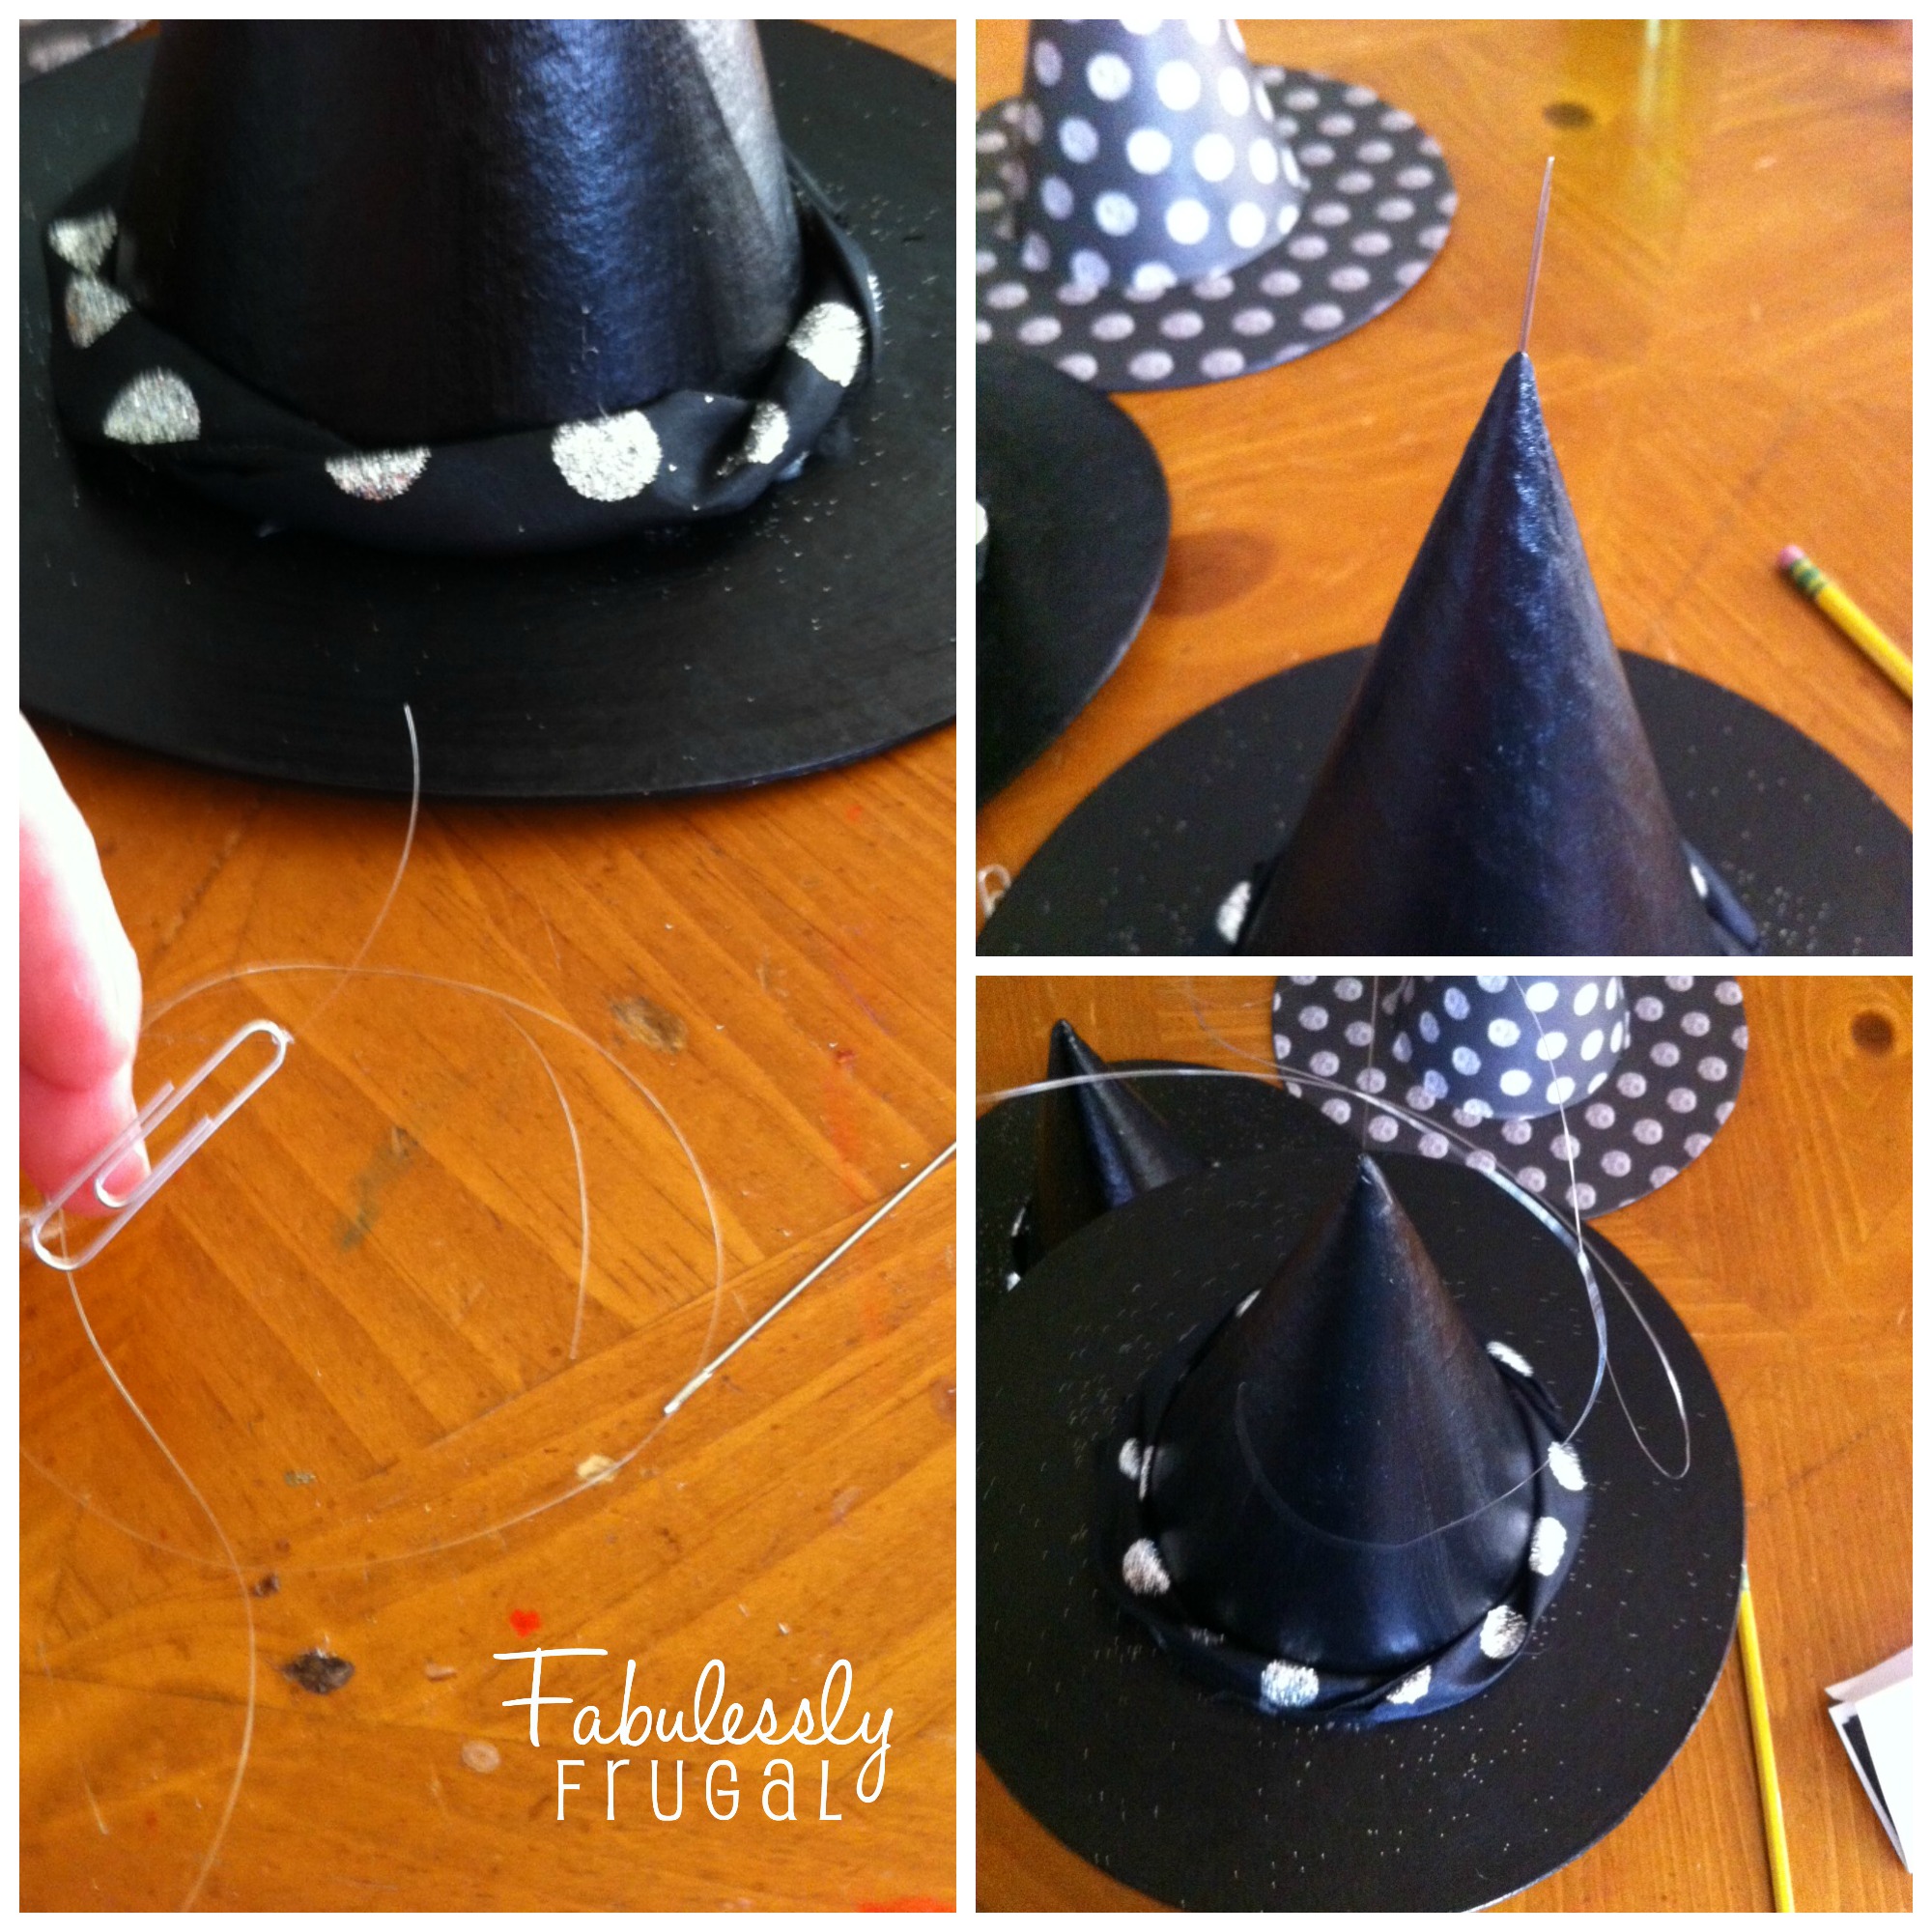
Prepare your fishing line by tying a paperclip to one end, and threading a hand needle through the other. Use fishing line that is approximately 4-5 feet long. Once the fishing line is tied and threaded, turn the hat upside down and drop the needle, pinpoint down, into the hat. Use the eraser side of your pencil to help you reach the needle, and use it to push the needle through the paper mache. Once it has poked through, pull the fishing line all the way through, and the hat is ready to hang.
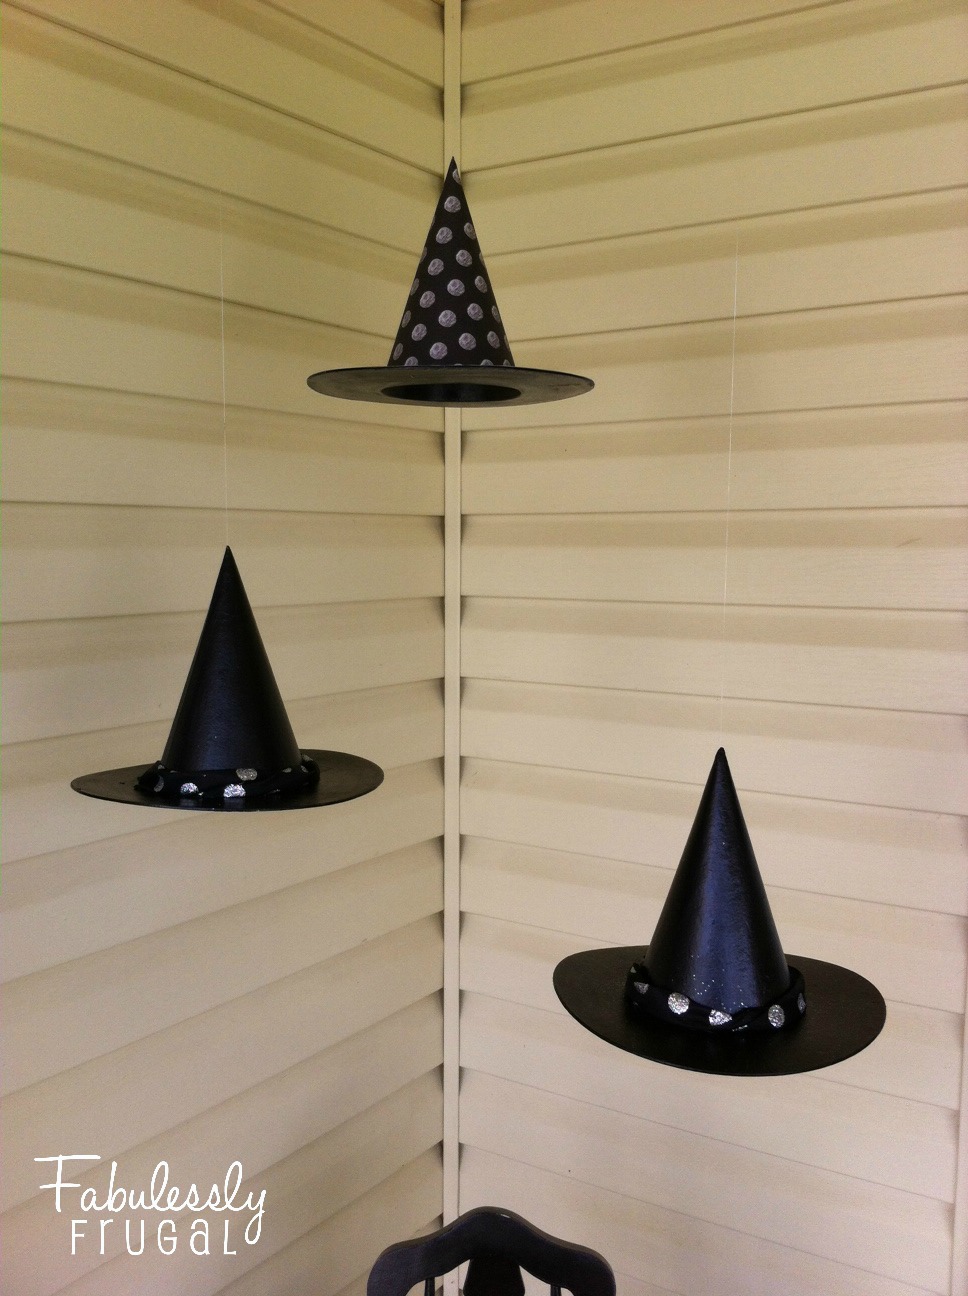
The floating hats look great on my porch, hovering over my pumpkin and chair. These hats would also be great indoors, hanging from a chandelier, or in a doorway. There are so many options. No matter where you use them, they are sure to catch the attention of your friends and family.
Trending Diys


Comments
Leave a Reply
More Related Diys


Trending DIY Projects
- DIY
- Recipes
- Deals
- Blog


Report a Problem
Please select the problem you are facing with this deal:
- Price Increased
- Price Decreased
- No longer available
- Expired
- Link doesn't work
- Suggestion
- Compliment
- Other
Add more details:
Thank you for your feedback. We really appreciate it.
Enter your email address if you would like
to receive a follow up.
Please Try Again
Thanks for providing the email address.
We will reach out to you as soon as possible.


Popular
Recommended
About Us

At Fabulessly Frugal, our goal is to help you live HEALTHY, WEALTHY, and WISE! My team and I work hard to bring you the best, online deals, clean eating, DIY's, freezer meal recipes, and more! I LOVE coaching and inspiring people to improve their health in my fitness challenge! You should also check out my favorite cleanse! Learn more about me and the rest of my team.

Copyright © 2008–2026
Fabulessly Frugal: A Coupon Blog Sharing Gift Ideas, Amazon Deals, Printable Coupons, DIY, How to Extreme Coupon, and Make Ahead Meals. All rights reserved
How cool! I love easy but fun DIY decorating ideas. Thanks for sharing.