
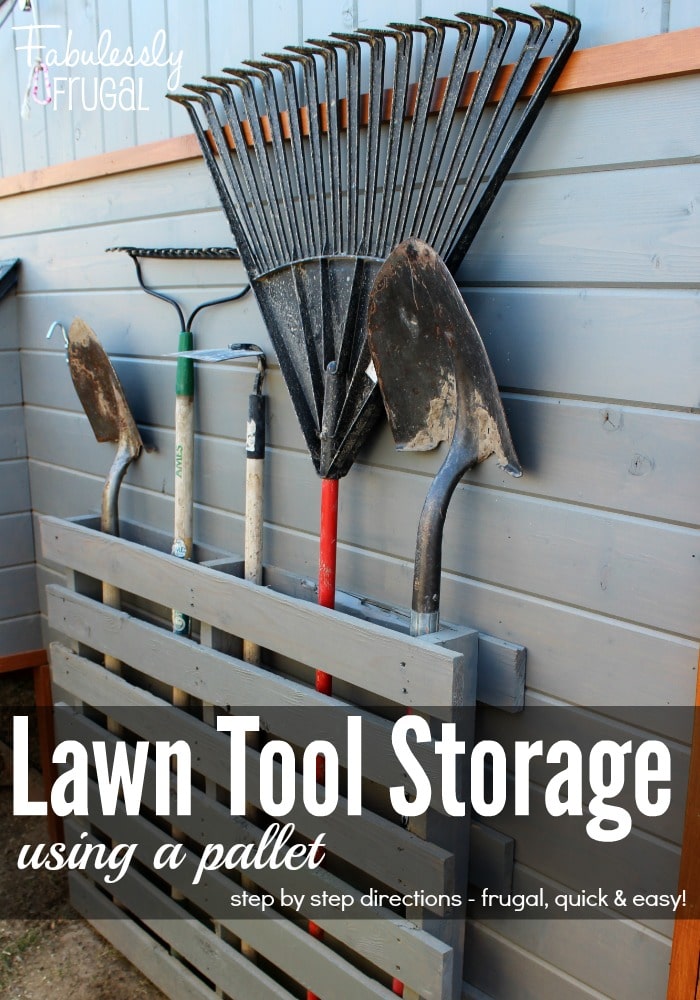
Store Lawn Tools With a Pallet!
All the tools used throughout the spring, summer, and fall can create quite a disorganized mess! So when Amber told me about using a pallet to store her lawn tools, I was intrigued! I asked her if she’d share exactly how she did it with me and I wanted to share it with you! This lady is a master at pretty much everything. She is creative and comes up with such nifty ideas! So take a look at what she came up with…
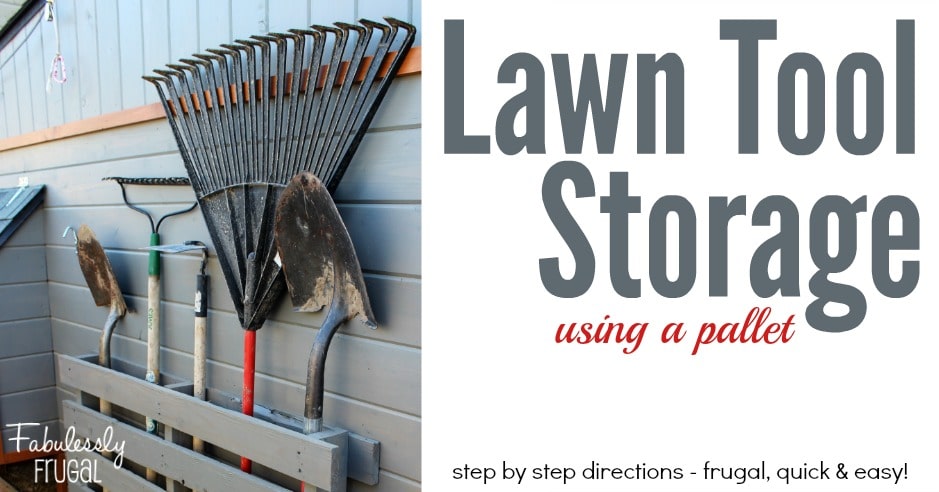
Organize your lawn tools!
If you have a yard or a garden you know that there are a lot of tools involved. You probably also know how obnoxious it is when you need the shovel or the rake and you have to walk all over the place to find it or pull it from the pile of tools in the shed. After a summer full of landscaping and gardening, I decided I was over the unorganized mess I had going on. My husband built a tool shed for me this spring, which I love, but after I get all of my planting materials in there, lawn mower, weed eater, seed spreader, you see where I am going here. So I started stacking them up on the side, and then it occurred to me that we should just have something there that I could hang on the side of the shed for my lawn tools. I have used the tool hangers in the garage, and they work great, I just worry about them being exposed to the elements and how brittle they would become. So after the frugal side of me kicked in, I started looking around to see what I had on hand that I could put together. And bam – I had a few pallets that I had laying around for some projects that just haven’t panned out. If you don’t have any laying around, they are easy to get for free. Many business will give them to you, but call first! Another great place to check is your local Craiglist ads. This was a quick one day project and now I have my tools organized and a place for them to be instead of scattered.
Items Needed:
Pallet
Hammer
Pry bar
Heavy duty screws or framing nails
Wood stain and a weather proofing sealant (this is optional but will allow it to survive the weather a lot longer.)
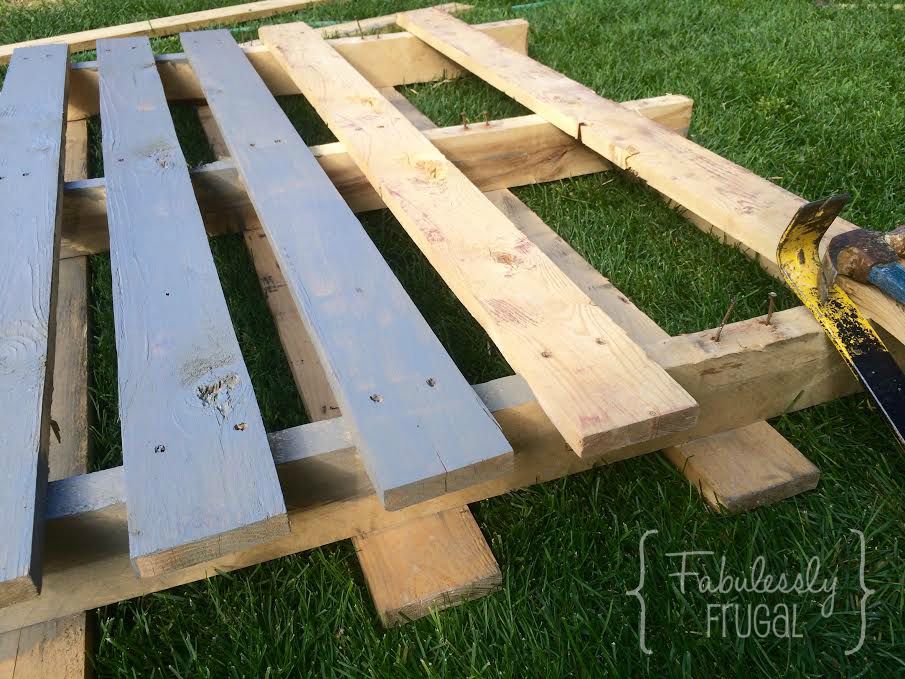
As you can see in the photo above, I started staining and then decided I should pry some slats off the pallet so that I can stain and attach it easier later. The prying is optional but I would recommend it. It made staining a lot easier. When it came time to attach it to my tool shed, it gave me a better surface area to secure it as well.
Once you have it stained and/or weather sealant on it, let it sit and cure overnight if possible, but a few hours is fine too. I wanted my stained so that it would blend in on the side of my tool shed better. So I used the same Behr All in One Wood Stain and Sealer from The Home Depot that I had used on the tool shed. If you do any wood work outside, like wood patio furniture, this stuff is AMAZING!
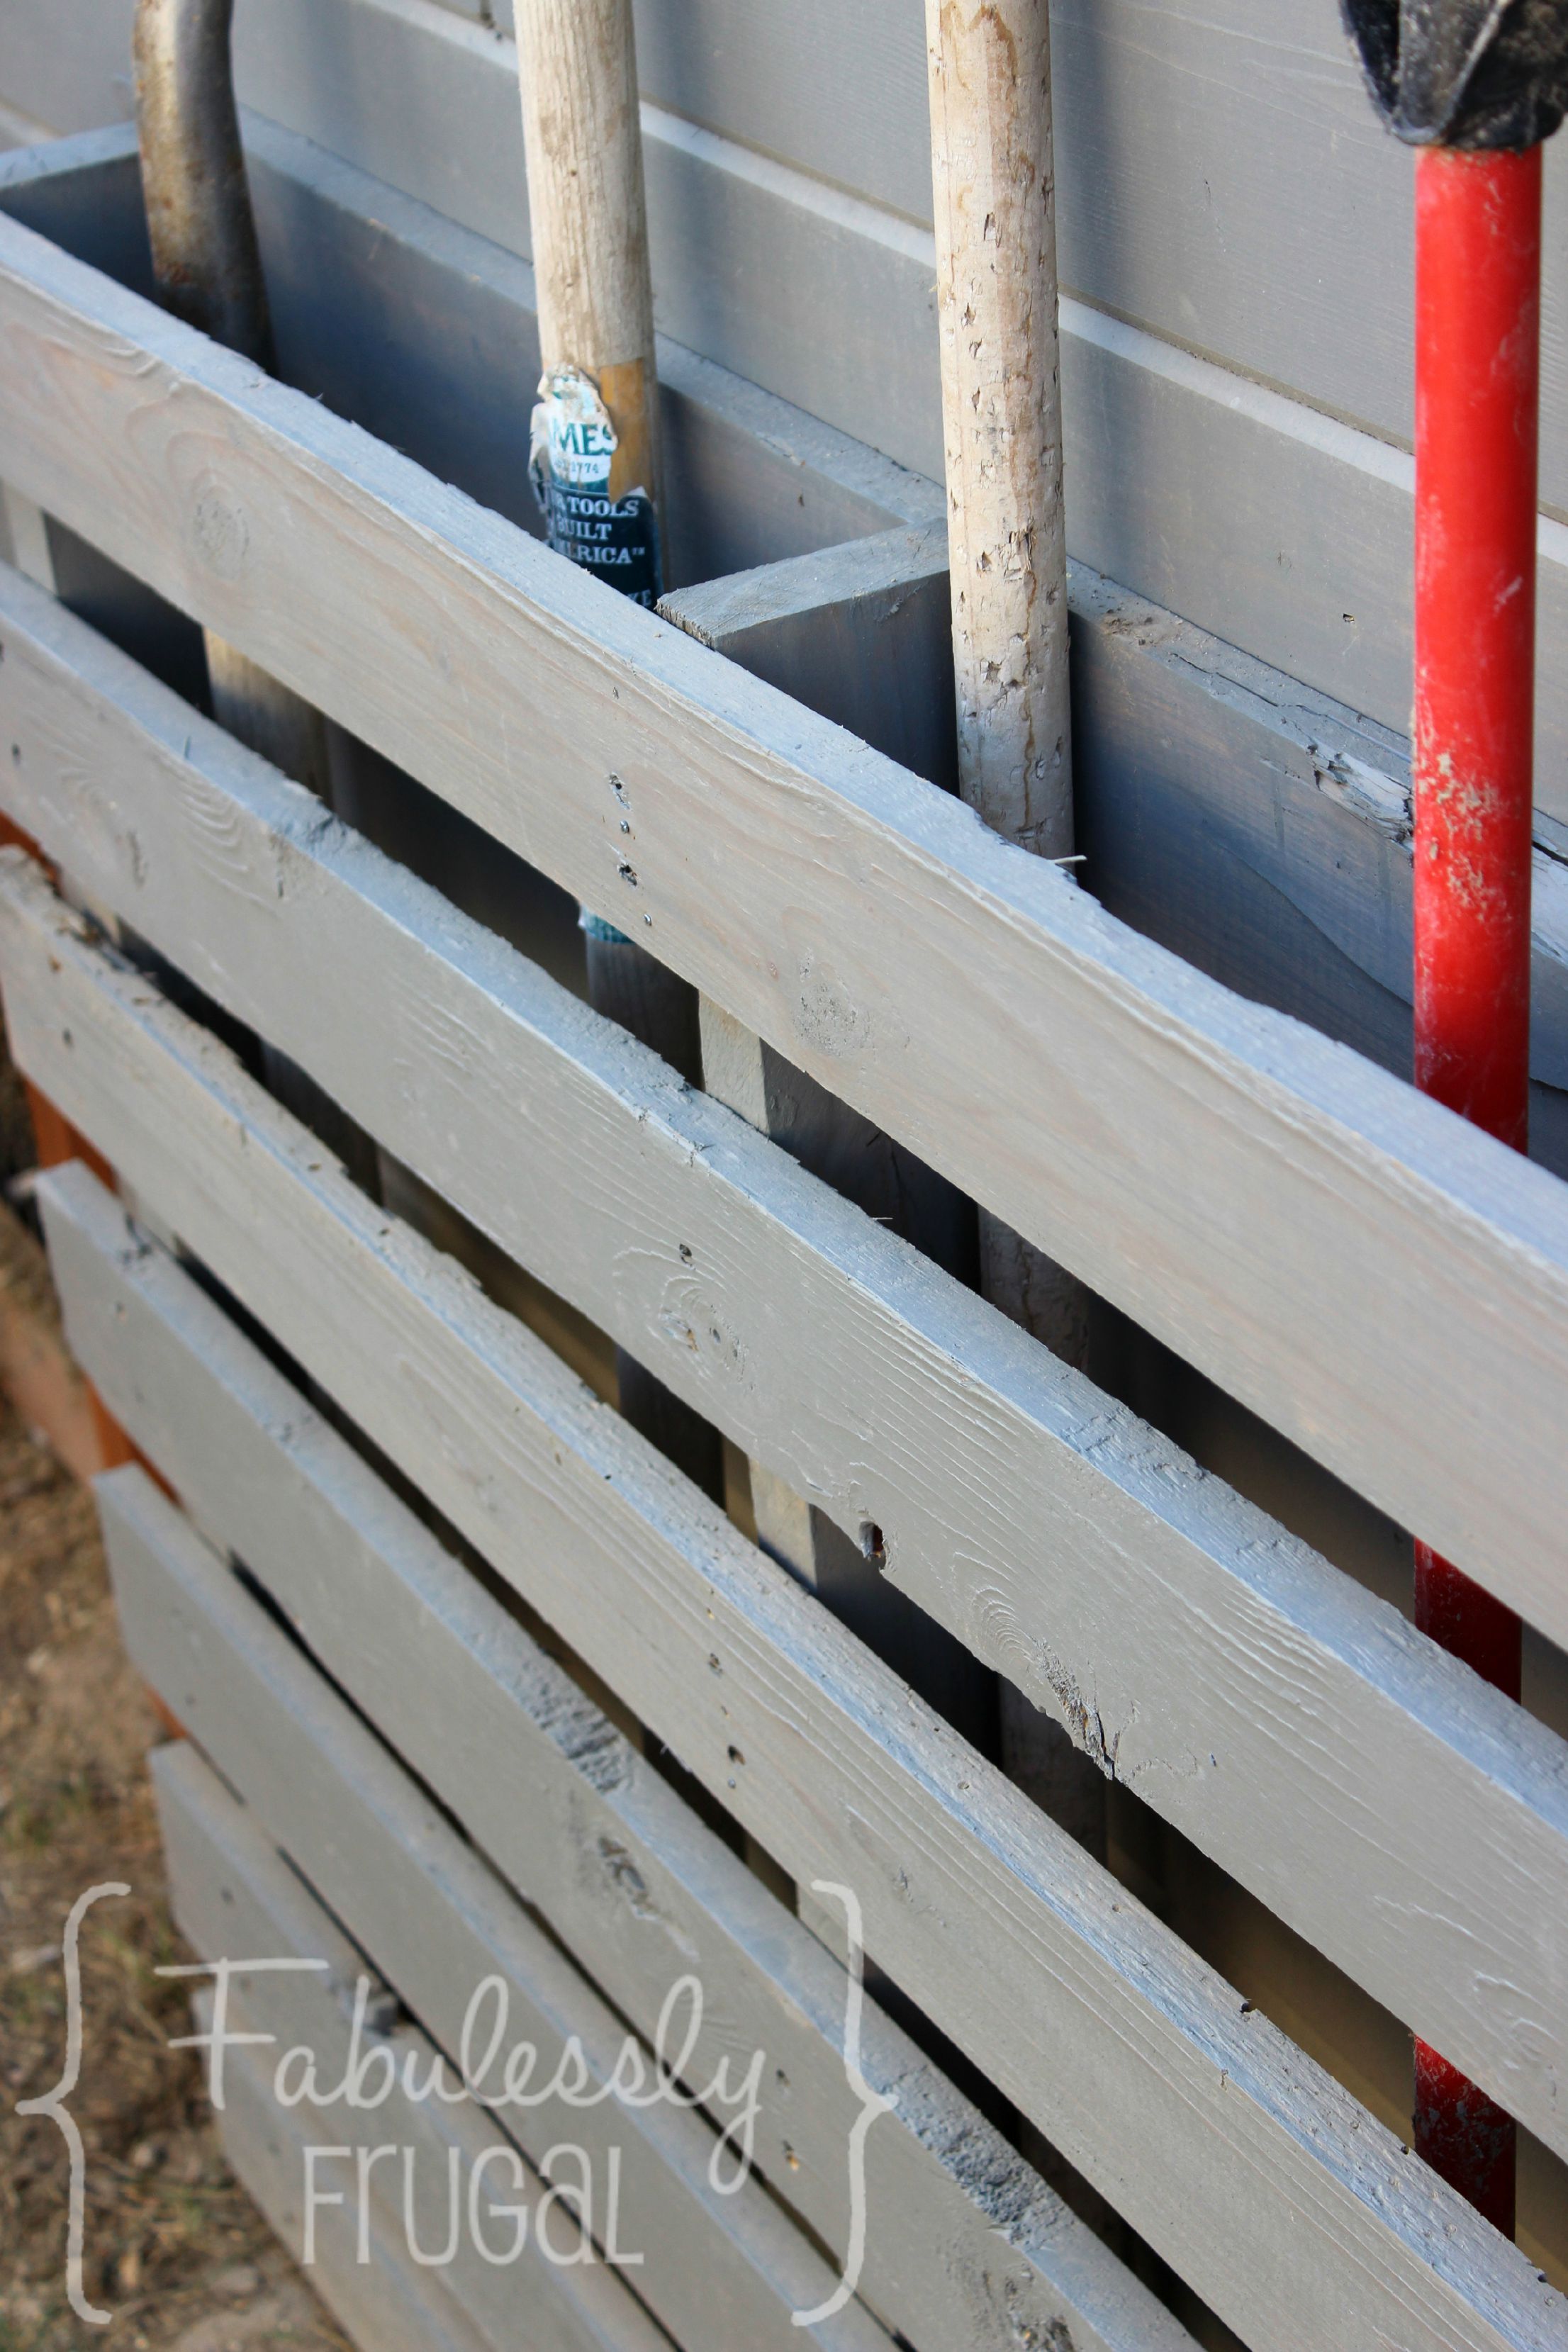
After the stain and/or sealer has dried, you can safely attach it to what ever you are attaching it to. You could easily attach this to a fence, the back of your house even if you wanted! I chose the side of my tool shed. No matter what you choose, you want to make sure that your screws or framing nails are long enough to go through both your pallet and what you are attaching it too. Since I was attaching mine to a tool shed, I used framing nails and just made sure to hit the studs on the other side of the wood siding. I only put three framing nails in. You won’t need a ton of screws or nails because the pallet isn’t to heavy and that is all the weight it has to support.
If you took the slats off earlier, you can just attach the pallet to the supporting structure on the back slats. If you did not, you can just screw or nail into the edges of the pallet at an angle. I didn’t do it this was because I don’t trust myself with a hammer and angles. I actually like my thumbs the way there are now! 🙂
You will want to make sure your pallet is at least a few inches up off the ground to keep leaves, water, or other debris from piling up in the bottom of it.
Once you have it attached, you can now attach the few slats you took off earlier and you are done. Now you have a quick and, possibly free, way to store your lawn tools and get your life a little more organized.
Comments
Leave a Reply
More Related Diys


Trending DIY Projects
- DIY
- Recipes
- Deals
- Blog


Report a Problem
Please select the problem you are facing with this deal:
- Price Increased
- Price Decreased
- No longer available
- Expired
- Link doesn't work
- Suggestion
- Compliment
- Other
Add more details:
Thank you for your feedback. We really appreciate it.
Enter your email address if you would like to receive a follow up.
Please Try Again
Thanks for providing the email address.
We will reach out to you as soon as possible.


Popular
Recommended
About Us

At Fabulessly Frugal, our goal is to help you live HEALTHY, WEALTHY, and WISE! My team and I work hard to bring you the best, online deals, clean eating, DIY's, freezer meal recipes, and more! I LOVE coaching and inspiring people to improve their health in my fitness challenge! You should also check out my favorite cleanse! Learn more about me and the rest of my team.


Copyright © 2008–2024
Fabulessly Frugal: A Coupon Blog Sharing Gift Ideas, Amazon Deals, Printable Coupons, DIY, How to Extreme Coupon, and Make Ahead Meals. All rights reserved
Great idea and so easy , thanks
You’re welcome!
Hello, thanks for posting this. It looks like a wonderful and quite “doable” project for me. I have not worked with pallets before so am not familiar with their construction. I am wondering if the tools will slide from side to side? Is there a something at the base to prevent this?
Hi Cookie! There is nothing in the pallet, minus one piece of wood right in the center. I placed this low enough to the ground to so that the bottom of the yard tool will rest on the ground! You shouldn’t have any issues with the tools sliding side to side though. They stand up straight well.
A great and simple solution! Thanks
Steve
what a great idea – I’ve got a couple of pallets and I’ll definitely try this
I would like to do this in my garage but what would be a good way to attach it to drywall??!
I think you’d want to anchor it to the studs, right?
We did this on the side of our house, it got everything off the ground and not leaning on exterior of the house . Good Idea
Right on, Michelle!
very smart idea !:o) I am going to attempt this.
Good luck!
A really great idea. I think I’ll make mine mobile by using a few 2x4s for stability “feet” at a 90 degree angle to each end of the pallet and put some casters on it.