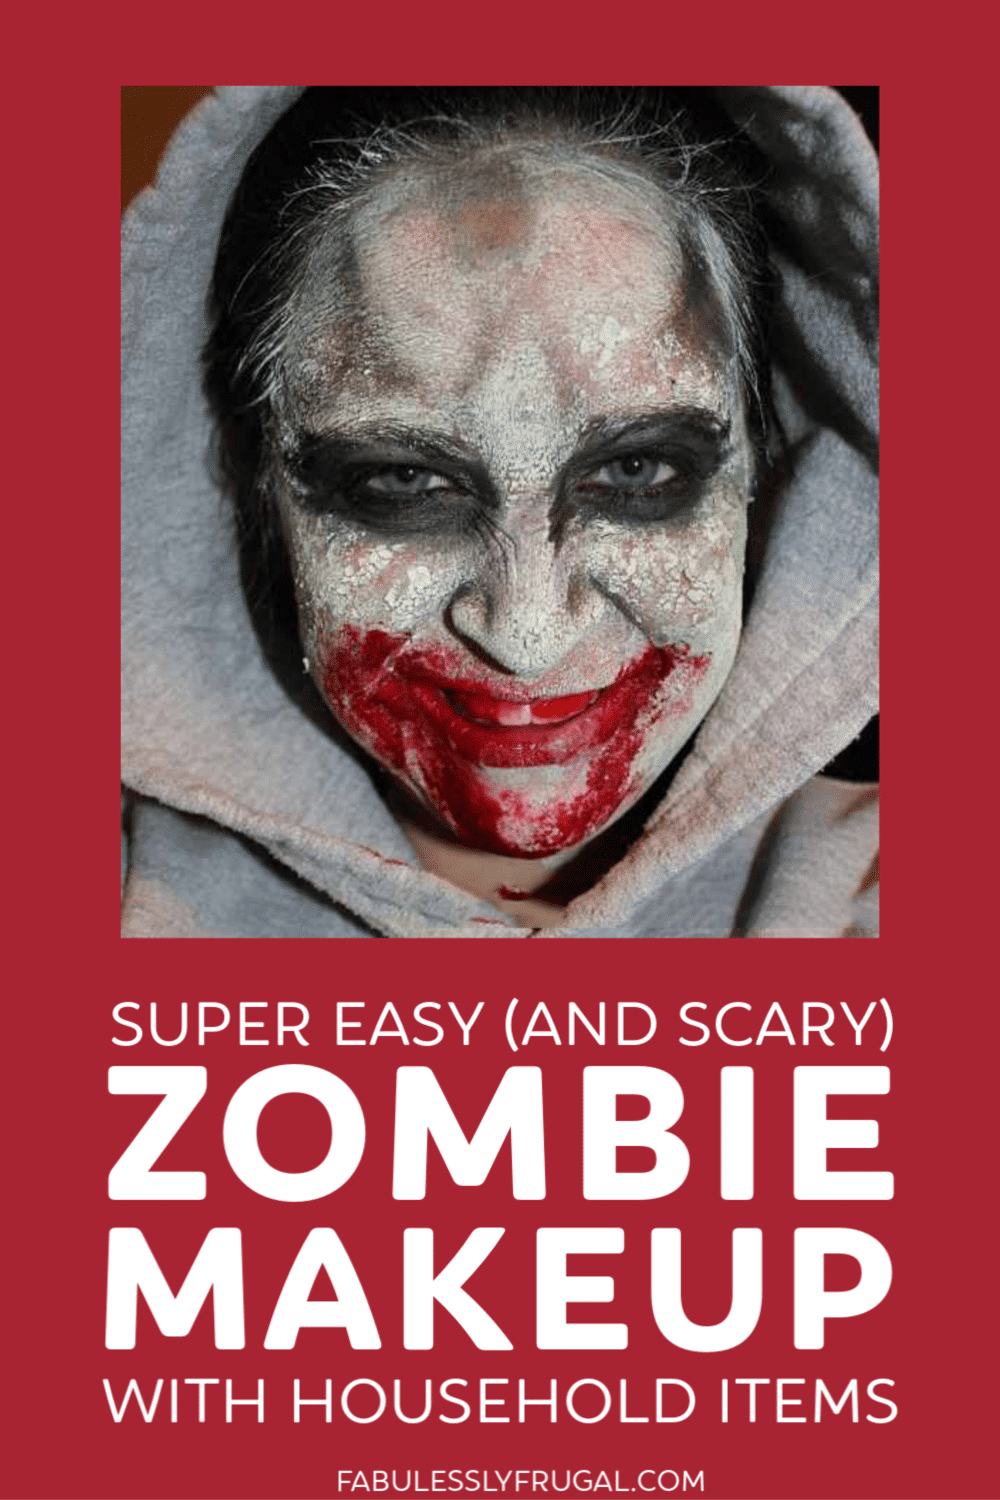
Easy DIY Zombie Makeup With Household Items
Easy Homemade Zombie Makeup Tutorial
I’m going to start this DIY zombie makeup tutorial with a Warning: This is NOT for the faint of heart! Of course, you can make yourself less scary but I went all out! Seeing the end result may give you nightmares! Keep reading at your own risk!
Part of the fun of Halloween is becoming something you’re not. Since the zombie apocalypse hasn’t occurred yet, I’m still human (for now). But, zombies are all the rage right now. That’s why I find it SO FUN to turn myself into one using what I have at home!
If you find yourself without a costume on Halloween, just follow these simple steps to transform yourself from human to zombie in under 10 minutes!
Zombie Makeup Ingredients:
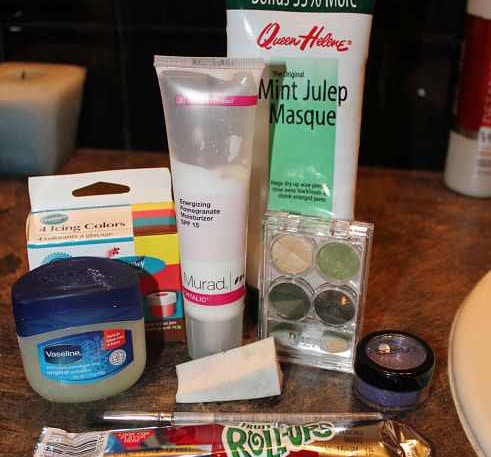
You won’t need any special makeup for this DIY zombie mask! The ingredients are super simple:
- Moisturizer
- Face Mask (use what you have; green or white ones work best)
- Green or Purple Eyeshadow (you can use them both if you want)
- Black Eyeliner
- Makeup Brush and Sponge
- Vaseline
- Red Food Coloring (I used red gel icing)
- Fruit Roll-up (any color will do)
Step 1. Apply Moisturizer & Face Mask
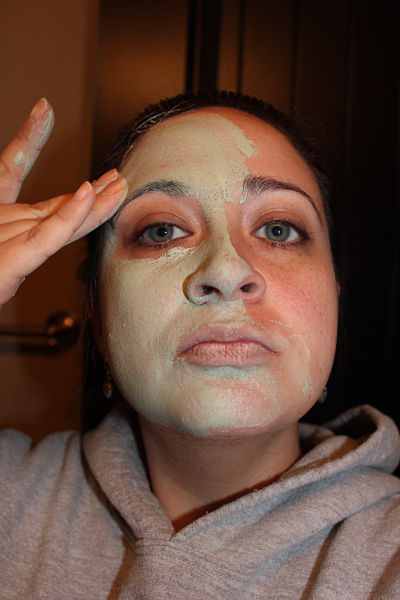
The first thing you need to do is moisturize your face. Really give it a good coating in whatever moisturizer you have. You are going to be coating your face in a face mask and it may irritate your skin if you don’t moisturize first!
Now, take your face mask (you know, the one you don’t wear when your kids are around so you don’t scare them), and coat your face and neck.
Step 2. Add Black Eyeliner Around Eyes
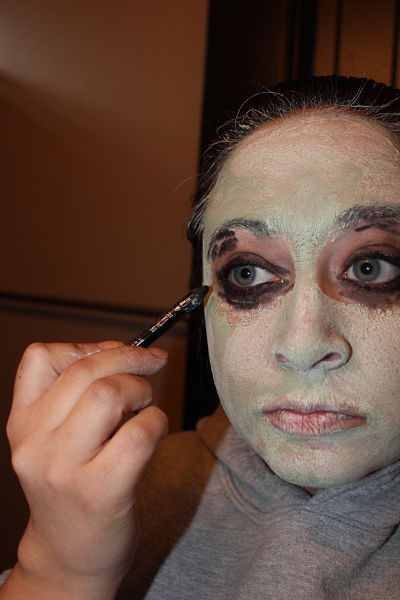
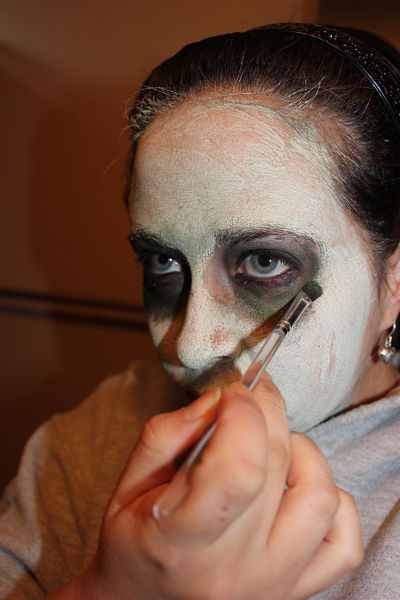
When your face and neck are completely covered in your face mask, take a black eyeliner and rim your eyes. Next, smug it underneath and over your eyelids.
Step 3. Smooth and Add Green Eyeshadow
Dip your makeup brush in your Vaseline. Use it to smooth out the eyeliner around your eye sockets. I added a bit of green eyeshadow to my brush here too.
Note: You can use your fingers instead of a makeup brush if you want to!
Step 4. Add Temple Shadowing
Ok, we’re starting to get scary looking! Faint of heart, turn away now!!!
Still reading? Good! Let’s keep moving then!
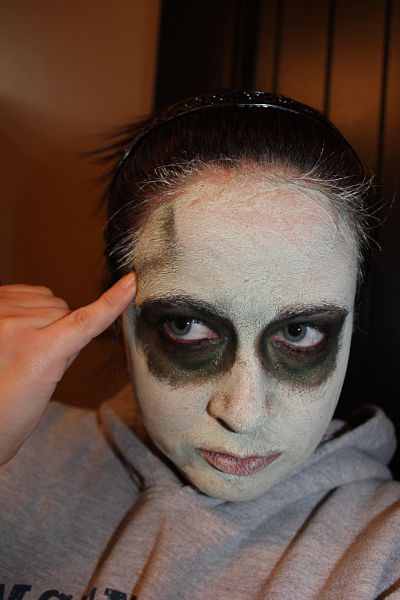
Now, use your green or purple eyeshadow to create triangles over your temples. You can use a brush or your fingers.
Step 5. Add Shadowing Around Nose
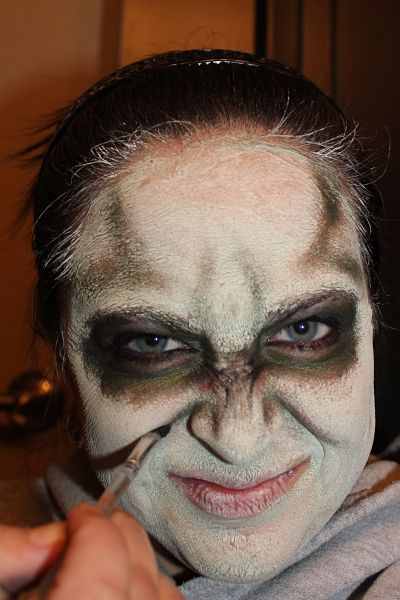
After you have both sides done, use the same eyeshadow to draw lines from the bridge of your nose up towards your hairline.
Now, scrunch your nose like you smell something bad! See all those little lines? Take your makeup brush and brush over them with your green or purple eyeshadow. You want to define the lines we spend so much time trying to hide on most days! Keep defining around your nose and your “smile lines”.
Note: You can stop here if you want to! You’re already pretty spooky! However, if you want to get gory, follow the rest of the DIY!
Step 6. Add Texture
Fill in the triangles over your temples. You can also add bumps and bruises on your face with your eyeshadow too if you like.
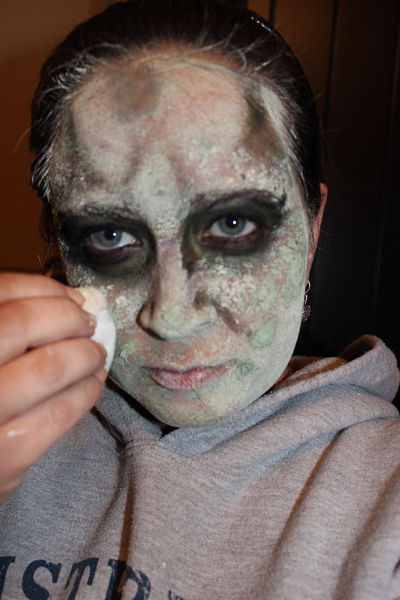
Now that your lines over your nose are defined, we are going to add a bit of texture. Take the face mask you used and put some of it onto a makeup sponge. Dab the sponge in random places on your face.
Step 7. Add Some “Blood”
Still with me? We’re about to get really scary here!
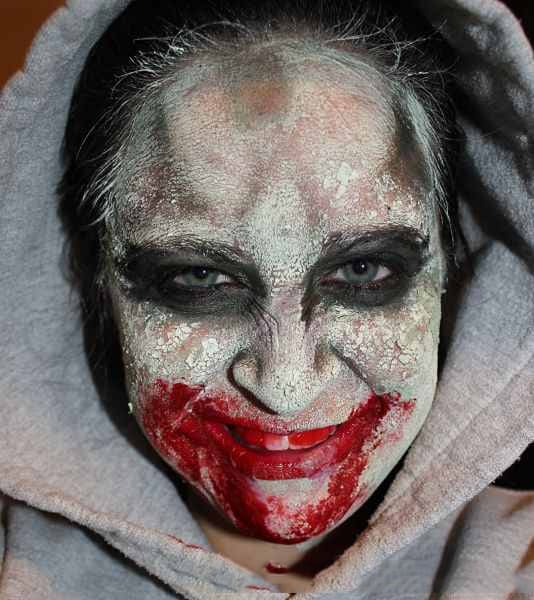
Now, take your red icing and dab your finger in it. Use your finger to dab “bloodstains” on your face. I put mine around my mouth and a placed a few marks down my neck.
Make sure you have a thick enough layer of face mask over the places you use the icing. IT WILL STAIN if you’re not careful with your layering.
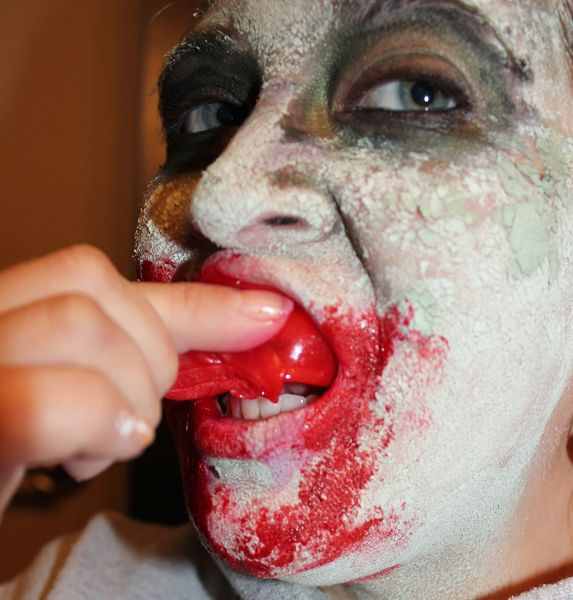
Now, open up your Fruit Roll-Up and tear off a piece long enough to place over the front of your teeth.
Once the Fruit Roll-Up is covering your teeth, suck on it enough that your teeth begin to show through. Your teeth should look bloody with the red Fruit Roll-Ups, or rotten with yellow, blue, or green ones.
Conclusion
That’s it!! Your zombie transformation is complete!!! Who knew it was so easy to look so scary!! Now, you’re all set to give nightmares to all those you encounter!
I’m sure some of you may be horrified now but those of you that aren’t, please be sure to share the post with your Halloween loving friends! By the way, my skin felt AMAZING once I took this off!! HAHA! Best use of a facial ever! 😉
More Halloween Ideas:
- Halloween Recipes
- 20 Kid-Friendly DIY Halloween Decorations
- 15 Candy Alternatives For Halloween (Super Fun!)
- 20 Homemade Halloween Costumes for Teens
- 17 Halloween Costumes Under $10 (All Ages)!
Comments
Leave a Reply
Report a Problem
Please select the problem you are facing with this deal:
- Price Increased
- Price Decreased
- No longer available
- Expired
- Link doesn't work
- Suggestion
- Compliment
- Other
Add more details:
Thank you for your feedback. We really appreciate it.
Enter your email address if you would like to receive a follow up.
Please Try Again





So glad I found this. Smart as hell! Thank you, and Happy Halloween!