How to Make DIY Reusable Bowl Covers
How to Make DIY Bowl Covers
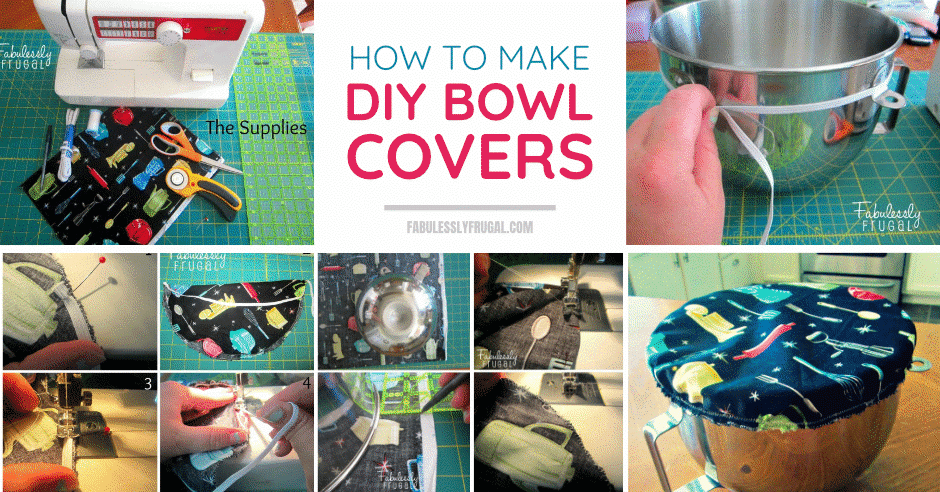
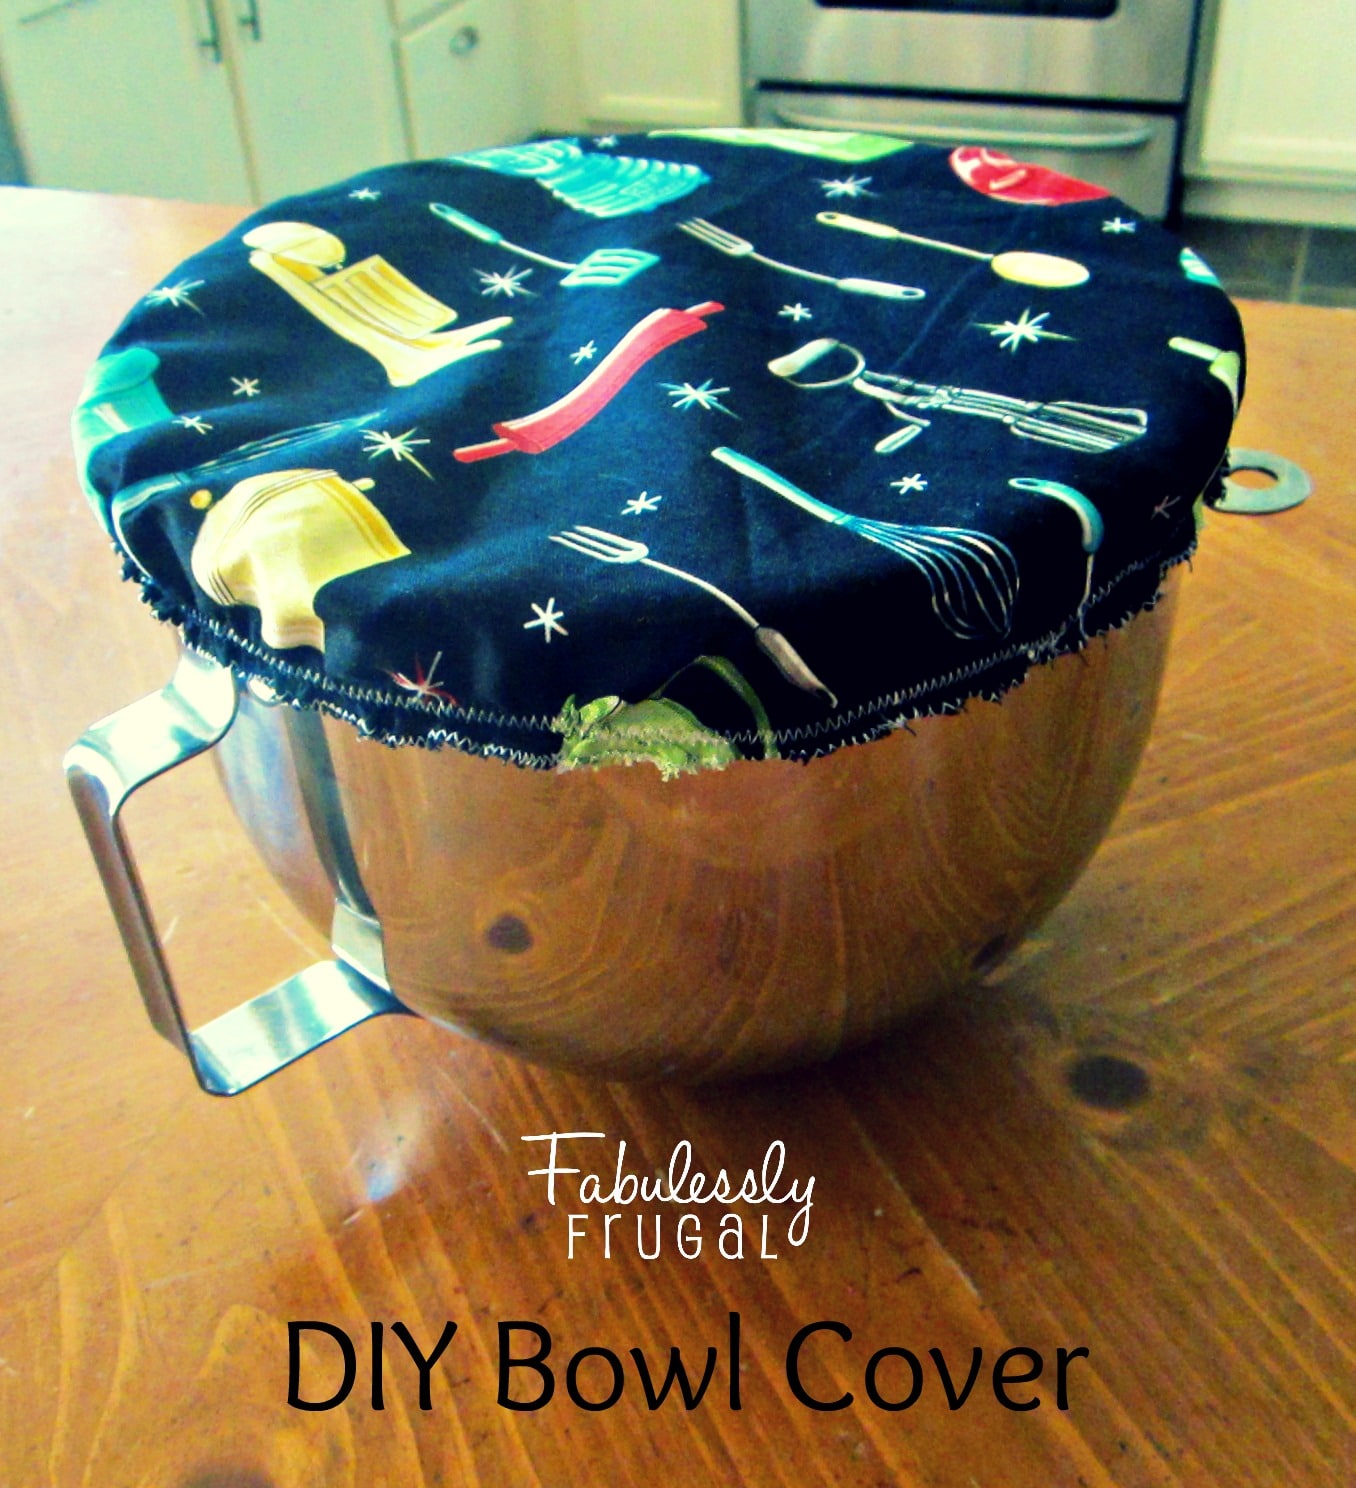
This DIY bowl cover has so many uses. I made this one to cover my mixer bowl. It will be perfect for when I need to cover yeast dough while it rises or keep frosting from drying out. It is also good for any kind of mixing or storage bowl.
Want to cover a bowl of cherries or grapes in the fridge and keep them easily accessible? Eating outdoors and want to protect your chips or salad from the flies? This bowl cover is so versatile. It has many practical uses, plus it saves you from having to use cling wrap again and again on a dish you will keep getting in to. It’s easy to make too. Try it out!
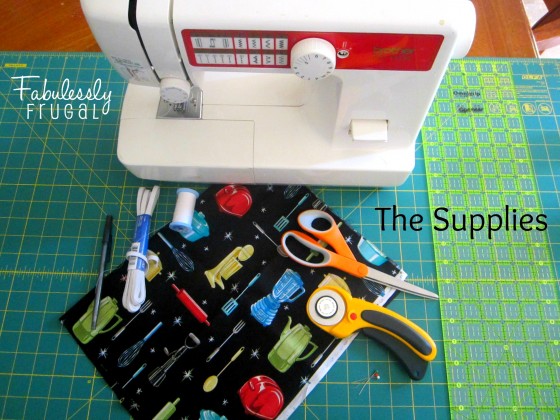
The Supplies:
- Fabric of your choice (size depending on the size of the bowl you want to cover – I bought 3/8 of a yard for this project)
- 1/4 inch elastic
- Rotary cutter (optional)
- Cutting mat (optional)
- Scissors
- pen
- sewing pins
- ruler
- sewing machine
- thread
The Instructions:
Step 1. Mark the lines
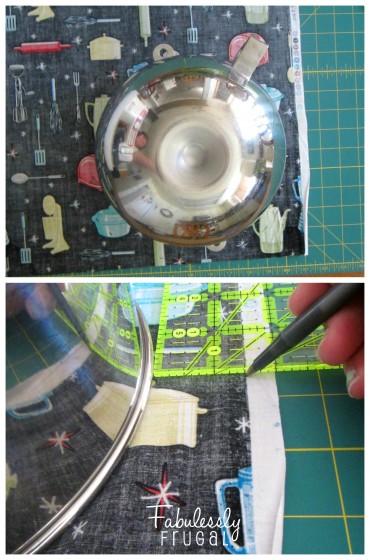
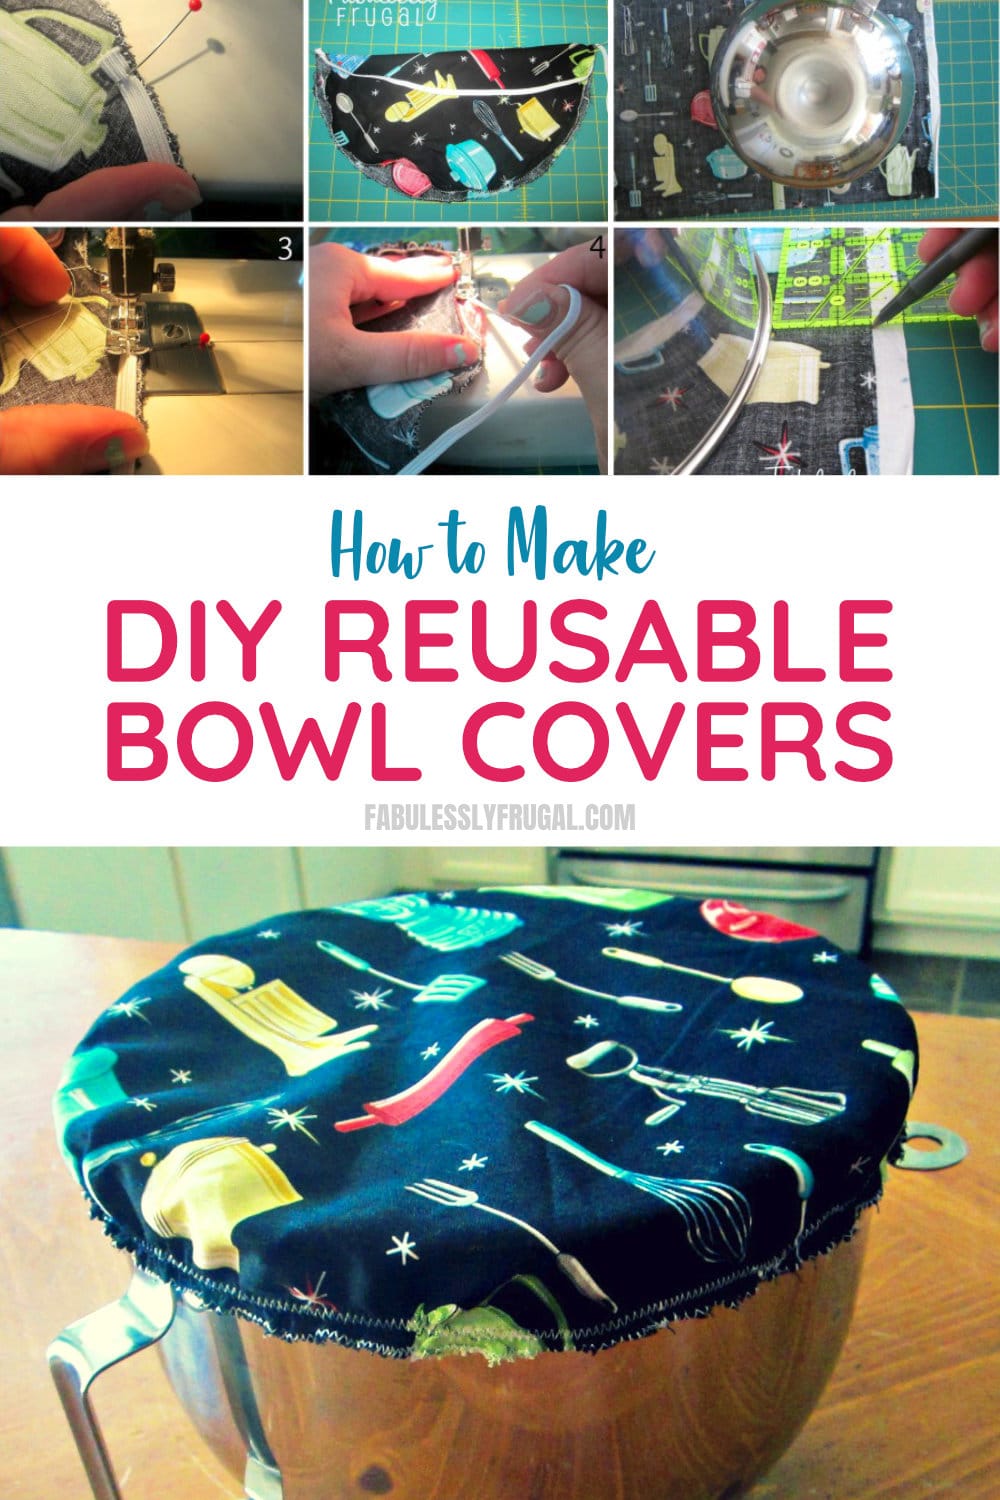
Place your fabric right-side-down on a flat surface. I laid mine out on my cutting mat. Use a ruler to mark 1.5 inches from the rim of the bowl.
If you don’t have a ruler on hand, hold the pen cap against the rim of the bowl and mark at the tip of the pen cap. It will be close enough to 1.5 inches. Continue marking around the whole bowl.
Step 2. Cut it out
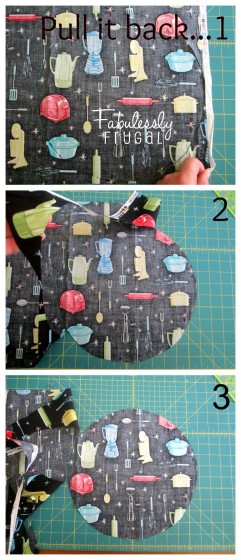
Use the rotary cutter to cut along the marked line, then pull the excess fabric away. It’s so easy with a rotary cutter and mat! If you don’t have a rotary cutter and mat, you can always use your trusty scissors.
The great thing about this project is nothing has to be PERFECT for it to turn out well. If the circle is a little off, there would be no way to tell in the end.
Step 3. Sew it
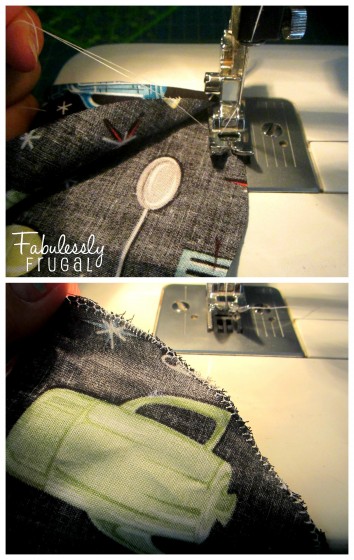
Now it’s time to set up and thread your sewing machine. Set it to the medium-sized zig-zag setting.
See that oval in the machine’s foot that the needle goes down through? You want to align the edge of the fabric with the edge of that oval. It does not need to align with the edge of the foot. We want it fairly close to the needle opening because we are doing a mock surged edge. The thread will automatically wrap over the side of the fabric if you keep it that close.
Step 4. Measure the elastic
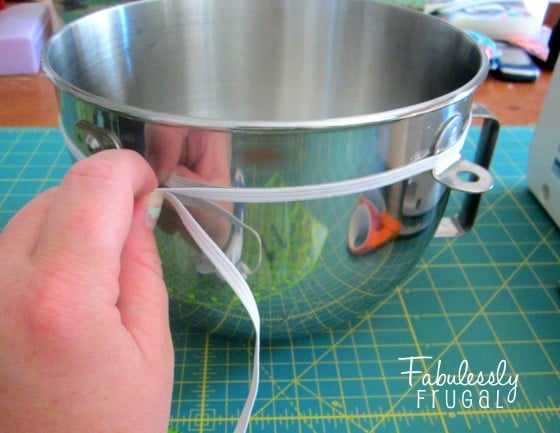
Next, measure the elastic around the bowl you want to cover. It should be snug enough to hold in place, but not pulled as tight as it can go by any means.
Step 5. Attaching the elastic
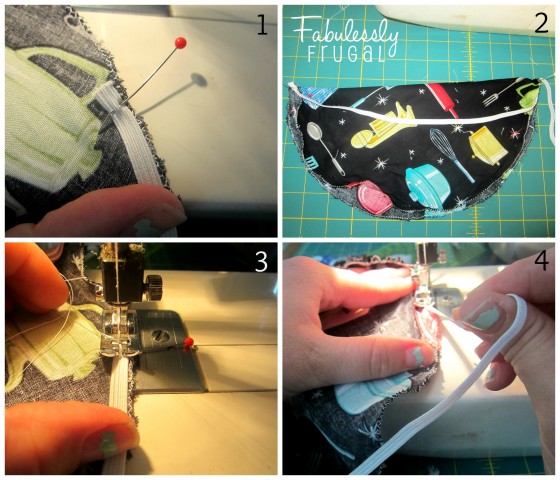
To attach the elastic to the fabric, start by pinning the elastic to the underside of the fabric. It should fit right beside the sewn edge, not over it, so make sure you can see that sewn edge peeking out.
With the first pin in place, fold the circle in half so you can identify the other “half-way” point on the other side of the circle. Fold the elastic in half and pin the middle of it to the other side of the circle. This just helps you have a reference point as you work. It will be much easier to identify if you are on track stretching your elastic if you know where half-way is.
Start sewing keeping the machine on a zig-zag setting. Zig-zag is the preferred stitch for fabric that needs to stretch.
Notice in the 4th square in the picture above how I have my hands placed. I used my left hand to keep the fabric feeding through properly, thumb in front, fingers in back. I used my other hand to stretch the elastic as I sewed.
Stop when you need to, to look at your half-way reference point and see if you need to stretch the elastic a little more or a little less as you continue. Continue sewing to the end and have your elastic ends overlap by an inch or so just to make sure it is secure.
Make as Many Reusable Bowl Covers as You Need!
Once you get the hang of how to make these reusable bowl covers, you can make them pretty quickly and easily! It’s useful to have more than one on hand so that you can custom fit them to each of your bowls.
These would also make a great gift if you have friends who love to bake. You could give them out as a homemade Christmas gift!
I hope you enjoyed this tutorial! Let me know how if you’re going to make any DIY bowl covers for yourself!
Other Posts You Might Like:
- DIY Kitchen Sink Cleaner
- Kitchen Tips To Make Life Easier
- Easy Do It Yourself (DIY) Homemade Fly Trap
Trending Diys
Comments
Leave a Reply
Report a Problem
Please select the problem you are facing with this deal:
- Price Increased
- Price Decreased
- No longer available
- Expired
- Link doesn't work
- Suggestion
- Compliment
- Other
Add more details:
Thank you for your feedback. We really appreciate it.
Enter your email address if you would like to receive a follow up.
Please Try Again







what a cute idea! Thanks for the great tutorial!
Thanks Becky! They are really easy to make too!
I have bought plastic covers but over time they tear, this is a much better idea
I’m glad you like it Ina. I thought about making these bowl covers two layers, with fabric on top and a layer of vinyl underneath. That would make it more air-tight. It might be another good thing to try too.
I liked this idea already, but I was wondering how you would put on the vinyl or something else. How would you wash it if you used vinyl underneath? I just recently obtained a sewing machine and am eager to try some projects.
Michaelene, I would do the same thing to make a vinyl layer as the fabric layer. I would just trace a circle and cut a piece out that matches the fabric circle. Then sew the two layers together when sewing the edges, before putting on the elastic. It might take a little trial and error. As far as washing, it would be really easy to throw it in the wash with other laundry, but let it air dry. I don’t think vinyl and the dryer would work very well together. Great questions! I hope you enjoy trying it out!
Where did you get the neat material?
Made one for my bread mixing bowl. Giving friends a Christmas stocking this year and a few different sizes of these in each will be welcome I am sure. Thanks for inspiration.