
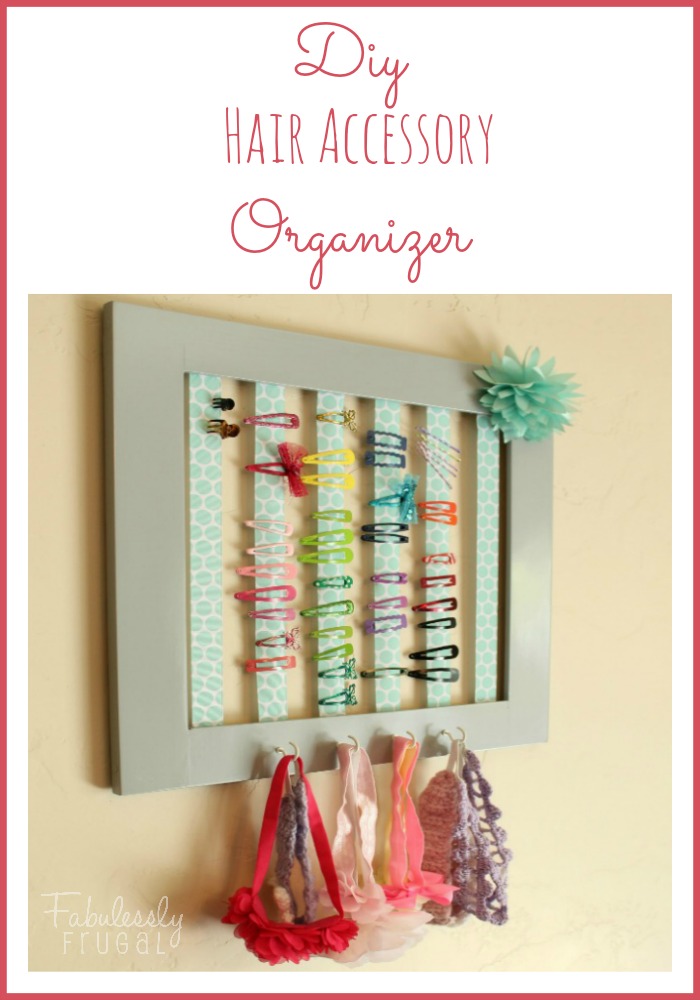
DIY Hair Accessory Organizer
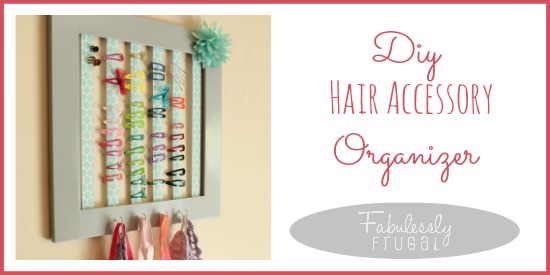
I have 8 children, four of which are girls. You can imagine we have quite the collection of hair accessories. I started out just storing them in a bathroom drawer but it was messy and unorganized so I decided we needed a better solution. I found the idea for this DIY organizer on Pinterest and got to work! After gathering the supplies, I quickly painted the frame, waited a few hours for it to dry then finished the rest of the project during nap time. I love quick projects! Now everything is organized, I can color coordinate pieces and find exactly what I’m looking for in no time. If you have a little girl(s) with lots of hair accessories, you should give this super cute organizer a try!
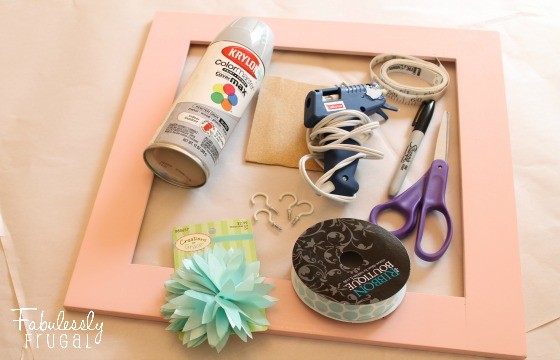
The Supplies:
- Frame (re-purpose an old on or pick one up at a hobby or thrift store)
- Sandpaper
- Paint
- Hot glue gun & glue
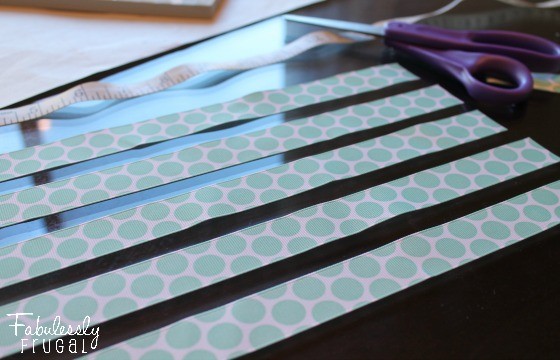
- Ribbon (I like 1″ craft ribbon the best)
- Scissors
- Tape measure
- Sharpie or something to mark with
- Cup hooks
- Embellishments (optional)
To Get Started…
Prep your Frame – Sand down any rough edges, or in my case where I used a frame that had already been painted from a previous project, I just did a light sanding of the whole thing to give the next coat of paint a better surface to adhere to. Thoroughly wipe off any sanding dust.
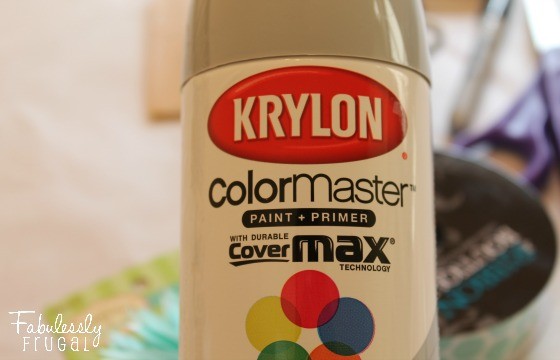
Prime it (optional) – If you plan to prime it, this would be the next step. Primer is optional but I recommend it. It helps smooth out uneven blemishes, creates a better surface to the paint to adhere to, ensures the true color of the top coat and helps avoid an uneven paint finish by allowing for even application, particularly on bare wood surfaces. For the sake of time, I personally like to use a spray paint + primer. Rustoleum brand is my favorite for quality and coverage but I think Krylon has a wider variety of fun colors to choose from.
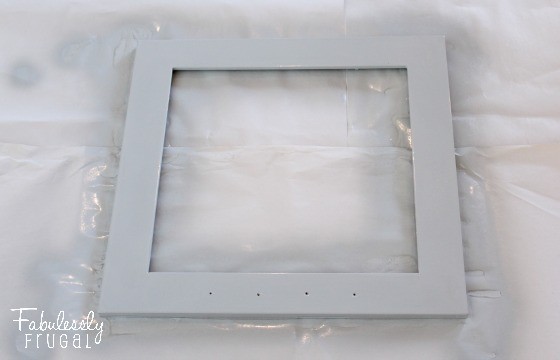
Paint it – Once your frame is prepped, you’re ready to paint! Give it a good coat or two and let dry completely… if its even remotely sticky when you touch your finger to it, it’s not dry yet. (The holes at the bottom of my frame are also from a previous project).
Add the Ribbon – Before starting this next step, you may want to turn your glue gun on so it has time to heat up.
Lay the frame face down and measure the length (top to bottom) of the frame. This is the length you’ll cut the ribbon pieces. Decide how many ribbons you want your frame to have and cut them out.
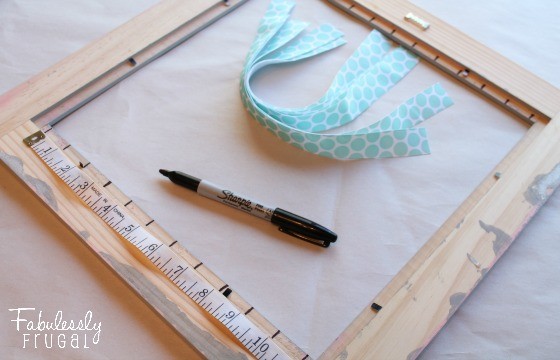
Using a sharping or marking utensil, measure out and mark when you want to place your ribbons. I was using 1″ ribbon so I just marked approximately every inch across on both ends (top and bottom) of the frame and planned to place a ribbon on every other inch.
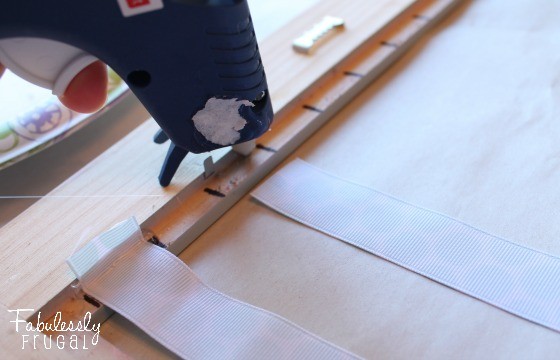
Once you’ve decided how you are going to place your ribbons, it’s time to glue them down. I simply put some glue where I wanted the end of the ribbon and firmly placed it. I recommend doing only one side at a time so the glue has time to harden and secure the ribbon. After it’s had a minute or two to dry, gently but firmly pull the other end of each ribbon tight (you don’t want the ribbon to have slack or be loose) and glue it down where you’ve marked on the opposite end of the frame. Let it dry and cool.
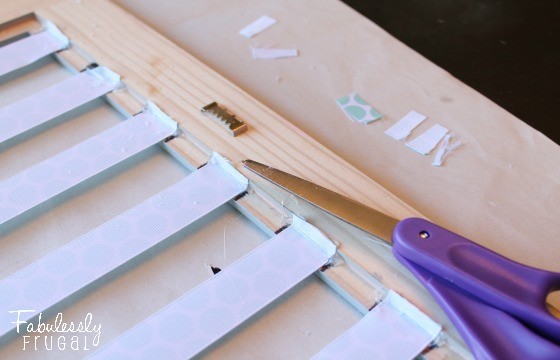
Cut any excess ribbon off the ends. It doesn’t have to be pretty or perfect, no one is going to see it. 🙂
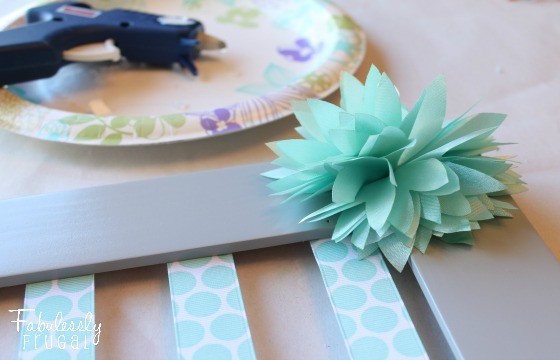
Add some Embellishments (optional) – You can add a little jazz to your frame with decorations or embellishments. I found this cute flower hair clip on clearance at a hobby store. I simply took the hair clip piece off the back and glued the flower part down. Use whatever you like, and make it your own!
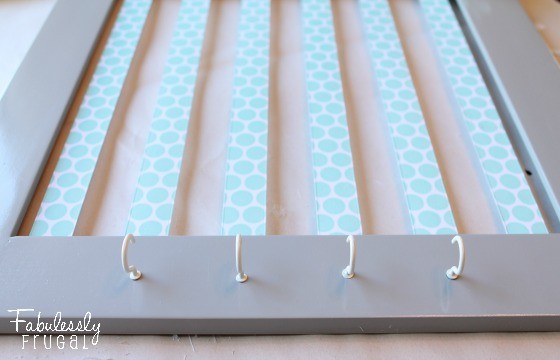
Add Cup Hooks – You can add as many as you like. I just did 4 but I’m thinking I might go back and add a few more. Measure out and mark or just eyeball it and screw them in. They’re pretty easy to just do by hand but it may be helpful to pre-drill or start a hole with the end of a screwdriver first. If you get one all screwed in but the hook is crooked or upside down, I found that you can unscrew it and try again. A couple of them took me a few tries but eventually I got them all straight. If anyone has trick to this, I’d love to hear it!

Once your project is complete, fill it with super cute hair accessories and hang! My daughters usually only use barrettes and headbands
but this organizer will also hold clips, bobby pins, pony tails, and rubber bands, especially if you add more hooks to the bottom or sides! Overall, this was my favorite kind of project, easy and inexpensive! I love the way it turned out and it’s going to look great on my daughter’s bathroom wall!
Trending Diys

Comments
Leave a Reply
More Related Diys


Trending DIY Projects
- DIY
- Recipes
- Deals
- Blog


Report a Problem
Please select the problem you are facing with this deal:
- Price Increased
- Price Decreased
- No longer available
- Expired
- Link doesn't work
- Suggestion
- Compliment
- Other
Add more details:
Thank you for your feedback. We really appreciate it.
Enter your email address if you would like to receive a follow up.
Please Try Again
Thanks for providing the email address.
We will reach out to you as soon as possible.


Popular
Recommended
About Us

At Fabulessly Frugal, our goal is to help you live HEALTHY, WEALTHY, and WISE! My team and I work hard to bring you the best, online deals, clean eating, DIY's, freezer meal recipes, and more! I LOVE coaching and inspiring people to improve their health in my fitness challenge! You should also check out my favorite cleanse! Learn more about me and the rest of my team.


Copyright © 2008–2026
Fabulessly Frugal: A Coupon Blog Sharing Gift Ideas, Amazon Deals, Printable Coupons, DIY, How to Extreme Coupon, and Make Ahead Meals. All rights reserved
That’s cute! Great idea!
I can’t wait to make this! So cute!