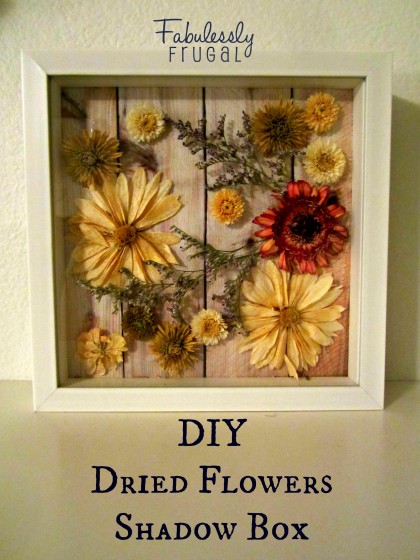
DIY Dried Flowers Shadow Box
Spring is ending and those hot summer days are almost here. Many of those spring-time blooms we love are beginning to fade. This shadow box project allows you to make a special decorative memory of your flowers. Whether they be from your own garden or ones you received on a special occasion, this is a neat way to turn them into a beautiful keepsake.
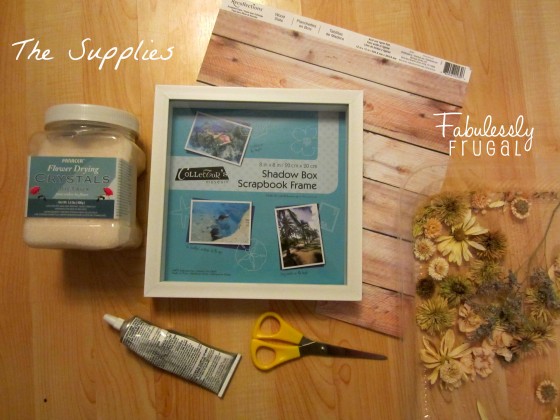
The Supplies:
- Flower Drying Crystals
- Flowers
- container for drying flowers
- 8”x8” shadow box frame
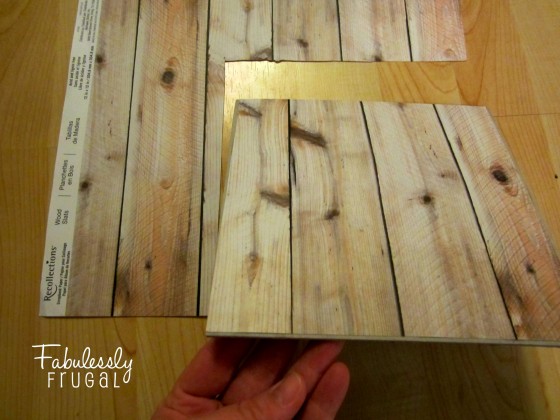
- “wood” scrapbook paper
- E6000 glue
- scissors
The Instructions:
Collect flowers to dry. You will want to dry more than you plan to use, as some turn out better than others in the drying process. I used a shallow plastic container, but a glass baking dish or something similar would work great as well.
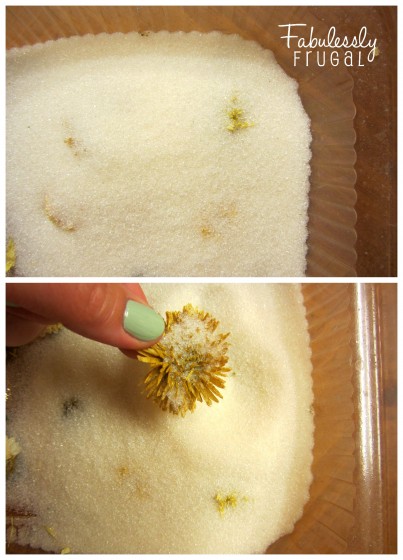
Next, pour enough crystals in the container until it is filled to approximately 1/2” when evenly spread out. Place the flowers face-up and nestle them down in the crystals. Gently pour more crystals over the faces of the flowers until they are completely covered. It will take a day or two for the flowers to completely dry out, depending on how large they are and how much moisture they were holding when you began. You will want to pull the flowers out before they become brittle, so they made need to be monitored once or twice a day during the drying process. When they are dried to your liking, remove them from the drying crystals, shaking off the excess. The crystals can be re-used, so pour the excess back into the container and save them for another time.
Gather the needed supplies to assemble the shadow box. Unwrap and disassemble the shadow box frame. Use the cardboard backing as a template when cutting out the scrapbook paper for your background. Glue the scrapbook paper onto the cardboard frame backing.
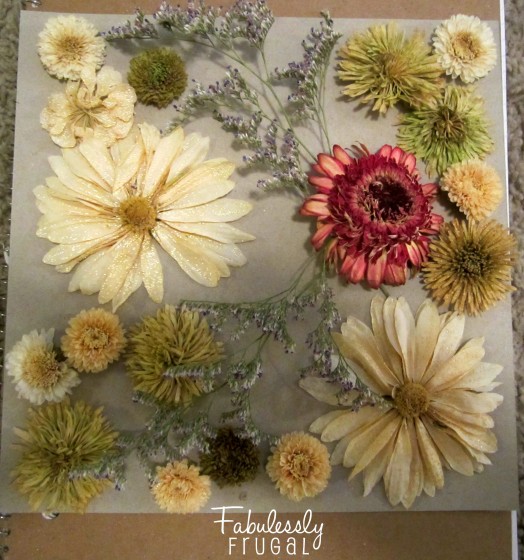
Do a dry-fit layout of the flowers before beginning to glue. Make sure the flowers are not placed too close to the edge of the backing, otherwise they will be crushed when the backing is placed back into the frame. Once you have the design how you like it, begin gluing on the scrapbook paper-covered background, piece by piece. Keep the glued flowers laying flat for an hour or so before trying to stand them upright.
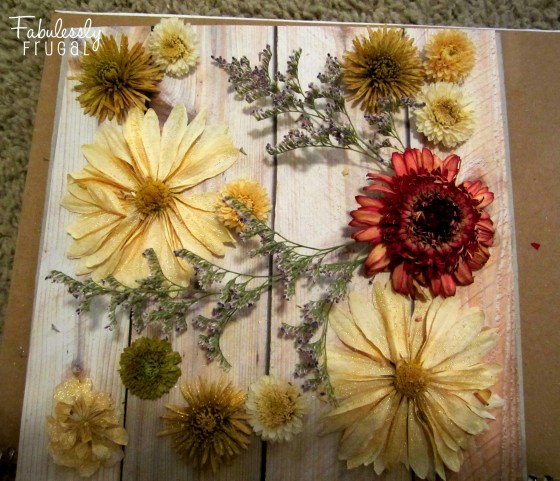 Once the glue is completely dried, insert the frame backing with the flowers into the frame. Secure the back and you are done. And you have a beautiful keepsake to preserve those flowers you love.
Trending Diys
Comments
Leave a Reply
Report a Problem
Please select the problem you are facing with this deal:
- Price Increased
- Price Decreased
- No longer available
- Expired
- Link doesn't work
- Suggestion
- Compliment
- Other
Add more details:
Thank you for your feedback. We really appreciate it.
Enter your email address if you would like
to receive a follow up.
Please Try Again
Thanks for providing the email address.
We will reach out to you as soon as possible.












Hi,
This is a great idea. May I ask if the dried flowers lasted though? Or do you have to replace them after a few months?
Thank you.
Regards,
Jeunx
They last the same amount as normal dried flowers! Around 1-3 years! All depends on your climate, type of flower, and the seal of the frame but the last one I did lasted 2 years!
How long does a wedding bouquet last for being dried
What kind of glue to use?