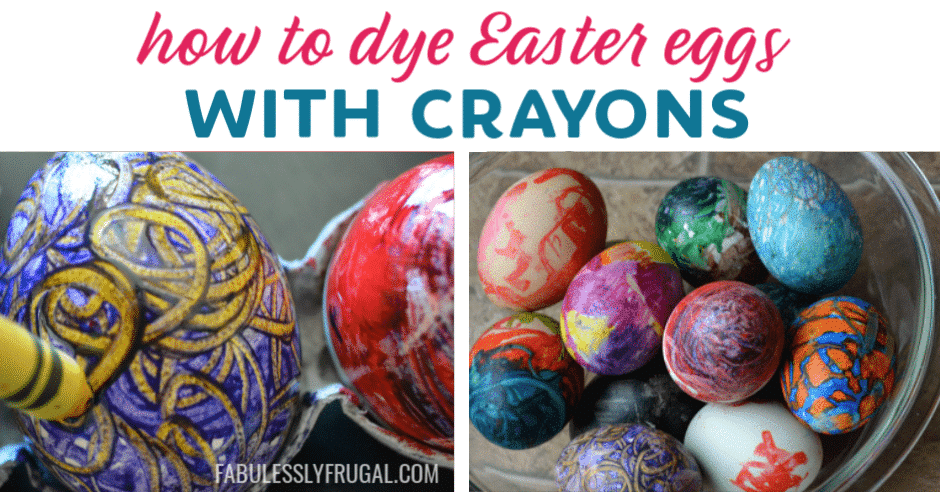
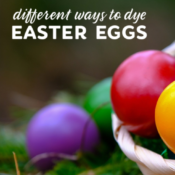
How to Dye Easter Eggs with Melted Crayons
Coloring Eggs with Crayons
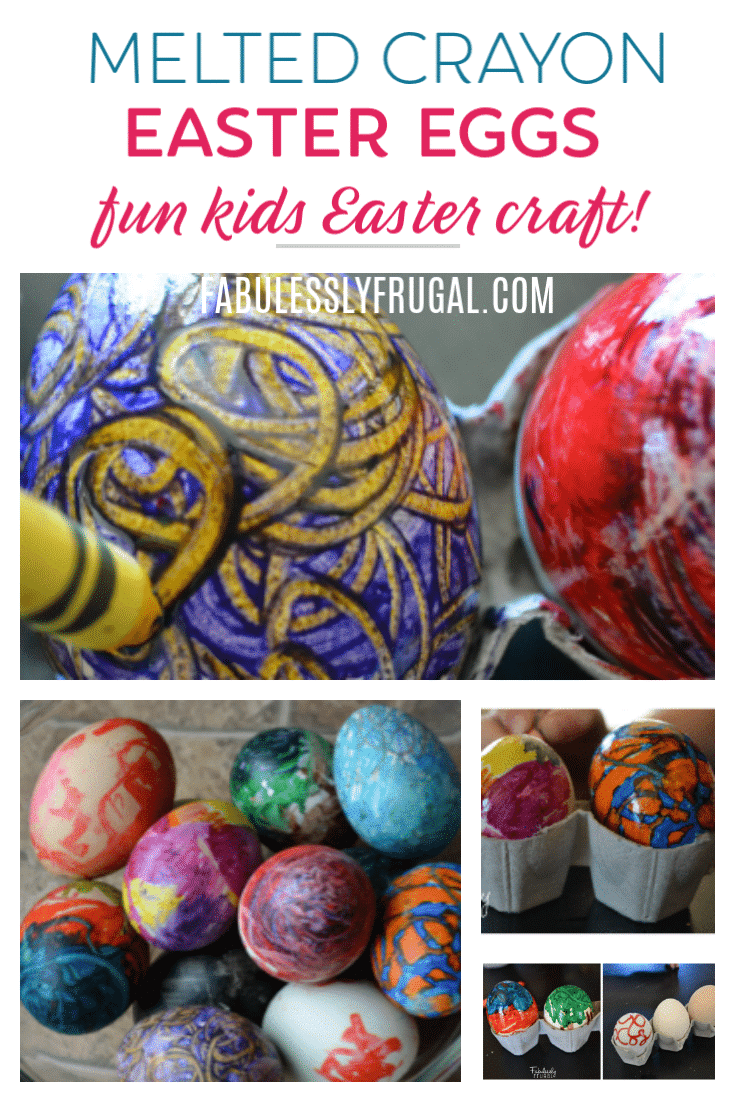
This year we are decorating Easter Eggs in a fun and crafty way. While I really enjoy dying eggs the old fashioned way, this looked like so much fun that we just had to try it. Let me tell you, it WAS fun!
At first, I was a bit skeptical of the crayons melting so easily on the hot eggs, but they do; and the colors are so vibrant and bright! Check out this fun, easy, and FRUGAL way to decorate eggs with the kids this year.
What you’ll need:
- Eggs & Carton
- Crayons
- Tongs or something to move the hot eggs back to the carton
- Scissors
- Complementary Color Wheel (optional)
How to Make Melted Crayon Eggs
Step 1. Hard boil your eggs
To get started, hard boil your eggs. To do this, I place the eggs in a pot and fill with water until covered, then bring the water to a boil on medium-high heat.
Once the water is at a boil, set a timer for 13 minutes. After the 13 minutes, remove from heat. (I know there are a LOT of different ways to hard boil an egg, but this is what I’ve always done…so use the method that you like best! Still not sure? Check out this handy Egg Timer tool to get the perfect hard boiled egg!)
Step 2. Wait for the eggs to boil
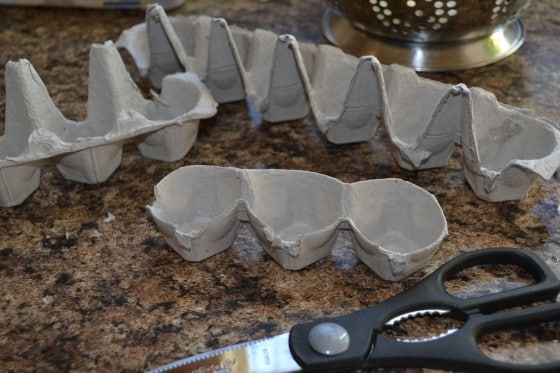
While the eggs are on the stove, grab your scissors and trim down the carton so the eggs can be decorated easily. It’s quick and simple…and very helpful once the coloring starts!
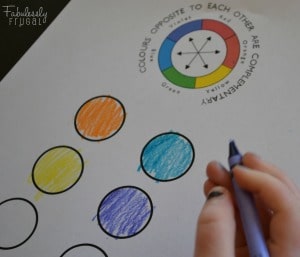
Another option for while the eggs are boiling is a quick lesson on primary, secondary, and complementary colors. First, we talked about the primary colors (red, yellow, blue), and secondary colors (main: orange, green, purple…but all colors that are mixed from primary colors).
Then we started a discussion on complementary colors. I also found a simple graphic and created a worksheet for the kids to try out with the crayons before they colored the eggs. This was a great way to fill some time while the eggs cooked
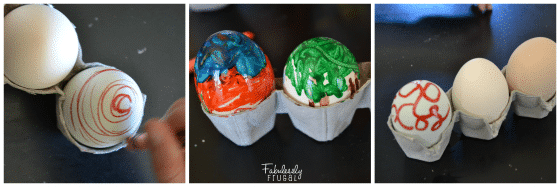
Step 3. Coloring the eggs with crayons
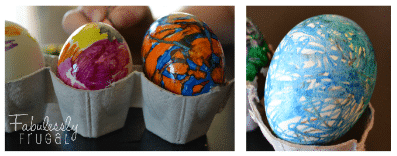
After the eggs have been hard-boiled, grab your tongs and move them back to the cartons. (Do not cool them off in cold water.) Then you’re ready to start coloring! YES that’s it! Simply color on the hot eggs!
My kids LOVED this and were so excited to see all of the different color variations. Because we had talked about complementary colors I challenged them to decorate one of the eggs using these combinations and they turned out great!
**Caution: The eggs will remain hot for quite some time so you’ll need to help little ones turn them over and around as needed.**
Conclusion
I honestly wasn’t sure if this would work out well when I first heard of the idea, but the eggs turned out great! This is such a fun way to decorate Easter eggs and the kids love it.
I think that the only thing that could have made this project better would be glitter or metallic crayons! If you need crayons for this project, you can find a large variety on Amazon.
More fun ideas for decorating Easter Eggs:
Need an egg alternative for your Easter egg hunt? Here are some fun fillers:
How to Dye Easter Eggs with Melted Crayons

Ingredients
- Eggs & Carton
- Crayons
- Tongs
- Scissors
Instructions
- While eggs are boiling, trim the carton down to make coloring easier.
- As soon as eggs are boiled to hard, use tongs and place eggs back into the trimmed cartons. (Do not cool them off in cold water.)
- Color eggs while they are hot and enjoy the vibrant colors!
- Caution: The eggs will remain hot for quite some time so you'll need to help little ones turn them over and around as needed.
Trending Diys


Comments
Trackbacks
-
[…] TP rolls for these 40 Easy Toilet Paper Roll Crafts. Save your kids’ broken crayons for these Dye Easter Eggs with Melted Crayons or try these 5 Easy DIY Crayon Art Project […]
Leave a Reply
More Related Diys


Trending DIY Projects
- DIY
- Recipes
- Deals
- Blog


Report a Problem
Please select the problem you are facing with this deal:
- Price Increased
- Price Decreased
- No longer available
- Expired
- Link doesn't work
- Suggestion
- Compliment
- Other
Add more details:
Thank you for your feedback. We really appreciate it.
Enter your email address if you would like
to receive a follow up.
Please Try Again
Thanks for providing the email address.
We will reach out to you as soon as possible.


Popular
Recommended
About Us

At Fabulessly Frugal, our goal is to help you live HEALTHY, WEALTHY, and WISE! My team and I work hard to bring you the best, online deals, clean eating, DIY's, freezer meal recipes, and more! I LOVE coaching and inspiring people to improve their health in my fitness challenge! You should also check out my favorite cleanse! Learn more about me and the rest of my team.

Copyright © 2008–2026
Fabulessly Frugal: A Coupon Blog Sharing Gift Ideas, Amazon Deals, Printable Coupons, DIY, How to Extreme Coupon, and Make Ahead Meals. All rights reserved
Wait! You didn’t say how to melt the crayons for the “Melted Crayon Easter Eggs”. So?
dude, just draw the crayon on a hot egg and that will melt it
Hi Janie, The hot temperature of the egg will melt the crayon as you color. It’s pretty neat to see the process take place – hope you enjoy it!
I love these! We are going to give them a try this week. Thanks for the share – they are lovely.