DIY Simple Glass Etching!
I’ve been wanting to try glass etching for the longest time but I’ve always had this idea that it was going to be way too hard to do. So, I never tried it. Then I found myself roaming the aisles of Michael’s Art Store the other day and came across some etching paint. I went ahead and bought it, came home, pulled out my Dollar Tree vases, and went to work! I couldn’t believe how easy the entire project was or how nice the results were!! So, for this DIY, I’m going to show you just how easy it is to etch glass.
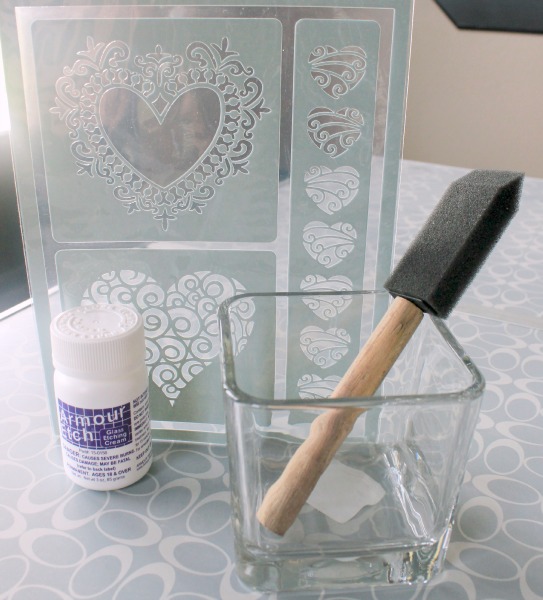
 Here’s what you need:
- Armour Etch Glass Etching Cream
- Glass votive, vases, or any glass you’d like to work with
- Sponge Paint Brush
- Stencils
- Wet Cloth or Towel
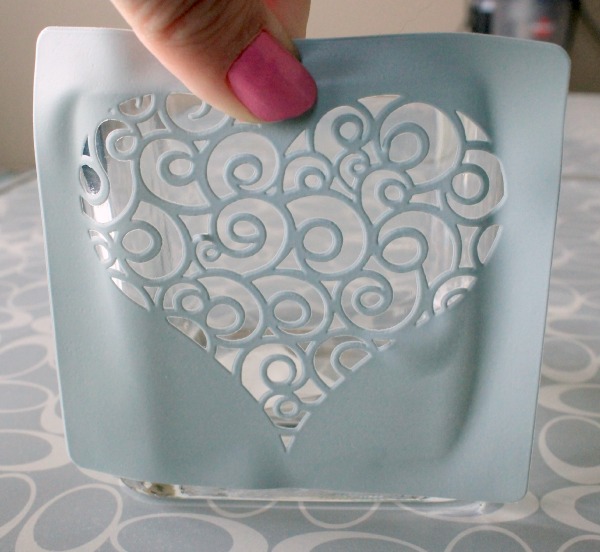
The first thing you want to do is choose your stencil. Once you’ve chosen, simply pull it off and apply it to your glass (exactly where you want your design to go). If your stencils are not sticky, simply tape the design to the glass.
 When your stencil is in place, grab your sponge brush and dip it into the etching cream and paint a layer directly over your stencil. Keep coating your stencil until there is a thick layer covering the top.
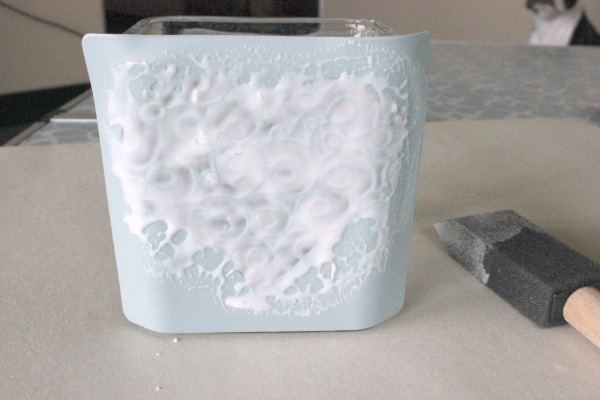
Let the etching cream sit for at least 5 minutes.
Once the cream has had some time to adhere. Take a damp cloth and wipe the remaining cream off the stencil and glass.
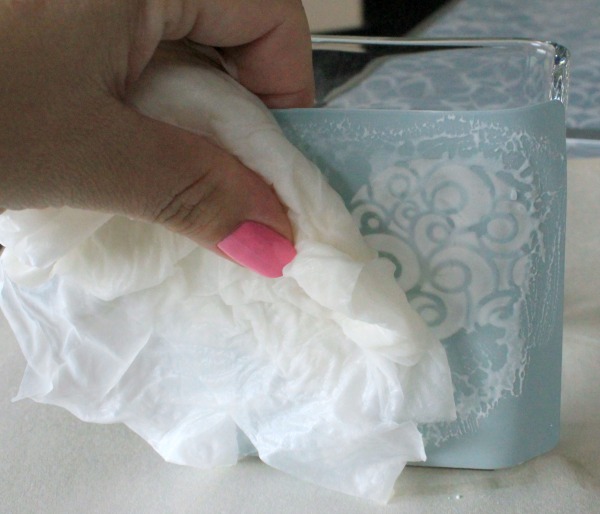
Then slowly peel the stencil off.
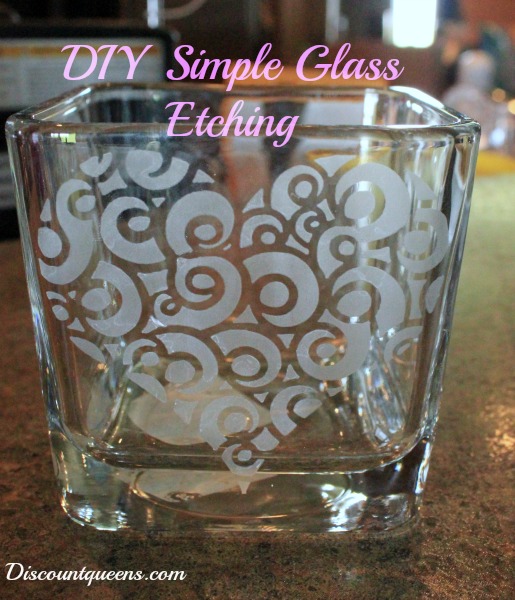
That’s it!! You now have your very own personalized glass etching!
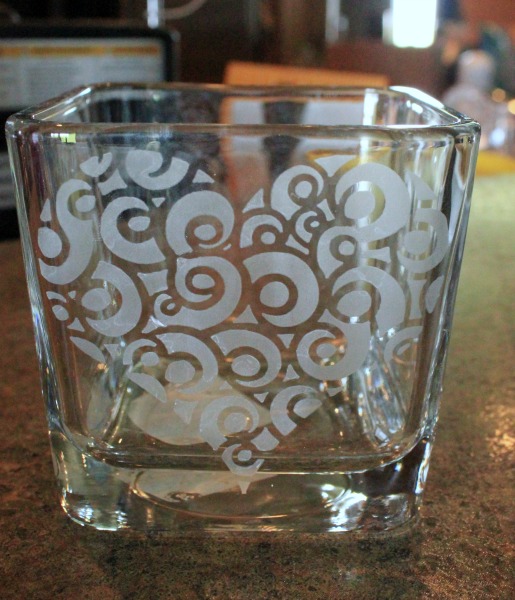
Once you get the hang of doing this and see how easy it is to pull off, you’ll certainly want to give these as gifts for the holidays!!
Thanks for reading! Please remember to like, share, tweet, and pin this post! 🙂
Trending Diys

Comments
Leave a Reply
More Related Diys


Trending DIY Projects
- DIY
- Recipes
- Deals
- Blog


Report a Problem
Please select the problem you are facing with this deal:
- Price Increased
- Price Decreased
- No longer available
- Expired
- Link doesn't work
- Suggestion
- Compliment
- Other
Add more details:
Thank you for your feedback. We really appreciate it.
Enter your email address if you would like
to receive a follow up.
Please Try Again
Thanks for providing the email address.
We will reach out to you as soon as possible.


Popular
Recommended
About Us

At Fabulessly Frugal, our goal is to help you live HEALTHY, WEALTHY, and WISE! My team and I work hard to bring you the best, online deals, clean eating, DIY's, freezer meal recipes, and more! I LOVE coaching and inspiring people to improve their health in my fitness challenge! You should also check out my favorite cleanse! Learn more about me and the rest of my team.

Copyright © 2008–2026
Fabulessly Frugal: A Coupon Blog Sharing Gift Ideas, Amazon Deals, Printable Coupons, DIY, How to Extreme Coupon, and Make Ahead Meals. All rights reserved
Love it!! I was scared at first, you made it so easy. I’m going to try it out.
Where did you buy the stencils from?