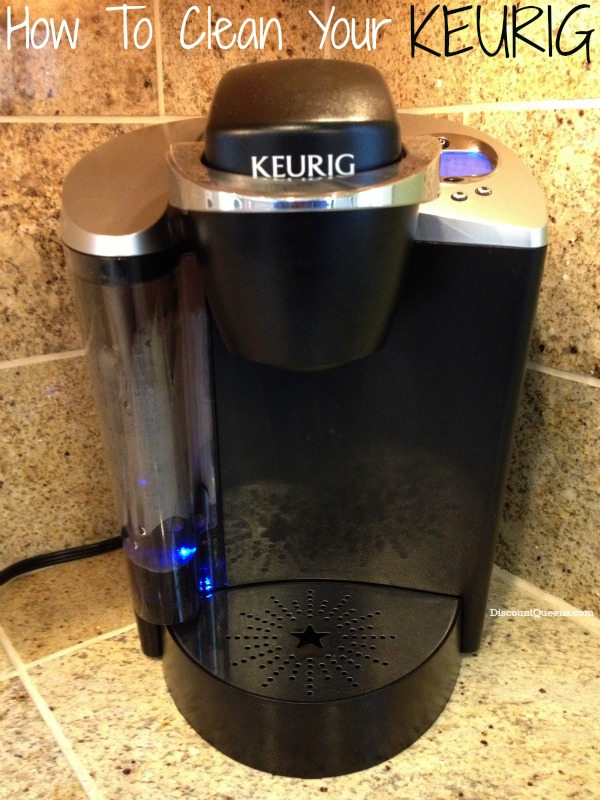
52 Weeks of Pinterest: Week 17 – How to Clean Your Keurig!
This year I wanted to go with a resolution I would have no problem sticking to! Then as I was pinning an item on Pinterest, a light bulb flashed on above my head. Ok, maybe not literally, but this great idea popped into my head. Those of us who are Pinterest users know that we pin hundreds of things a week, but do we ever do them? So I decided this year I would do one of my pins every week. At the moment, 52 weeks of Pinterest was born. Each week I will do something I found on Pinterest rather it be a craft, new recipe, organizing technique, or whatever!
It is Spring, many of us are in cleaning mode! This week I decided to go with a pin from the I Need a Maid! Board: How to Clean Your Keurig.
What You Will Need:
Clean Toothbrush
White Vinegar
Cleaning Cloth
Dish Soap
All Purpose Cleaner
If your Keurig is to you what is it to me .. it’s probably a prized possession! Nothing is more satisfying in the morning than that steaming cup of coffee.
Though the Keurig is an amazing device, it too, needs some upkeep. May as well through your Keurig in with your Spring Cleaning activities. I recommend doing this at leas every two months or so, depending on how often you are using it.
First step is to unplug your device.
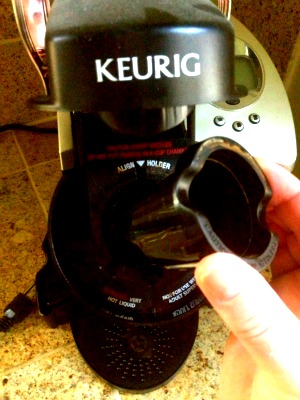
Second step is to remove the water reservoir, drip pan, and the K-cup holder/funnel. Be careful when you remove the K-cup holder/funnel seen below because there is a sharp needle inside.
Once you have removed all of these parts, you can put almost all them in the dishwasher in the top rack. Everything but the reservoir lid. However, I prefer to just use the sink. I filled my sink up with hot water and a few drops of dish soap. Wash all of your parts, rinse, and towel dry to avoid water spots.
Now, onto cleaning the Keurig itself.
Grab your clean toothbrush and clean the area where your K-Cups go.
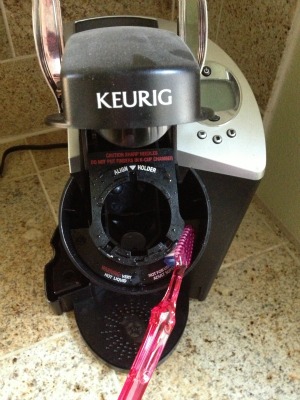
This will remove any coffee grounds or dried coffee stains. Mine had quite a bit of coffee grounds.
Once you have this clean, shut it and start wiping down the rest of your machine. You can see mine is quite dusty at the moment, we are in the processing of doing new drywall in our living room and dining room! 🙂
You can use any multi-purpose cleaner ans cloth to wipe down the machine itself. I actually cheated and used disinfectant wipes!
While you are cleaning, you may notice some white mineral buildup at the base of your machine where the water reservoir sits.
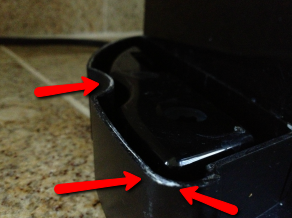
To clean this, just wet a cloth with some white vinegar and wipe it down. And wa-la, it’s gone!
Now that it is all wiped down, put your baby back together. Once it is back together, now we can work on cleaning the inside of the Keurig!
Fill your water reservoir about half way up with white vinegar. Now brew it through your machine a few times, of course, with no K-cup inside. This will take care of any mineral buildup in the tubes inside your machine.
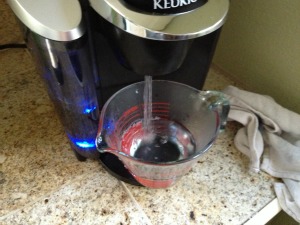
If you are a geek like me, brew it into a clear cup of some sort so you can see what comes from inside the machine! I saw quite a few white little flakes in my measuring cup! Once you have depleted your vinegar, fill your reservoir with water and brew until you no longer smell vinegar. No one wants coffee that tastes like vinegar!
And that’s it! Your Keurig is clean and you on your way to a nice steamy cup of coffee again!
This takes me about 15 minutes from start to finish. If you are worried about the amount of mineral buildup on or in your Keurig device, you can use distilled water instead of tap water. I just use tap water in mine.
Make sure to pin this to Pinterest to save for later! If you are not following us on Pinterest, make sure to do so now so you don’t miss out on some great pins!
Hope you enjoyed Week 17 of 52 Weeks of Pinterest, come back next Saturday for another attempted pin! If you don’t want to wait a week for a new pin idea, checkout our DIY posts, there are some great ideas there as well!
Trending Diys


More Related Diys


Trending DIY Projects
- DIY
- Recipes
- Deals
- Blog


Report a Problem
Please select the problem you are facing with this deal:
- Price Increased
- Price Decreased
- No longer available
- Expired
- Link doesn't work
- Suggestion
- Compliment
- Other
Add more details:
Thank you for your feedback. We really appreciate it.
Enter your email address if you would like
to receive a follow up.
Please Try Again
Thanks for providing the email address.
We will reach out to you as soon as possible.


Popular
Recommended
About Us

At Fabulessly Frugal, our goal is to help you live HEALTHY, WEALTHY, and WISE! My team and I work hard to bring you the best, online deals, clean eating, DIY's, freezer meal recipes, and more! I LOVE coaching and inspiring people to improve their health in my fitness challenge! You should also check out my favorite cleanse! Learn more about me and the rest of my team.

Copyright © 2008–2026
Fabulessly Frugal: A Coupon Blog Sharing Gift Ideas, Amazon Deals, Printable Coupons, DIY, How to Extreme Coupon, and Make Ahead Meals. All rights reserved