St. Patrick’s Day Paper Crafts for Kids
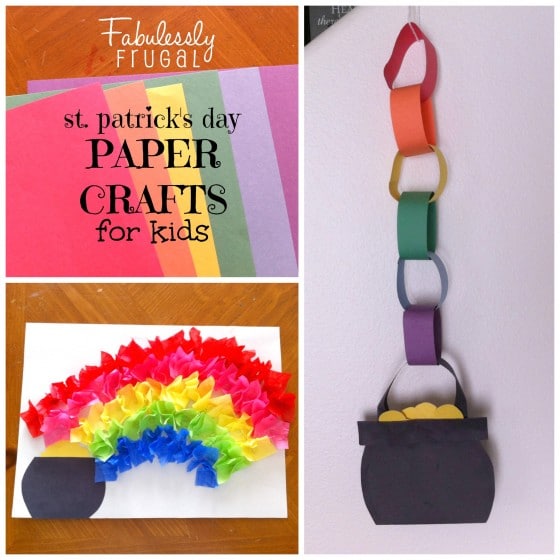 St. Patrick’s Day is such a fun excuse to bring out bright colored construction paper and tissue and make something fun with your kids. In this tutorial I will show two different paper crafts you can try.
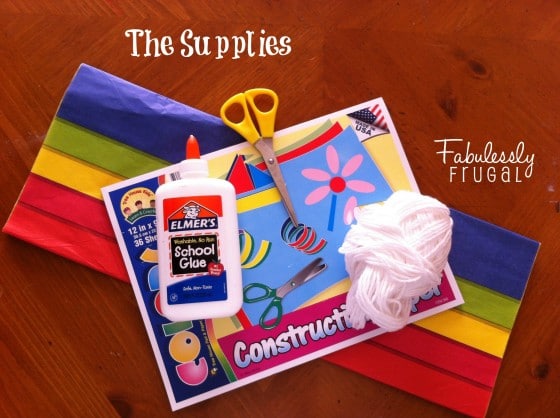
The Supplies:
- Construction paper pack
- tissue paper pack
- scissors
- glue
- pencil
- string or yarn (optional- for hanging)
The Instructions:
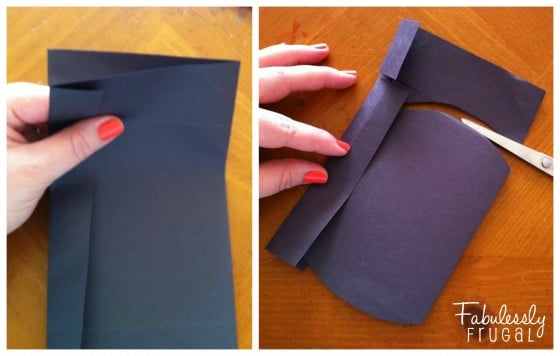 For the first project, the rainbow paper chain, start by folding a black piece of paper in half (hamburger style). Then fold over a one-inch section over each side, to represent the rim of the pot of gold. With the scissors, cut a curve on each side, cutting underneath the rim, and then trimming the rim so it sticks out slightly further than the edge of the pot itself.
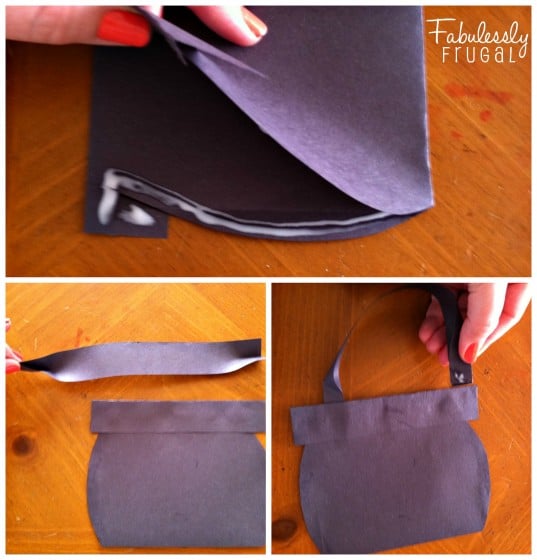 Next, life the sides of the pot and run a line of glue along the edge. You don’t need to put glue all over, that would just make it look soggy, and you want the top to remain open so you can stick the handle and the gold coins in. For the handle, cut a strip of black paper. Pinch a fold in the center of each tip, but don’t fold the whole strip. Next place a dot of glue on each side of the pinched fold and place it between the two layers of paper that make up the pot. This way if you decide to hang your project it will look good from both sides, and all the glued edges will be tucked away in the middle of the pot. Secure both sides and allow the glue to dry.
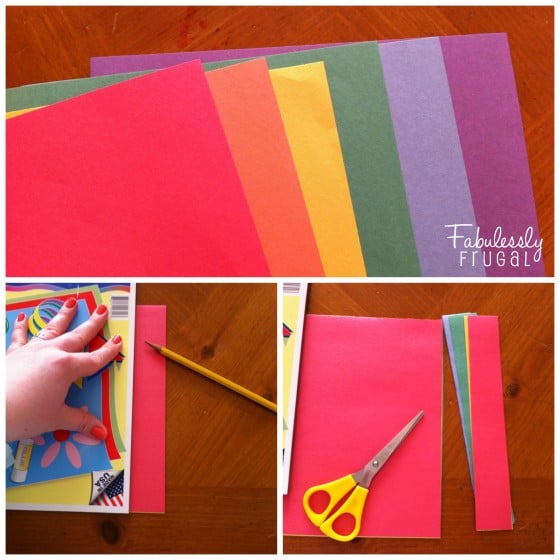 Next, prepare the strips of paper for the rainbow chain. Stack one page of each color needed: red, orange, yellow, green, blue, purple. You can use the bound edge of the construction paper pack to draw a straight line with a pencil. Cut along the line and you will have 6 matching strips. You can also just cut these free hand, and if your kids want to do it on their own, go for it! It does not have to be perfectly straight to look really cute.
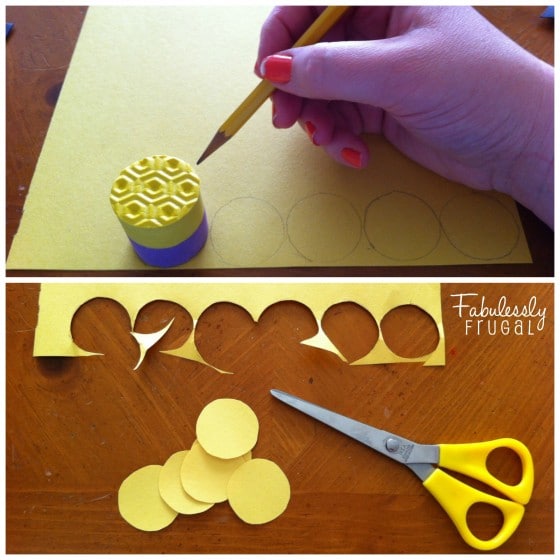 Next it is time to make the gold coins. If your children are old enough, they can cut these free-hand. If they need a bit of help, it might be a good idea to find a round object they can trace. Great motor skills practice. Trace 5 or 6 circles and cut them out.
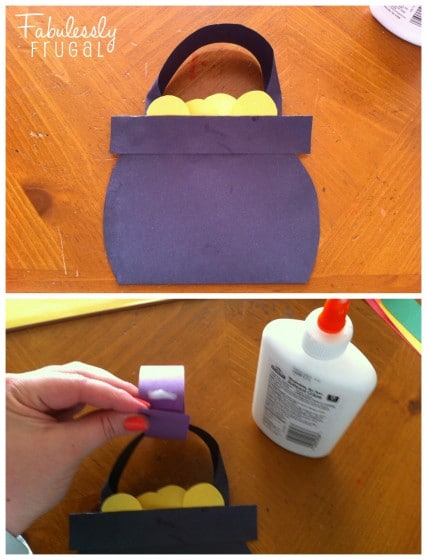 Place a dot of glue on each coin and place them inside the opening of the pot. Arrange them anyway you like, just leave them showing a bit. To finish the project, start gluing the rainbow-colored strips to make the chain. Work backwards, starting with purple and linking the chain to the handle on the pot of gold. Continue with blue, green, yellow, orange, and red.
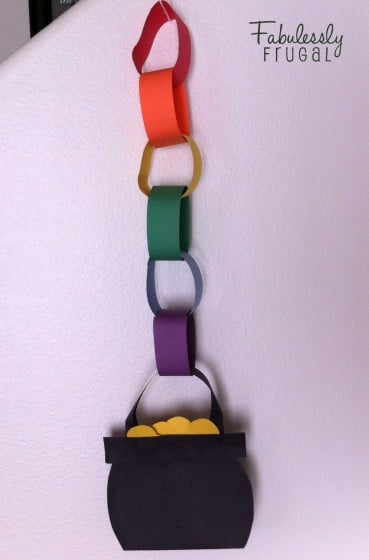 Isn’t that cute? Now, if you want to add some string to the top to help it hang flat you can do so. The top chain doesn’t sit flat against the wall, making it kind of tough to hang without ripping it. String can help it hang from any angle, whether it’s flat against the wall, or in the middle of the room, like from a chandelier.
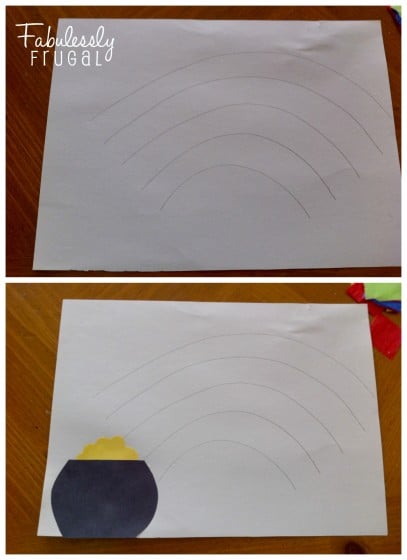 The next project is very easy to prepare. If your children are old enough, they can do it all on their own. If they are a little younger, they may need some help. Start with a white sheet of construction paper. Draw 5 lines, spaced about one inch apart, for the 5 colors of tissue paper. Next, cut a pot out of black paper, and a curvy piece from yellow paper to make the gold coins. Glue the pot of gold pieces to one side of the paper.
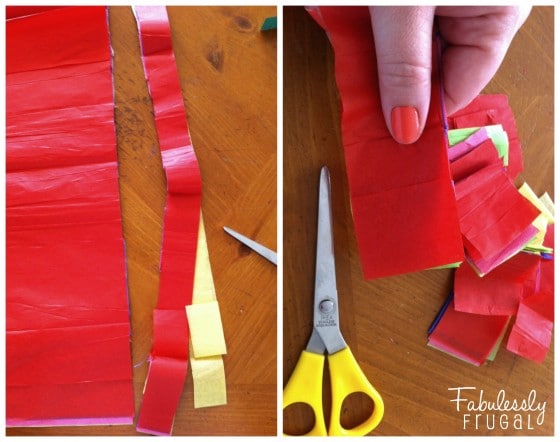 Unfold the entire pack of tissue paper, but leave it all in one pile. On one side, start cutting all the layers at once in a long strip. Once the strip is cut, hold it together with one hand, and cut it into little squares with the scissors.
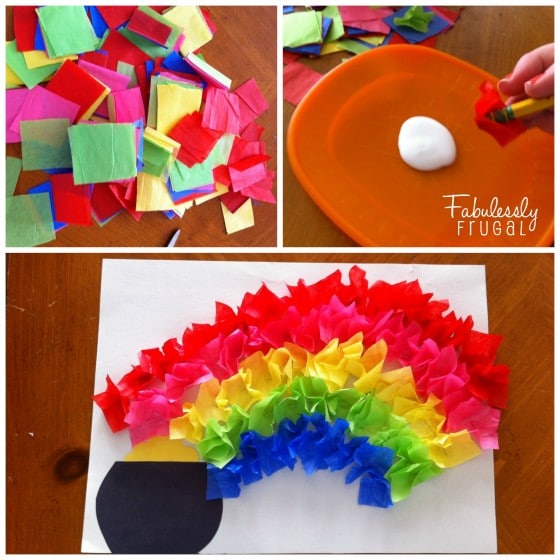 Pour some glue out onto a plastic or paper plate. Wrap a square of tissue paper around the eraser tip of a pencil, like in the top-right of the picture above. Dip the tip in glue. Press the pencil and tissue square down on the lines you drew for the rainbow. Continue, using one color at a time, until the rainbow is complete.
For younger children, wrapping tissue around the pencil may be a little challenging. Instead, trace one line of glue at a time on the rainbow. One line and color at a time, have them practice finding the specific color of tissue from the pile, and place them along the line of glue. No need to scrunch the tissue, they can just glue flat squares along each line.
 I hope you and your kids have fun getting crafty together! Enjoy the fun and bright colors!
Trending Diys
Report a Problem
Please select the problem you are facing with this deal:
- Price Increased
- Price Decreased
- No longer available
- Expired
- Link doesn't work
- Suggestion
- Compliment
- Other
Add more details:
Thank you for your feedback. We really appreciate it.
Enter your email address if you would like
to receive a follow up.
Please Try Again
Thanks for providing the email address.
We will reach out to you as soon as possible.


