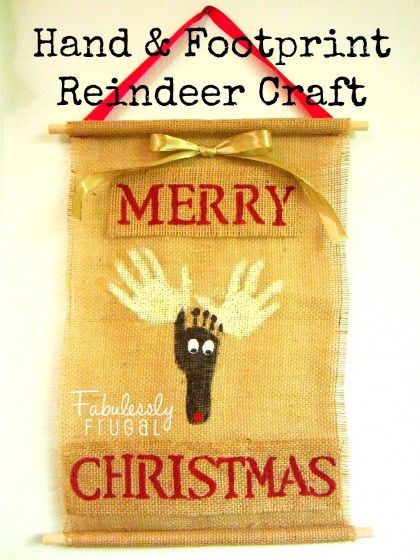
Hand & Footprint Reindeer Christmas Craft
{Pin This}
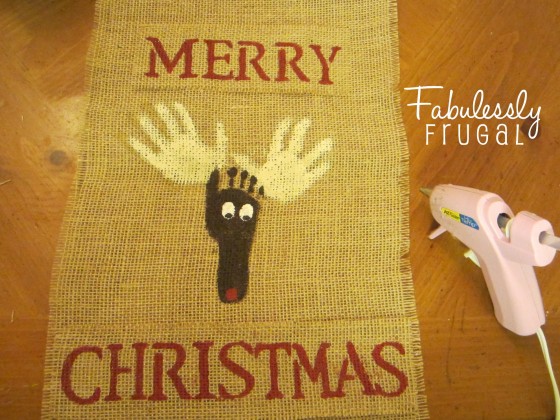
This hand and foot-printed reindeer decoration would make a great gift for a grandparent or teacher, or would be a great keepsake for your own home. It is also a fun activity to do with your children. There are a lot of ways to personalize it, and I included some ideas at the end of this tutorial. Take a look and see what style best suits you and your family.

What you will need:
- ½ yard burlap
- 2 wooden dowels (I used ⅝” wide and 12” long pre-cut in a package)
- red, gold, or your choice of ribbon
- brown, light tan, white, and red paint
- paintbrushes
- black sharpie
- alphabet stencil (optional)
- glue gun and glue sticks
Instructions:
Start by cutting your burlap to size, just under 12” wide. The length depends on how big the child is (you will need more space for bigger handprints). I recently learned a trick for cutting burlap without fraying the edges.

Prepare the burlap by pulling out one thread where you would want to cut. Then, cut along the space where the thread came out. Now your edges will be a lot more durable.
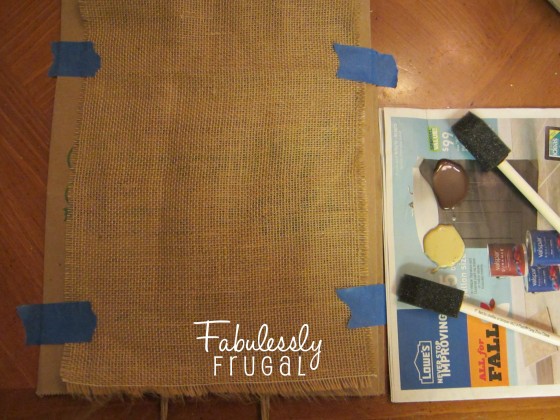
I did this project with my 7-month-old, so if I can get him to hold still, it should work for children of all ages. Best of all, they will think it’s fun! I tickled my little guy’s hands and feet with the paintbrush and he giggled and had a great time. So if your children are small, make it a game. I taped down the burlap so it would not slide and smear when wiggly hands and feet got to it.
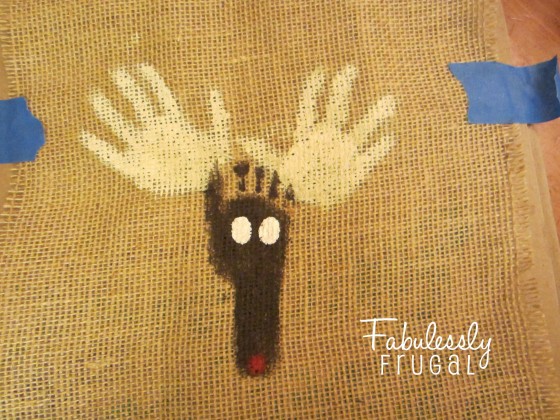
Paint the foot first, and stamp, then the hands for the antlers. Fill in any gaps with a paintbrush. Once that has a few minutes to set, paint white circles for the eyes and a red nose.
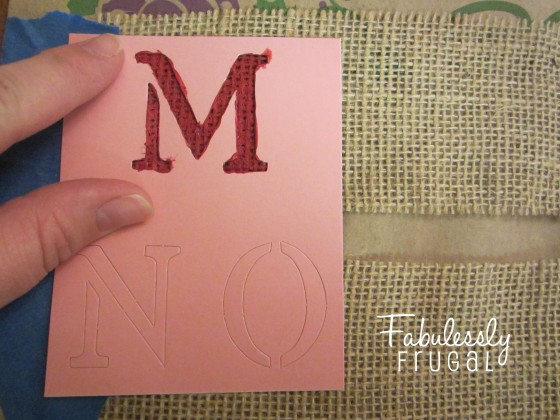
While the reindeer dries, cut two strips of burlap. I used a stencil, but if you want to free-hand it, go for it! Paint “Merry” and “Christmas” on the two pieces and allow them to dry. *The best part about not painting directly onto the reindeer burlap is, if you mess up, you can scrap it and start over. It also gives some added texture to have the words painted on to another piece of burlap.Use the permanent marker to draw pupils on the reindeer’s eyes.
Lay out your burlap words to see where they will look best. Heat up your glue gun and make light lines of glue along the back of the “Merry” and “Christmas” pieces. If the glue is too heavy it will seep through the burlap, so I waited about 10 seconds before attaching it so the glue was already beginning to harden a little. Press down on the pieces so they adhere well.
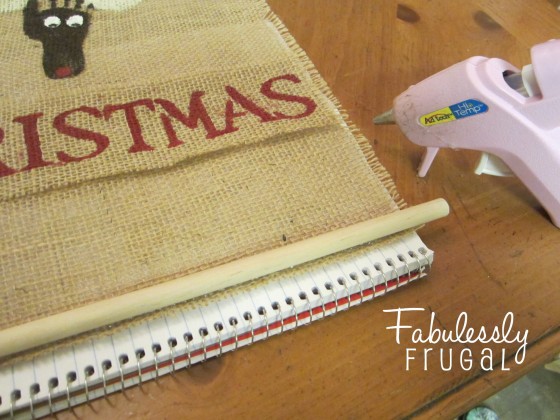
Place a strip of glue along the bottom edge of the burlap and center the dowel in the glue. (Helpful Hint: I placed a notebook underneath so I didn’t glue my project to the table. A little glue will come through the burlap, but just peel it up before the glue sets against whatever surface you are using.) Roll the dowel inward, make another line of glue, and roll the dowel into the glue again. Repeat for the top edge.
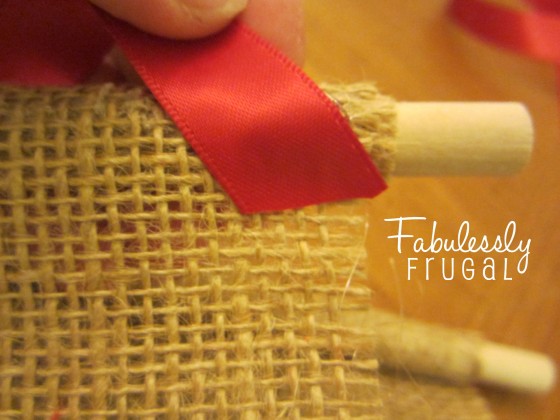
Once your project comes together, you can attach ribbon to hang it up with. Cut the end of the ribbon and glue it on an angle at the corner on the back of the dowel, that way it doesn’t show through the burlap on the front side. I also added a gold bow. You can embellish your reindeer however you like.
Here are a few tips to personalize this project and make it your own:
- Use white burlap instead of brown, just pick a darker color of paint for the antlers.
- Use a red pompom or red jingle bell for the nose.
- Use wiggly eyes instead of painting the eyes.
- Make a reindeer family on a wider piece of burlap. You can buy 36” wide dowels and use them as is, or saw them down to size. You could fit 3 or 4 reindeer side-by-side.
- Make a vertical wall-hanging by making two or more individual projects. Hang the oldest child’s at the top, then use ribbon to attach the next child’s reindeer below. Tie the bottom-left corner dowel of the first reindeer to the top-left corner dowel of the next child’s project, etc.
- If you do this project for more than one child, you can opt to write the child’s name at the top and the year at the bottom, instead of having “Merry Christmas” on each one. I’m thinking about doing this for each of my babies for their first Christmas. That way I can add on to my project for each child down the road.
- If your children are old enough, you can let them help more by having them paint the wooden dowels, or paint them yourself: brown, red, green. There are a lot of options.
Have fun!
{Pin This}
Trending Diys


Comments
Leave a Reply
More Related Diys


Trending DIY Projects
- DIY
- Recipes
- Deals
- Blog


Report a Problem
Please select the problem you are facing with this deal:
- Price Increased
- Price Decreased
- No longer available
- Expired
- Link doesn't work
- Suggestion
- Compliment
- Other
Add more details:
Thank you for your feedback. We really appreciate it.
Enter your email address if you would like
to receive a follow up.
Please Try Again
Thanks for providing the email address.
We will reach out to you as soon as possible.


Popular
Recommended
About Us

At Fabulessly Frugal, our goal is to help you live HEALTHY, WEALTHY, and WISE! My team and I work hard to bring you the best, online deals, clean eating, DIY's, freezer meal recipes, and more! I LOVE coaching and inspiring people to improve their health in my fitness challenge! You should also check out my favorite cleanse! Learn more about me and the rest of my team.

Copyright © 2008–2026
Fabulessly Frugal: A Coupon Blog Sharing Gift Ideas, Amazon Deals, Printable Coupons, DIY, How to Extreme Coupon, and Make Ahead Meals. All rights reserved
Love the cute little reindeer. That is a reindeer to promote memories. Cute gift!
Love this!!