DIY Patio Furniture (Sofa AND Love Seat) using Pallets and Just $45 in Wood!!

Well I finally did it!! I have been wanting patio furniture, comfy-solid-indestructible-to-kids-furniture, on my back porch for a while now and just couldn’t find any that fit that criteria…. that also fit in my budget.
I mean, I am a Discount Queen after all and that means I just don’t have it in me to pay full price for something. Anything. Not happenin’. 🙂
So I got my hands on some FREE pallets and got to work. The sofa was 4 small pallets (equal in size), 2 stacked on 2. And the love seat was 2 larger size pallets (equal in size) stacked on each other. So 6 total pallets. Actually, before I even got the pallets I picked out the cushions I wanted (this was the most pricey part, but still WAY cheaper than buying actual furniture). That way I could do some measuring and make sure my cushions would fit to it.
I decided to cover my pallets completely with wood because I have a slight paranoia of bees nests. They are every where around my house and the shady cool pallets would be a prime location for them to form a nest. Not exactly my idea of relaxation to sit down and have a sworm of nests come out from under me. No thanks.
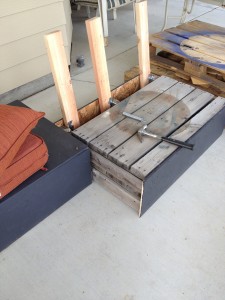
It only took 3 sheets of plywood ($30) to cover everything. I bought some trim ($15) to just give it a bit some design I guess 🙂 And that’s it!! (I already had some black paint on hand).
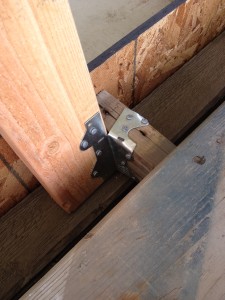
The most difficult part was the back. Only because I wanted it to recline a little. My dad gets credit for this one – he showed me these handy little brackets that cost a whopping .58! These allow you to tilt the 2×4 to the angle you want, and then secure it to the pallet. Dad’s are awesome 🙂
And that’s pretty much it 🙂 I’m so so happy with it and pleasantly surprised it all came together. Excuse me now, while I go relax with a book and a Dr. Pepper on my new comfy couch 🙂
If you like the post please share on Facebook or pin it on Pinterest –Follow us too for more project updates! See you there!

More awesome posts coming your way! See for yourself below—


DIY Body Wash! Turn a $1 Bar of Soap into Luxurious Body Wash!
Repin from Page: 116K+ times!
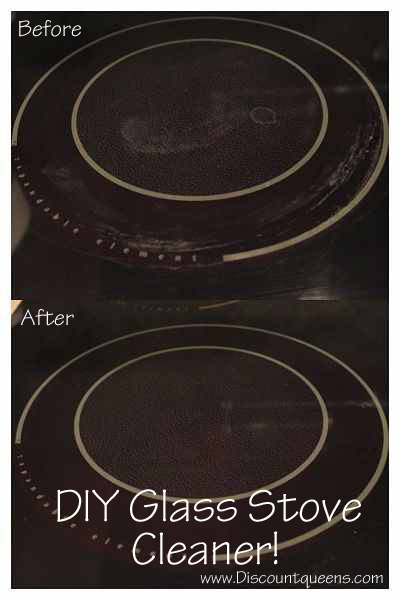
Do It Yourself Glass Stove Top Cleaner! Only THREE Ingredients!
Repin from Page: 29K+ times!
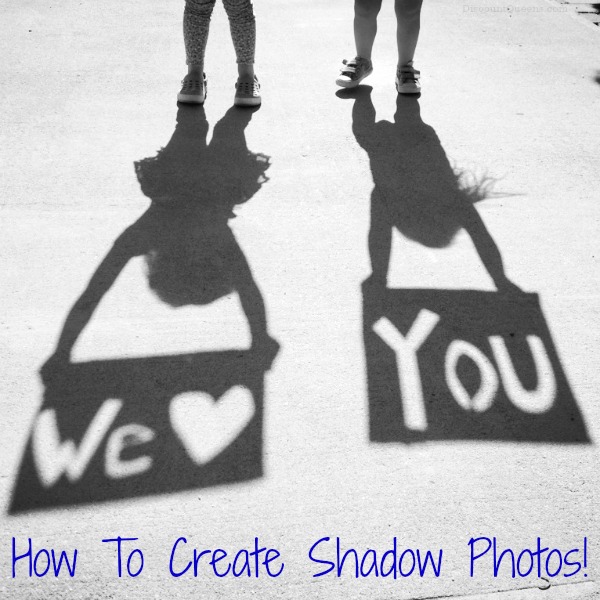
52 Weeks of Pinterest: Week 23 – Father’s Day Shadow Photo!
Repin from Page: 20K+ times!
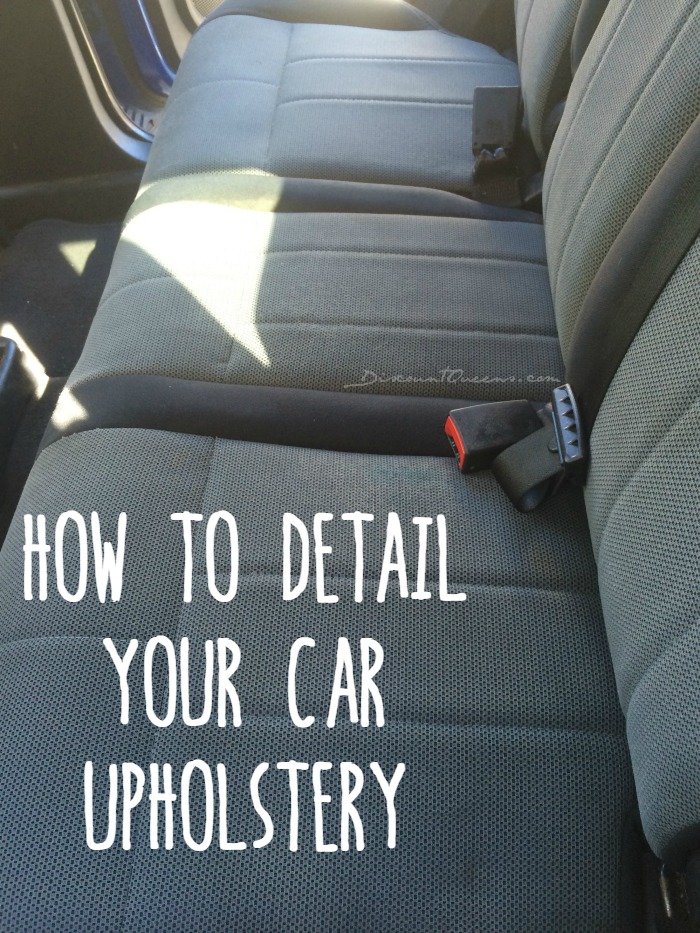
DIY: Detail Your Cars Upholstery!!
Repin from Page: 22K+ times!
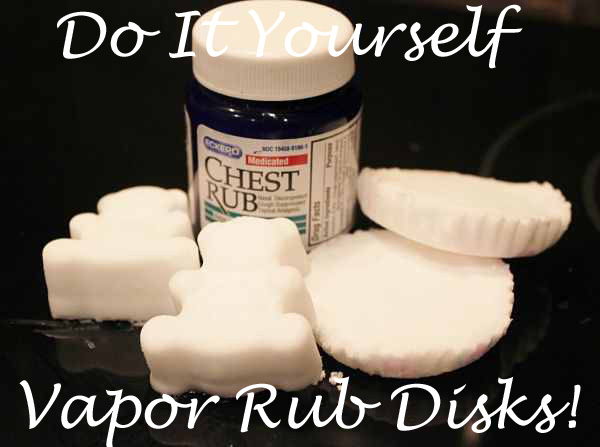
Do it Yourself Vapor Shower Disks!! Only THREE Ingredients!!
Repin from Page: 16K+ times!
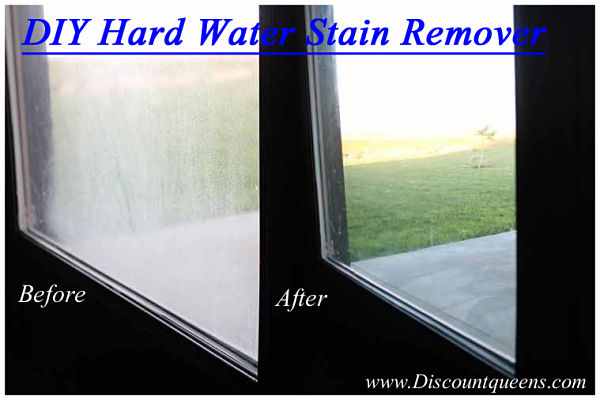
Do It Yourself Hard Water Stain Remover! Only TWO Ingredients!!!
Repin from Page: 14K+ times!

Do It Yourself Candle Image Transfers! Perfect for Mother’s Day!
Repin from Page: 12K+ times!
Can’t get enough of our Projects?
You can now visit our —> DIY Project Gallery!
Follow us on Pinterest —> FabulesslyFrugal
Trending Diys


Comments
Trackbacks
-
[…] Tutorial: fabulesslyfrugal.com […]
Leave a Reply
More Related Diys


Trending DIY Projects
- DIY
- Recipes
- Deals
- Blog


Report a Problem
Please select the problem you are facing with this deal:
- Price Increased
- Price Decreased
- No longer available
- Expired
- Link doesn't work
- Suggestion
- Compliment
- Other
Add more details:
Thank you for your feedback. We really appreciate it.
Enter your email address if you would like
to receive a follow up.
Please Try Again
Thanks for providing the email address.
We will reach out to you as soon as possible.


Popular
Recommended
About Us

At Fabulessly Frugal, our goal is to help you live HEALTHY, WEALTHY, and WISE! My team and I work hard to bring you the best, online deals, clean eating, DIY's, freezer meal recipes, and more! I LOVE coaching and inspiring people to improve their health in my fitness challenge! You should also check out my favorite cleanse! Learn more about me and the rest of my team.

Copyright © 2008–2026
Fabulessly Frugal: A Coupon Blog Sharing Gift Ideas, Amazon Deals, Printable Coupons, DIY, How to Extreme Coupon, and Make Ahead Meals. All rights reserved
Where did you get the cushions for this?
Where is the plans that you said you found. Nice Idea, but your post gives no information on how?
I didn’t follow set plans per say… I looked at many pictures on Pinterest for ideas and then kinda winged it. the base of it all is pallets stacked 2 high, then covered with plywood. The love seat is 2 pallets stacked on each other. The couch is 4 small pallets (2 high) and it’s actually 2 sections scooted together. Otherwise it’d be impossible to move. This whole set up is HEAVY, so get it in place where you want as much as you can. Then I just opted to nail ply wood to the entire thing. I used 1×2 boards as a decorative trim around the edges and to cover up where my plywood didn’t wasnt cut straight, etc. I also put a piece of the trim in the center of the couch where it comes together so you can’t see that it’s 2 sections. And I got cushions that measured as close as I could. The loveseat is a couple inches wider than the cushions and the couch a couple inches short. But whatever. It works. I’m not a perfectionist. 🙂
How many pallets were used?
6 pallets, 4 for couch and 2 love seat.
Great idea.. But this post was very unuseful 🙁
agree! total waste of my time
Where’s the instructions? Would love to make.
What’s the little bracket called? Where did you happen to find it
The best I got out of my dad was a “post joice bracket”. I’m not even sure I spelled that right. I’m sorry. It basically looks like a corner bracket and the top inch or so can be bent to whatever angle you need.
What are the brackets called and where did you get your cushions? Beautiful! Starting this project soon and cannot wait!!!
Thank you! I bought my cushions at Lowes.
As for the bracket, the best I got out of my dad was a “post joice bracket”. I’m not even sure I spelled that right. I’m sorry. It basically looks like a corner bracket and the top inch or so can be bent to whatever angle you need.
Where did you get your cushions from?
Lowes 🙂
Would you be able to provide a link to the cushions product in lowes.com ?
These ones are similar. Shop the deep seated style cushions to fit this:
https://www.lowes.com/pl/Deep-seat-patio-chair-cushion–Patio-furniture-cushions-Patio-cushions-pillows-Patio-furniture-Outdoors/4294415673?refinement=3226246762
If you could post some more information as to how you did it would be great. If not then its a little hard to believe you actually made this
Lol. I’m sorry. It was one of those projects I didn’t take a ton of pictures of while doing it, but I assure you I did it 🙂 It’s still being used daily. Though in hindsight I would not have painted it black – really shows the dust and dirt. Anyway, the best way I can explain in a step by step directions is as follows:
1. Gather your pallets and stack them 2 high. (I recommend measuring and looking for cushions at this point before completing it entirely. the plywood will only add about 1/4-1/2 inch in width, so you can get a pretty good idea what cushions will fit. If you’re putting a back on it as I did, don’t include the last plank of the pallet when measuring for the depth of you cushions. You’ll take this off. See next step)
2. For the back I removed one plank of the top pallet and placed 2x4s down into it (pictured above) using bracket (my dad couldn’t remember the exact name of it…a post joice bracket was the best he could do. ?? sorry!) to secure it. These allow you to tilt the 2×4 a bit so you can recline the back somewhat.
2. Cover with plywood. I literally just used screws to cover it completely with plywood. And I used 1×2’s on the edges and corners to make it look “finished” (and also cover up where the plywood didn’t meet up cleanly on the edges – which was pretty much every edge 🙂
3. Then I painted it.
That’s really it. It wasn’t too complicated. A little time consuming maybe.
Do you know the name of the brackets?
How long are the 2×4’s u got for the back? And how many did u use total?
These look awesome. We are going to use your idea. Your instructions are simple and for just “winging it” you did a great job.
Yay!! I hope you love it!
Where do you find wood pallets? I feel like I always see them, bu now that I am looking for them, it will be a ghost town!
Usually in the production areas of town…
Hey can you please tell me what store you purchased those brackets from?? I can’t find them. Thanks
Yes! We got them at Lowes but they can be found at any hardware store!
Don’t use that type of plywood if it will be exposed to water because it will just fail over time
Do you find places that give you the pallets or do you buy them? Are companies anxious to get rid of their pallets?
Hi– You were asking where to find pallets? Please check Craigslist.org, click on the “free” category and put “pallets” into the search box. I always find someone or someplace giving them away!
Thank you for the tip!
I thought this was going to be a tutorial with a print out of instructions
I’m going to be building this weekend, what kind of trim is that called and where can i get it?
Holy moly!! People are so entitled. Thanks for the idea. From the pics you posted you can pretty much see how to do this project. Sorry you received so much grief 🙄🤣
Thanks for the idea!!
Great idea. Plywood not suitable in UK because of rain! But can I suggest scaffolding boards which you can get second hand quite cheaply.