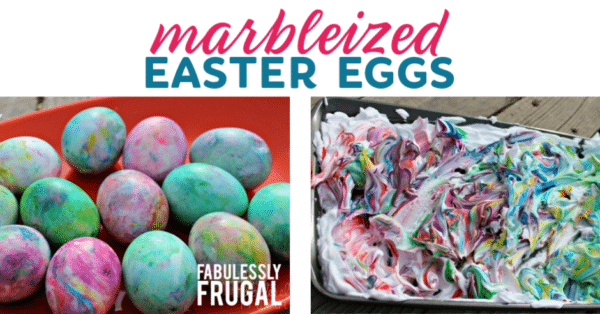
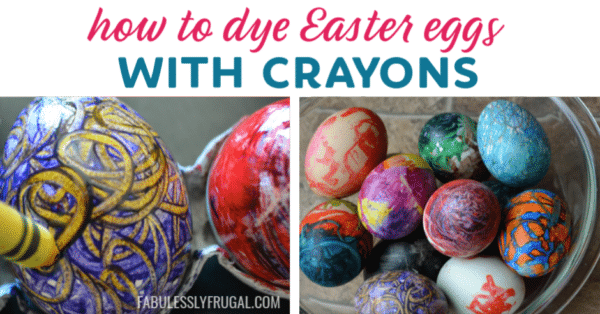
3D Paper Pumpkins
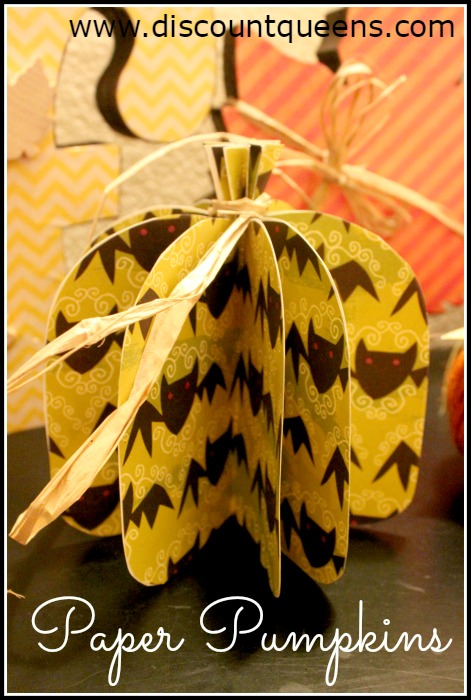
I thought these turned out super cute. Â I should have made some that would have been good for the whole Fall season, but I only had Halloween paper on hand, and didn’t feel the need to run out and buy something else. Â I have yet to make the other 2 that I have almost ready, but this one turned out cute, and goes great with the other Halloween decor we have put out this week. Â I also changed up how I did them a bit, but you can do it however works for you.
MATERIALS NEEDED:
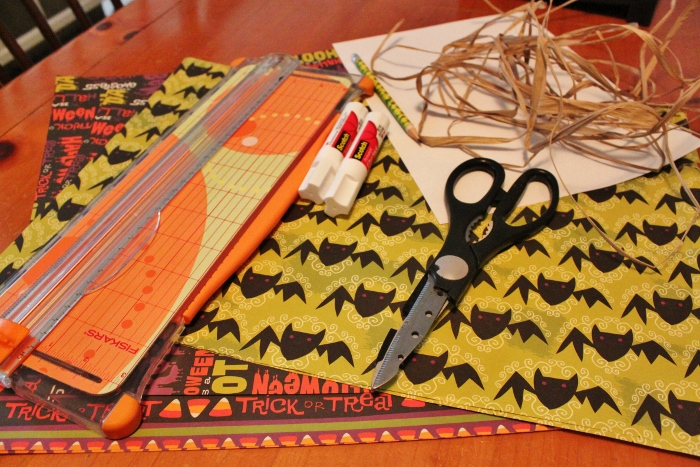
Scrapbook paper
Glue stick
twine or rafia
scrap paper and paper for pumpkin stencil
scissors
DIRECTIONS:
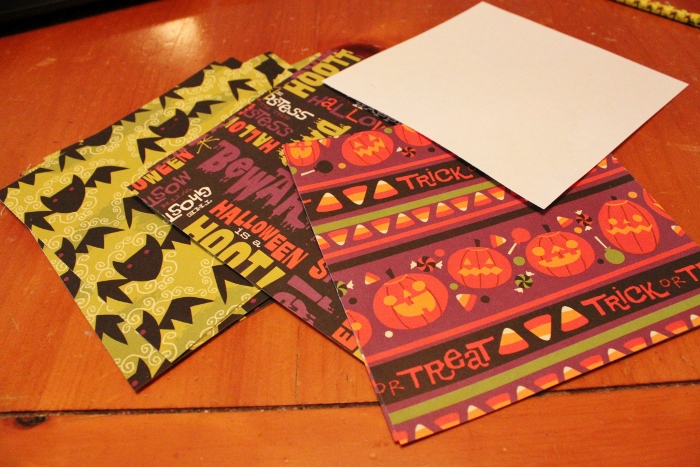
Cut your paper into 6″ squares. Â I ended up using 8 squares per pumpkin. Â Cut your scrap paper into a 6″ square as well.
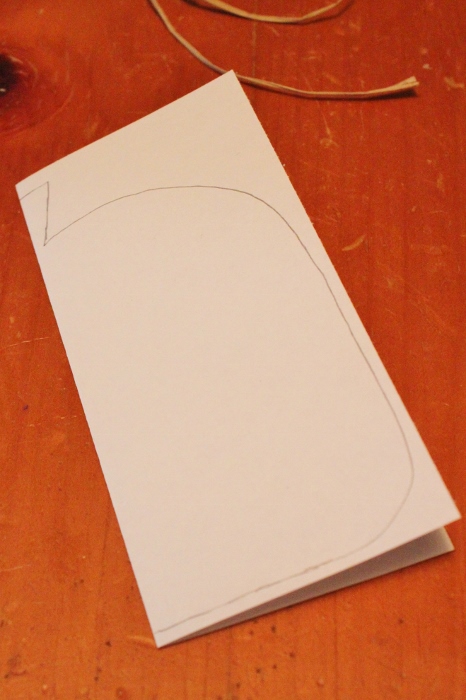
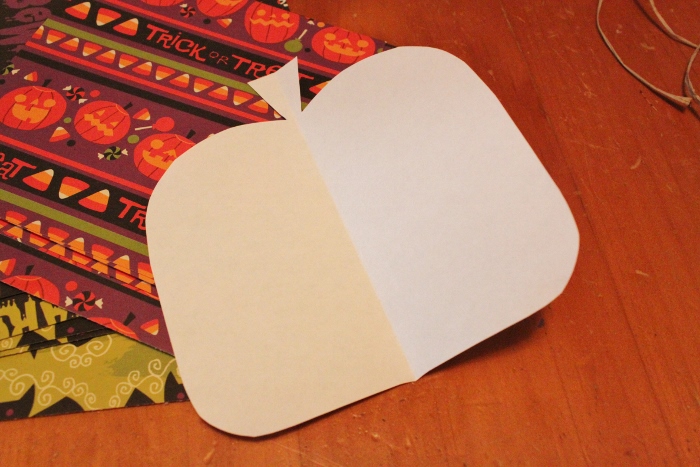
Draw on your pumpkin pattern, being sure to give it a stem. Â This will be your template for all the others.
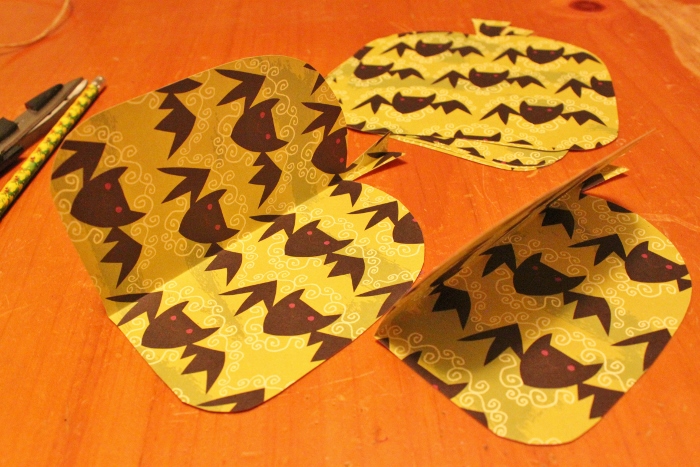
Cut out your pumpkins and fold each in half, creasing it down the middle.

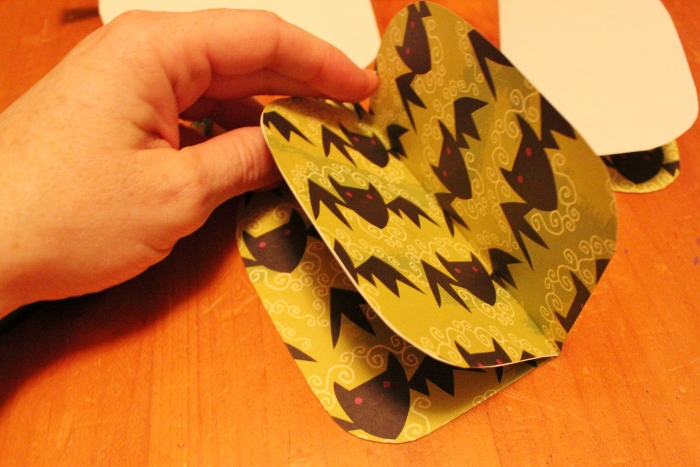
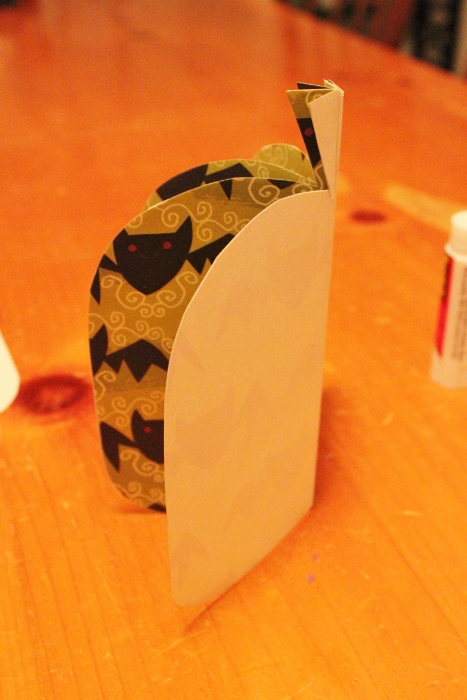
Using your glue stick, glue wrong sides together. Â Continue staking and gluing.
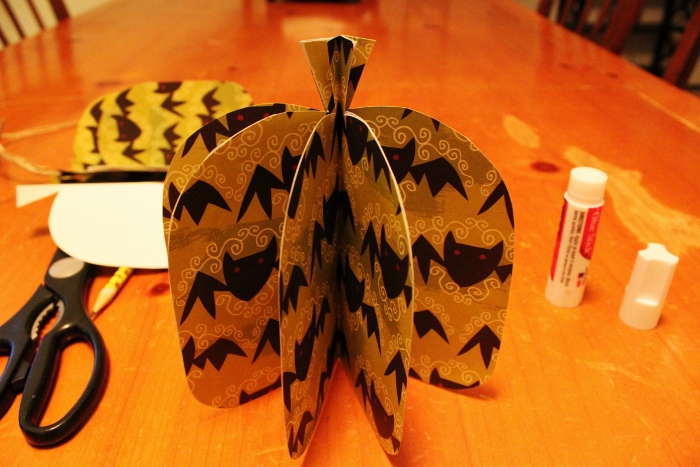
Glue the last two wrong sides together, making your 3-D pumpkin. Â Tie a piece of twine to the stem. Â Easy and cheap!!
Trending Diys
More Related Diys


Trending DIY Projects
- DIY
- Recipes
- Deals
- Blog


Report a Problem
Please select the problem you are facing with this deal:
- Price Increased
- Price Decreased
- No longer available
- Expired
- Link doesn't work
- Suggestion
- Compliment
- Other
Add more details:
Thank you for your feedback. We really appreciate it.
Enter your email address if you would like
to receive a follow up.
Please Try Again
Thanks for providing the email address.
We will reach out to you as soon as possible.


Popular
Recommended
About Us

At Fabulessly Frugal, our goal is to help you live HEALTHY, WEALTHY, and WISE! My team and I work hard to bring you the best, online deals, clean eating, DIY's, freezer meal recipes, and more! I LOVE coaching and inspiring people to improve their health in my fitness challenge! You should also check out my favorite cleanse! Learn more about me and the rest of my team.

Copyright © 2008–2026
Fabulessly Frugal: A Coupon Blog Sharing Gift Ideas, Amazon Deals, Printable Coupons, DIY, How to Extreme Coupon, and Make Ahead Meals. All rights reserved