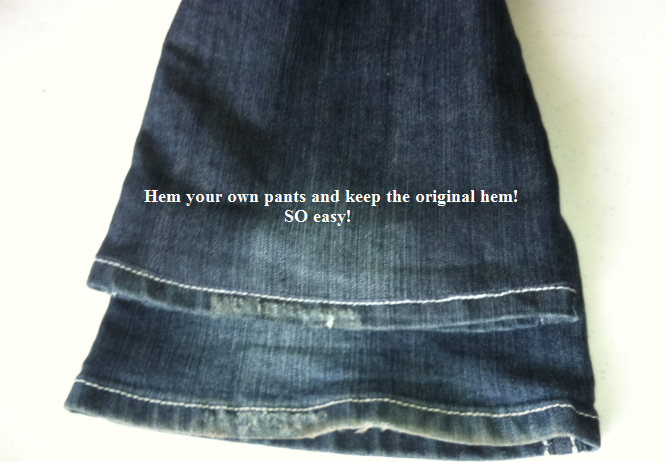
DIY: Hem your own pants WITH original hem – then take it out for more length later
I LOVE to buy jeans. I’m not exactly rich so I can’t buy as many or all the brands I would like to, but I still enjoy buying a new pair every now and then. I generally have them hemmed at a professional tailor for around $12. It’s not a huge expense but it can add up and it’s just a pain when they don’t turn out right or you have to wait 2 weeks to get them back. Plus, $12 bucks is $12 bucks to a cheapo like me! So… through a bit of trial and error, I figured out how to hem my own pants, and maintain the original look of the jeans by keeping the original hem (that was a must for me). It was so easy I sort of feel dumb posting this – but in case you’ve been paying a tailor, here’s you chance to do it for yourself and save that $12.
One of the best parts of this technique is that you can let the hem out in the future if you need more length. Obviously I’m done growing at age 28 ;), but your kids might not be and you can increase the length of the pants as your kid grows. It’s a win win for saving money.
Step #1:
Measure the length of the pant. You can do this however you like, but this is what I’ve found to be easiest. If anyone has a better idea, let me know. This is the most painful part of the process.
- Put your pants on and roll up the bottom to the desired length and pin it. Measure the length of the roll. Subtract the length of the original hem then divide in half. Re-roll the pant to that number.
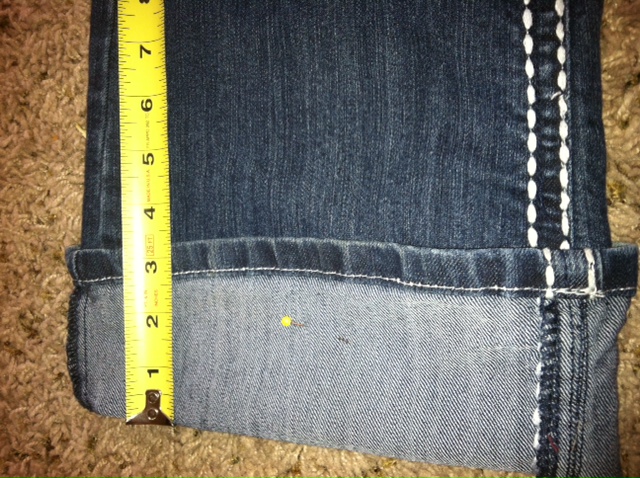
Image #1: This is a weird angle, but make sure you have rolled the pant equally. This roll measure 3 1/2 total. I’ll subtract 1/2 (for the hem) and divide by two. My final number would be 1 1/2 inch. Re-roll the pant up 1 1/2 inch and pin (the 1 1/2 includes the hem).
Step #2:
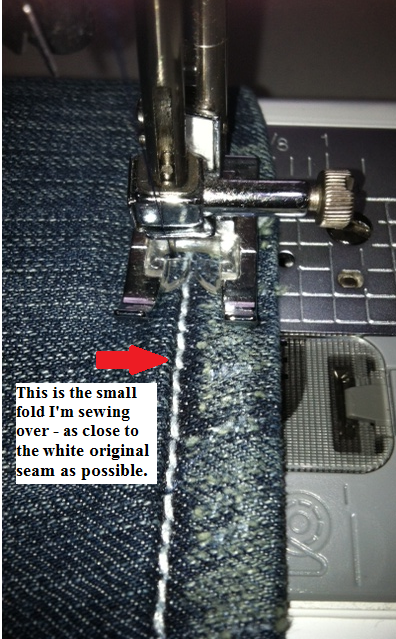
Using thread that is as close to your pant color as possible, sew along the original seam as close as you can without sewing on the seam. You’ll lose the look of the original hem if you sew over it.
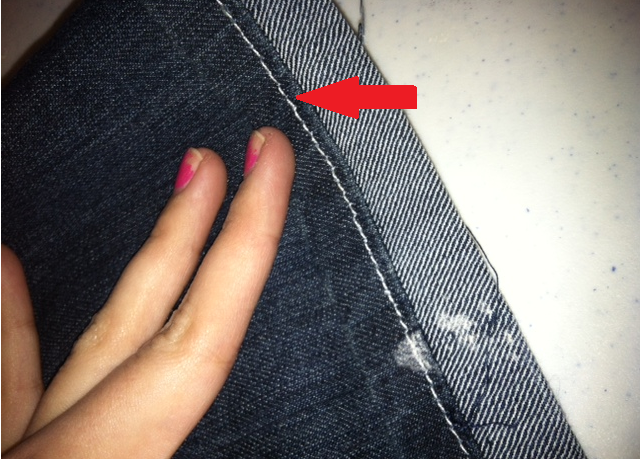
Can you see the navy seam? It’s just below the original white threaded seam (where my re arrow is pointing).
Step # 3:
Flip the pant hem over so that it’s right side out and the original hem is showing. You may need to tug the material a bit to get the original hem to show. The closer you have sewed to the original hem in step #2, the better. You’ll now sew along the crease as close the original hem as possible. This will allow the hem to stay flat and in place when you wash it.
Step #4 (Optional):
If you’re happy with the length and will not need to alter it, you can cut off the excess material on the underside of the hem. You can use a surger to finish the edge to prevent fraying or just use a zig zag stitch over the raw edge.
If you want to be able to release this hem in the future to add more length, keep the extra material and put a small stitch going up each side (be the side seams), to prevent the extra material from flapping down when walking (depending on how much is material has been hemmed up).
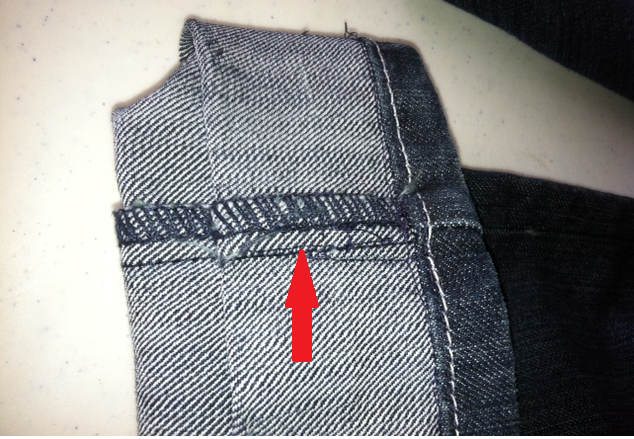
Where I put a smal stich to hold the extra material against the jean (optional).
TIPS:
- You may need to use the manual turn option on your sewing machine when you get to sewing over the side seams. Depending on the pant, this may be to bulky to use you pedal without risk of messing up your tension.
- Sew slowly! If you sew over the seam in step #2, it’s not going to look right!
Comments
Leave a Reply
Report a Problem
Please select the problem you are facing with this deal:
- Price Increased
- Price Decreased
- No longer available
- Expired
- Link doesn't work
- Suggestion
- Compliment
- Other
Add more details:
Thank you for your feedback. We really appreciate it.
Enter your email address if you would like
to receive a follow up.
Please Try Again
Thanks for providing the email address.
We will reach out to you as soon as possible.
















tall girls don’t know how lucky they are! i totally pay someone to do this too 🙂 perhaps if i invested in a sewing machine…….
I learned this trick about 5 years ago and it was my very first “real” project with my sewing machine. I was so proud of how it looked that I went around showing everyone my hem-job. I think the optional stitch is crucial. I still wear the first pair of jeans that I did this on and over time, the fold gets kind of wonky so I have actually added a few small stitches with navy thread around the entire cuff to keep it in place. You can’t see it and it keeps the shape a bit better. I don’t know why I don’t just cut off the excess…I guess I’m still hoping to grow another inch in my late 30’s.
I have been sewing for years and was frustrated with this method back in the days of “bell bottom” or “flare leg” pants because the hem didn’t work out evenly.
I noticed in your 1st picture that one side of the pants leg is much wider than the other where you turned it up. That helps, but, I would have a lot of extra width that I didn’t know how to deal with.