DIY Paper Flower Wreath
 It’s spring time! Flowers are popping up everywhere. What better way to celebrate this beautiful time of year than to bring the flowers inside your home too. This cute paper Dahlia makes a fun seasonal wreath that you can hang just about anywhere. It’s also a great decoration for a little girl’s room or nursery, a great party decoration for a baby shower, bridal shower, or garden party. It’s pretty simple, just takes a little patience. Here is what you will need to get started…
 The Supplies:
- Card stock paper (color of your choice, but having three shades gives dimension – I used 12×12 for most pieces)
- Card board circle (cut out of a cereal box works great)
- Hot glue gun
- Extra hot glue
- Sliding paper cutter
- Double-sided tape
The Instructions:
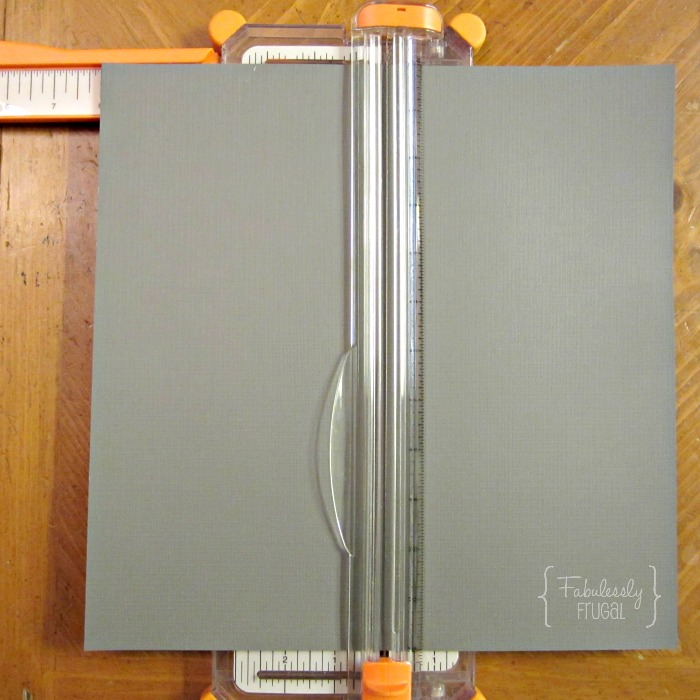 Start by cutting a 12×12 piece of card stock paper in half. Pull out the ruler on the sliding paper cutter to get an exact measurement, or if you prefer, use some scissors and cut it by hand. You can usually cut more than one piece at a time too.
 Once your 12×12 paper is cut in half, cut it into three pieces. It does not have to be perfect. What you are going for is the look of a volcano in the middle. Do you see it?
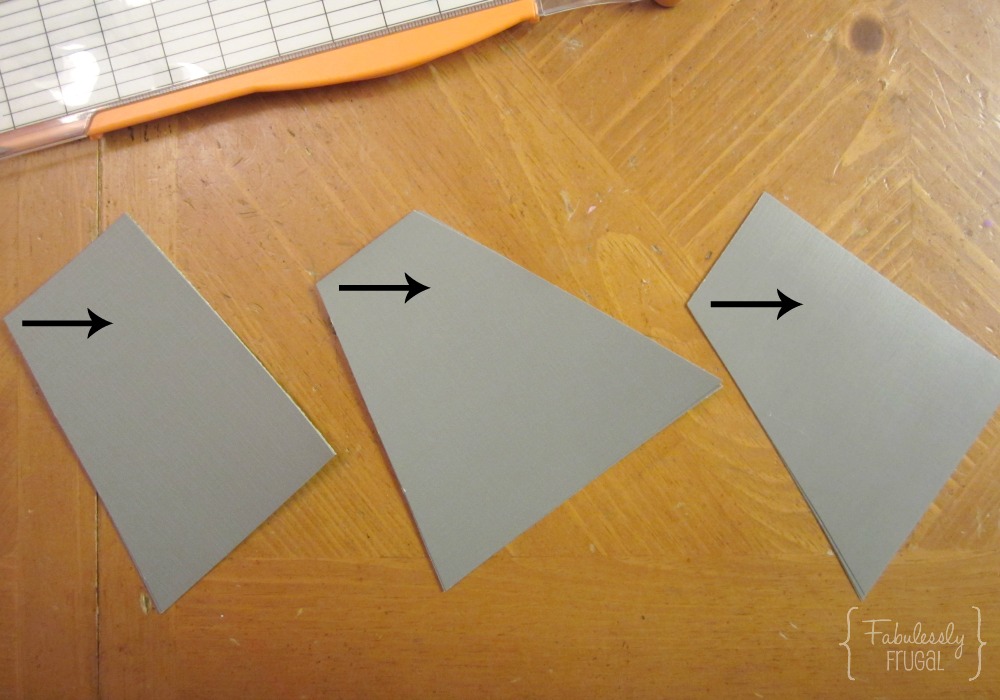 This picture shows the same “volcano” pieces turned to show you which way to roll. The points on the top and on the bottom are going to be the top and bottom of the cone shape we make. You want to start rolling where the arrows start, and roll towards the right.
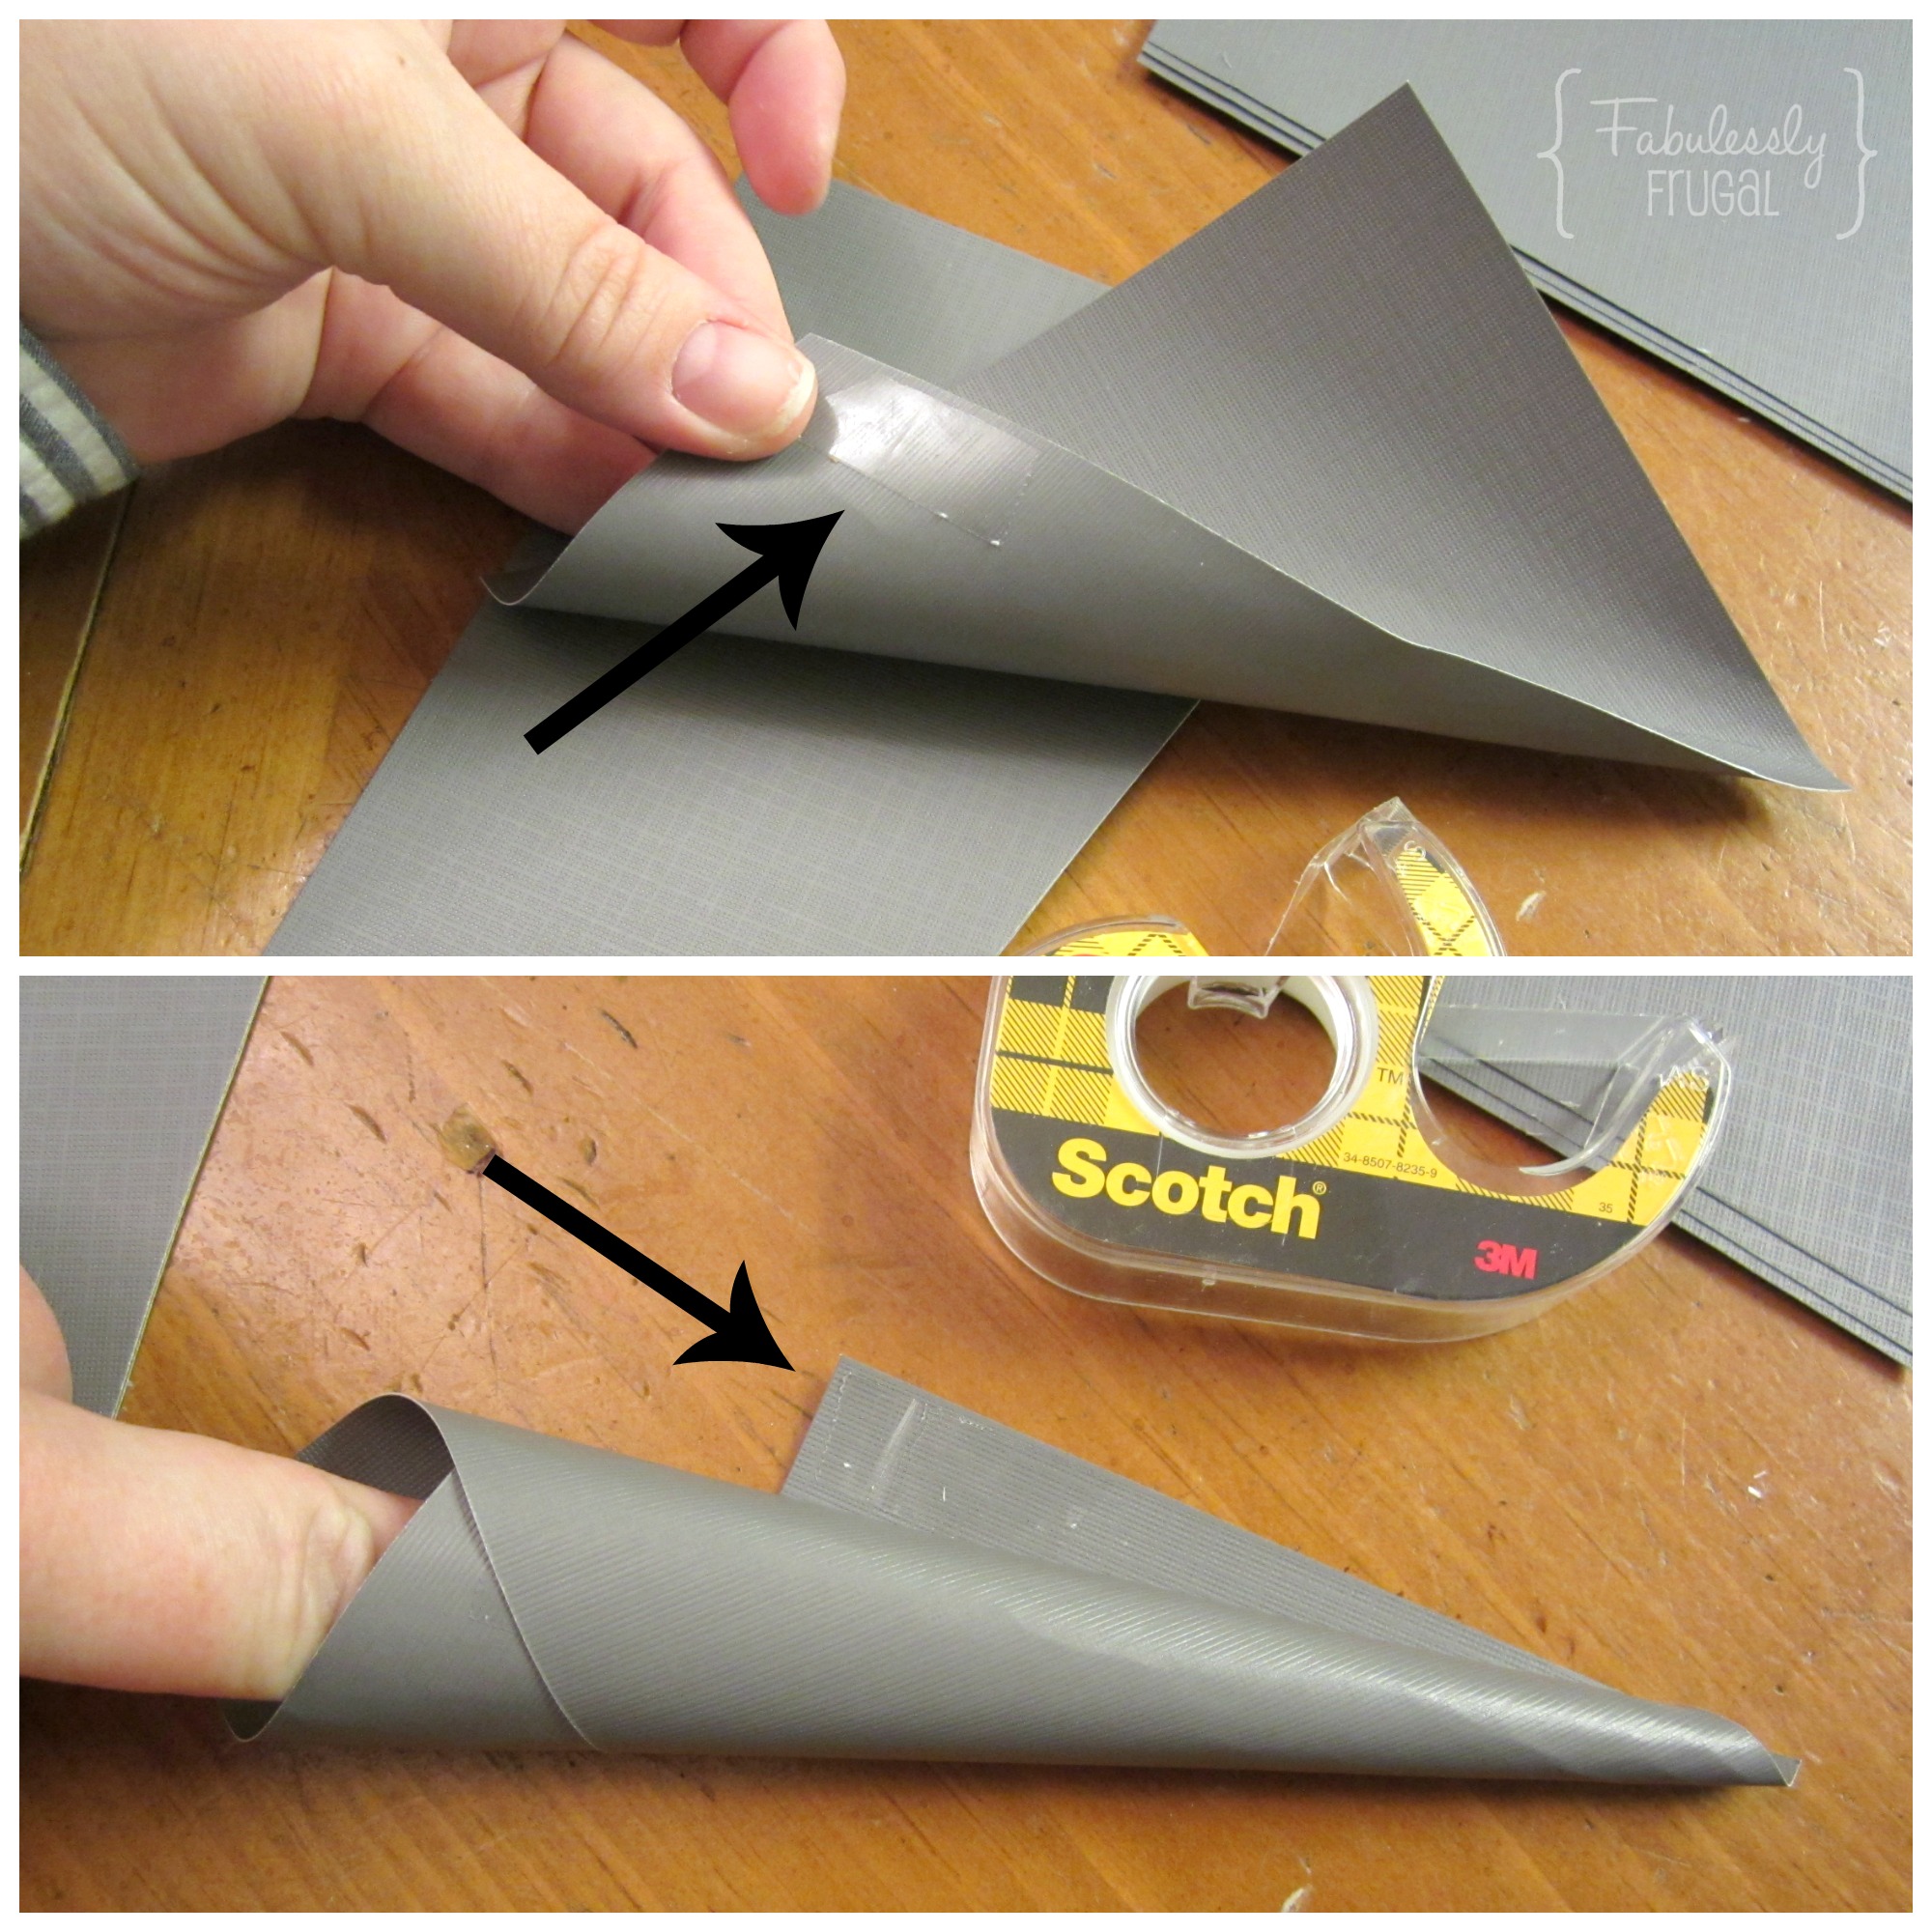 As you roll, secure a piece of double-sided tape on the inside (as seen in the top picture) and then once the paper is completely rolled, secure it with another piece of tape at the end (as seen in the bottom picture above). Super easy!
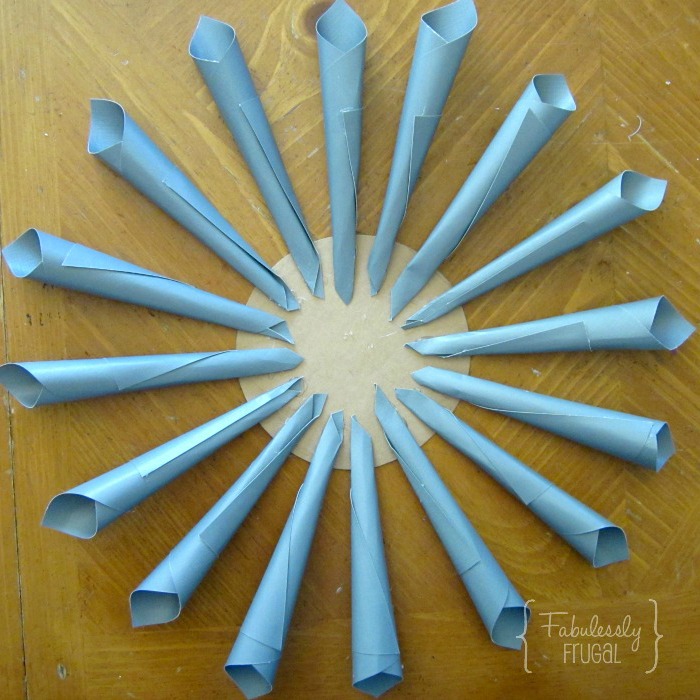 Pull out that circle piece of card board. Mine is just cut from a cereal box. It does not have to be thick. Start gluing the paper cones from the near the rim. I used gray as the background color and only did one go around in my first color, meaning after this I’ll be using purple. As you are starting to glue, place one on top, and one on bottom. Then place one on the left, and one on the right, making four corners. If you glue opposite spots as you go, it will help the overall look to be more even and concise. I wouldn’t trust myself to glue around the edges in a clockwise pattern. It would probably end up very uneven, but if you are brave you can try it.
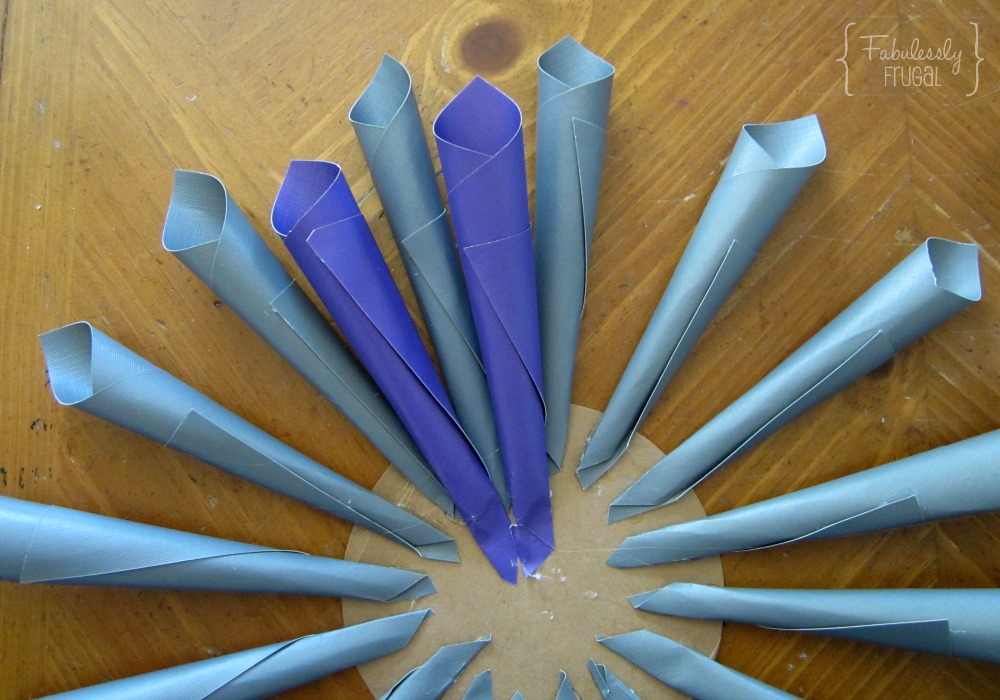 For the next layer, I switched to purple cones. I flattened the bottom tip, and that way the cones tilted upward. This will help the look and texture of the flower in the end. You just want to make sure you place the purple cones in between each gray one. Stagger them.
 See the height difference between the two layers? That’s exactly how we want it.
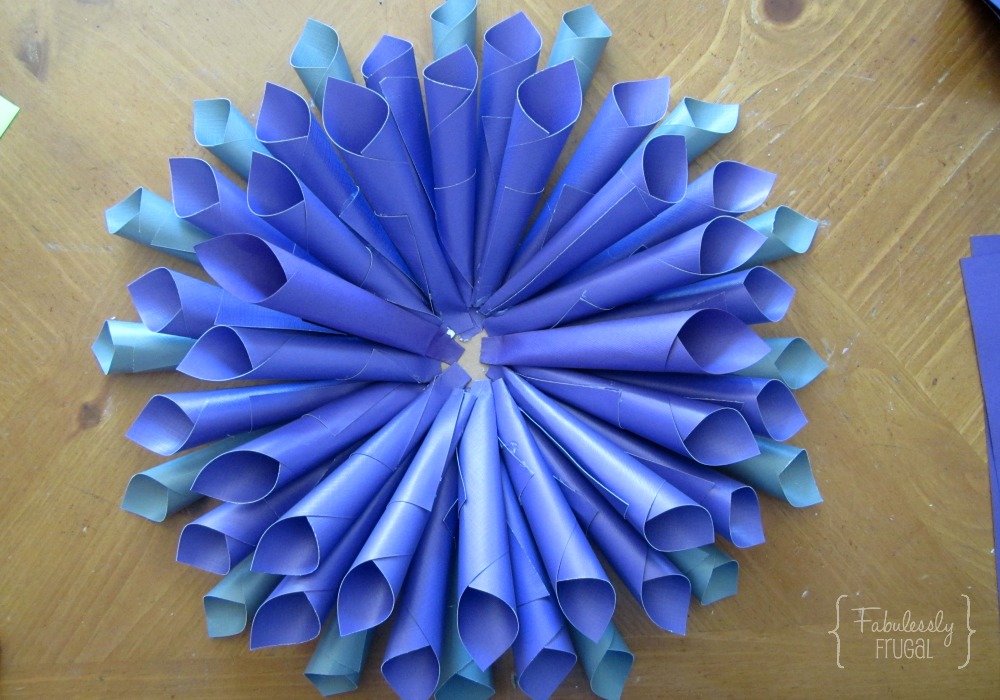 Next layer. Looking good! We’re almost there. I changed to a lighter purple as I got to the middle. It gives a more natural flower look. Once it’s completed, turn it over and glue down some ribbon to hang it with. And…
 Voila! Isn’t it pretty! I love it! The color changed considerably depending on the lighting, but it really is gray, purple, and light gray. One more important note: I made this flower with regular scrapbook paper (colored outside, white backside) and although I liked it, it did not match the beauty of this flower. I think finding solid paper that is the same color on both sides is a very important step if you want a natural and beautiful looking flower. Have fun making your own!
Trending Diys


Comments
Leave a Reply
More Related Diys


Trending DIY Projects
- DIY
- Recipes
- Deals
- Blog


Report a Problem
Please select the problem you are facing with this deal:
- Price Increased
- Price Decreased
- No longer available
- Expired
- Link doesn't work
- Suggestion
- Compliment
- Other
Add more details:
Thank you for your feedback. We really appreciate it.
Enter your email address if you would like
to receive a follow up.
Please Try Again
Thanks for providing the email address.
We will reach out to you as soon as possible.


Popular
Recommended
About Us

At Fabulessly Frugal, our goal is to help you live HEALTHY, WEALTHY, and WISE! My team and I work hard to bring you the best, online deals, clean eating, DIY's, freezer meal recipes, and more! I LOVE coaching and inspiring people to improve their health in my fitness challenge! You should also check out my favorite cleanse! Learn more about me and the rest of my team.

Copyright © 2008–2026
Fabulessly Frugal: A Coupon Blog Sharing Gift Ideas, Amazon Deals, Printable Coupons, DIY, How to Extreme Coupon, and Make Ahead Meals. All rights reserved
This is an amazing packaging idea for paper cone boxes. Thanks for the great sharing.