DIY Fall Candle Holders (Cheap & Easy to Make)
It is that time of year everyone! Fall is in the air, Halloween is over, and we are getting ready for Thanksgiving. I have been a little worried about ways to decorate my home for Thanksgiving and I decided to come up with a DIY made especially for gals like me who are wanting to add a little bit of a fall touch to their home without spending a load of cash! Decorations can be cute and affordable!
I came up with this idea to make DIY fall candle holders! Candles are super expensive! Especially if you are wanting one in an adorable holder. It is much more affordable to buy a plain jane candle and create your own holder. Just because you aren’t buying the expensive candles doesn’t mean that it has to look ugly! This DIY will allow you to use items already in your home to create the perfect Thanksgiving touch!
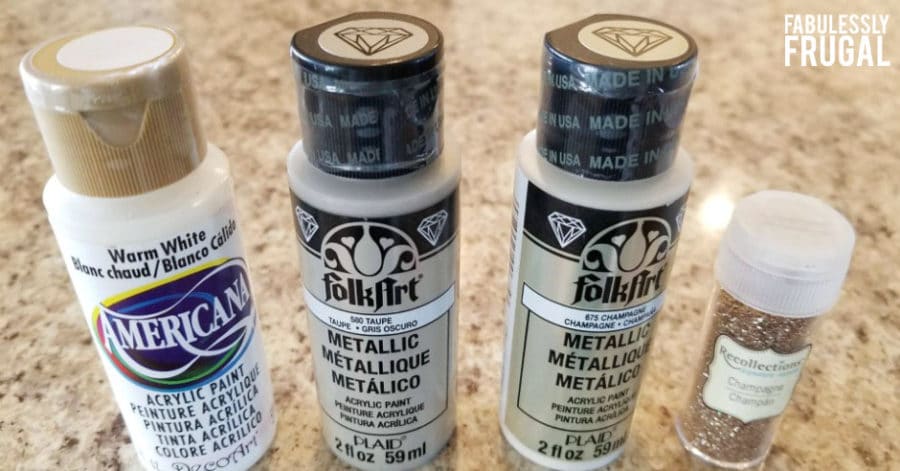
What You’ll Need:
Now, the beauty with this DIY is that you can substitute any of the items! This is a DIY that I want you to customize based on what you have on hand. This is just what I had in my cupboards so I wanted to show you how to literally make something out of nothing. You will be amazed at how amazing this turns out.
My little secret is that I spent less than 5 dollars on this DIY! That is right, LESS THAN 5 DOLLARS! I only had to buy two items:
- One small container of Folk Art Paint; and
- The sprig of berries
That totaled to about $4.50. Everything else that I used was already in my home. It took some thinking and some creativity, but I was able to find a way to make the perfect DIY.
How to Make DIY Fall Candle Holders
Step 1. Pick Your Container
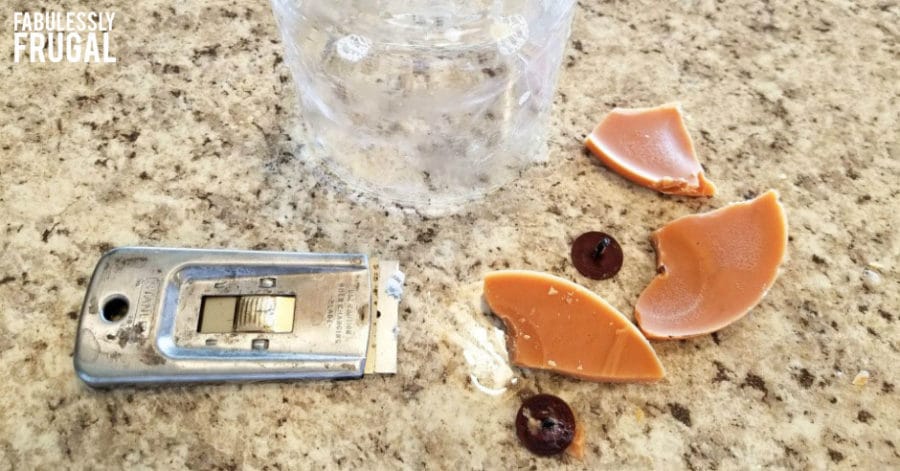
I used an old Bath and Body Works Candle container that I had lying around. There was a little bit of wax left at the bottom so I put it in the freezer for about 20 minutes, took it out, and chipped the remaining wax out with a knife. It all came out super easy!
If you do not have one of these candle containers, you can use any other candle container or a mason jar! There are mini mason jars that are perfect for creating candle holders in! Be creative! Look in your Tupperware cupboards and see what glass containers you have on hand.
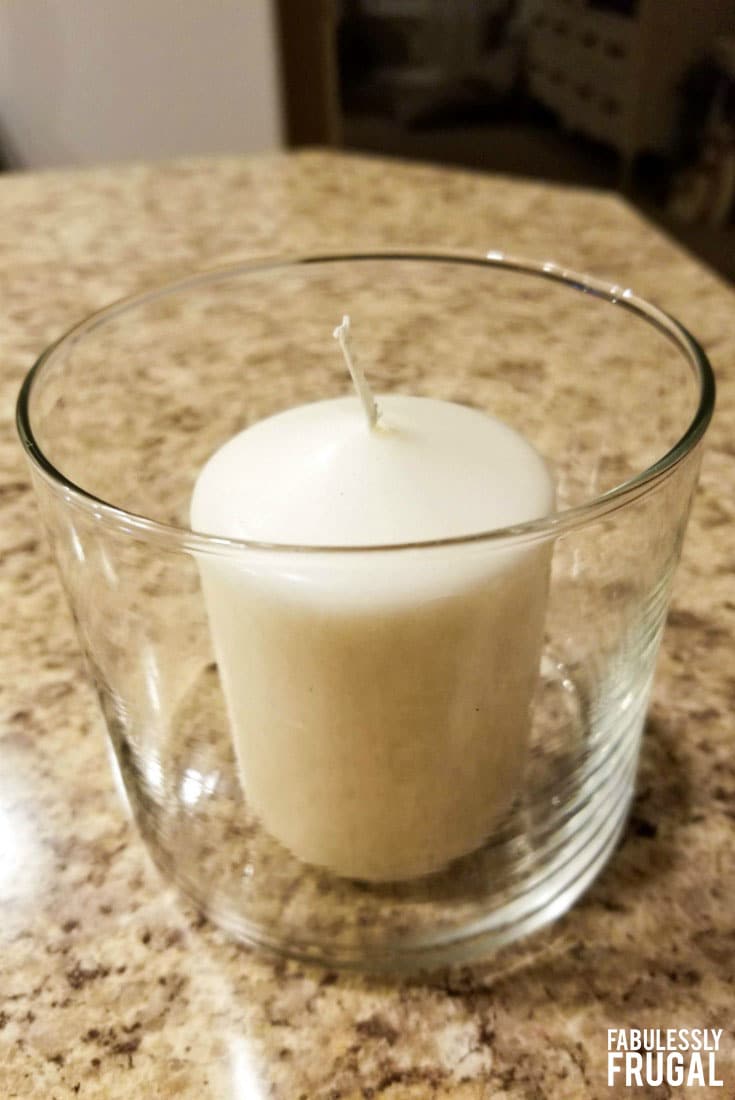
Step 2. Find Your Candle
I had a candle votive lying around that we used for an event a couple months back and I decided that would be my candle! I am sure you have a candle lying around your home somewhere. If not, you can go out and by a plain jane candle for less than $2. For example, the dollar store would be an awesome place to go to if you’re looking for a candle.
Once you pick your candle out, make sure that it fits nicely in your container like so:
Step 3. Decide on Paint
My home is very neutral and I had some paint on hand that I honestly had never opened. Sometimes I go through these phases where I say I am going to DIY everything and then never get around to it! Finally, I am able to crack open this paint and get some use out of it.
I also had some glitter stuffed away in the cupboard. I wanted to make sure that I could tie the candle holder in nicely with my kitchen table decor so I went out to buy the taupe metallic paint by Folk Art. I decided that these colors would look best in my home and with the fall look I was trying to go for.
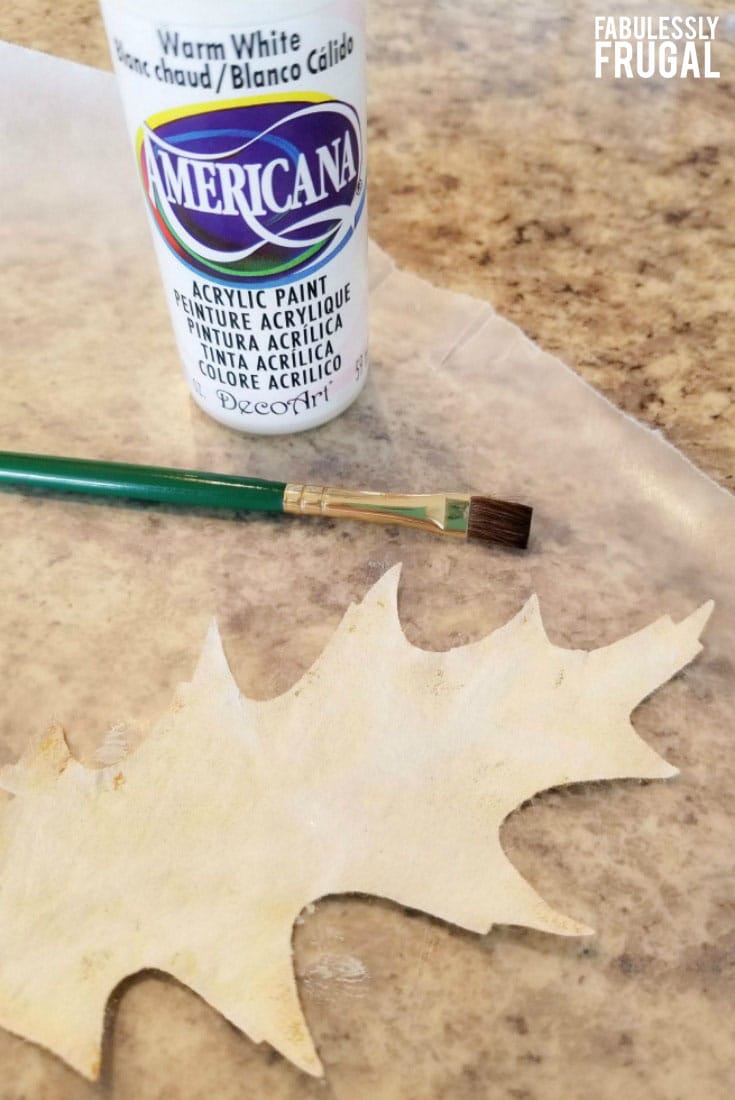
Step 4. Paint Leaf
I had a packet of orange colored paper leaves in the closet and I decided to paint it warm white to make it go better with the neutral look I have in my home. It only took a few coats and it was white and ready to go. Before the last layer dried, I added a few champagne colored sparkles to the tips of the leaf. I thought that would add a cute little touch! It looked awesome once I was done.
Be sure to just set the leaf aside and let it dry while you finish the rest of the container.
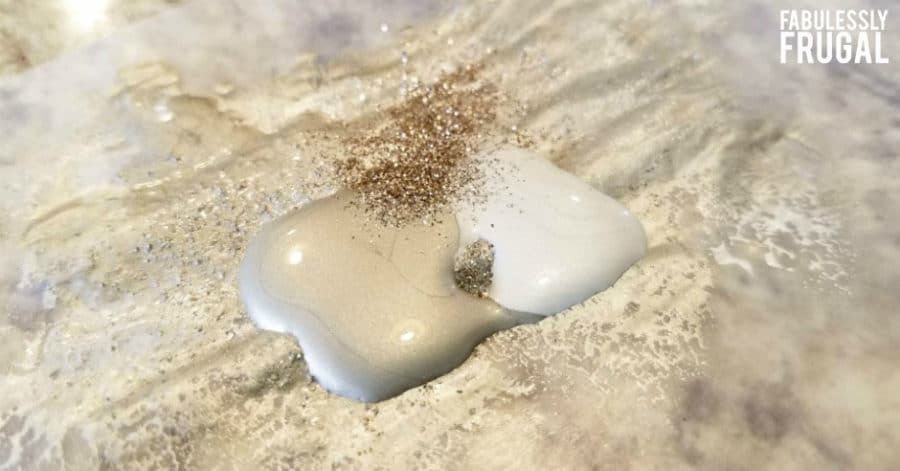
Step 5. Paint Container
Here I decided to combine the taupe and champagne metallic paints together and add a little glitter! I mixed these paints together and created the paint I wanted to use for the inside of the candle holder.
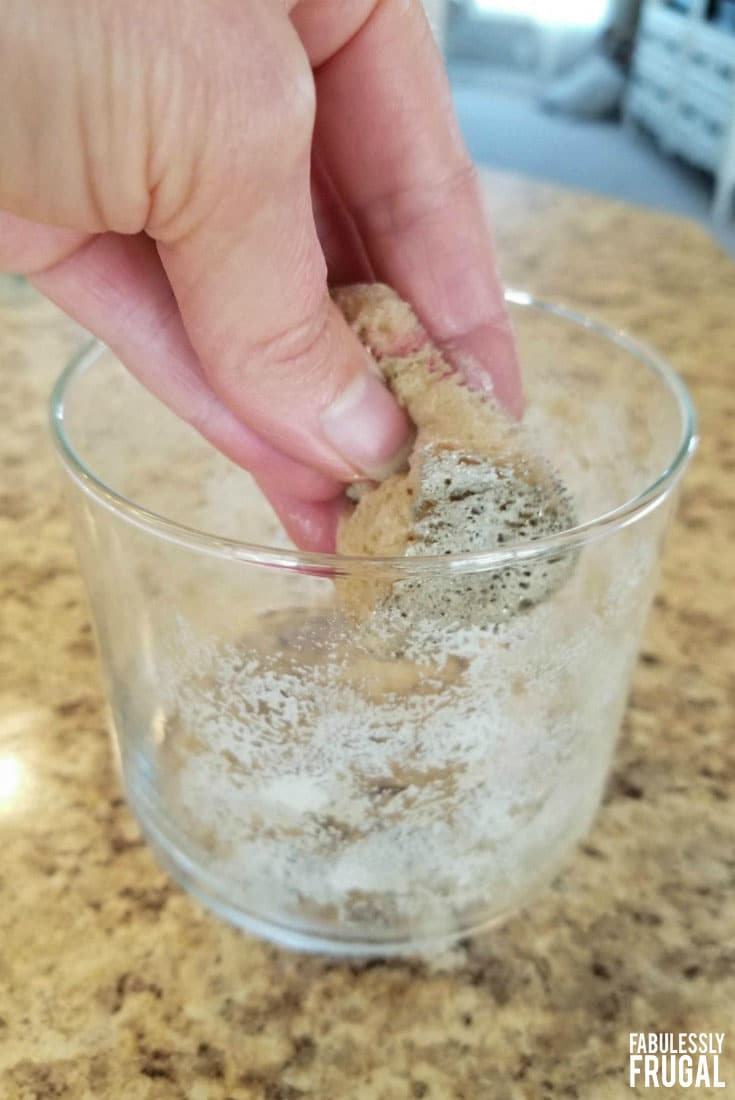
After that, I just took an old sponge that I found in my craft basket and dipped it in the paint mixture. I lightly dabbed the inside of the container to coat it with the paint. I chose to not paint too much, but you can coat the entire container if you wish. I wanted to just lightly dab it and make sure I could still see the light the candle was giving off from the outside.
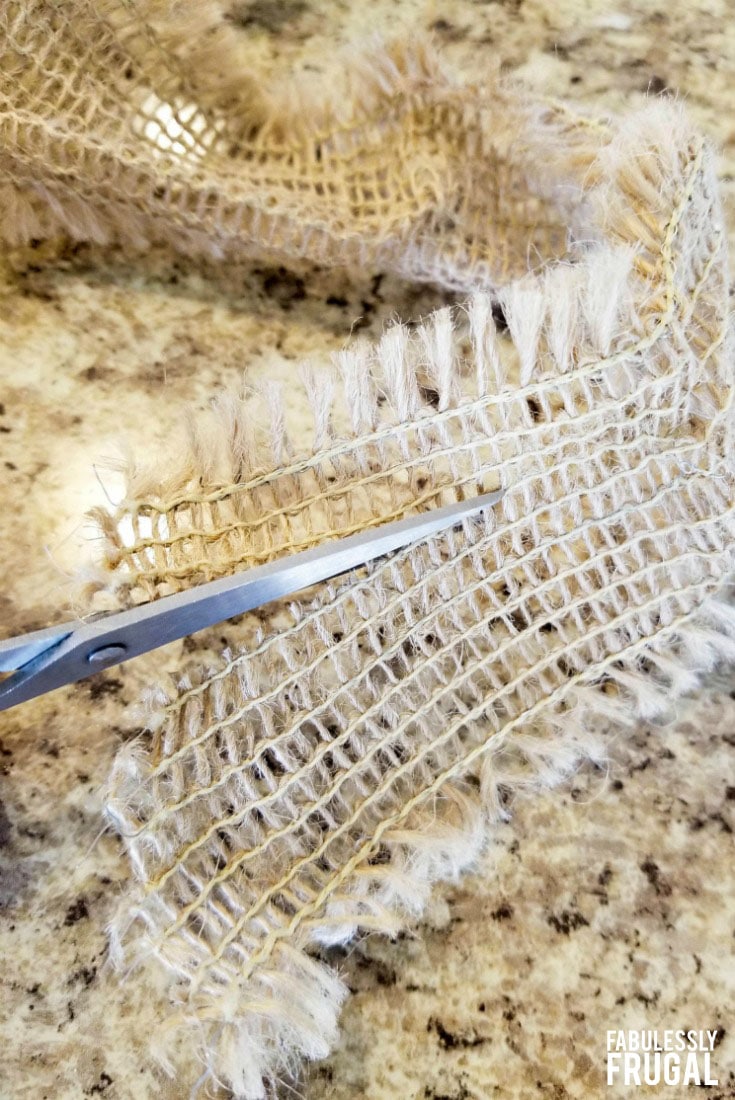
Step 6. Size Your Ribbon
I then found some burlap ribbon in my craft closet to tie around the container. The roll of ribbon that I had was a little too wide for my liking so I decided to just cut it in half. That made it the perfect size! I was super happy with how it looked after cutting it.
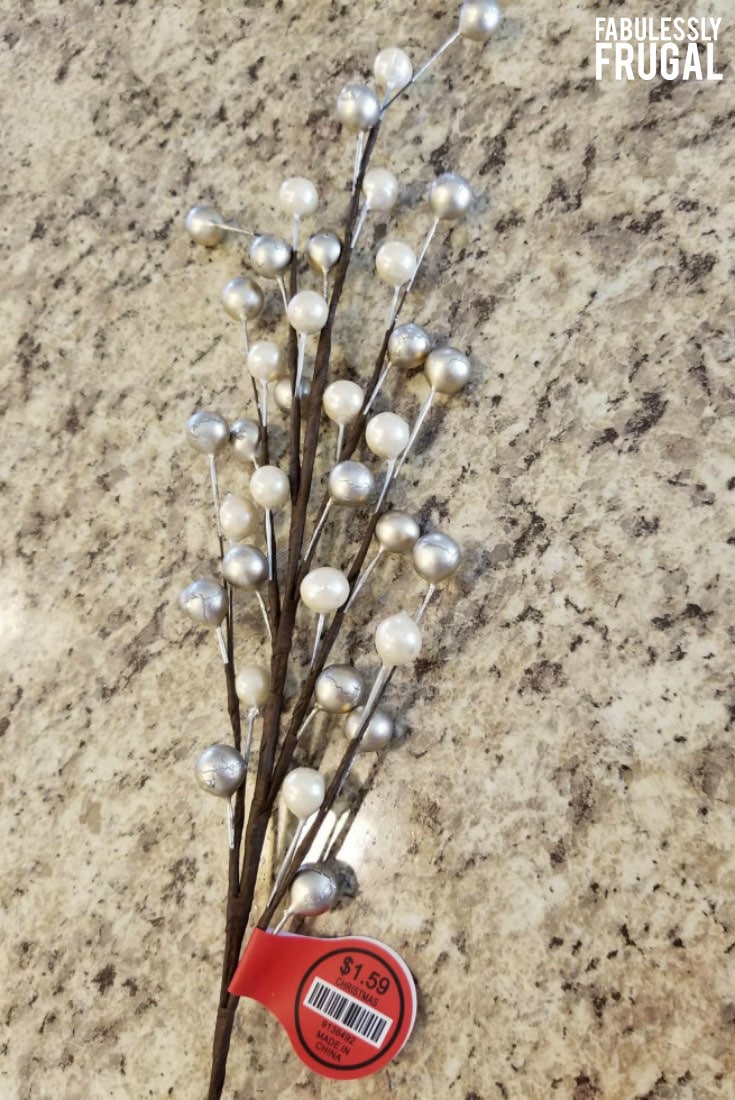
Step 7. Add Your Berries
I decided I wanted to add some berries to the outside to add a little more fall to the container. I unfortunately could not find mine, so I went to a local craft store and purchased these for just over $1. They matched my color tone perfectly, but if you have berries that do not match, you can totally just paint them to go well with your colors!
Here all you need to do is select a little piece of the sprig of berries, cut it off, and prepare to add it to the container.
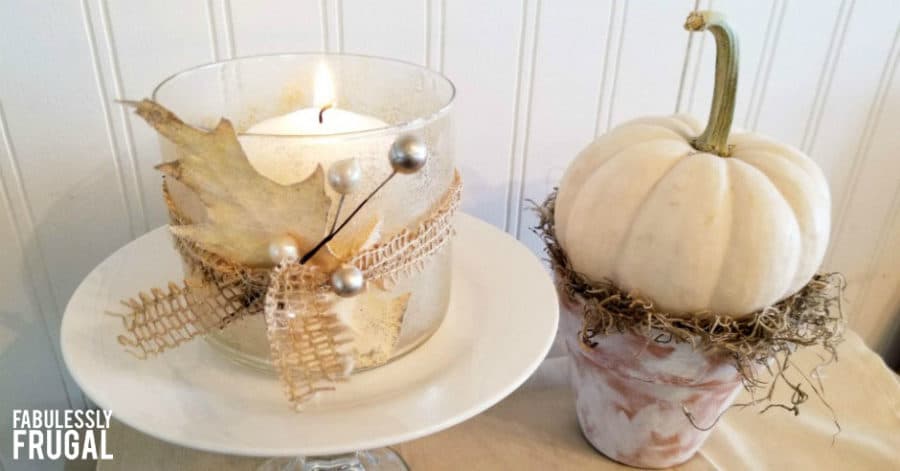
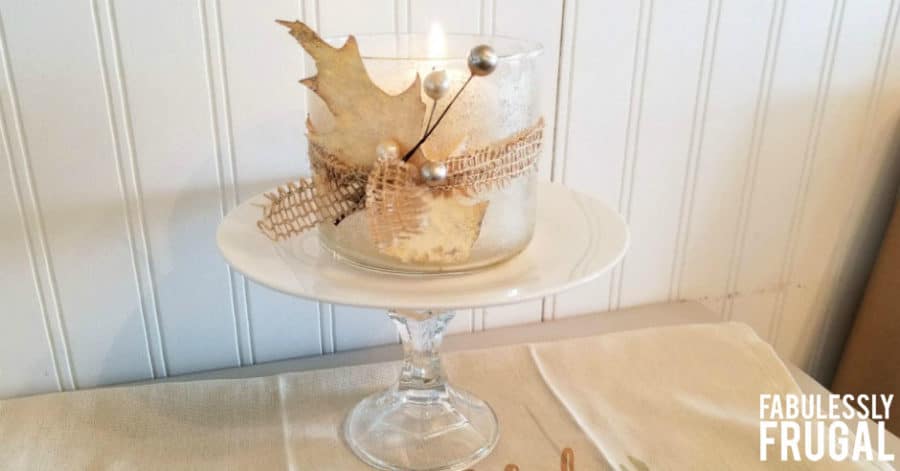
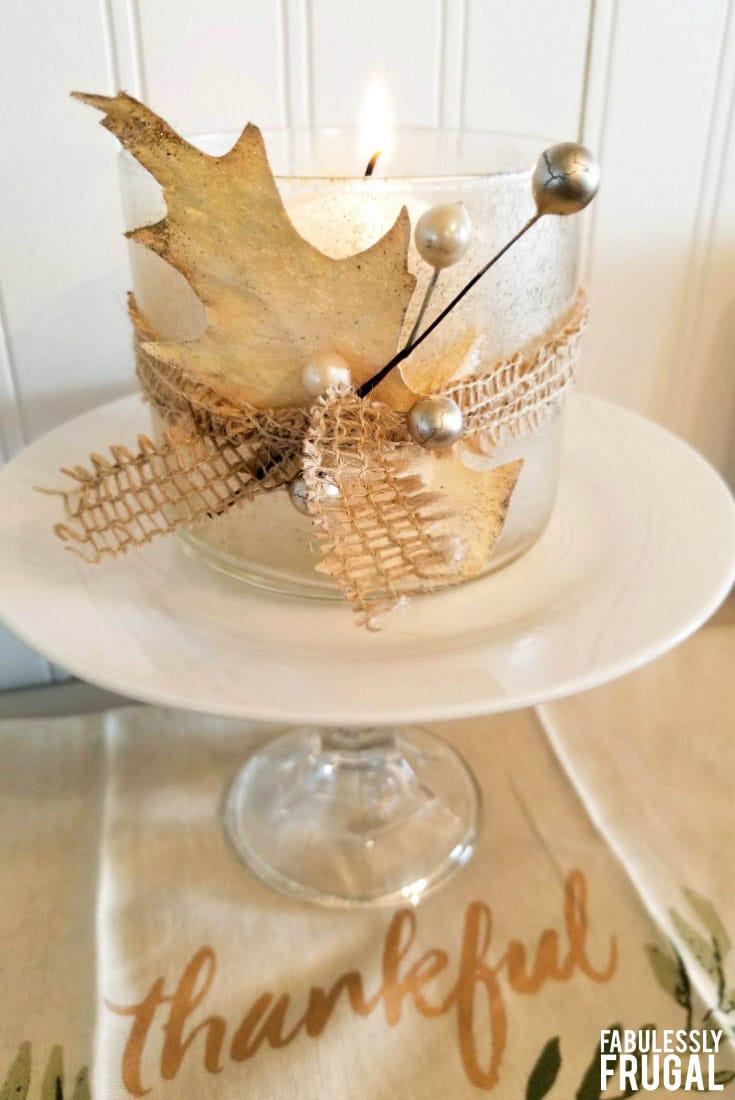
Step 8. All Finished
To finish, I made sure that the inside of the container was dry and I dropped the candle in. I then tied my burlap ribbon around the container and stuffed my leaf behind the ribbon. I then took my little sprig of berries and tucked it into the knot of the bow of the ribbon.
That was all! My project was completed and the candle holder was done! It was SO simple and I honestly couldn’t believe how well it turned out. It fits right in on my kitchen table!
Now It’s Your Turn
Now you need to go out and find the best way to make your own DIY fall candle holder! This project took me less than a half an hour and it turned out great. It is perfect to do during your lunch break, while the kids are napping, or whenever you get a spare moment! Happy DIYing!
Trending Diys


More Related Diys


Trending DIY Projects
- DIY
- Recipes
- Deals
- Blog


Report a Problem
Please select the problem you are facing with this deal:
- Price Increased
- Price Decreased
- No longer available
- Expired
- Link doesn't work
- Suggestion
- Compliment
- Other
Add more details:
Thank you for your feedback. We really appreciate it.
Enter your email address if you would like
to receive a follow up.
Please Try Again
Thanks for providing the email address.
We will reach out to you as soon as possible.


Popular
Recommended
About Us

At Fabulessly Frugal, our goal is to help you live HEALTHY, WEALTHY, and WISE! My team and I work hard to bring you the best, online deals, clean eating, DIY's, freezer meal recipes, and more! I LOVE coaching and inspiring people to improve their health in my fitness challenge! You should also check out my favorite cleanse! Learn more about me and the rest of my team.

Copyright © 2008–2026
Fabulessly Frugal: A Coupon Blog Sharing Gift Ideas, Amazon Deals, Printable Coupons, DIY, How to Extreme Coupon, and Make Ahead Meals. All rights reserved
Comments
Trackbacks
[…] the mood with DIY candle holders inspired by the season. Repurpose old glass jars by wrapping them in colorful fall leaves, or […]
[…] it comes to making candle rings, the type of candles you choose can greatly impact the overall look and feel of your creation. […]