
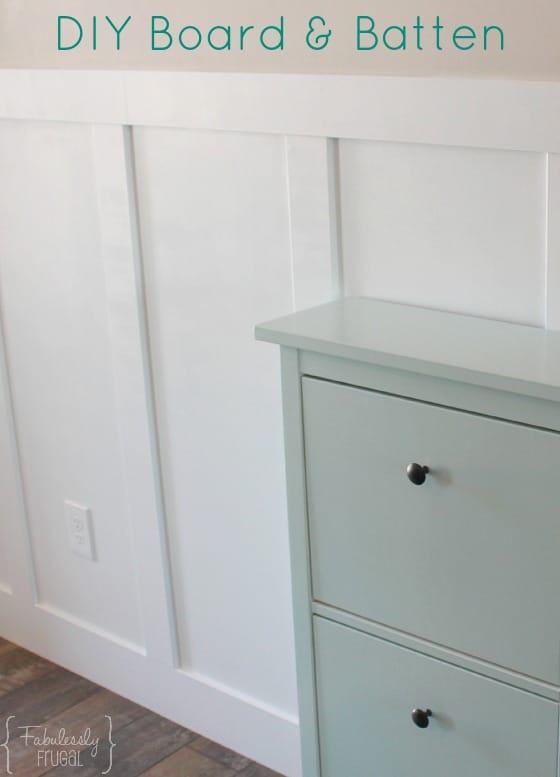
DIY Board and Batten Wainscoting
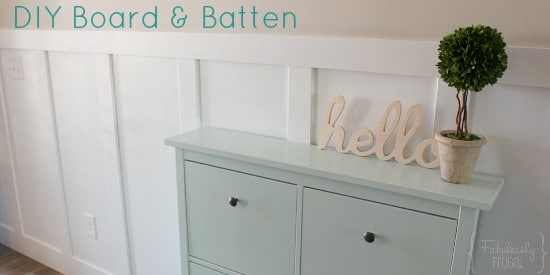
I recently decided I wanted to jazz up my entry. We came up with some good ideas, but my friend convinced me that I should do board and batten along my entry wall. Yes! I love having savvy, smart friends.
Board and batten wall paneling is almost universal! It can work with nearly any style home and it really brightens and freshens up a room. A nice upgrade to add value and beauty, yet simple enough that you can do it yourself in a weekend! Fabulous and frugal!
Here are the basic steps:
- Take measurements and plan it out.
- Get the wood and supplies.
- Attach the wood to the wall according to your plans.
- Fill in the nail holes and seams, let dry, then sand smooth.
- Caulk along the edges and corners of each board, and let dry.
- Wipe clean with damp cloth and let dry.
- Paint.
Plan It Out
The first step is deciding how you want it to look and getting out the measuring tape. You need to know how tall you want the paneling to be and how long the space is.
Decide on the height:
I’ve seen board and batten wainscoting go 1/3 of the way up the wall, 2/3 up, and all sorts of other different heights. I chose to have my paneling go above the light switches, which is pretty close to halfway up my wall. You can do whatever you think will look best in your space!
Decide on the panel size:
Carefully measure the wall that you are working on. You need to figure out how many panels will fit nicely in your space and how wide those panels will be. Especially if you are doing one accent wall, you want the board and batten to fit in the space evenly with equally-sized panels.
You might even want to plan the panels to work with your light switches and outlets, so you don’t have to interrupt one of the vertical slats, if possible. Don’t bother trying match up all of the vertical boards with studs, although it is awesome if they do. Not all studs are evenly spaced, and if you go around a corner with your paneling it will probably mess those measurements up anyway.
Another measurement you need for this is the width of the vertical wood pieces. A common width for those pieces is 3 1/2 inches, but you might want to go to a store and pick out the sizes of wood you plan to use so you know for sure.
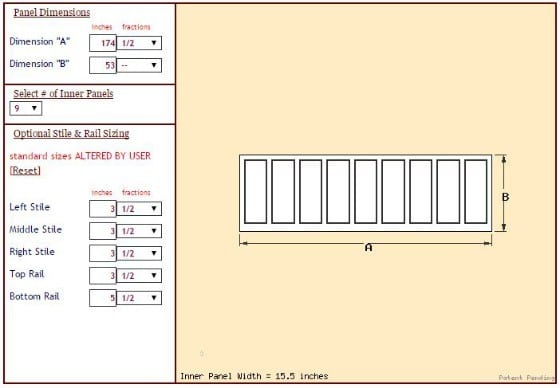
Planning it all out can get complicated with so many measurements! I found a very helpful tool though! You can use the Wainscoting America Design System for free. Here’s what my design looks like with the tool…
To recap, you need:
- The length of the wall,
- The desired height of the paneling; and
- The width of the vertical pieces, top rail, and bottom rail.
Then, you can mess around with the number of inner panels to find the look and fit that you want.
The key information from this tool is the “inner panel width” at the bottom. Now I know how far apart to space my vertical slats to get the right fit! It is a good idea to use masking tape or a few light pencil marks to get an even better idea of how it will look on your wall.
I found it very helpful to mark on the baseboard where the vertical boards would be placed and keep the marks there throughout the installation.
Evaluate your wall:
Is there a lot of texture? Can you sand the texture down to smooth it out? Do you mind seeing the wall texture in the inner panel area? I have a minimal texture, I think it is called Santa Fe.
I have seen several people just put the wood pieces directly on the wall and paint it all one color. Looks great! The texture is so light that it definitely works, and many people wouldn’t even notice. However, I really wanted to try having a smoother background. I tried sanding the texture down, but it wasn’t working well.
I decided to use a 1/8-inch panel of utility board or hardboard as the backing for my paneling. It is pretty inexpensive and comes in 4’x8′ panels. Just make sure there is a smooth side and that it is paintable. Feel free to skip the backing board though if you want to!
DIY Board and Batten Materials
- Primed MDF trim, cut to height for vertical pieces
- Top rail trim
- Bottom rail trim (if current baseboard doesn’t work)
- Finish nailer and compressor (can be rented) or hammer, nails, and nail set
- Liquid nails
- Miter saw (If you buy your wood at Home Depot or Lowes, they will make a certain number of cuts for you for free!)
- Spackling (I used Dap DryDex)
- Fine sandpaper
- Caulk-EZ (optional)
- Small, smooth paint roller
- Small paintbrush for cutting in edges (I used a 1-inch foam brush)
- Paintable caulk (I used white Dap Alex Fast Dry) and caulk gun (I have the Newborn Drip-Free Caulking Gun, but you can get cheaper ones for under $5.)
- Drop cloth
- Paint
Additional supplies, if you do a backing board:
- 1/8-inch hardboard/utility board for backing, one side primed
- Cardboard for outlet template
- Jigsaw
- Primer (Kilz or Zinsser brands are recommended)
- Staple gun
Get the wood:
Using primed MDF trim pieces is a great way to go! I had an employee at my local Home Depot cut the pieces to the correct measurements for me. (Some people buy a large panel and have it cut into strips for the pieces, but I think the trim is easy and looks great.)
One of the tricky parts about choosing the wood is the thickness of the pieces. You probably don’t want the vertical wood pieces to be thicker than the bottom or top rail. I think it is ideal for the vertical boards to be flush or recessed from the rails. Decide on how you want it to look and see if you can find wood that will work for it. If you use a backing board, you will definitely want the vertical pieces to be thinner than the rail pieces, so you can account for that 1/8 inch of the backing board.
All of the wood only cost me about $65, including the backing boards.
More supplies:
If you don’t have a finish nailer, you can rent one and a compressor from a local home improvement store. Or you can try nailing the trim to the wall by hand.
Because I had the store do most of the woodcuts for me, I only needed a jigsaw to cut out the outlet and light switch holes in my backing board. Then I used the miter saw to cut the top rail at a 45-degree angle to join the two top rail pieces with a nice seam, and also to cut one of those boards the perfect length for my wall. Start longer, then make small adjustments to get it to just the right length.
Have any of you tried Caulk-EZ before? I saw this video online about it and had to try it out for this project!
I couldn’t find it at my local home improvement stores, but it is available on Amazon here. Sure, it isn’t necessary, but it does make caulking a bit easier and helps it look like a professional job.
Caulk a thin bead, then spray the Caulk-EZ over it, glide your finger over the bead, removing excess along the way. Very nice. I don’t think I’ll ever want to caulk again without it! (The 1 oz can was not quite enough for my project, so you will probably want the 2.5 oz Caulk-EZ unless your project is smaller.)
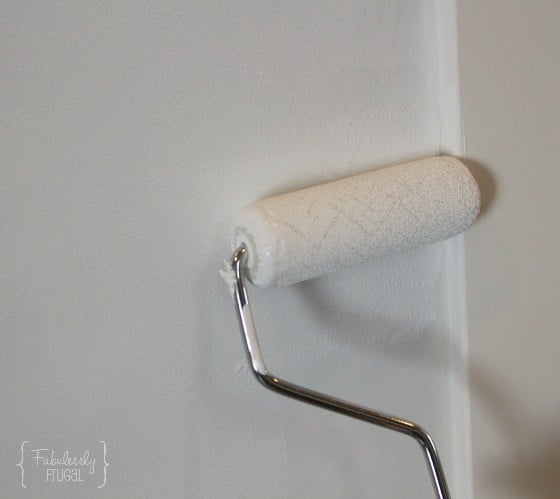
I used a small 4-inch foam roller for this project because that is what I had around. It ended up working pretty well because I was able to paint the sides of the vertical boards with the end of the roller.
Speaking of which, you will still need a small paintbrush to cut in some of the edges and corners. You should probably also put a drop cloth down to protect your floor from drips or spills.
How to Install DIY Board and Batten
Now you’ve got it all measured and planned out. The supplies have been acquired.
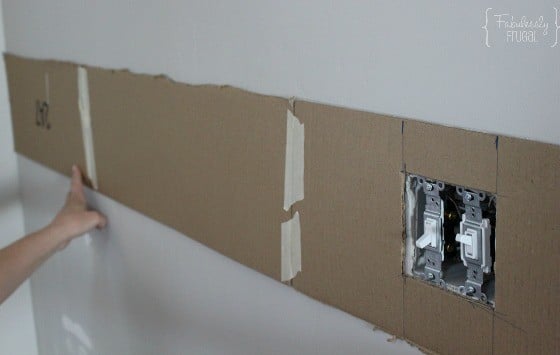
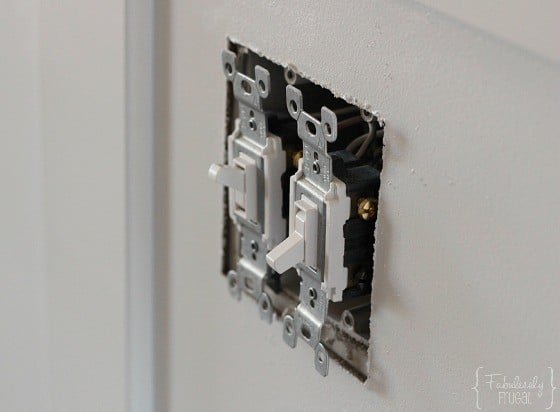
If you are installing a backing board, remove outlet and light switch covers. Next, use a piece of cardboard to make a template for the outlets and light switches.
 How to make the cardboard template:
 How to make the cardboard template:
- Place the cardboard on your baseboard right next to the outlet and draw lines on the cardboard marking the top and bottom of the outlet hole.
- Then use a straight edge to draw those lines across the cardboard.
- Measure the width of the outlet box with a ruler or measuring tape, and mark the measurement on the cardboard between the lines.
- Cut out a hole in the cardboard that is the same size as the outlet hole.
- Draw a simple straight line at the bottom of your cardboard template.
- Place the template over the actual outlet so the holes match up, and mark a line on the baseboard to match with the line on the bottom of the template.
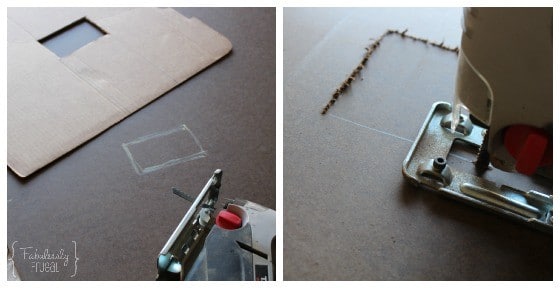
Cutting the hole(s) for your electrical outlets:
- Place the backing board onto the wall as it will be
- Draw a line on the board that matches up with the line on the baseboard
- Take the board down
- Put the template onto the board, matching the lines, and trace the hole in the template onto the board
- Then you can cut the hole into the board with a jigsaw
Do the same sort of thing for the light switches too, if needed.
The goal here is to be able to mark the holes onto the backing board in the correct places so it matches up to the holes on the wall.
The holes don’t need to be exact because the outlet covers will cover up a lot, but it is nice to be able to pull the switches out to rest them on top of the backing board once you are finished. Otherwise, you will want to use a spacer in order to keep the switch cover flush with the switches.
Prime the outward side of the backing board and let it dry. Then it is time to mount it on the wall.
I used a staple gun to attach the board to the wall, keeping the staples in line with where the vertical boards would soon be. You could also use liquid nails to attach the board, but it would definitely ruin your wall if you ever decided to take the board down.
By the way, I needed to use two utility boards for my wall and I planned for the seam between boards to be under one of the vertical boards.
Now it is time for the vertical boards. Since I marked the baseboard where the boards should go, installing them was pretty easy.
Applying the vertical boards:
- On the backside of the board, I applied liquid nails, then put the board in place on the wall.
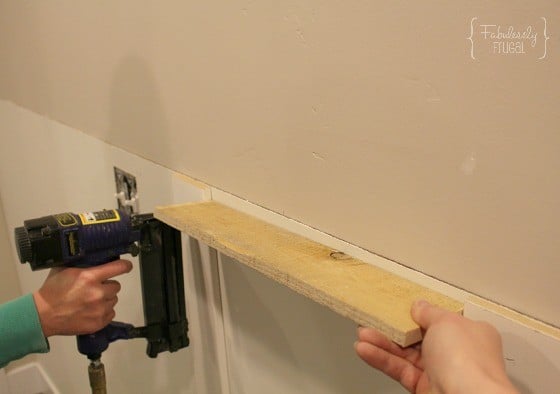
- I started at one end of the wall and used a scrap piece of wood to make a guide for keeping the boards level (Using a level is a great way to keep the boards straight too.) The scrap wood is cut to the inner panel width, 15.5 inches in my case.
- Place the guide at the bottom, between two vertical boards, nail the bottom of the vertical board in place, then move the guide up to the top and level the board before nailing the top in place.
- We also placed a nail in the middle area of each board.
I tried to hit studs where I could! In fact, I used a stud finder and put pencil marks on the wall above the board where the studs should be.
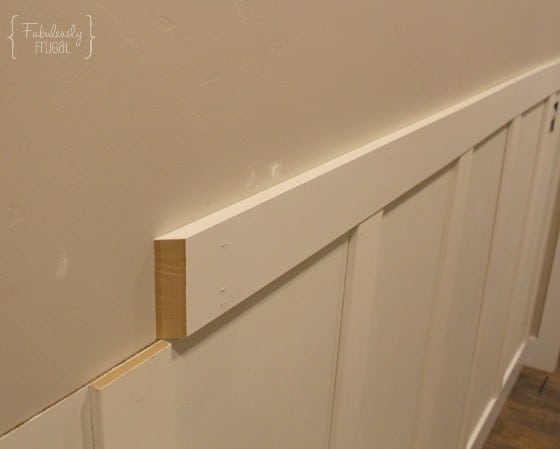
Now for the top rail:
Since my wall is longer than the board, I needed to use two boards for my top rail. To get a nice seam, I cut one end of both of the top rail boards at a 45-degree angle, then put those ends together up on the wall.
If you need to go around corners, you will want to use a miter saw to the cut the ends of the top rail boards at angles too. Try to hit all of the studs when you nail the top rail to the wall.
Assembly Complete!
This part of it only took me a few hours with the help of a friend.
Now you can use spackling to fill the nail holes and seams. Once dry, sand it smooth. Wipe off the dust from sanding and you can start caulking.
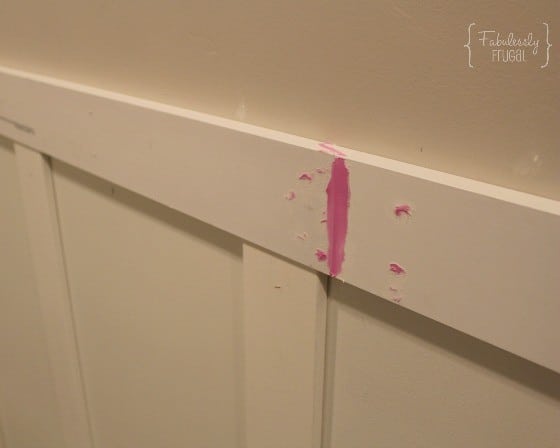
Caulking is a bit of a pain, but the Caulk-EZ really did make it a little easier. Your finger glides a bit easier over the caulk and the bead is nice and precise, even for an amateur like me. I tried to get before and after pictures of one part with Caulk-EZ and one part without…

I did a thin bead of caulk over the bottom part of both sections. You can see the bead is pretty similar. Then I used my finger and Caulk-EZ on the left section, and my finger and no Caulk-EZ on the right.
I think you can tell from the pictures that the caulk on the left is a much smaller, cleaner bead. The one on the right is a bit more soft-looking and it spread a bit. I like Caulk-EZ. It isn’t necessary, but it is nice!
The final step:
Once the caulk is dry, you can start painting! Plan to do at least two coats of paint and you may need to paint your baseboard too. Once it is done, you will probably want to touch-up the paint on the wall along the edges of wainscoting too.
Let it dry, replace the outlet and switch covers, and enjoy your fresh, bright space!
I watched videos and read some tutorials, but I found this video particularly helpful.
Trending Diys


More Related Diys


Trending DIY Projects
- DIY
- Recipes
- Deals
- Blog


Report a Problem
Please select the problem you are facing with this deal:
- Price Increased
- Price Decreased
- No longer available
- Expired
- Link doesn't work
- Suggestion
- Compliment
- Other
Add more details:
Thank you for your feedback. We really appreciate it.
Enter your email address if you would like to receive a follow up.
Please Try Again
Thanks for providing the email address.
We will reach out to you as soon as possible.


Popular
Recommended
About Us

At Fabulessly Frugal, our goal is to help you live HEALTHY, WEALTHY, and WISE! My team and I work hard to bring you the best, online deals, clean eating, DIY's, freezer meal recipes, and more! I LOVE coaching and inspiring people to improve their health in my fitness challenge! You should also check out my favorite cleanse! Learn more about me and the rest of my team.


Copyright © 2008–2026
Fabulessly Frugal: A Coupon Blog Sharing Gift Ideas, Amazon Deals, Printable Coupons, DIY, How to Extreme Coupon, and Make Ahead Meals. All rights reserved