DIY Halloween Frame & Free Halloween Printable
Dollar Store Halloween Frame (Easy DIY with Free Printable)

Cute $1 Halloween Picture Frame Tutorial (Free Printable)
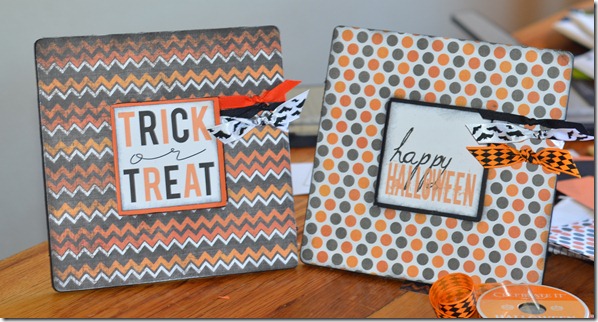
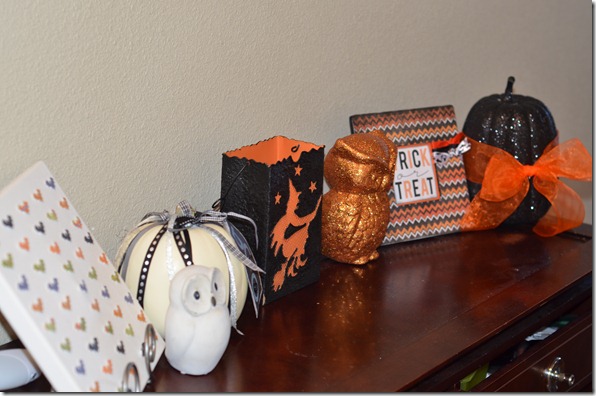
I needed one last touch for my entryway table, so I grabbed a couple of my favorite dollar-store frames and made these cute Halloween picture frames in under 30 minutes (including drying time!). They’re quick, budget-friendly, and a perfect kid helper project.
🎃 Free Halloween Printable!
Grab the exact Halloween artwork I used for these $1 frames! Just print on white cardstock and pop it into your finished frame — instant festive décor.
👉 Download the Free Printable PDF
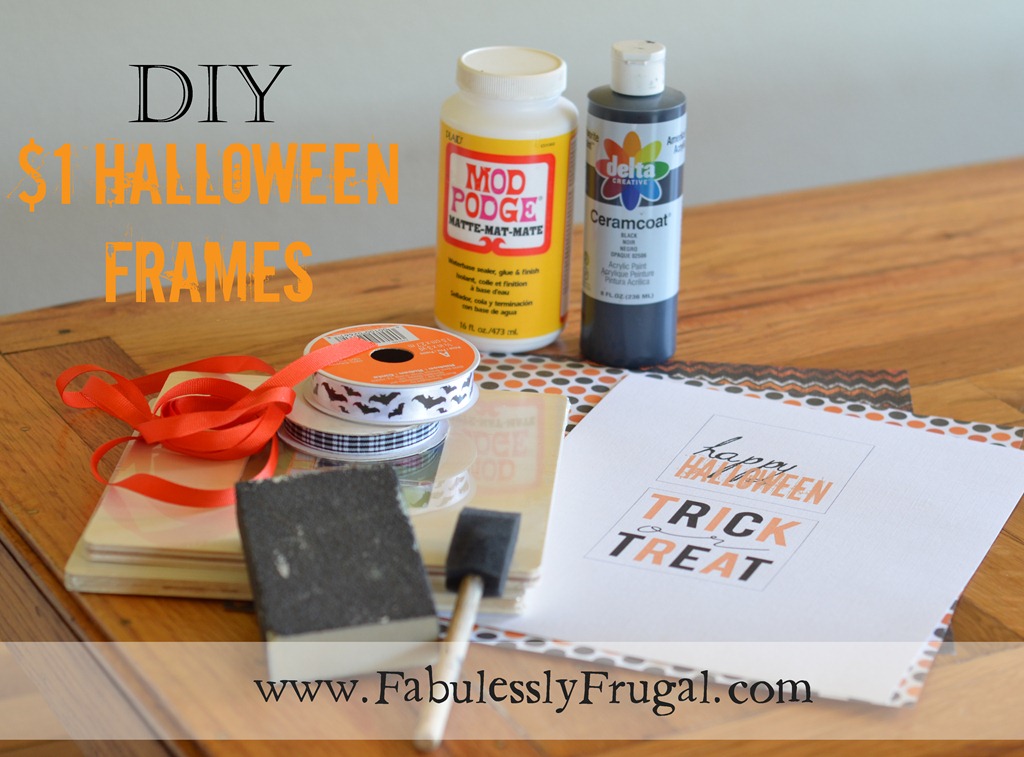
Supplies
- Square $1 frames (Dollar store, Walmart, or Michaels)
- Black paint
- Mod Podge (matte or gloss)
- Decorative Halloween paper (I used leftovers from our DIY Halloween banner)
- Black or orange cardstock
- Ribbon
- Sanding sponge or large emery board
- Craft knife (X-Acto) and cutting mat
Step-by-Step Instructions
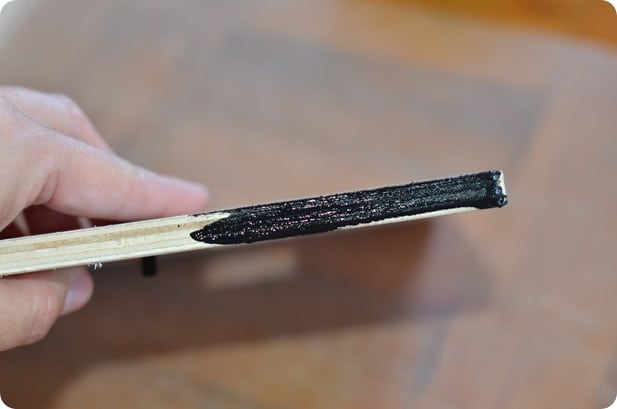
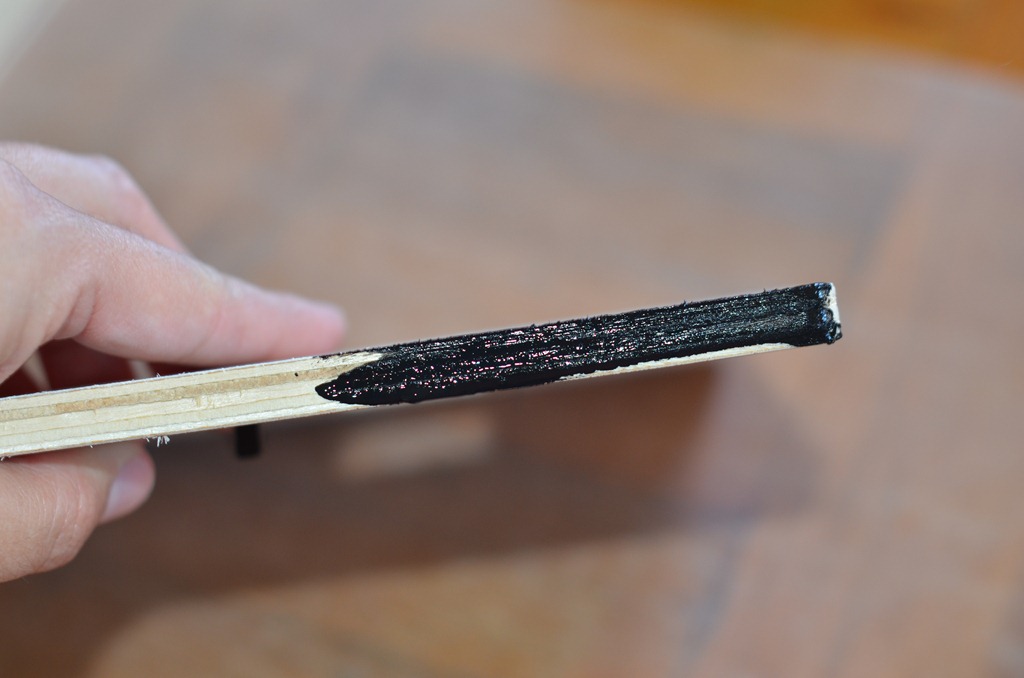
- Paint the frame edges. Paint the outside edges, inside edges, and the back of the frame. Let dry.
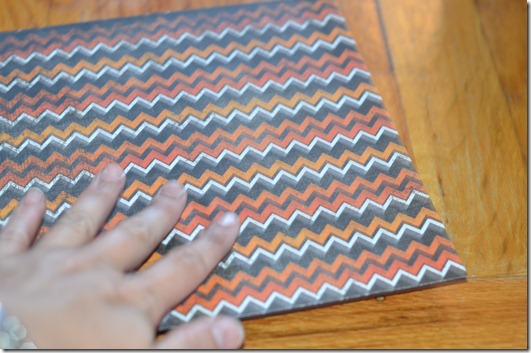
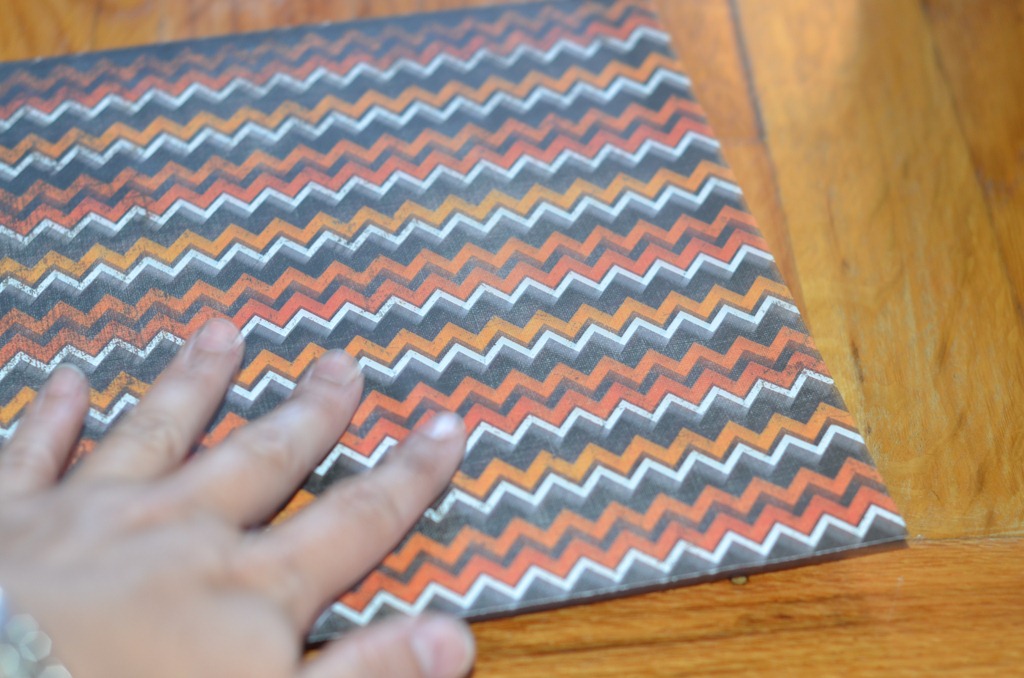
- Apply paper with Mod Podge. Brush a thin coat of Mod Podge over the frame and place the decorative paper. Smooth out bubbles.
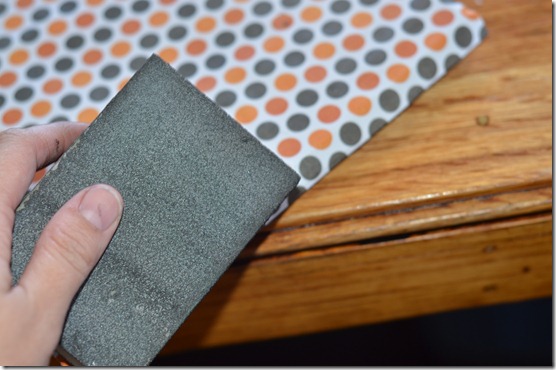
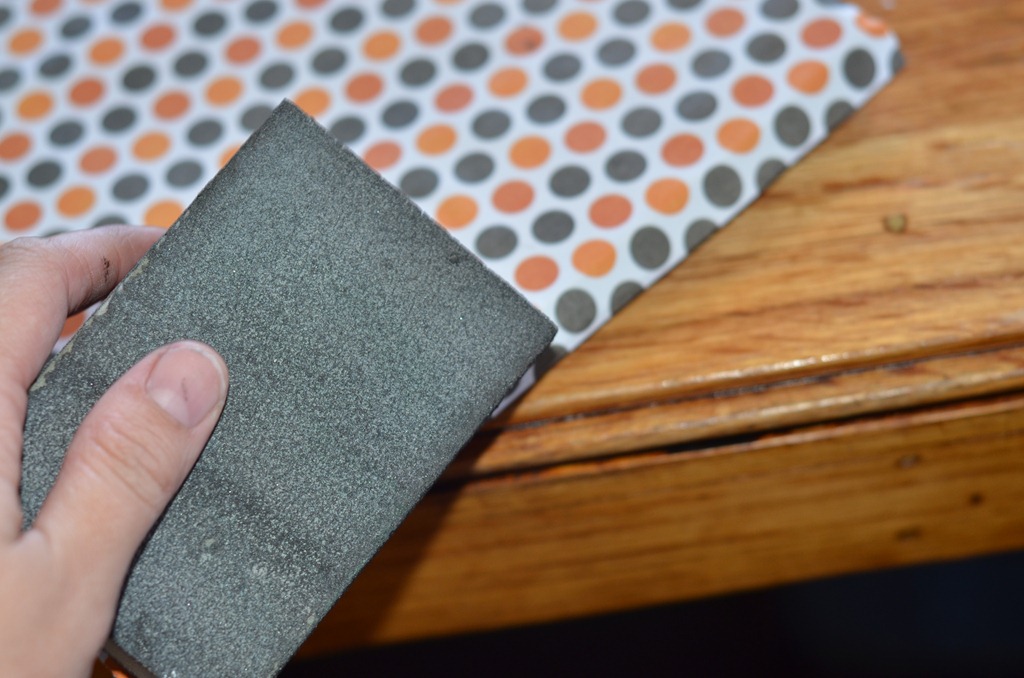
- Sand off extra paper. After drying, use a sanding sponge to remove the excess paper by sanding downward only.
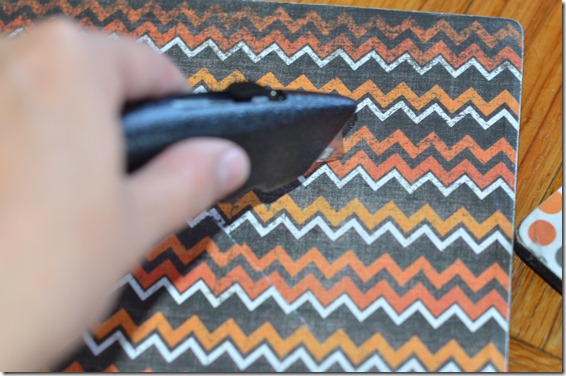
- Cut out the window. From the back, cut an X through the paper. Sand the inner edges downward to clean them up.
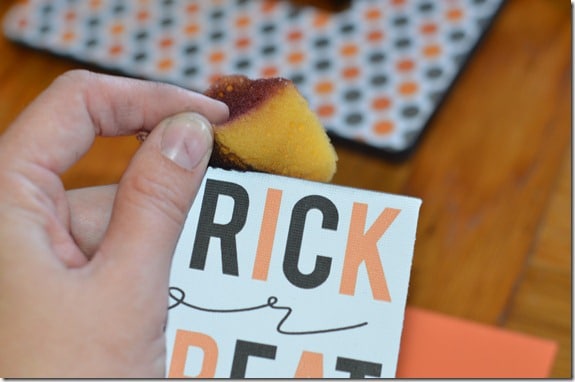
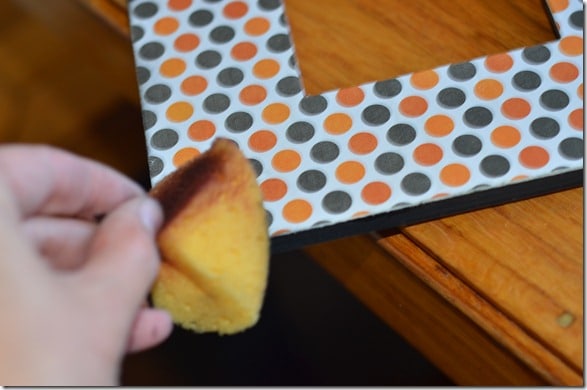
- Add your printable art. Mount your printed image on cardstock if needed and ink the edges for depth.
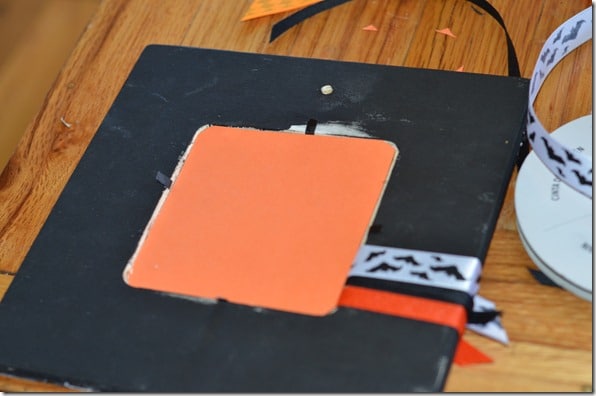
- Tie ribbon and finish. Add 1–3 ribbons with a square knot. Odd numbers look best. Pop in your art and enjoy!
Haven’t downloaded the printable yet?
Click here to grab your free Halloween printable PDF and make as many frames as you’d like for friends or teachers!
Tips & Variations
- Paper weight: 65–80 lb scrapbook paper works best for smooth adhesion.
- Seal it: Add a final Mod Podge coat for extra durability.
- Personalize: Add stickers or stencil “BOO!” on the corner for fun.
- Learn decoupage basics: Check Plaid’s Mod Podge guide for expert tips.
DIY Halloween Frame FAQ
Can I use other shapes of frames?
Yes! Rectangular or oval frames work too—just cut your paper slightly larger and trim or sand to fit once dry.
What if my paper wrinkles?
Apply Mod Podge in thin, even layers. Smooth with a card or brayer from the center outward while the glue is still wet.
How long should I let the Mod Podge dry?
Allow 15–20 minutes between layers. If you’re sealing the top, let the first coat dry completely before applying another.
More Halloween DIYs & Ideas
- 🎃 Visit our Halloween Hub for more ideas
- 20 Kid-Friendly DIY Halloween Decorations
- DIY Halloween Banner Tutorial

Trending Diys


Comments
Leave a Reply
More Related Diys


Trending DIY Projects
- DIY
- Recipes
- Deals
- Blog


Report a Problem
Please select the problem you are facing with this deal:
- Price Increased
- Price Decreased
- No longer available
- Expired
- Link doesn't work
- Suggestion
- Compliment
- Other
Add more details:
Thank you for your feedback. We really appreciate it.
Enter your email address if you would like
to receive a follow up.
Please Try Again
Thanks for providing the email address.
We will reach out to you as soon as possible.


Popular
Recommended
About Us

At Fabulessly Frugal, our goal is to help you live HEALTHY, WEALTHY, and WISE! My team and I work hard to bring you the best, online deals, clean eating, DIY's, freezer meal recipes, and more! I LOVE coaching and inspiring people to improve their health in my fitness challenge! You should also check out my favorite cleanse! Learn more about me and the rest of my team.

Copyright © 2008–2026
Fabulessly Frugal: A Coupon Blog Sharing Gift Ideas, Amazon Deals, Printable Coupons, DIY, How to Extreme Coupon, and Make Ahead Meals. All rights reserved
Very cute! Love how you remove the excess paper, I’ll remember that one for sure!!
So cute and looks easy enough for me too! Thanks for your nice clear directions.
Never would’ve thought of this! Love it! I’ve been wondering what to do with some old frames. I hate throwing things out, and sending them to a thrift store is no good, because I just KNEW I’d eventually figure out what to do with them. 😉