
How to Make a Love String Art Sign (Tutorial)
Valentine’s Day Love String Art Photo Tutorial
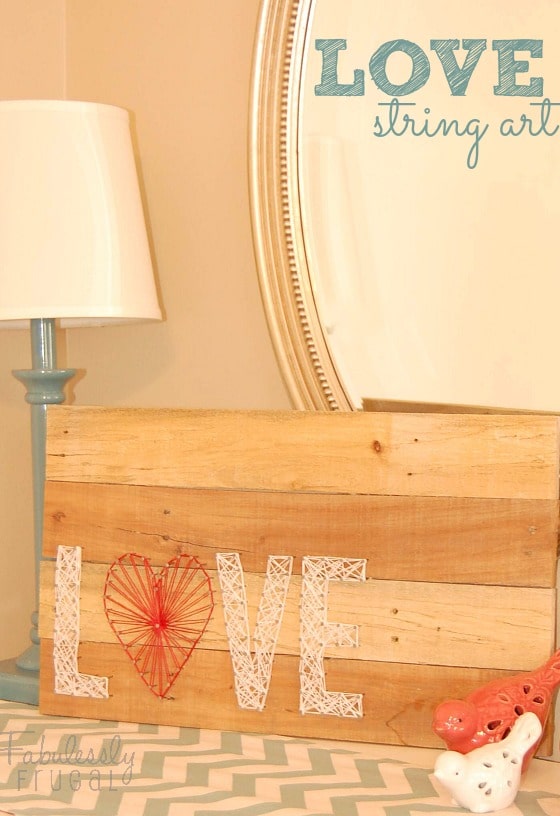
This pallet board string art love sign is super cheap to make and will be a fun addition to your Valentine’s Day decor collection. It is such a unique project that I can guarantee you won’t see something exactly like yours anywhere else!
For this tutorial I’ll be going through the exact steps I took to make my pallet sign, and I’ll also give you a love string art template so you can easily make your own! Keep in mind that you don’t have to follow exactly what I do, this sign can be customized however you like!
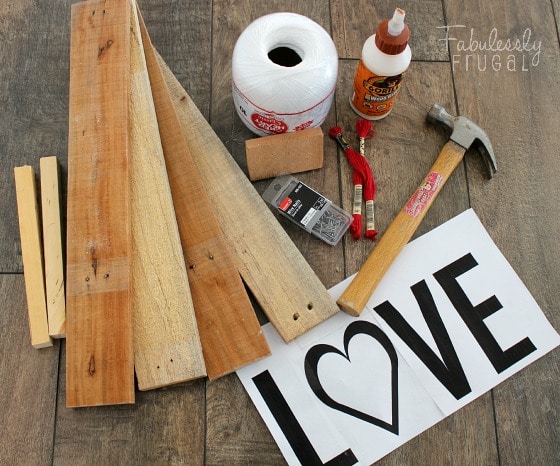
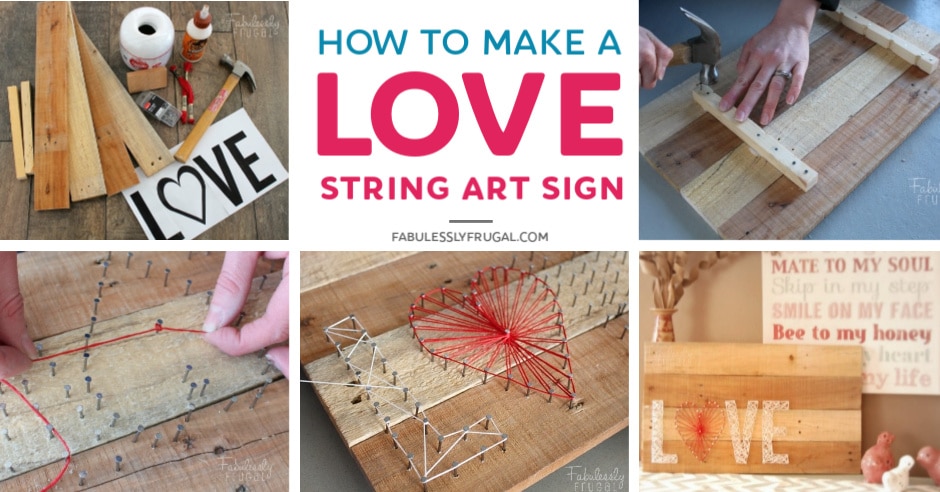
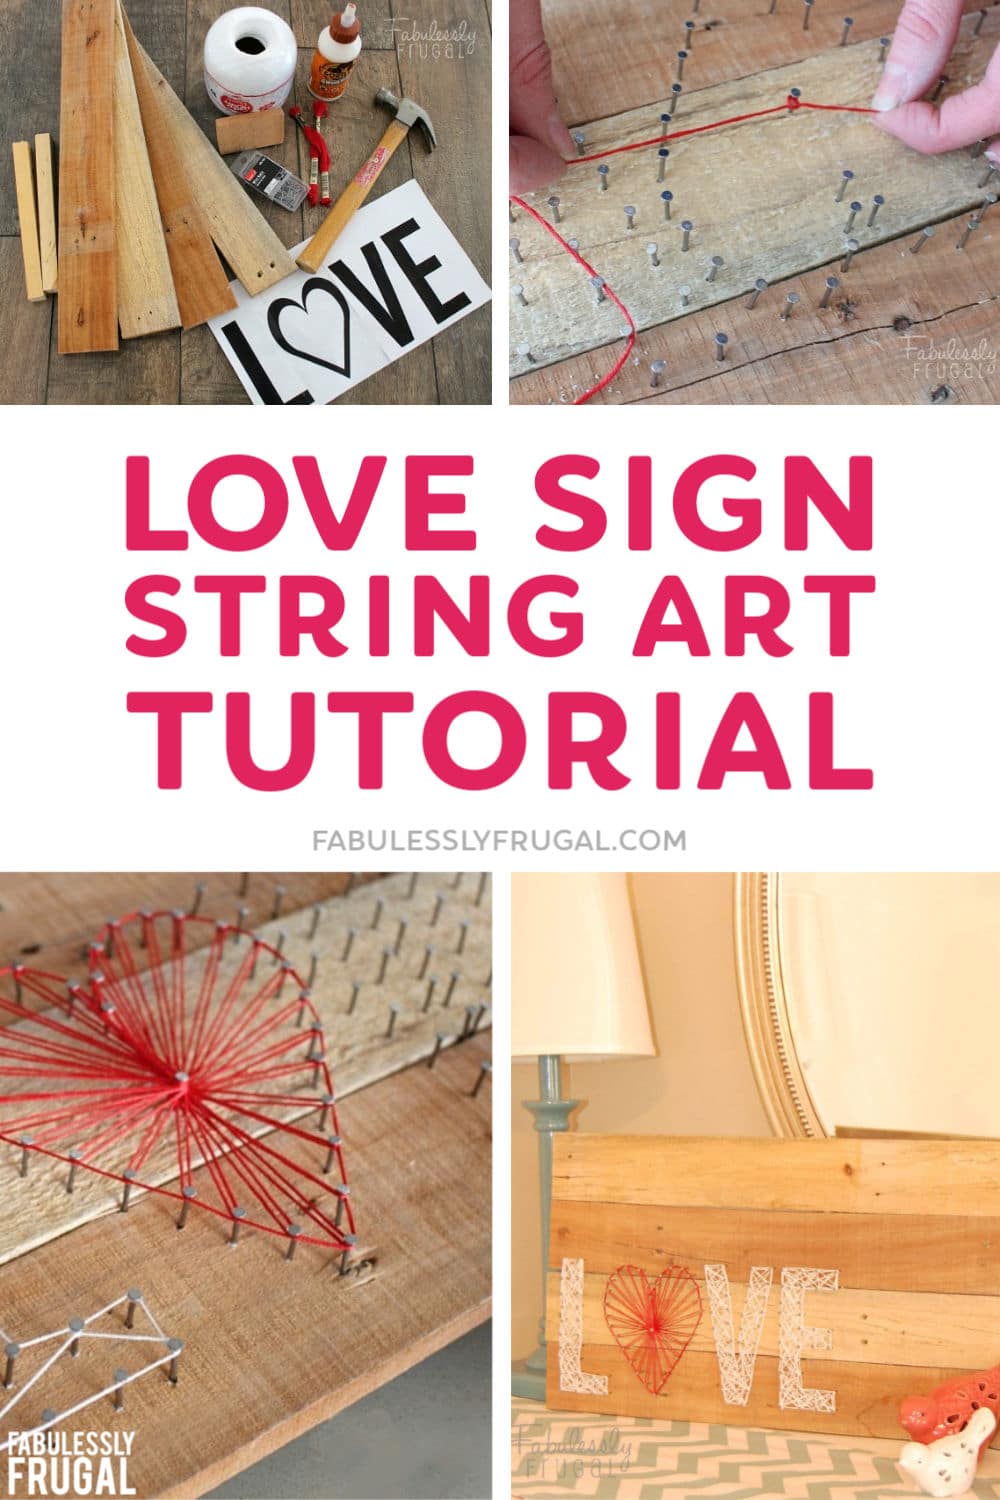
For this project you will need:
- Pallet wood or other similar boards
- Nails (1-1.5″, depending on the thickness of your boards)
- Embroidery thread
- Wood glue
- Love string art template (You can make your own and customize it however you like, or print the one I made here in landscape orientation and uncheck “fit to page”. The letters are 5.5 inches tall.)
- Hammer
- Drill with 1/16″ bit (optional)
Note: I used about 1 bundle of the red thread for the heart and I’m estimating that I used about 3 bundles worth of white thread for the letters.
Step 1.
To start off, I took two pallet boards and cut them in half, leaving me with four boards that are about 19 inches long. I chose which side I want to be the “front” of each board, and then write “back” on each of the backsides. If I don’t mark them, I could do something silly like accidentally drilling through the good side of the board! Speaking from experience here!!
Step 2.
Lay the four boards with the BACK side facing up. Align the boards as you will want the finished product to look. I prefer my edges to be perfectly lined up, but some like it when they are a little “messy” and uneven.
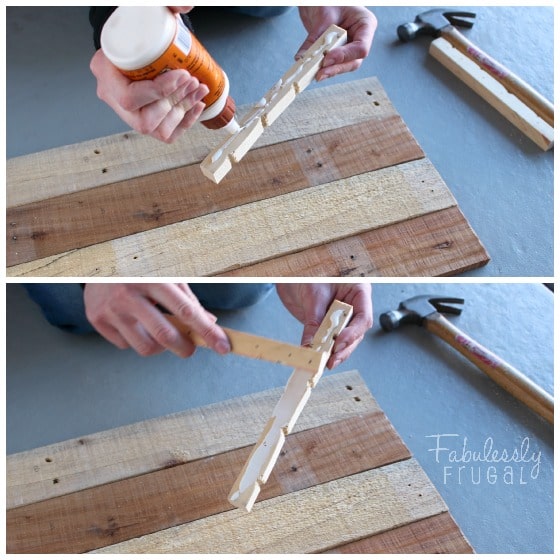
Use any scrap wood you have on hand to attach the boards together. Sometimes I take a pallet board and cut it in half lengthwise and use that to attach the boards together on the back. Another option is to use flat metal brackets or mending plates to secure the boards together.
Apply a good amount of wood glue to the small scrap piece, and spread the glue out with whatever you have on hand. I usually use my finger or another small scrap of wood.
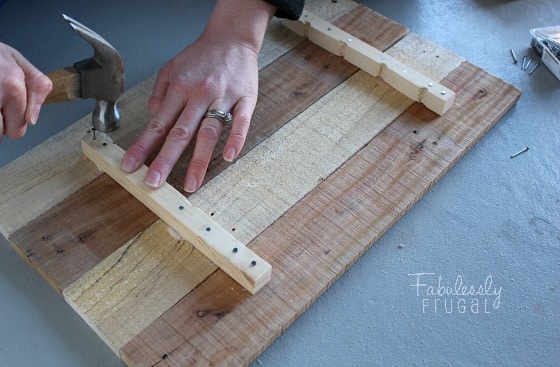
Step 3.
Lay the small wood piece glue-side-down onto the back of your pallet boards. Then, nail the boards together. I find that using two nails per pallet board works great. If there’s only one nail in each pallet board, it seems to be less stable.
Note: Make sure you choose nails (or screws) that are long enough to go through the scrap wood and into the boards but won’t poke through the front of your sign. In this case, 1 ¼” nails were perfect.
If you choose to stain the front side of your boards, now is the time to do it. Just apply stain with a brush or clean rag, and then wipe off the excess with a clean rag. Allow the glue (and stain, if doing) to dry for about an hour or so.
Step 4.
The next step is to find the middle of your template heart by lining up the top and bottom of the heart and making a fold, then line up the left side with the right side and make a fold. You will then see your center point where you will later place one nail.
Attach your paper template to your pallets with tape, just to hold it in place. I chose to place mine in the left corner of the wood.
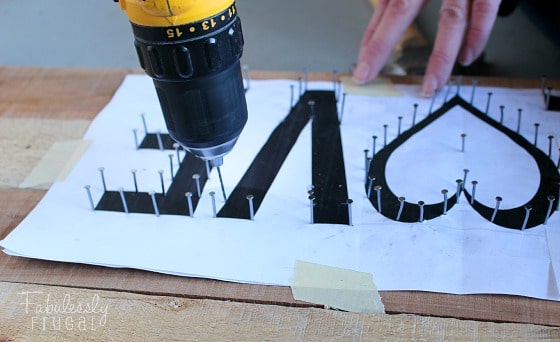
Now, it’s time to get hammering! Place your nails on the outer edge of all the letters, about ½-¾” apart. Leave about 1/2″ of the nail remaining on top of the wood. You can mark the paper using a ruler to get precise spacing, or just eyeball it as I did.
About halfway through the project, I realized I had some stubborn pallet wood on my hands! I decided it may be easier to pre-drill holes where the nails would be placed, to help the nails go in easier. This worked great. Just be SURE you choose a drill bit that is smaller than the nails you are using. I used a 1/16” drill bit, and 17 gauge nails. Next time I will use nails that are slightly thicker than the 17 gauge because a few of the nails were a little loose.
Once all the nails are in place, I tap the sides of some nails with the hammer to straighten them out and ensure the lines look straight. Now you can gently rip away the paper template.
Step 5.
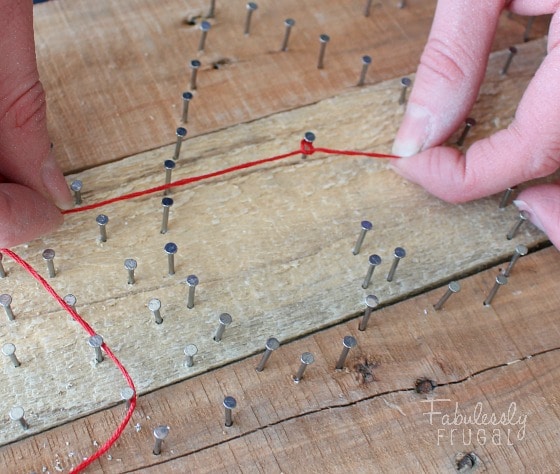
Find a corner starting point (or the center of the heart) and tightly tie the string to the nail. If you want to be certain your string will not come untied, put a little dab of Fray Check or clear nail polish on the knot.
Step 6.
It’s now time to wrap your string around the outline of the letter or shape. Twist the string around the head of each nail, going along the outline. You can go around a second time if you want a darker outline.
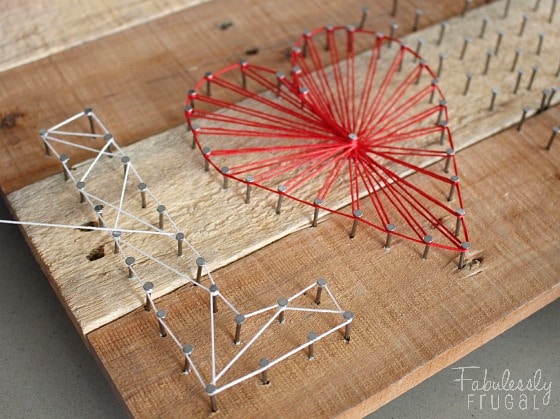
Now fill in the letter in a random pattern, gradually filling in the letter. On the heart, I chose to wrap the string from the middle nail up to each outer nail, then back down to the center nail, creating a different pattern than the letters.
Once the letter is filled in enough to your liking, tie off the string on one nail as you did in the beginning. Do the same thing with each letter and the heart until you’re finished!
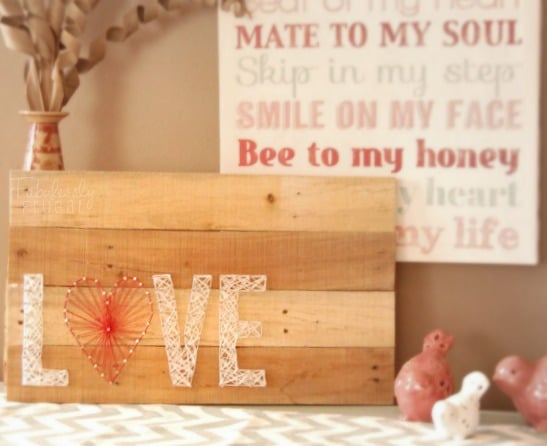
Enjoy your new Valentine’s day decoration!
Thanks for sharing this love string art craft project with me, Shannon! I LOVE it! Haha.
This love string art pallet board sign would make a great & thoughtful Valentine’s Day gift for that special someone, or you can just keep it for yourself as a decoration! Either way, I hope you had a fun time making it! For more fun, check out our other string art projects & ideas.
See all of the other Valentine’s Day ideas we have been working on:
- Valentine’s Day Recipes
- Homemade Valentine’s Day Crafts and DIY projects
- Non-Candy alternatives for kids’ parties
- Valentine’s Day Box Ideas
- How to Rock Valentine’s Day for Your Kids
Trending Diys

Comments
Leave a Reply
More Related Diys


Trending DIY Projects
- DIY
- Recipes
- Deals
- Blog


Report a Problem
Please select the problem you are facing with this deal:
- Price Increased
- Price Decreased
- No longer available
- Expired
- Link doesn't work
- Suggestion
- Compliment
- Other
Add more details:
Thank you for your feedback. We really appreciate it.
Enter your email address if you would like to receive a follow up.
Please Try Again
Thanks for providing the email address.
We will reach out to you as soon as possible.


Popular
Recommended
About Us

At Fabulessly Frugal, our goal is to help you live HEALTHY, WEALTHY, and WISE! My team and I work hard to bring you the best, online deals, clean eating, DIY's, freezer meal recipes, and more! I LOVE coaching and inspiring people to improve their health in my fitness challenge! You should also check out my favorite cleanse! Learn more about me and the rest of my team.


Copyright © 2008–2026
Fabulessly Frugal: A Coupon Blog Sharing Gift Ideas, Amazon Deals, Printable Coupons, DIY, How to Extreme Coupon, and Make Ahead Meals. All rights reserved
Hi! I am just wondering if you had a chance to try this with thicker nails, I am currently using 16 gauge nails and am not sure what size drill bit to buy.
Sorry, I haven’t tried it with different nails yet. Sounds like the 16 gauge nails would be slightly thicker than the 17 gauge nails used in this post, so the same bit (the 1/16″) might actually work great with them. You can always take a nail to a store and compare the size to the bit too! Hope that helps.