Repurpose Inspiration: Dining room hutch turned playroom learning station!
One day, while The Hubs was driving in his work truck, he found this with a sign that said “Free” on it: 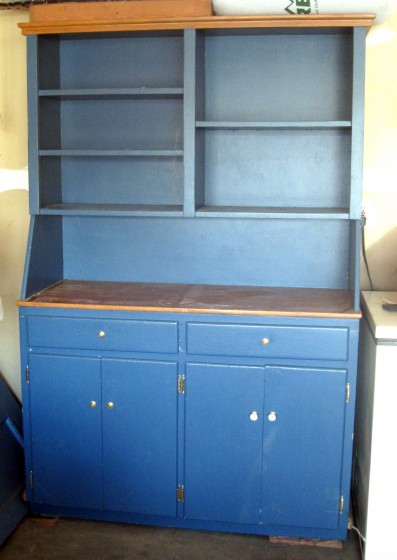 Now, the sweet guy knows me well enough to know that any piece of free furniture has potential in our home, so he called me, asked if I wanted it, and figured out a way to get it home. Now, cottage blue ain’t my signature color, but it had “good bones”, so I parked it in the garage for a few months until I was inspired. And then it hit me…I was going to make a learning center/toy storage for my Littles’ playroom. So, how did I turn
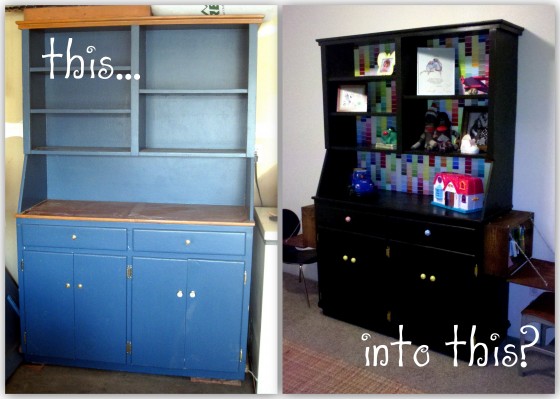
Allow me to show you what I affectionately call “The Paint Chip Hutch”. The materials I used were:
- Black latex paint
- 6 door knobs (seriously, the most expensive part of the entire project!)
- A collection of paint chips
- 1″x6″ pine and plywood, stained
- Miscellaneous hardware
And here’s what I did: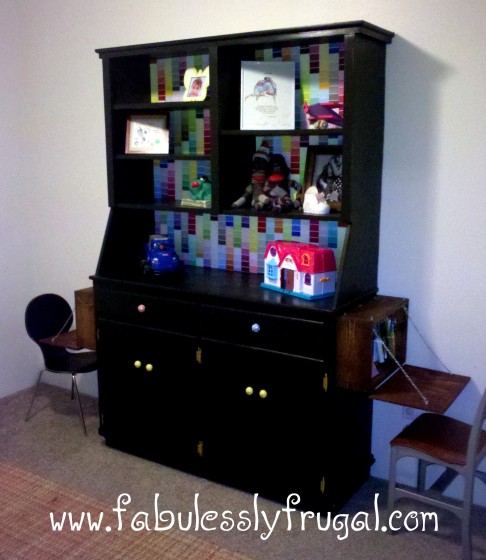 The Paint Chip Hutch
Step 1: Paint the hutch
I started by painting the entire hutch black, save the back walls of the top shelves. I also left the interior shelves covered by doors natural wood.Initially, I was planning on stripping, sanding and staining the entire thing, but when I discovered there were 3 layers of paint on it, I went with Plan B.
Step 2: Create the Paint-Chip Mosaic
With friends who own a paint store, and a shipment of paint chips that were the wrong color line, I was given a wad of paint chips to use. 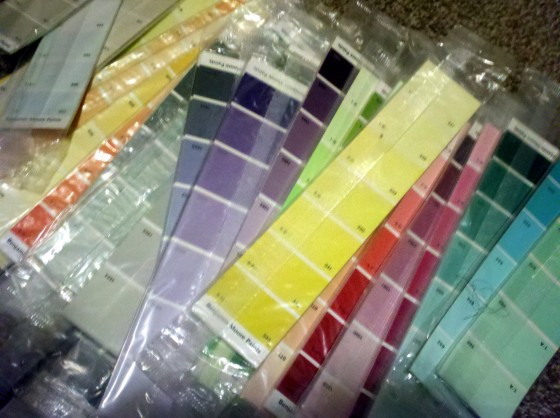 This seriously isn’t even all of them! Using a can of spray adhesive, latex gloves, and a pair of scissors, I created a mosaic using these vibrant colors. I snipped off the bottom 1/4″ that said, “Benjamin Moore Paints” and then started by finding the center of each panel I would be working on. I placed my first paint chip.
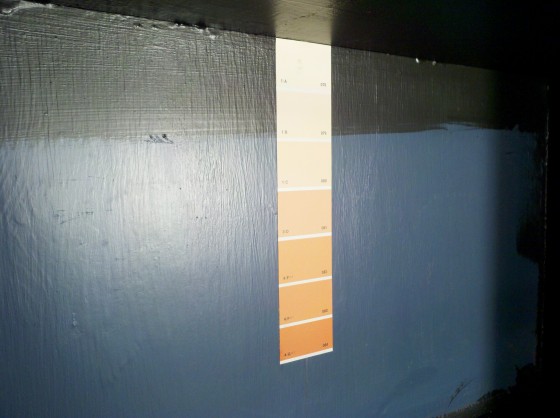 Then, using my next paint chip as a measure, flipped it over (top to bottom, not side to side), and measured where to make my cut so the 2nd piece fit perfectly.
 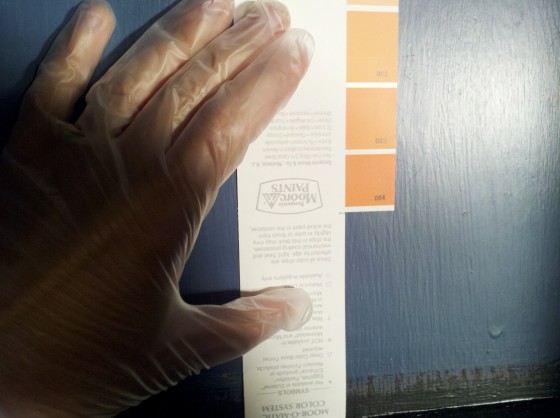 I continued on in this way, first to the right from the center,
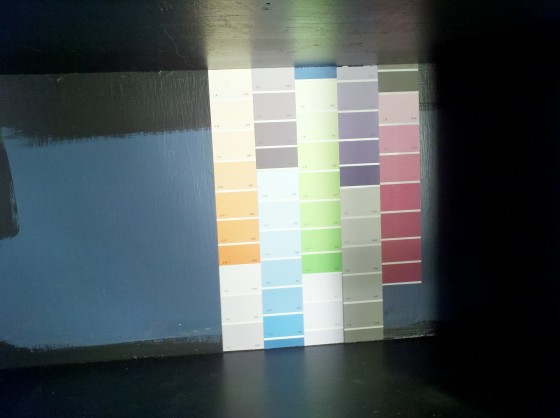 and then to the left, until I had the entire panel complete. And then another one.
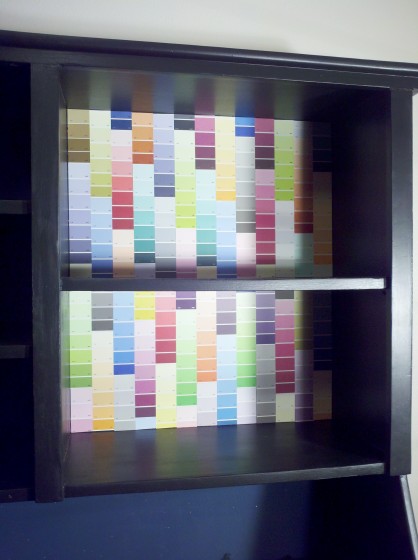 And another and another, until all 6 panels on the back walls of the shelves were covered with the mosaic.
 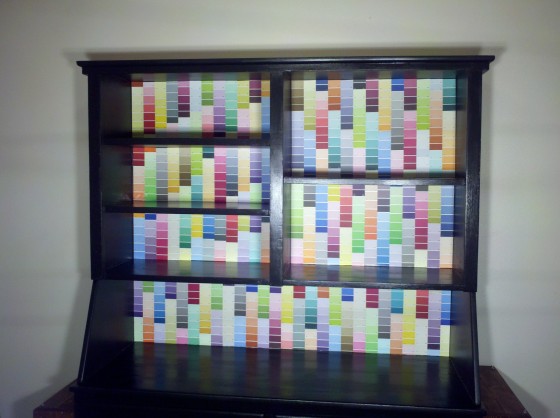 Whew! This did not happen all in one night, friends. In fact, I think I dreamt in paint chips one night during the project. But while I was at it, I decided to add some artwork to match:
 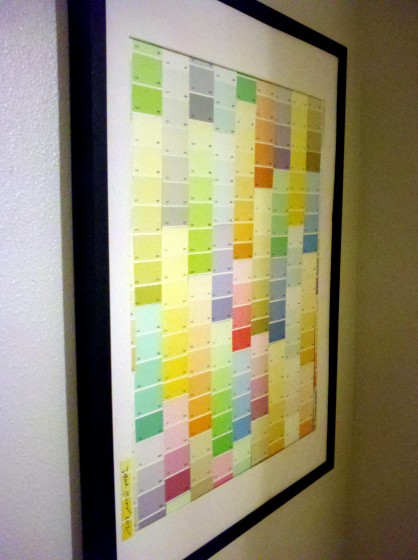 And I should say…please don’t run to Home Depot and steal as many paint chips as you can. Not nice. You might ask a store if they ever toss discontinued paint chip collections, or simply ask how many paint chips you are allowed to take when you visit. You certainly don’t want the store staff to have your mug shot behind their desk with a caption that says, “Paint chip thief!”, right?
Step 3: Attach the knobs
At a garage sale about a month ago, I found some super cute polka dot drawer knobs for $1 each. Blue, pink, yellow. 3 of them. Since this hutch required 6 total knobs, I went over to Amazon and found some matching knobs that I used for the bottom 4 doors. Here’s a close-up of what they look like: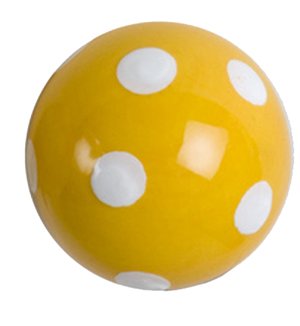
Yellow with White Polka Dots
Ceramic Drawer Pull
I attached them with provided hardware and we were good to go. Easy peasy lemon squeasy.
Step 4: Build the work stations.
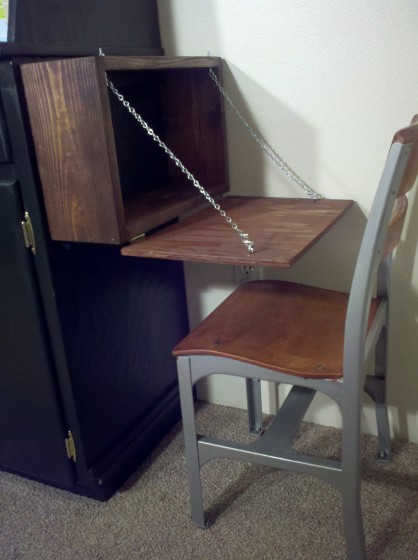 This was a fun little step I added to my hutch at the last minute. Always looking for ways to capitalize on using space wisely and frugally, I wanted to give both of my kids, ages 5 and 2, a place where they could draw, color, and do homework. So I built 2 boxes the width of the hutch out of 1″x6″ pine. For this, I used a chop saw and a pneumatic air gun (I love power tools!), but a saw, hammer, and nails works too. I assembled all 4 sides of the boxes and then, using the boxes as measures, cut the lids to the boxes which actually serve as my desktops. I attached the desktops with 2 hinges, and then used chain, eyehooks, washers and nuts to create the level desktop surface. I added the chairs to complete the station. This one above was given to me and at the time, covered in white paint. I stripped and stained the wood, and spraypainted the metal.
To attach the workstations, I screwed 2 3/4″x3/4″ cut pieces of pine to the side walls of the hutch (the top one to rest the top of the box on and the bottom one to set the bottom of the box on).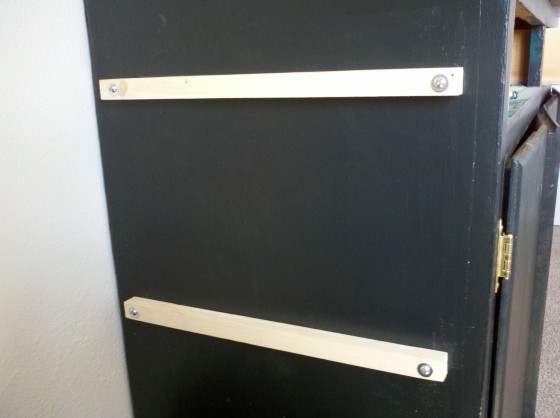 Then I set the box in place, and secured the box with screws into the 3/4″x3/4″ pine. Super solid.
Step 5: Organize toys
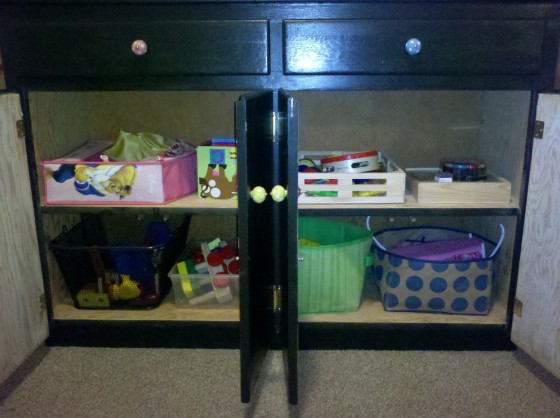 After the construction was done, I organized the Littles’ toys, placed them in containers, and set them inside the cabinet. Closed doors on toys is a beautiful thing friends…keeps things nice and tidy, and sometimes, toys that are out of sight are also out of mind. Which equals less mess!
As with all of my repurposing projects and blog posts, I don’t expect anyone to find exactly what I have found lying on the side of the road and the proceed to make it into what I did. My main goal is to inspire you to look at a blah piece of furniture (or basket, or desk, or whatever)and figure out a way to make it awesome. And one of these weeks, I am going to show you how I repurposed an old unused toy into a new play station for my little guy.
If you have a piece of furniture you’d like to repurpose but aren’t quite sure what to do of it, email me at dana {at} fabulesslyfrugal {dot} com with a picture and I’ll help you come up with some ideas!
Trending Diys
Comments
Leave a Reply
Report a Problem
Please select the problem you are facing with this deal:
- Price Increased
- Price Decreased
- No longer available
- Expired
- Link doesn't work
- Suggestion
- Compliment
- Other
Add more details:
Thank you for your feedback. We really appreciate it.
Enter your email address if you would like
to receive a follow up.
Please Try Again
Thanks for providing the email address.
We will reach out to you as soon as possible.











Great idea!
Also, if you can’t get a hold of that many paint chips lol maybe use some shelf liner with a neat pattern to line the back?
absolutely! that works as well as cute scrapbook paper, photographs, whatever you want. good idea!