DIY Spider Web Frame
 I love decorating for Halloween, but I am not a fan of all the scary, bloody, make-you-want-to-cry kind of stuff. I like the fun, inviting, playful approach to decorating for Halloween. That is why I think this spider web frame is just right: not too scary, but not overly cutesy. Perfect!
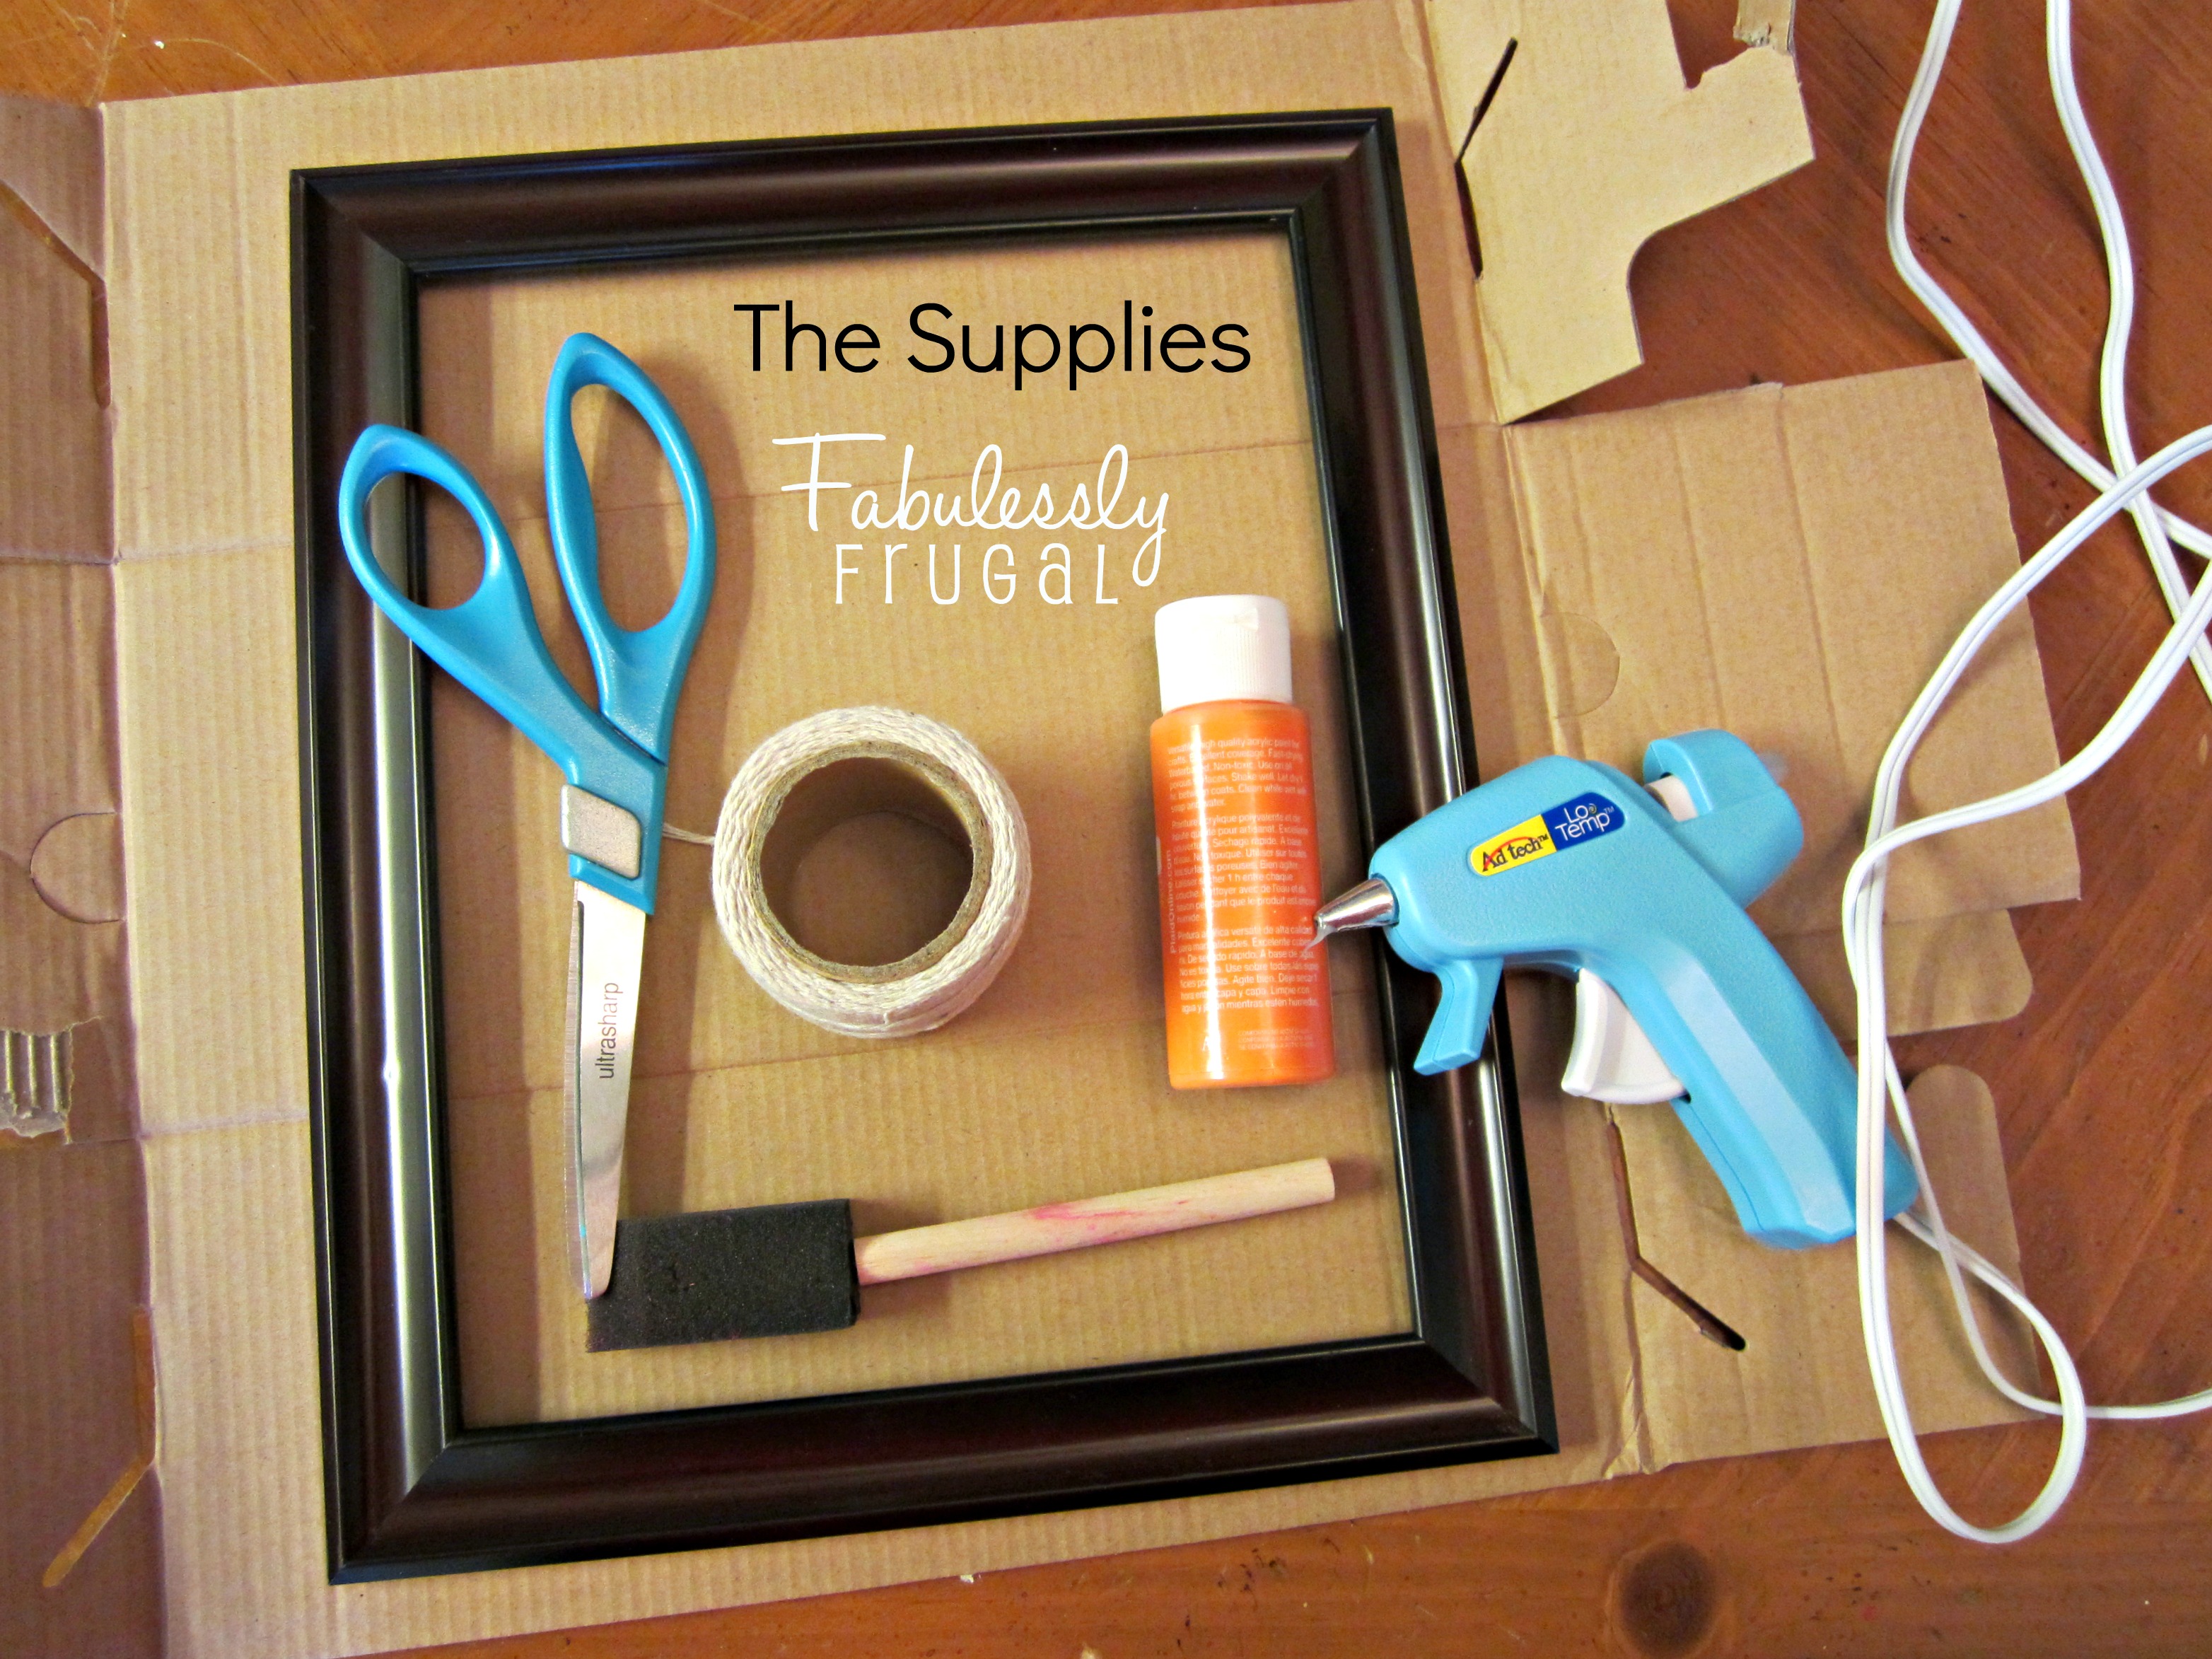 The Supplies:
- a frame of any size, with the glass and backing removed
- orange paint, or color of your choosing
- paintbrush
- off-white string or yarn
- scissors
- hot glue gun
- cardboard or newspaper
The Instructions:
 Start by laying out your cardboard or newspaper and painting the frame. I used an inexpensive frame from the dollar store, but an old one you have on hand, or a thrift store find would be great. Because my frame was black to begin with, I thought it would give it a nice “aged” look by using a sponge paintbrush. The brushstrokes left lines that gave an old Halloween feel. If you prefer, your frame can stay as is, or be painted with a smooth finish. I took this up-close picture above so you could see the method I used. Once painted, let the frame dry before beginning the web.
 To start your spider web, lay out the string across your frame and cut to size, leaving just enough that you can glue the edges down. A generous dot of hot glue will hold that string in place. I found a plastic fork was a handy tool for pressing the string into the hot glue without getting burned.
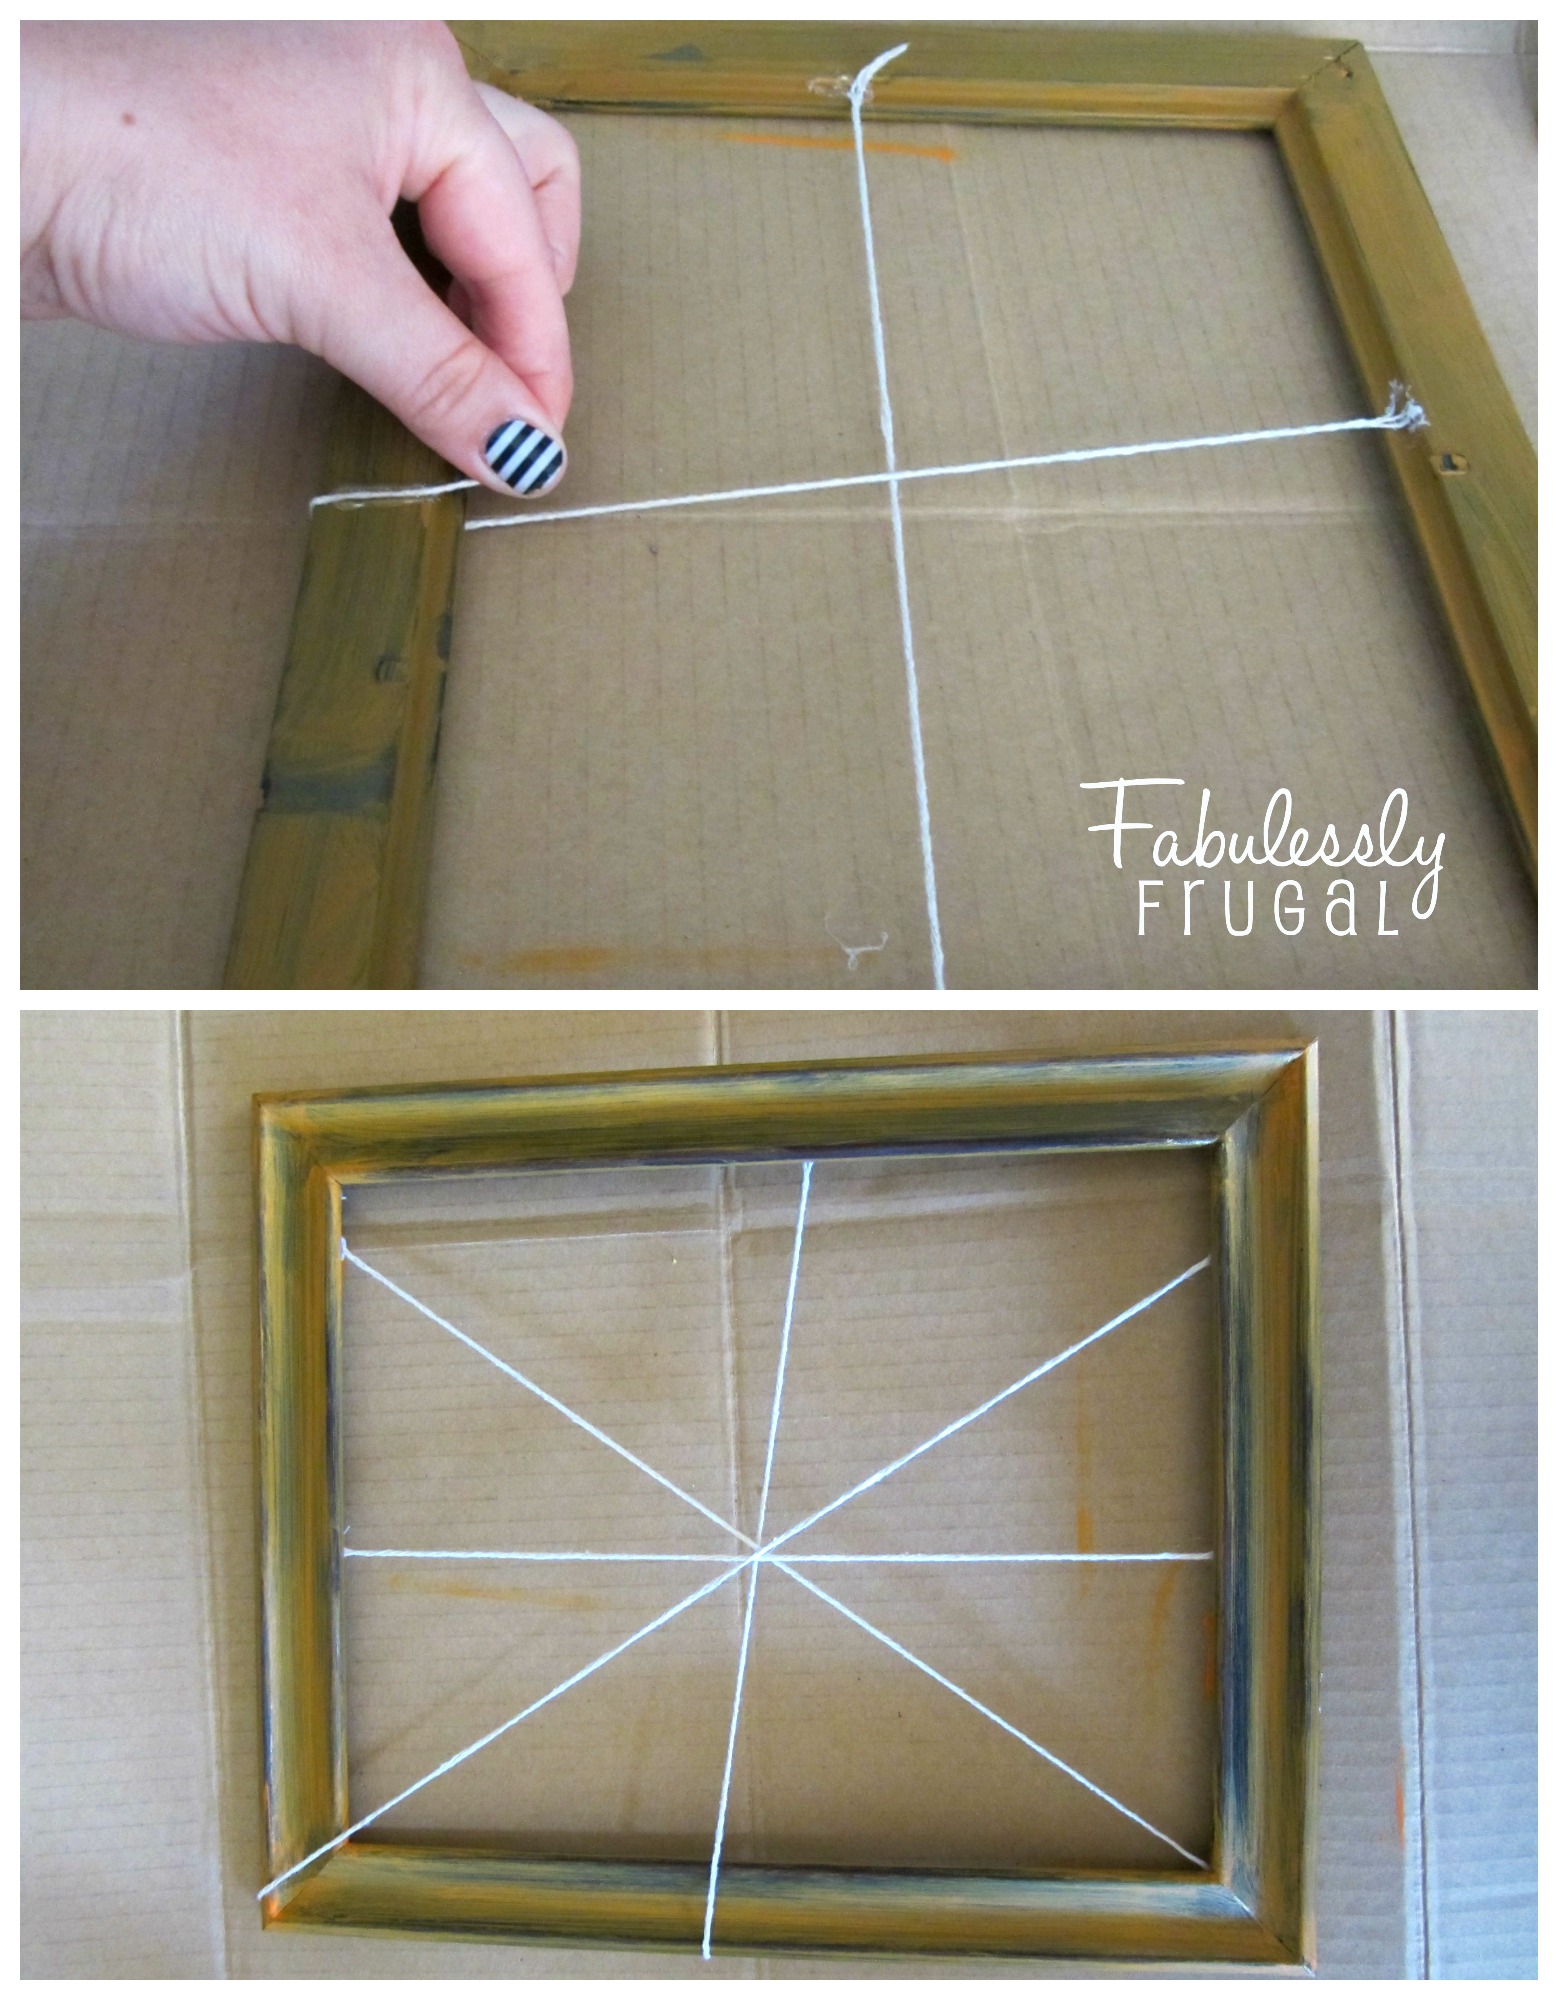 Continue making the intersecting lines of the spider web my making a line from top to bottom, and corner to corner. You basically want your strings to intersect in the middle looking like a “+” sign and an “x.” As you can see, I chose to have mine a little off-centered to make it look more natural. The main thing is you want to be sure as you are gluing that the lines all cross in the center. If they do not quite line up, you can tie a knot over the middle to make sure they stay together. You will also notice I had two of the strings go over the top of the frame. I also thought that gave it a more authentic look.
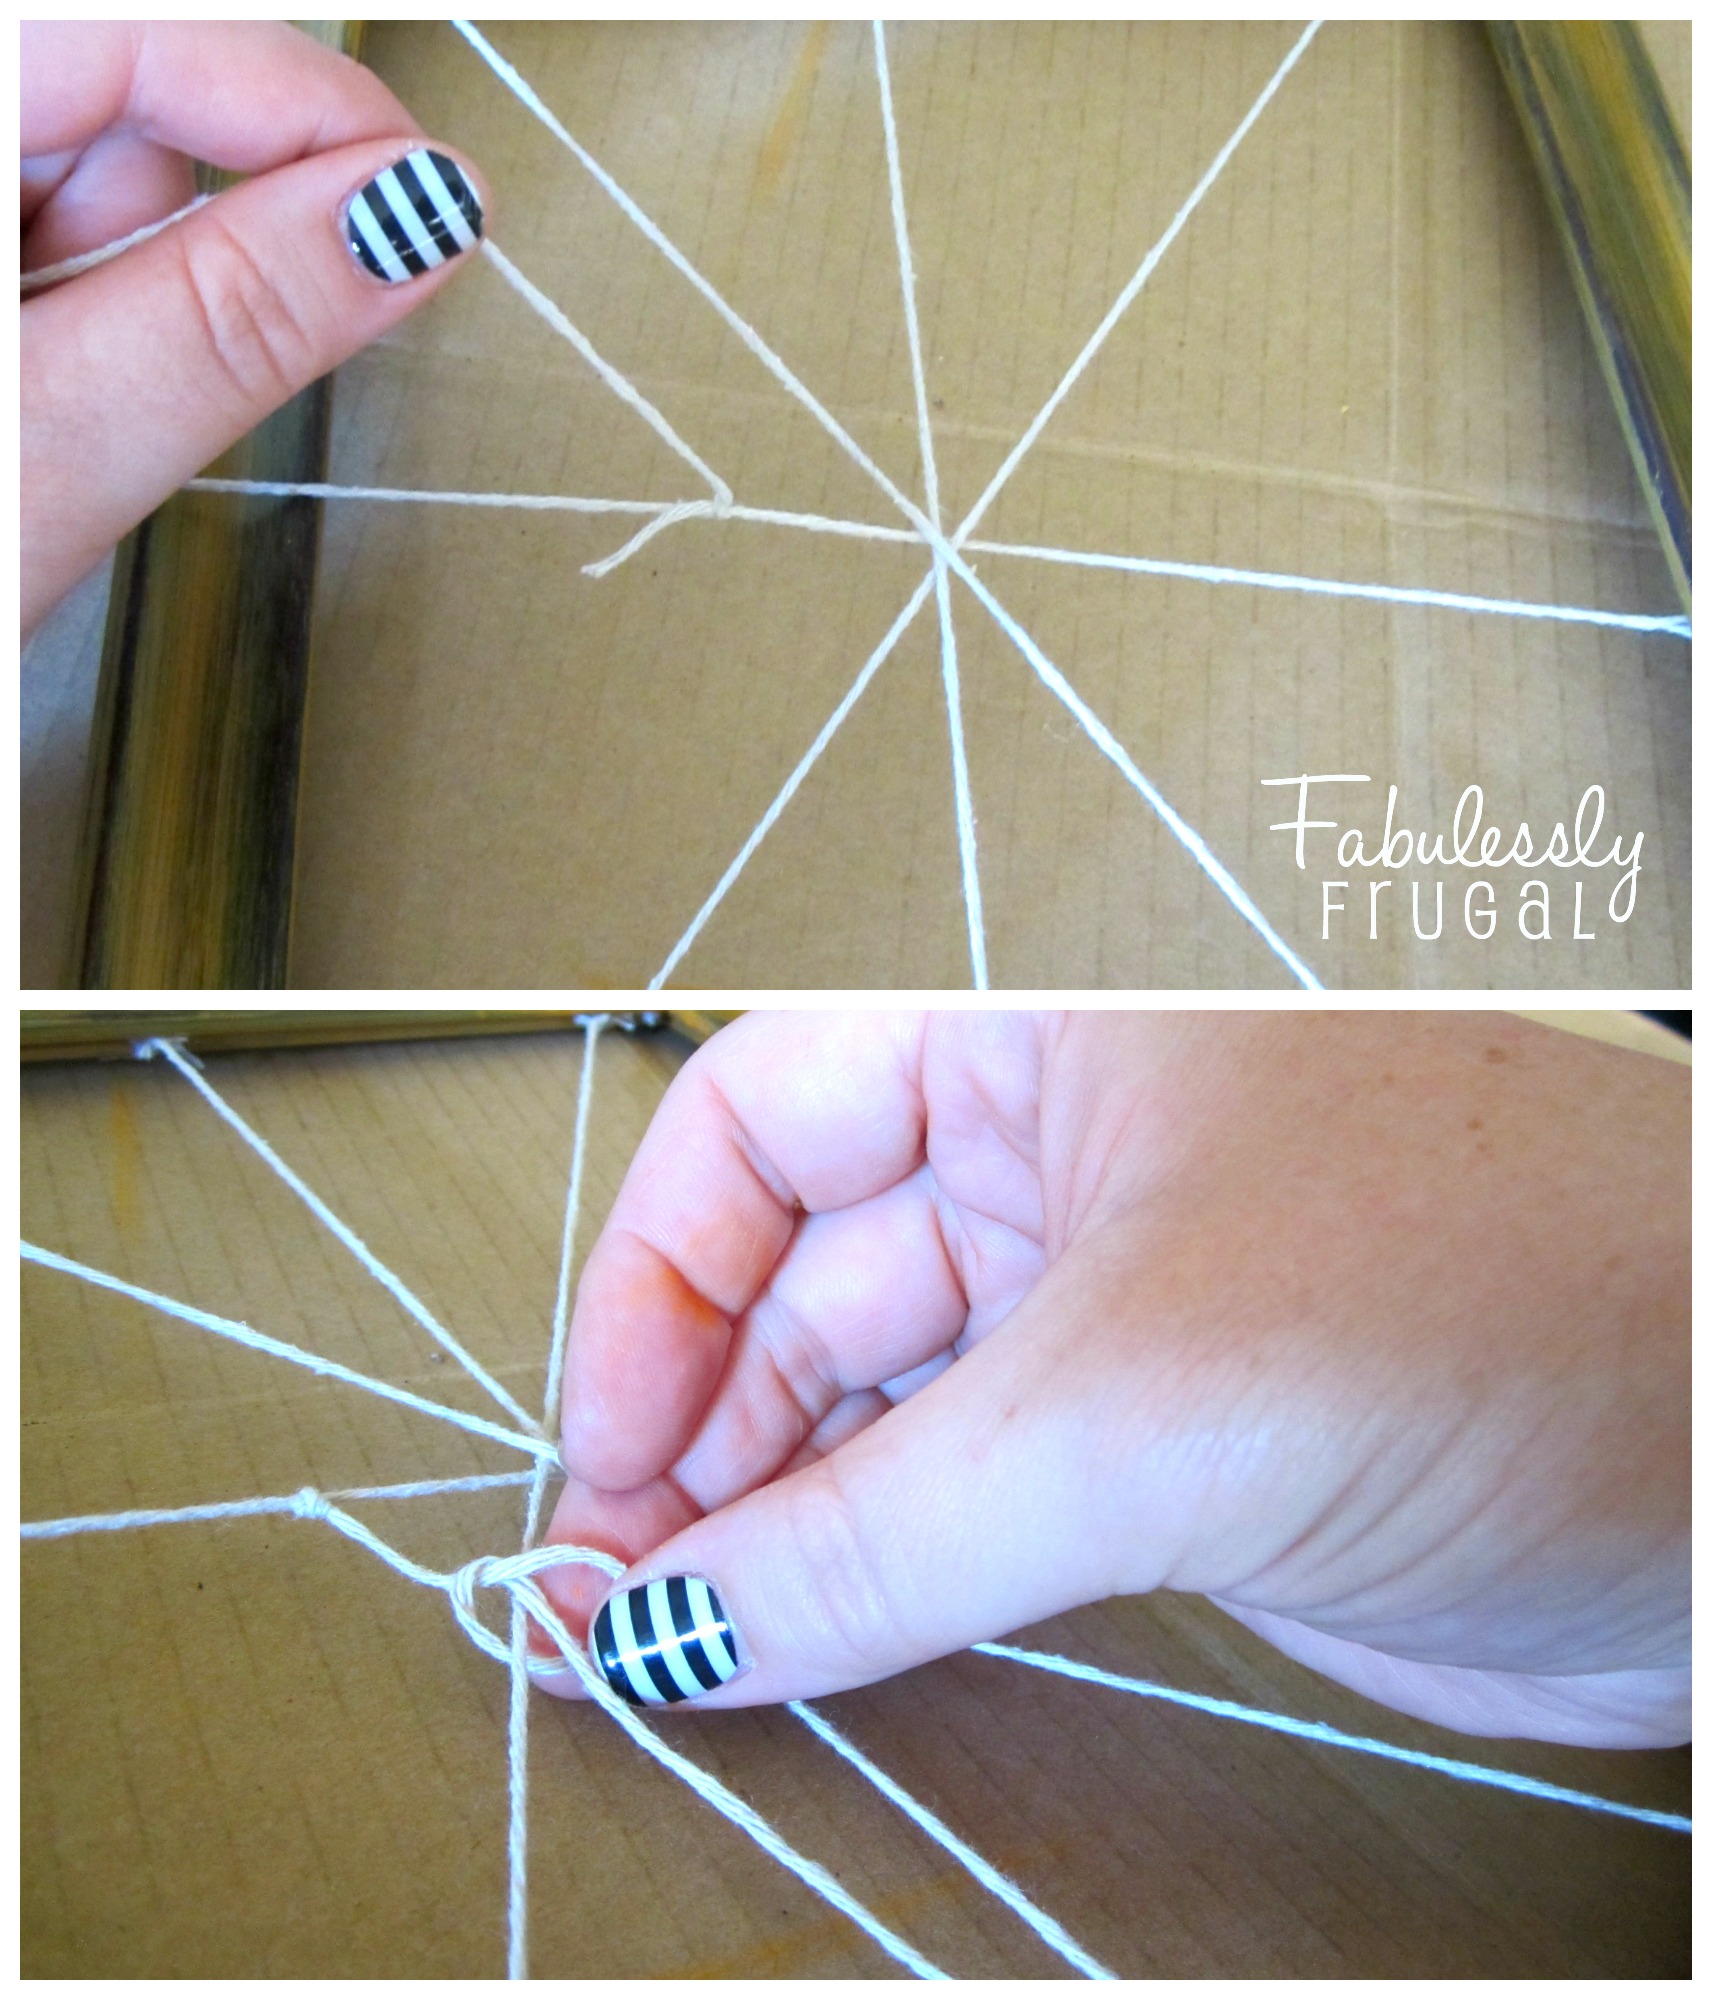 With the intersecting lines all in place, start making the “rings” of the web by tying a knot onto one of the strings, starting about an inch from the center. Once it is tight, cut off the short end, and pull the long part of the string to the next line and tie another knot. You have to pull it a little bit to keep it tight. Continue tying knots until you circle all the way around the web and connect to where you started the first know. Cut off any excess string. To reinforce your knots, and keep them from sliding around, you can add a tiny dot of hot glue to each knot (from the back side of the frame) to hold it in place. I tried to make sure to wipe off any excess before it dried if too much glue came out at once.
 After the first ring is completed, cut a new piece of string (fairly long) and continue the same process to make a second and third ring. Depending on the size and dimension of your frame, you may want more or less. The rings do not have to be symmetrical, so do not worry about perfection. The bends and kinks in the web make it look unique. If you want to hang your web frame, you can glue a piece of ribbon to the back and hang it over a door. Otherwise it looks cute on it’s own sitting on a shelf or mantle.
I hope you have fun making your own!
Trending Diys


More Related Diys


Trending DIY Projects
- DIY
- Recipes
- Deals
- Blog


Report a Problem
Please select the problem you are facing with this deal:
- Price Increased
- Price Decreased
- No longer available
- Expired
- Link doesn't work
- Suggestion
- Compliment
- Other
Add more details:
Thank you for your feedback. We really appreciate it.
Enter your email address if you would like
to receive a follow up.
Please Try Again
Thanks for providing the email address.
We will reach out to you as soon as possible.


Popular
Recommended
About Us

At Fabulessly Frugal, our goal is to help you live HEALTHY, WEALTHY, and WISE! My team and I work hard to bring you the best, online deals, clean eating, DIY's, freezer meal recipes, and more! I LOVE coaching and inspiring people to improve their health in my fitness challenge! You should also check out my favorite cleanse! Learn more about me and the rest of my team.

Copyright © 2008–2026
Fabulessly Frugal: A Coupon Blog Sharing Gift Ideas, Amazon Deals, Printable Coupons, DIY, How to Extreme Coupon, and Make Ahead Meals. All rights reserved