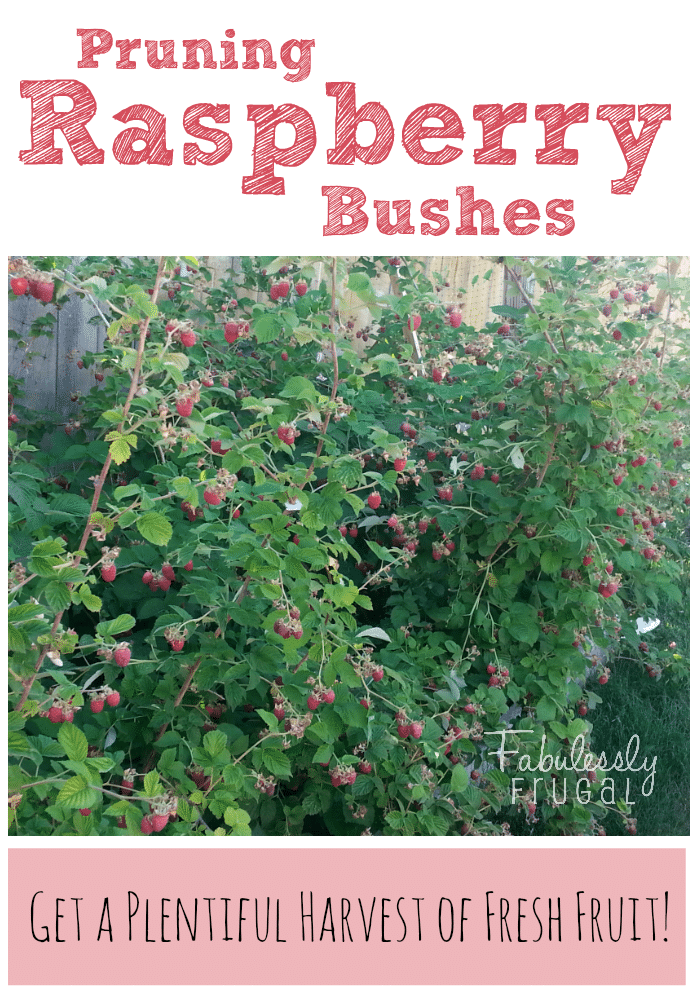
Garden Tips: Pruning Raspberries & Box Cleanup
It’s time to Prune Bushes & Clean out Boxes!!
Spring is here and the trees, fruit bushes, and flowers in my yard are getting ready to bloom! So, this is the week…I’m headed outdoors and ready to help with berry bushes growth and dig in the dirt to get everything ready to transplant veggie starts that have been inside!
This week we’re working on Pruning Raspberries and cleaning out the Garden Area/Boxes. (I got a very late start on this, so don’t worry too much if you haven’t done it yet…try and get out this week.)
Pruning & Prepping Raspberry Bushes
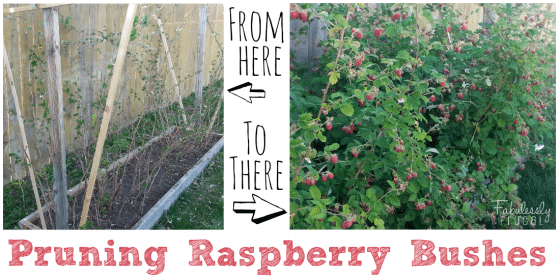
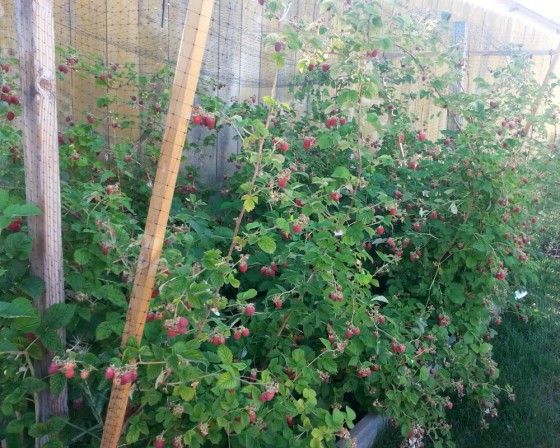
Like I said earlier, this is the first chance that I have had to get out to the raspberries this year, and the ideal time to prune is from December to March depending on your climate. As you can see my raspberries needed A LOT of work this Spring…but within a few hours, they are ready to go and looking great. To begin with, clear out all of the leaves, weeds, grass, and loose branches that are in the raspberry area/box.
Next, you’ll want to use pruning sheers or garden clippers to clip out all of the old canes. You’ll see that the old ones have no buds, and are grey in color. Also, they do not have a green core if you cut the cane close to the ground. It is important to cut old canes as close to the ground as possible so that new buds will grow from below the soil surface. If canes are not cut low enough, new shoots may form on any remaining portion. These are not healthy and can be prone to disease and entry points for insects.
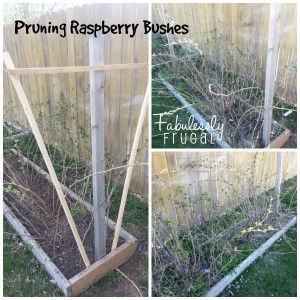
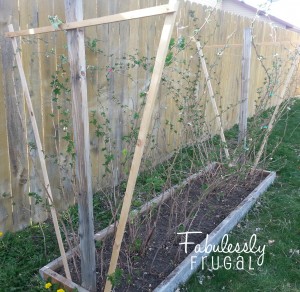
After you have cleared out the ground area and pruned back all of the old canes, you’ll want to help direct the new growth upwards. For our box I used some scrap wood in my husband’s pile and ripped down the boards on the table saw. I used (2) 1/2″ x 1″ boards and set them in a V shape on the outer edge of the box. Next, I drilled cross board to support the V shape. I secured the top areas with 2″ screws and also reinforced the bottom of the boards along the raspberry box. I did that for both sides of the box and then used a loop screw to string wire from end to end to help support the raspberry canes.
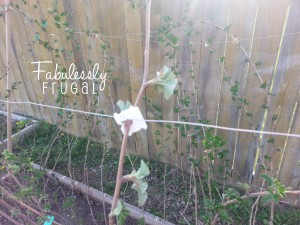
Lastly, I used old bread clips (for some reason I have a HUGE supply of them) to secure the raspberry cane to the wire in order to keep them all in place. You can also use twisty ties, garden clips, or twine…but since I have a huge stock, and wanted to be frugal, the sandwich clips worked great for me.
Here’s the final product!
**After originally writing this article in April 2014, I am PLEASED to report that I had one of the most successful years of raspberries I’ve ever had! The branches were healthy and FILLED with berries that we all enjoyed!**
Cleaning out your Garden Box
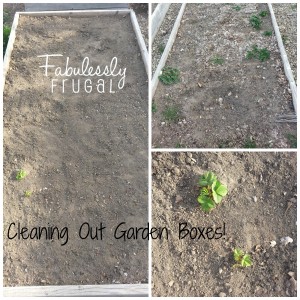
This is pretty simple if you already have an established garden. The biggest thing is to clean out leaves, grass clippings, and any other debris in the planting area off of the first layer of dirt. The top picture above shows the leaves and grass clippings we used to help “put the garden to bed” last fall. I ALWAYS make sure that I have gloves on…but I’m not a huge fan of spiders and other bugs that are in the dirt. Here is my favorite pair of gloves that I use.
If you are just starting a garden area or are wanting to add a box you’ll want to pick up any brush, twigs, branches, rocks, or other debris and get them all out of the way. Overall, you should be starting with a nice, level, flat, clean area that you want to have your garden area. If you are not using a raised bed, you can mark off the area with rocks, stone pavers, or even plastic edging.
After the area is cleaned, you’ll want to add & mix in compost and top soil to “top off the boxes” if needed. The next step for me is adding a small amount of top soil and compost to help recharge the soil already in the box. You can stop in at Lowe’s where there are several good deals on gardening supplies. Buy Online, Pick Up in Store – 20 Minutes Guaranteed only at Lowe’s!!
Now that my boxes are ready for planting, I’ll be deciding this week where I will be planting everything.
Happy Gardening this week! Hope you have a chance to get out there and get everything ready for planting.
More Gardening Tips and Tricks
More Related Diys


Trending DIY Projects
- DIY
- Recipes
- Deals
- Blog


Report a Problem
Please select the problem you are facing with this deal:
- Price Increased
- Price Decreased
- No longer available
- Expired
- Link doesn't work
- Suggestion
- Compliment
- Other
Add more details:
Thank you for your feedback. We really appreciate it.
Enter your email address if you would like
to receive a follow up.
Please Try Again
Thanks for providing the email address.
We will reach out to you as soon as possible.


Popular
Recommended
About Us

At Fabulessly Frugal, our goal is to help you live HEALTHY, WEALTHY, and WISE! My team and I work hard to bring you the best, online deals, clean eating, DIY's, freezer meal recipes, and more! I LOVE coaching and inspiring people to improve their health in my fitness challenge! You should also check out my favorite cleanse! Learn more about me and the rest of my team.

Copyright © 2008–2024
Fabulessly Frugal: A Coupon Blog Sharing Gift Ideas, Amazon Deals, Printable Coupons, DIY, How to Extreme Coupon, and Make Ahead Meals. All rights reserved