
How to Decorate Terracotta Pots with Fabric and Paint
Learn How to Decorate Flower Pots with Fabric and Paint
With Mother’s Day coming up and spring in full swing, what better activity than making a fun, fresh, personalized planter pot. It is simple and beautiful.
In this tutorial, I will make two styles: fabric-covered planter pots, and painted planter pots. This would be a fun project to do with your children and it would make a great gift to give to your mother or friends.
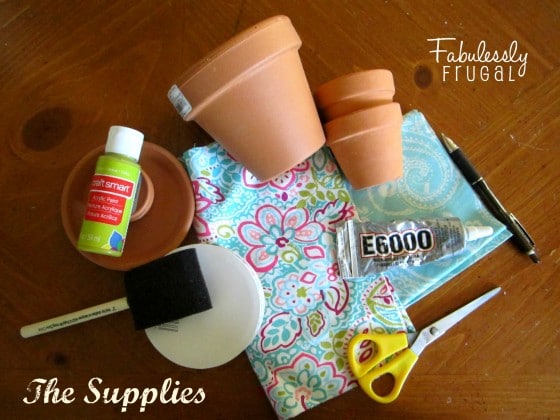
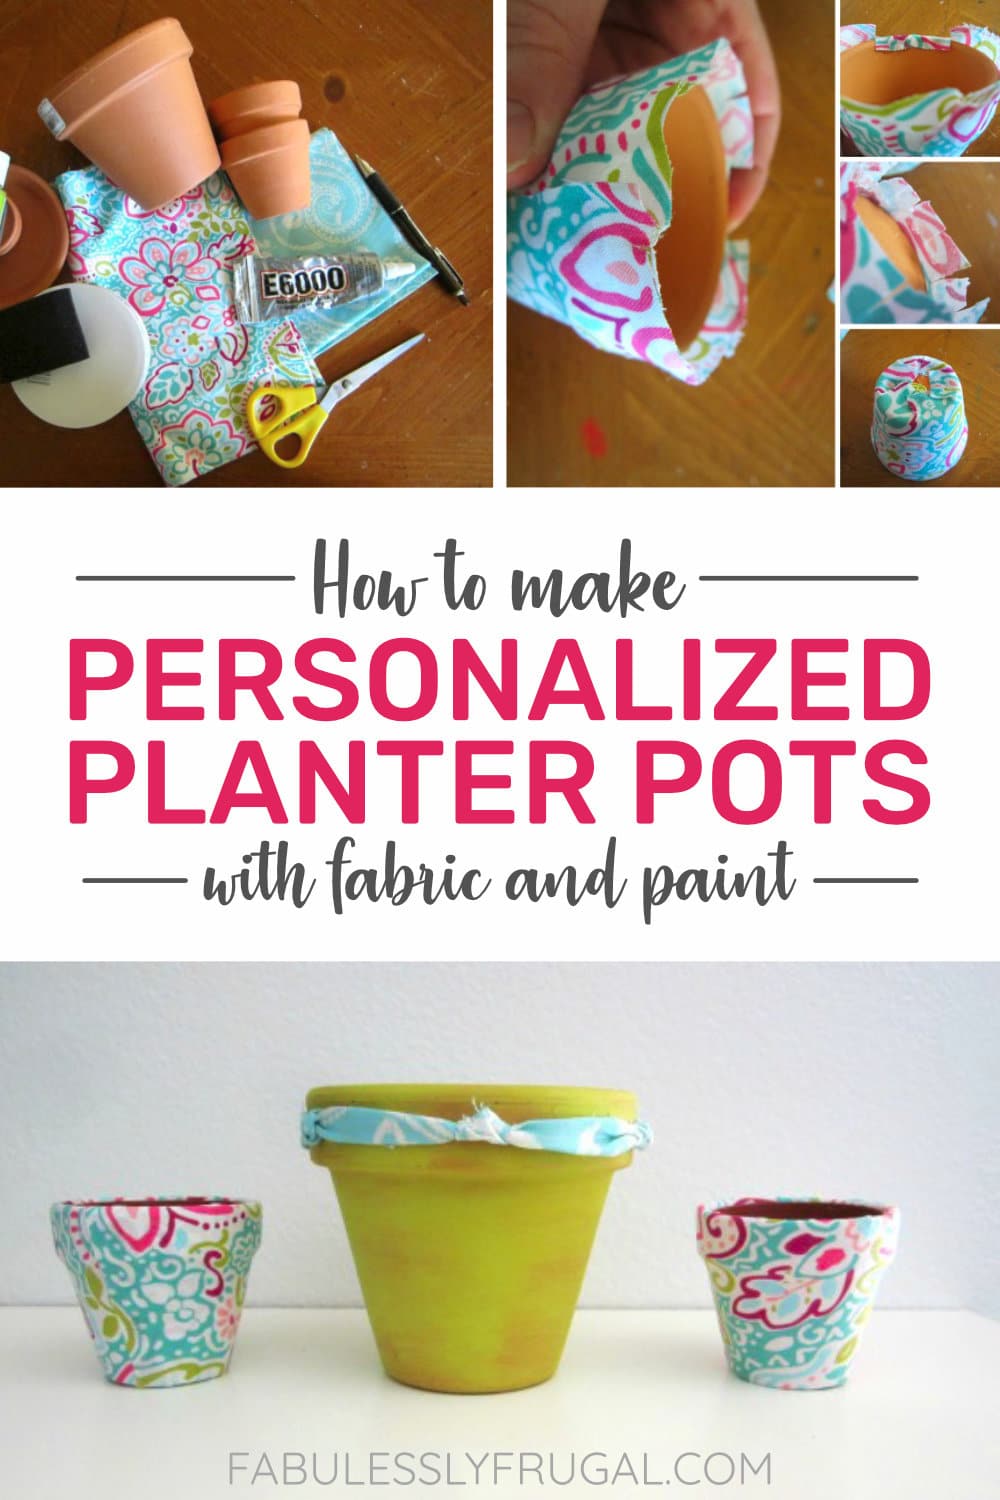
The Supplies:
- Terra-cotta planter pots (your choice of size- I did one 6 ” and two small pots)
- Round Terra-cotta base (only necessary if there is a drainage hole in the bottom of the pot you choose)
- Fabric
- E6000 Industrial Strength Adhesive
- Scissors
- Pen
- Craft paint
- Sponge brush
- Plant or soil and seeds of choice
How to Decorate Flower Pots with Fabric
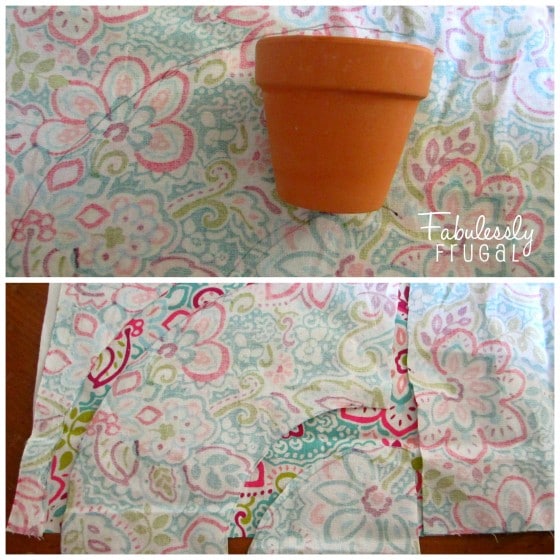
Step 1. Prepare the Fabric
When you decide what size pot you want to use, be sure you add a few inches to the height of the pot to be sure you have enough fabric. I would also recommend a non-directional pattern.
Start by laying out the fabric with the back facing upward. Set the pot on the edge of the fabric, align a pen with the top of the pot and roll the pot with the pen so you make a curve shape.
Repeat with the bottom edge of the pot. It should look like a rainbow arc with the two lines.
In order to make sure you have enough to go around the circumference of the pot, you will want to make the curve look like ¼ of a circle (think pie charts). Cut along the lines.
Step 2. Attaching the Fabric to the Pot
Next, you will want to align the pot on the edge of the fabric. Practice rolling the pot over the fabric so you make sure you have it aligned correctly before you glue.
Then place a light line of glue going top-to-bottom, and press the fabric into the glue. You will not want to put glue over the entire pot, one line is enough. However, you will want to let it sit and dry before tugging on it to wrap it around the pot.
The reason you do not want glue over the entire pot is that terra-cotta pots absorb water when you water the plants. With just one line of glue, the fabric can breathe and dry out again if it were ever to get damp during watering.
Once the initial line of glue dries (it took about 15 minutes for me), wrap the fabric around the pot, pulling it semi-snug. Hold it in place and cut a straight line to cut off any extra fabric, making sure you leave a ½ inch or so overlapping.
Then add the second line of glue directly over where the first line of glue was placed. Hold the fabric in place for a minute and then let it sit to dry again.

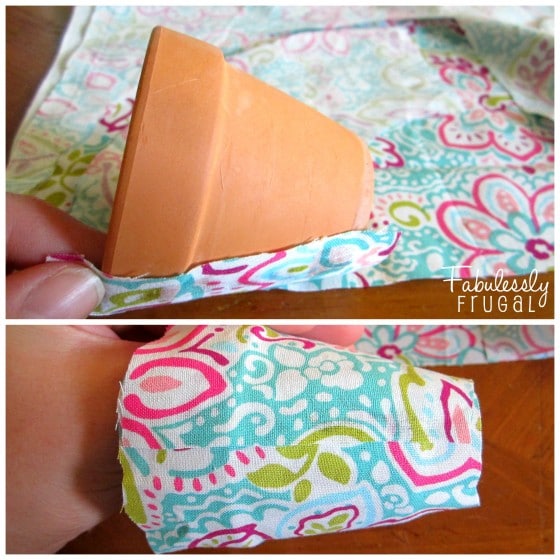
Step 3. Shape the Fabric
Once the glue has set, cut the extra fabric at the top of the pot into 1” sections. Place beads of glue on the inside of the little cut tabs and fold them over into the pot.
Cutting the little tabs will help the fabric lay smooth, as they overlap each other once folded over. For the bottom of the pot, since it is smaller, I cut the tabs into ½” sections and folded those over as well.
Let the pot dry again, and that’s it. You’re done your fabric flower pot!
How to Decorate Your Terracotta Pot with Paint & Fabric
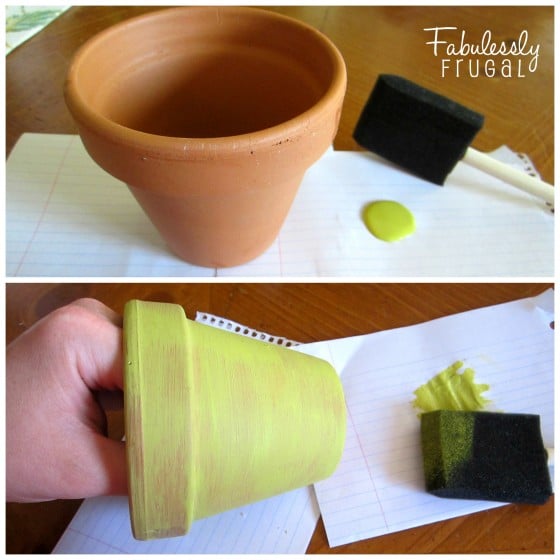
Step 1. Paint the Pot
For painted pots, place a small amount of paint and the pot on a paper surface. I only used a silver-dollar-sized pool of paint.
Use a sponge brush to apply paint, making sure you paint horizontally on the pot. Terra-cotta absorbs moisture, including paint, very quickly. It is like a sponge, and the paint will dry almost as fast as you put it on, so it is important to make your brush strokes go the direction you want them to right from the start.
Hold the pot by putting your hand on the inside and tipping it slightly so only one little corner is sitting on the paper. This will keep your hands a lot cleaner and help you not leave fingerprints all over your pot.
Realize that you probably won’t get perfect coverage, but seeing some of the terra-cotta colors through the paint gives it some extra charm.
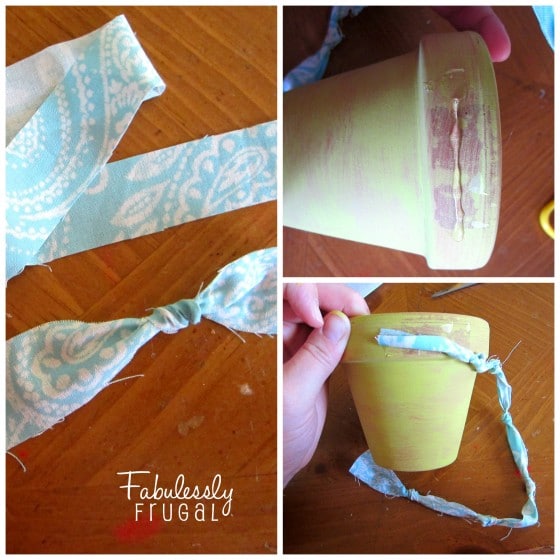
Step 2. Decorate with Fabric
To make a decorative trim, I cut a long 1” wide strip of coordinating fabric. I tied a knot every 2 inches, letting the paint dry for a few minutes while I worked on that.
Then I added a line of glue on the back where the barcode sticker left some residue and it doesn’t look as nice. I plan to have that hide in the back.
I again attached the first part of the trim and let the glue dry before I pulled on it and tried to wrap it around. When that was dry, I glued about 2 inches, set the fabric trim, and kept going. At the end, I had to hold the last piece for a minute to make sure it stuck.
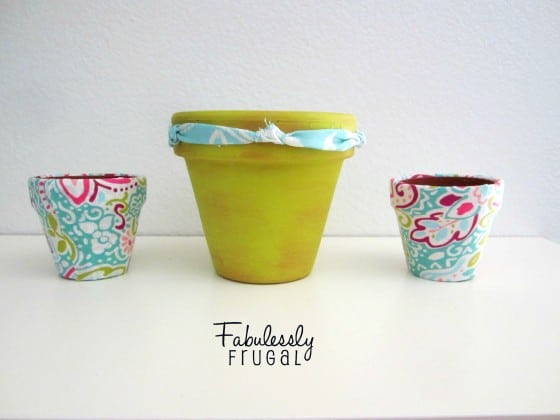
What will you do with your new flower pots?
Once the pots were ready to go, I found an indoor plant for the larger pot and I will use the smaller ones for seed starters.
I put a terra-cotta base under the planted pot to catch the water run-off. It is so cute sitting up on my shelf!
I also have a Terra-cotta pot I painted last summer still sitting out on my back patio. It still looks great! So indoors or outdoors would both be great options.
I hope you enjoyed this tutorial on how to decorate terracotta pots! Let me know how your crafting goes in the comments below. 🙂
You might like these posts:
More Related Diys


Trending DIY Projects
- DIY
- Recipes
- Deals
- Blog


Report a Problem
Please select the problem you are facing with this deal:
- Price Increased
- Price Decreased
- No longer available
- Expired
- Link doesn't work
- Suggestion
- Compliment
- Other
Add more details:
Thank you for your feedback. We really appreciate it.
Enter your email address if you would like to receive a follow up.
Please Try Again
Thanks for providing the email address.
We will reach out to you as soon as possible.


Popular
Recommended
About Us

At Fabulessly Frugal, our goal is to help you live HEALTHY, WEALTHY, and WISE! My team and I work hard to bring you the best, online deals, clean eating, DIY's, freezer meal recipes, and more! I LOVE coaching and inspiring people to improve their health in my fitness challenge! You should also check out my favorite cleanse! Learn more about me and the rest of my team.


Copyright © 2008–2024
Fabulessly Frugal: A Coupon Blog Sharing Gift Ideas, Amazon Deals, Printable Coupons, DIY, How to Extreme Coupon, and Make Ahead Meals. All rights reserved