
Easy DIY Bulletin Board (French Memory Board)
Hey, Y’all! Today I’m going to show you how to make this easy French Bulletin board. If you’re looking for a nice, fun little decoration that can go in any room of your house, this DIY bulletin board is perfect! Personally, I made mine for my craft room and it looks great!
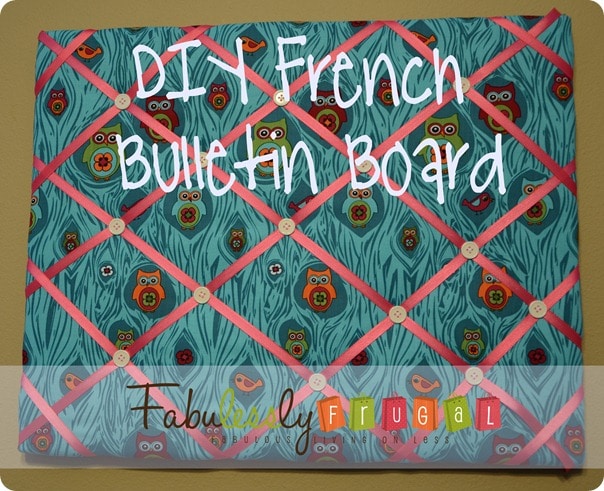
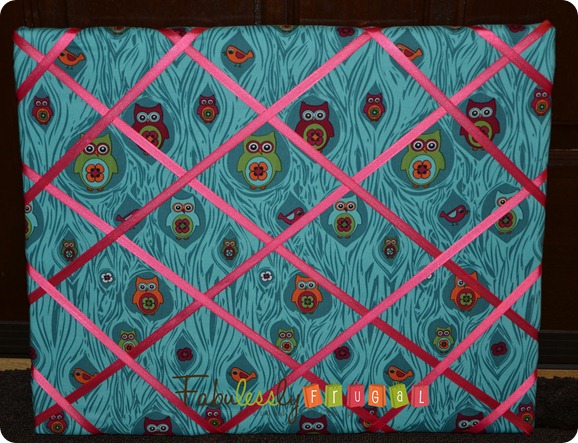
This homemade bulletin board is also a great idea for a baby shower, or a project a group of teen girls could do. Here’s what the finished product looks like:
{PIN THIS}
DIY Bulletin Board Materials:
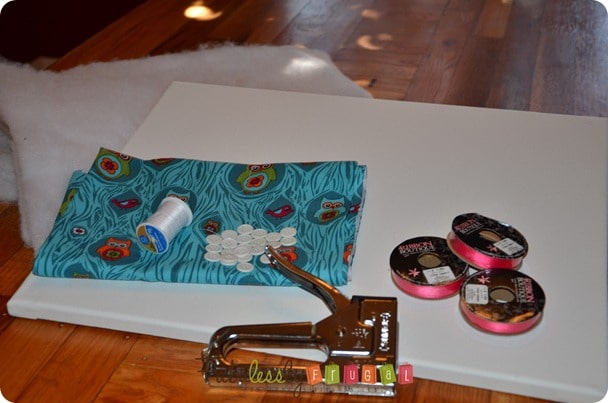
- A Canvas {I used a 16×20 that I had leftover from when I bought 2 and made the bow board}
- Fabric {enough to cover your canvas I used 1/2 yard}
- Batting
- Ribbon
- Buttons
- Staple gun
- Needle & thread
Once you have your materials ready, it’s time to get started crafting this homemade french memory board!
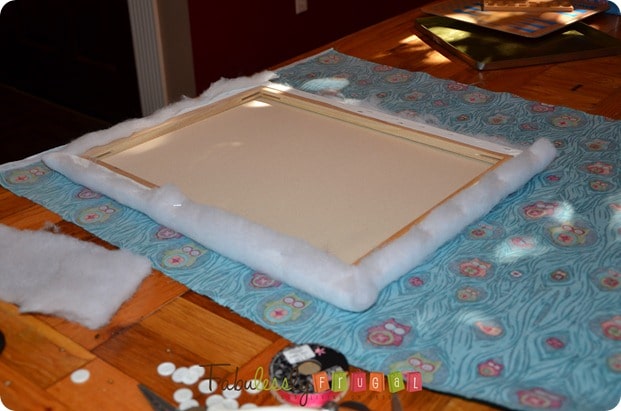
1. Lay out your batting and trim the edges leaving enough to fold over the back:
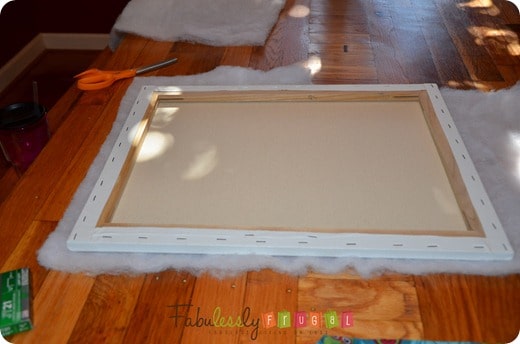
2. Fold the edges of your batting over and staple it down on the back of the canvas.
I put staples every 4-6 inches all around. Pull the batting tight so it lays flat. A regular stapler won’t work. Staple guns are pretty inexpensive and you will find all kinds of uses for it!
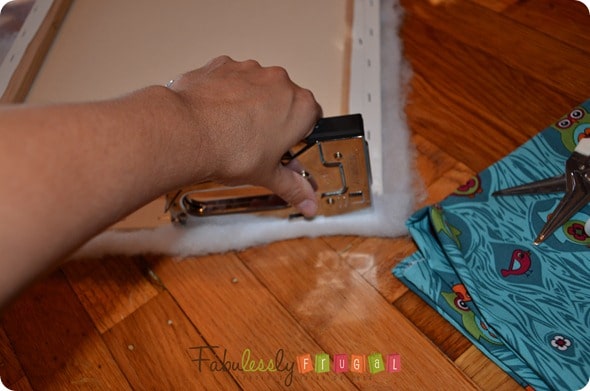
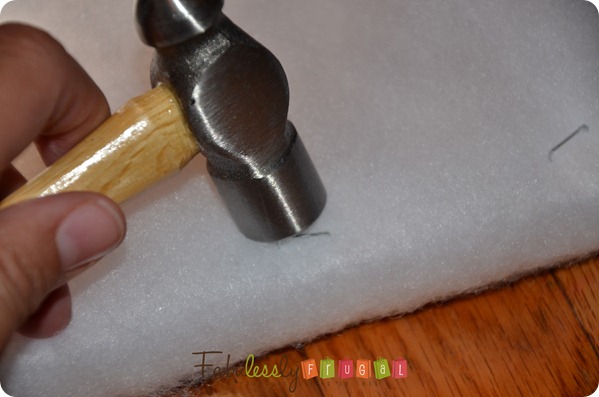
3. If the staples don’t go all the way in, use a hammer to tap them down:
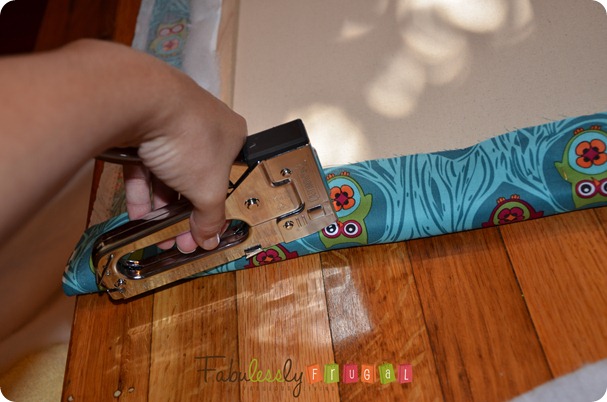
4. Lay down your fabric, leaving enough to fold over the back. Trim off the extra and save it for another project.
5. Staple the fabric down every 4-6 inches:
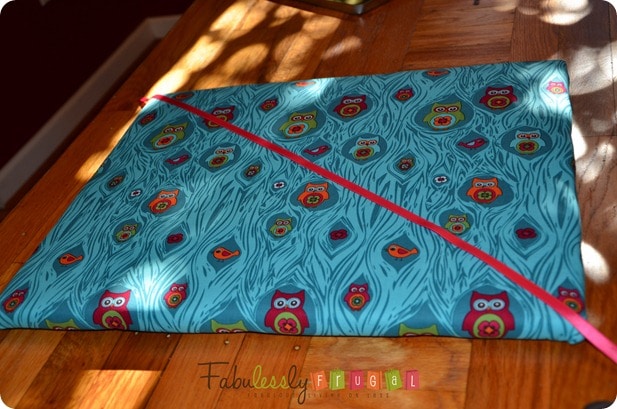
6. Now it is time to add the ribbon. I start by placing the ribbon diagonally down the canvas:
7. Staple the ribbon down on the back:
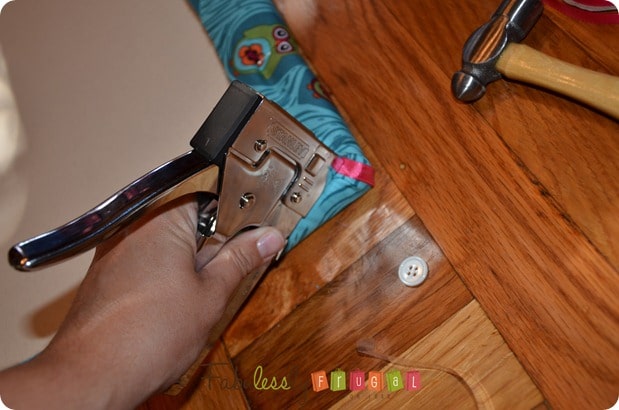
8. Continue placing the ribbon diagonally like so:
I don’t measure, just eyeball it every few inches until it looked like I wanted it to. I used about 30 feet of ribbon. How much you need depends on how big of a canvas you are using.
9. Sew the buttons on and you’re done!
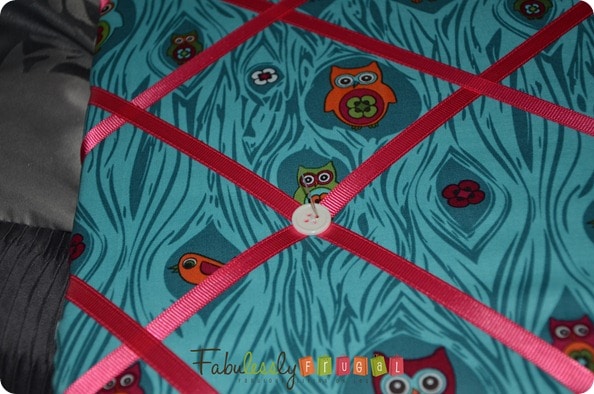
This part takes a little time but is worth it. It really makes the bulletin board look better. I decided to go with white buttons because I had a lot of them on hand.
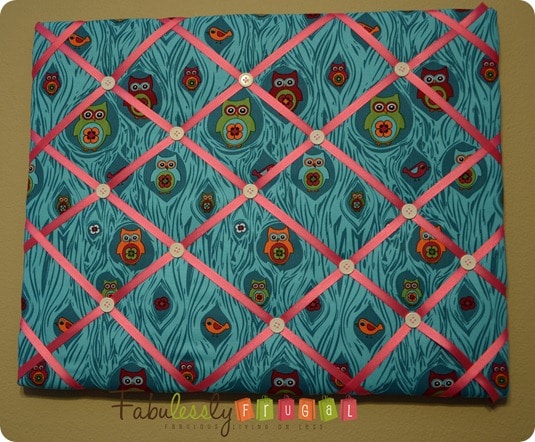
Here’s the finished product:
{PIN THIS}
…and here it is hanging up with pictures on it:
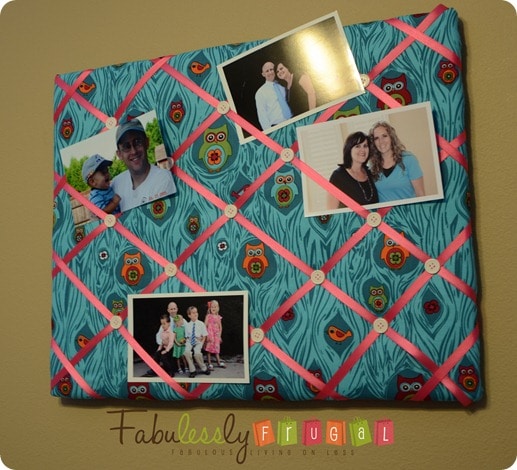
It gives me more motivation to actually print out some of the thousands of pictures I take! I love the pop of color it adds to my craft room.
More Easy & Fun Craft Projects:
Comments
Leave a Reply
More Related Diys


Trending DIY Projects
- DIY
- Recipes
- Deals
- Blog


Report a Problem
Please select the problem you are facing with this deal:
- Price Increased
- Price Decreased
- No longer available
- Expired
- Link doesn't work
- Suggestion
- Compliment
- Other
Add more details:
Thank you for your feedback. We really appreciate it.
Enter your email address if you would like to receive a follow up.
Please Try Again
Thanks for providing the email address.
We will reach out to you as soon as possible.


Popular
Recommended
About Us

At Fabulessly Frugal, our goal is to help you live HEALTHY, WEALTHY, and WISE! My team and I work hard to bring you the best, online deals, clean eating, DIY's, freezer meal recipes, and more! I LOVE coaching and inspiring people to improve their health in my fitness challenge! You should also check out my favorite cleanse! Learn more about me and the rest of my team.


Copyright © 2008–2024
Fabulessly Frugal: A Coupon Blog Sharing Gift Ideas, Amazon Deals, Printable Coupons, DIY, How to Extreme Coupon, and Make Ahead Meals. All rights reserved
Hello, I’m making this for my daughter and had a question. When you sew the buttons on did you just sew them to the ribbon or to the fabric as well?
Not sure how she did hers, but when I made these a while back I sewed them through the ribbon, fabric and canvas, so it gives a spot to tuck the pictures into – good luck, they really are very pretty when they are finished
hi I love your simple step by step dyi board, just curious do I have to use the batting material or could I just staple the fabric right onto the canvas board?
You don’t have to use the batting if you don’t want to. I personally like the look the batting gives it. You could definitely just staple the material right onto the canvas.
I’m looking for a project my crafty 9-year-old can make with just a little help. I’ve never used a staple gun – is it do-able for young hands? She would LOVE the power of that! Any additional tips to make it a success would be very welcome. Thanks 🙂
You have to give quite a bit of pressure for the staple gun. I’m not sure if little hands could do it. I’m sure if you helped her it would work though. Good luck!
Thanks for info! Turns out my dad has an electric one that will be easier for her. Looking forward to seeing her make this.
How is the back finished off?
The fabric is just tacked to the back… You can see how the do it in a couple of the pictures! 😀