
DIY Decorative Carrots Easter Craft
How to Make a Carrot Wreath
Easter is such a fun time for DIY projects! There are so many different ones you can do. You could make an Easter egg pinata, dye your Easter eggs, or you could make this DIY carrot wreath!
These carrots are honestly such a cute way to decorate for Easter and spring. I am really happy with how they turned out and they are easy to put together too. I hope you all like it!
The Supplies:
- ½ yard orange organza fabric
- ½ yard green tulle fabric
- 4 packages of orange Easter Grass
- Natural-colored raffia
- twine
- hot glue gun and glue sticks
- Sewing machine
- Sewing pins
- Scissors
- Needle and thread
- Cutting mat and rotary cutter (optional, but it makes it a lot easier)
The instructions:
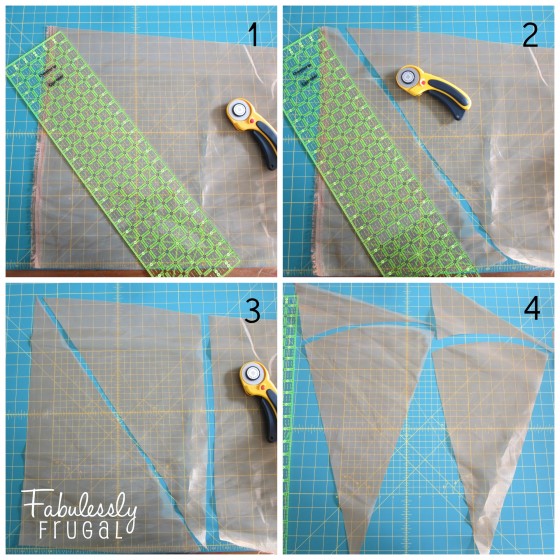
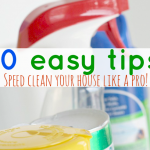
Step 1. Cut the Fabric
Start by cutting the orange fabric into triangles for the carrots. You will want varying sizes so you get a little variety.
I laid my fabric out and cut an angle across, then cut a straight line, making two triangles out of a square. Then, I cut a curve across the top. The curve can be trimmed after sewing so it doesn’t have to be perfectly even.
I would highly recommend using a rotary cutter and cutting mat for this. It cuts a lot of time and makes perfectly straight lines. It has a lot of other uses as well.
If you do not have a cutter or mat, cut these triangles by hand with scissors.
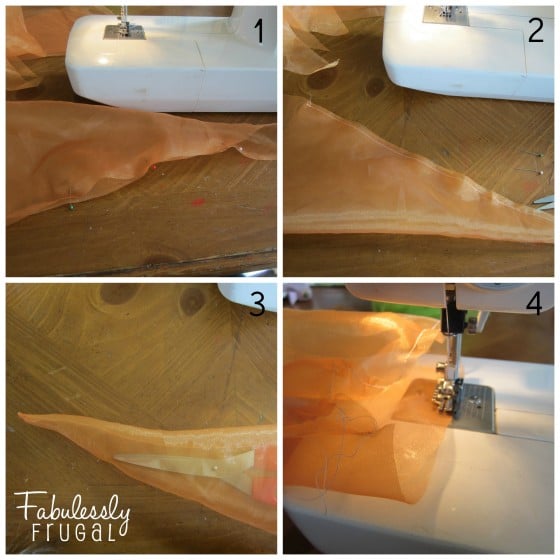
Step 2. Sewing the Carrots
Next, pin the triangle into the carrot shape, starting at the point. When the pins are in place, you can gauge if you need to trim the curved line at the top so the two ends meet.
To sew the carrot, sew from the top to the tip at a ¼ inch seam allowance. Again, it does not have to be perfect because we are going to trim it.
Once it is sewn, trim the seam down to about ⅛ of an inch. Cutting off some of the seam allowances will make the seam look smoother and less visible in the final product.
Once the carrot is sewn together, turn the fabric right-side-out, so the seam is on the inside. If you have trouble getting the point to flip right-side-out, use closed scissors to gently push the fabric out.
Next, change the tension and stitch on your sewing machine so it does a bigger, loose stitch. Sew around the top of the carrot, leaving a few inches of thread on each side to help pull it closed.
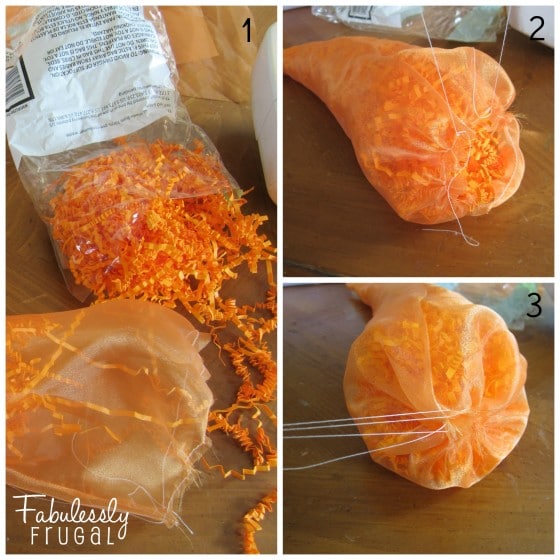
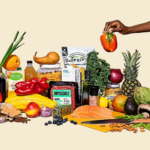
Step 3. Stuff the Carrots
Stuff the carrots with the orange Easter Grass. Fluff it up a little as you put it in. It will make it easier to shape the carrot.
Once the carrot is filled, grab the bobbin thread (or under-side of the sewing around the carrot top) from both sides. If you are holding the right thread, the fabric will scrunch together easily when you pull it.
Once it is tightly closed, secure it with a few knots.
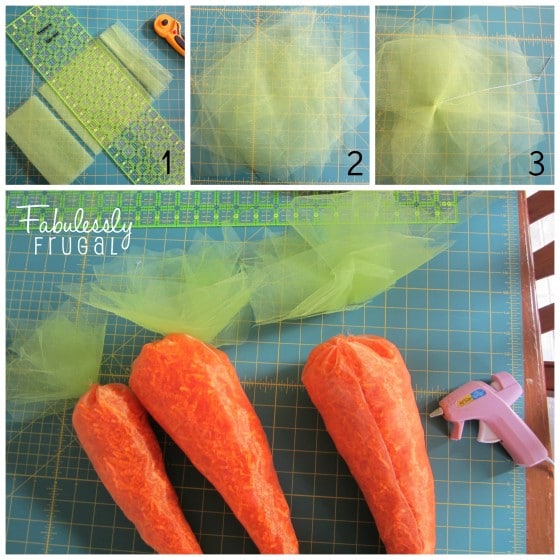
Step 4. Make the Carrot Tops
To make the green carrot tops, cut varying sizes of green tulle squares, rectangles, or even triangles. The biggest pieces I used were no larger than an 8”x8” square, but varying the sizes and shapes will give your leafy carrot tops more texture and shape.
Make a random pile of the tulle pieces, trying to get the points of the pieces to stick out in different spots. Use a needle and thread to sew the pieces together from the middle. Then pinch the sewn part together and that is the part you will glue to the carrot top.
If you can’t get your carrot top to stand up right, you can use a dot of glue in the middle to get the pieces to stick together.
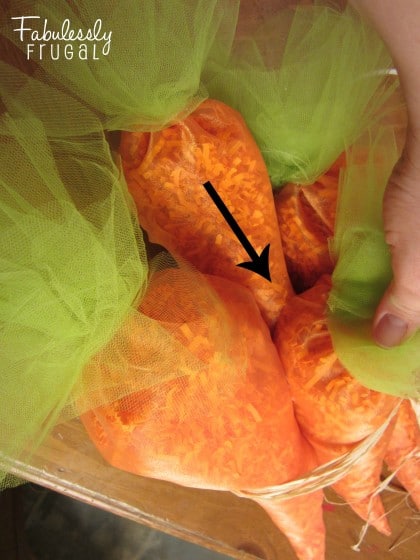
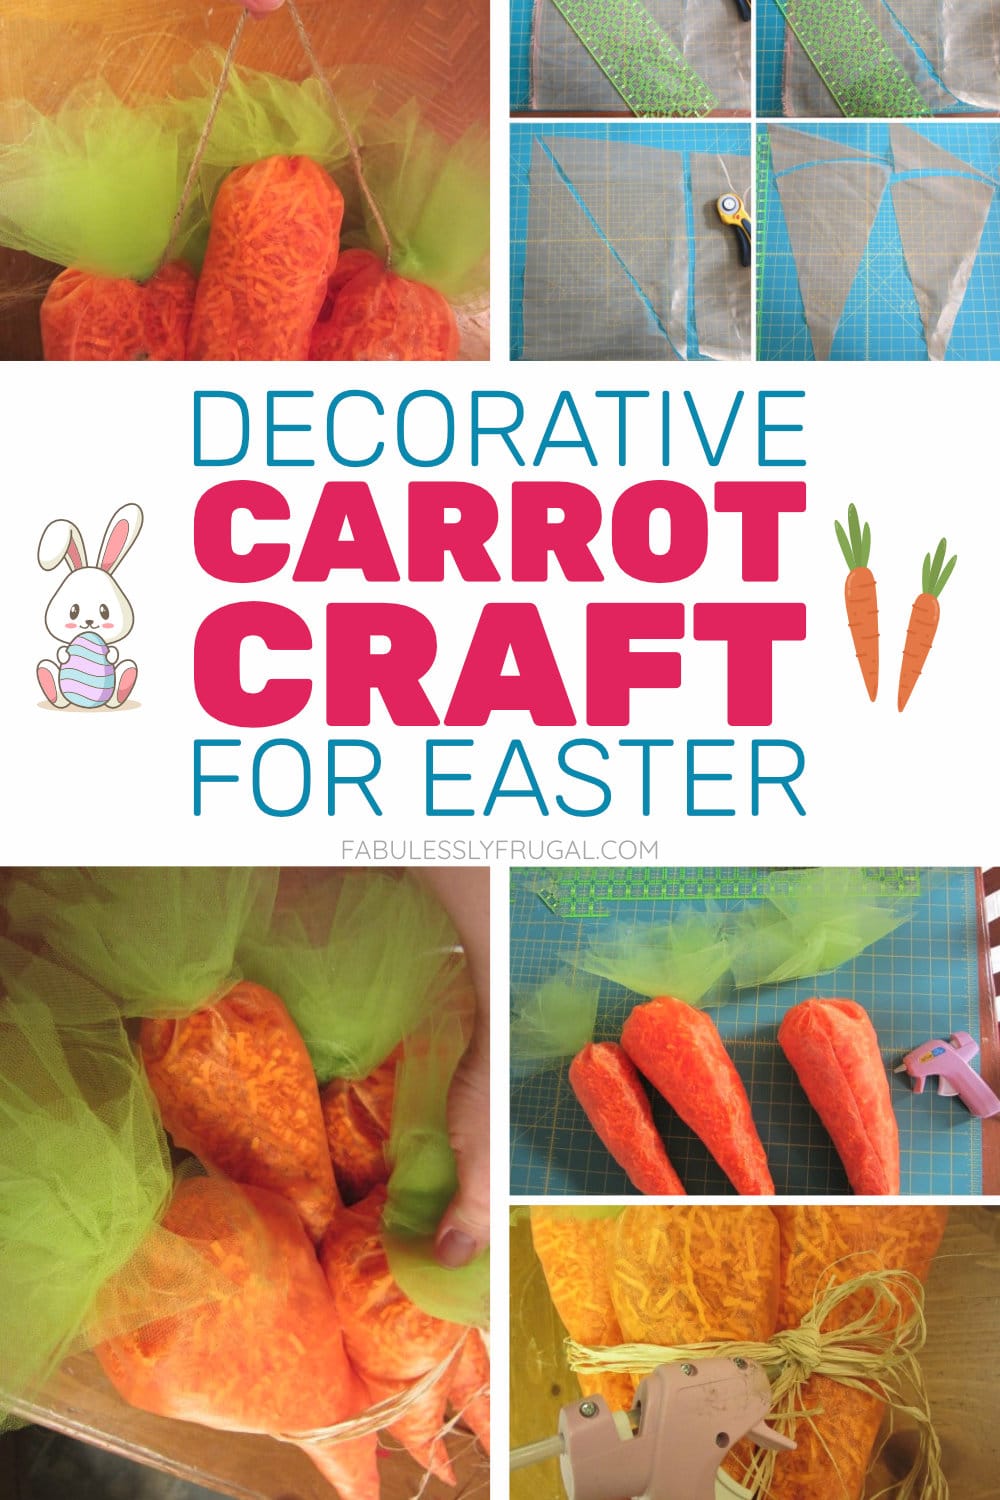
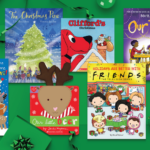
Step 5. Arrange the Carrot Wreath
To finish the cluster of carrots, arrange them how you like them.
I made four carrots and put the two largest on the outsides and glued the smallest one in the middle between them. Then I glued the medium-sized carrot on top, but a little lower, so the small carrot in the back can still be seen.
I used the hot glue gun anywhere I thought needed reinforcement to keep the carrots together, but it did not need much. The arrow in the picture above shows where the glue is holding the carrots together.
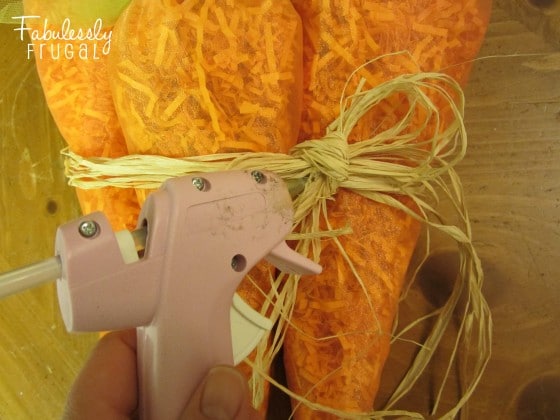
Step 6. Add a Bow
I tied a raffia bow around the bunch of carrots and reinforced the raffia by gluing it on the carrots in the back and under the bow in front. The glue keeps the raffia from sliding off and it keeps the bow looking nice and neat.
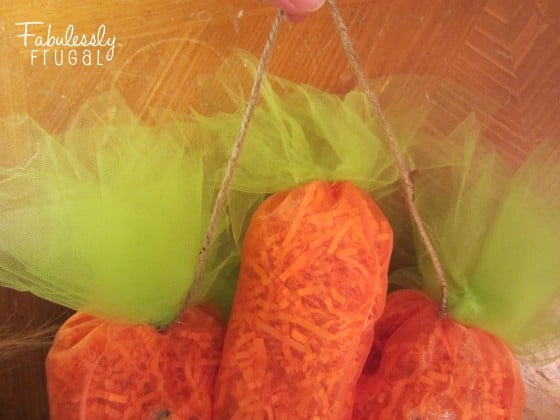
Step 7. Add Twine for Hanging
I glued a piece of twine near the top of the two large, outside carrots, to have something to hang the carrot wreath. I learned by trial and error that if you glue the twine on the backs on the carrots, then your bunch will tip forward when you hang it.
Try to glue the twine near the top and the weight will be distributed more evenly, but hide the glue under the green tulle. Then your carrot bunch will hang flat.
Final Thoughts
There you have it. Making this carrot wreath did take a bit of time, but it really wasn’t too difficult. Once you get your first carrot done the rest of them are easy!
Plus, the finished result is worth the work! You can reuse this decoration every yera as well. I hope you all enjoy this project and have a happy Easter!
More Easter Ideas:
- How to Dye Eggs with Kool-Aid (No Vinegar)
- How to Dye Easter Eggs with Melted Crayons
- 90+ No-Sugar Easter Basket Filler Ideas!
More Related Diys


Trending DIY Projects
- DIY
- Recipes
- Deals
- Blog


Report a Problem
Please select the problem you are facing with this deal:
- Price Increased
- Price Decreased
- No longer available
- Expired
- Link doesn't work
- Suggestion
- Compliment
- Other
Add more details:
Thank you for your feedback. We really appreciate it.
Enter your email address if you would like to receive a follow up.
Please Try Again
Thanks for providing the email address.
We will reach out to you as soon as possible.


Popular
Recommended
About Us

At Fabulessly Frugal, our goal is to help you live HEALTHY, WEALTHY, and WISE! My team and I work hard to bring you the best, online deals, clean eating, DIY's, freezer meal recipes, and more! I LOVE coaching and inspiring people to improve their health in my fitness challenge! You should also check out my favorite cleanse! Learn more about me and the rest of my team.


Copyright © 2008–2024
Fabulessly Frugal: A Coupon Blog Sharing Gift Ideas, Amazon Deals, Printable Coupons, DIY, How to Extreme Coupon, and Make Ahead Meals. All rights reserved