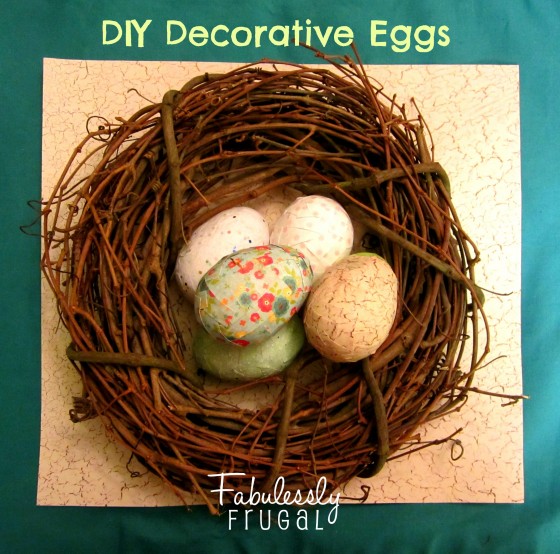
DIY Decorative Eggs
In years past, I have seen decorative paper-mache-like eggs in different home decor stores. They are so cute, but so overpriced. I figured if I could use a plastic Easter egg as a base, that I could get the same look. It saves a good amount of money, plus I would have the added bonus of picking my own style of paper.
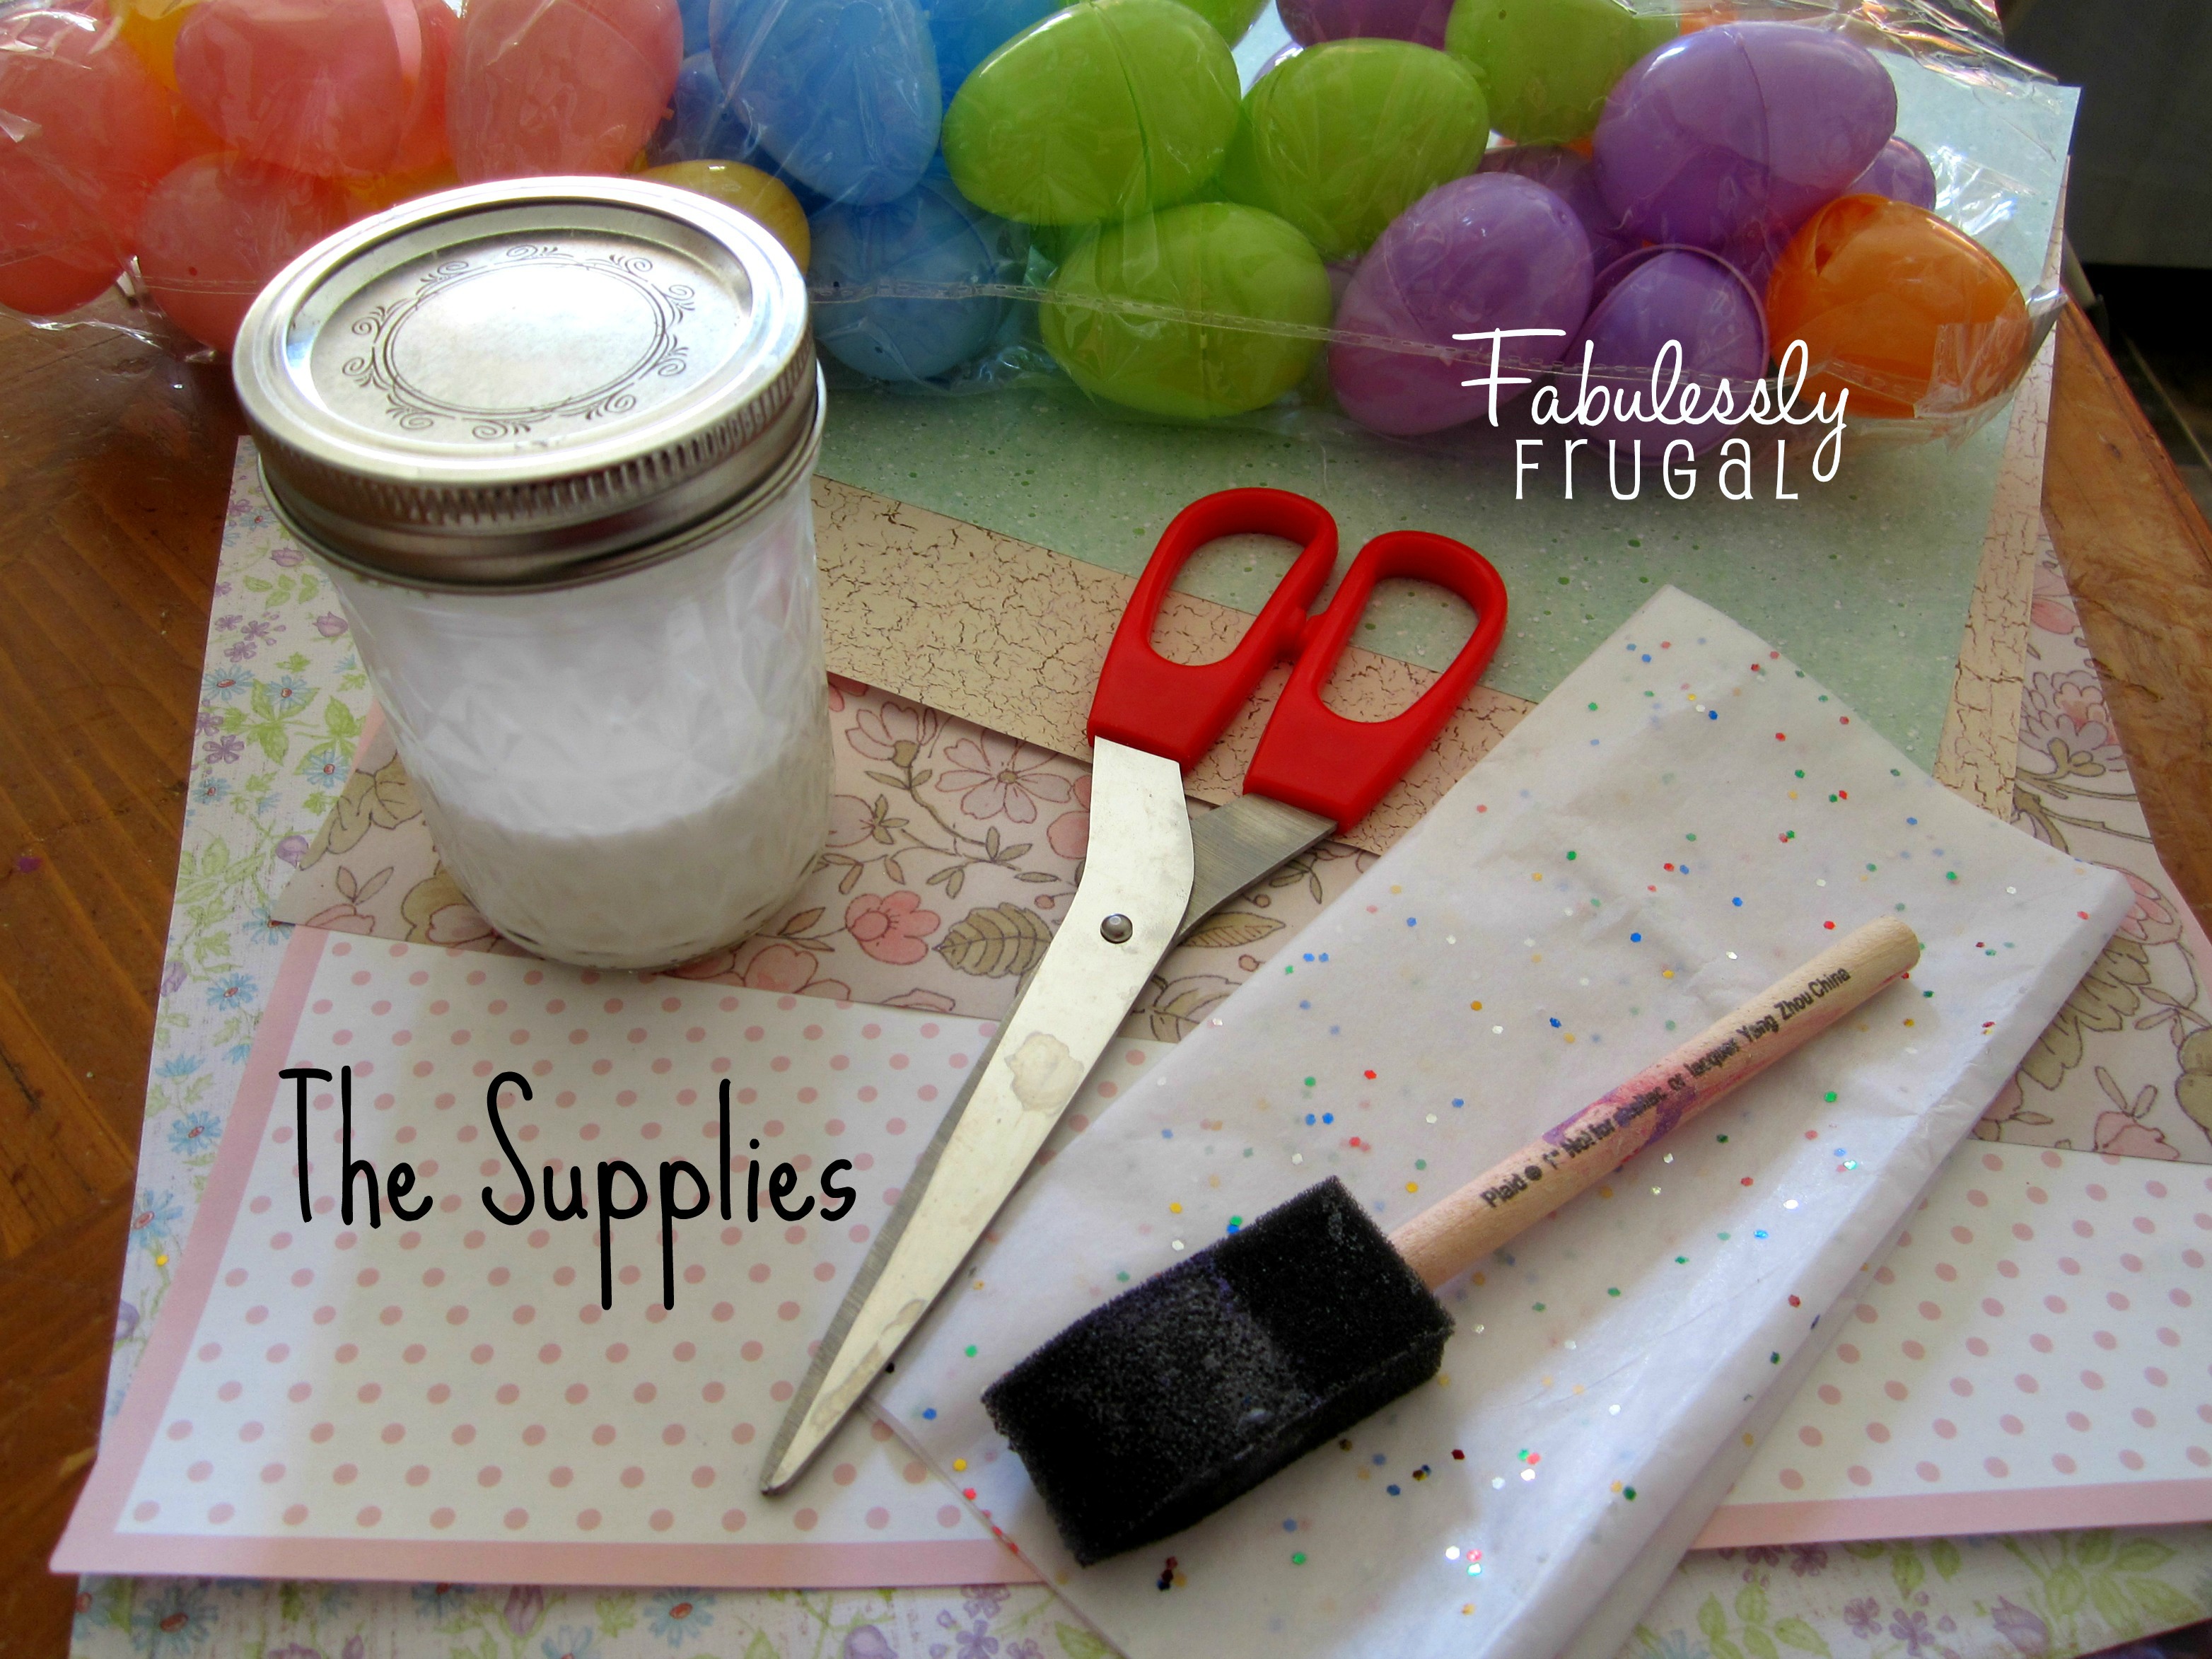
The Supplies:
- plastic Easter eggs
- tissue paper and/or lightweight scrapbook paper (not cardstock)
- Homemade Mod Podge (there are instructions on how to make it in my last craft tutorial, but of course you can always buy it too)
- sponge brush
- scissors
- plastic grocery bag
The Instructions:
The scrapbook paper eggs and the tissue paper eggs worked a little differently during the application process. The amount of layers and the size and shapes of paper vary between the two types of eggs, so I’ll include instructions and tips for both ways.
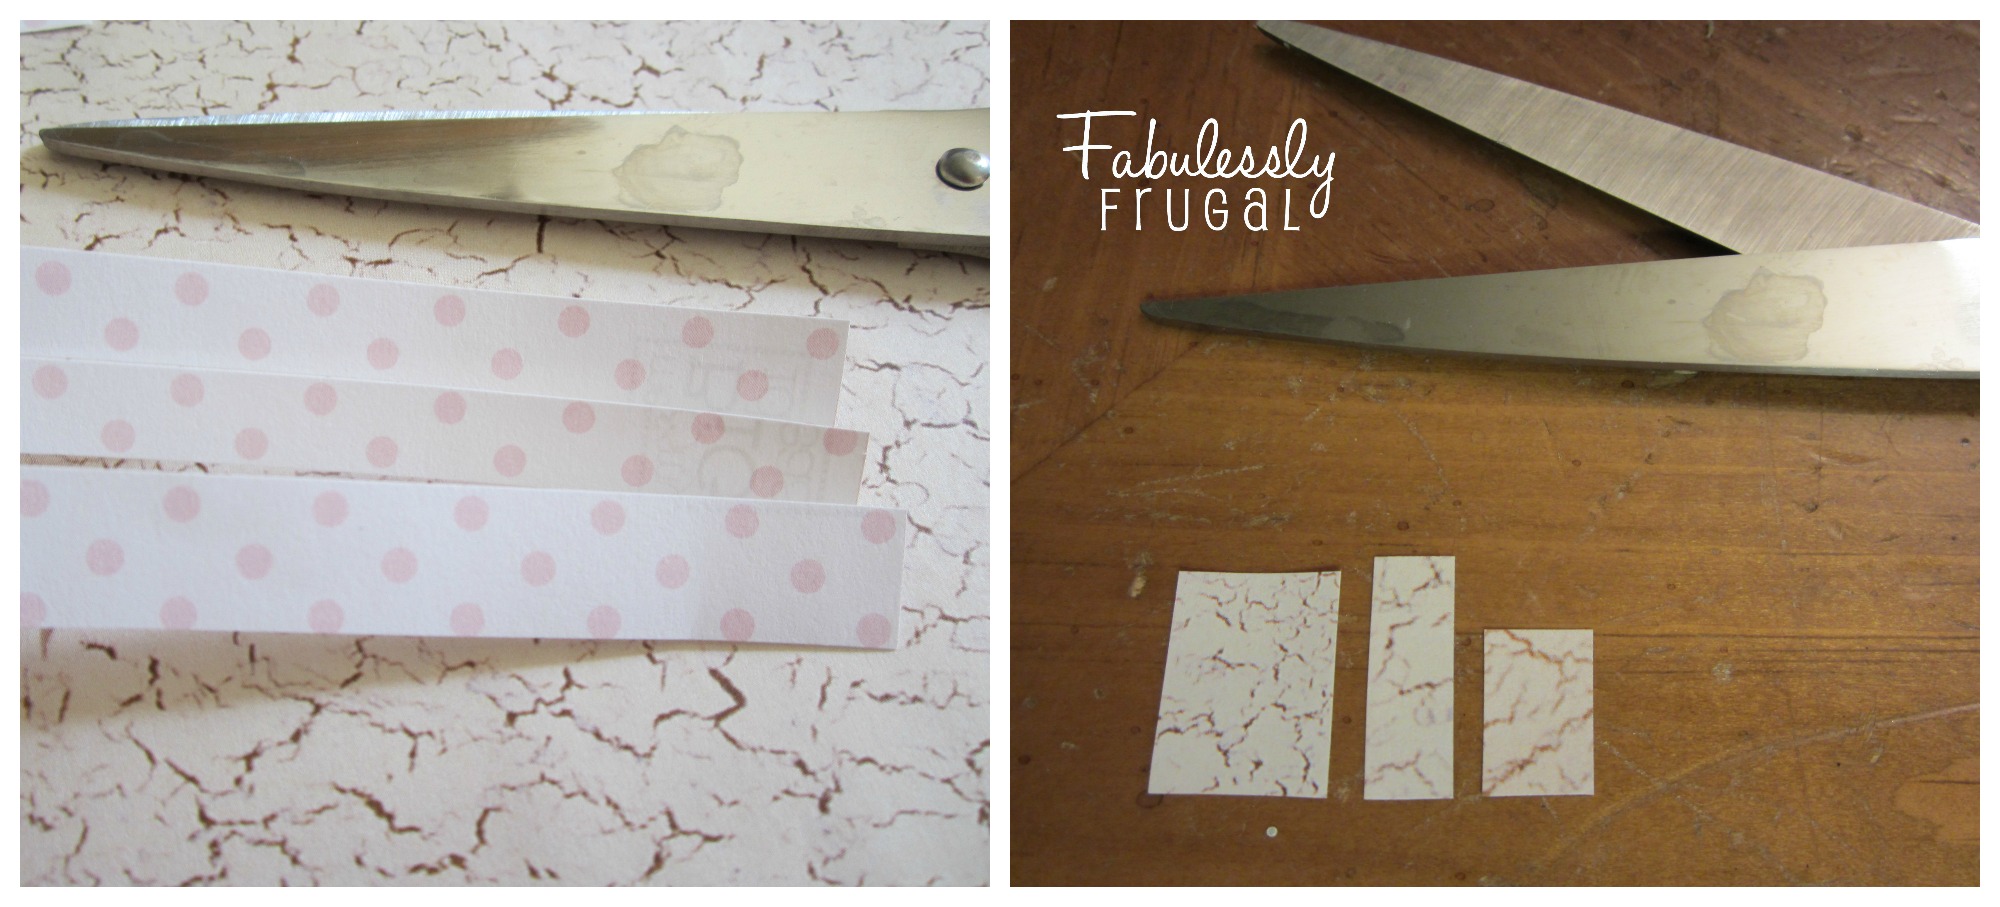
For scrapbook paper eggs, you only need one layer of paper to cover the egg. The pieces overlap a little, but it is more like a puzzle. Start by cutting your paper into small pieces. I found it was best to have three basic sizes, all suited for the different curve areas of the plastic egg. I used approximately ¾” square pieces on the flattest part of the egg (near the middle, over the seam). I used longer, thinner pieces where the egg was curvier (near the points). Then I had small pieces that were approximately ⅓” square to fill in any gaps. Together, all these pieces make a nice, random collage. Brush the back side of the paper with glue and stick it on the egg. Because scrapbook paper is a little heavier, you may need to paint mod podge over the paper too, to get it to stay pliable and adhere well. You basically have to soak the paper a little bit or it will begin to peel back.

For the tissue paper, it made no difference what shape the pieces were cut. Because it is so thin, the pieces could be quite large, and they would still lay nicely and stick well. It worked more like real paper mache. A lot less glue was needed too. I brushed the egg with mod podge, then stuck multiple pieces of tissue paper on, then brushed them all down at the same time.
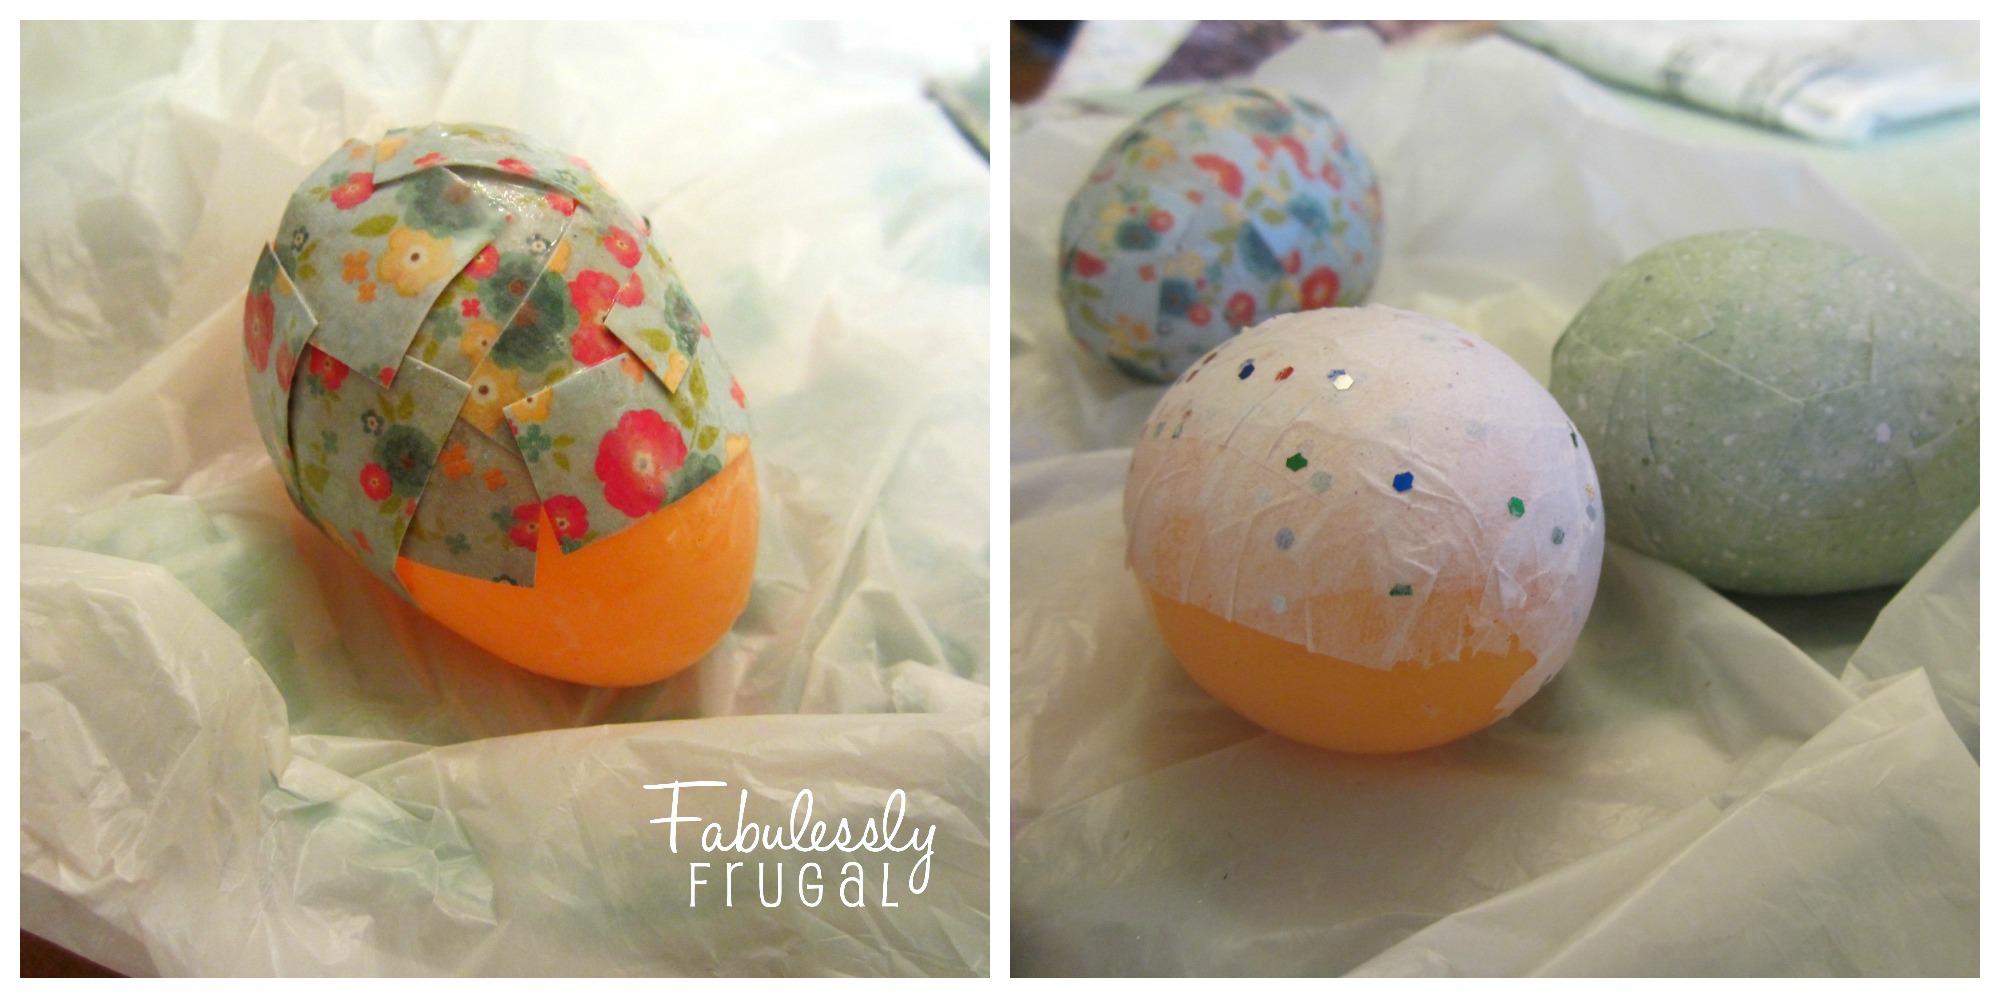
Because the eggs got sticky when covered with mod podge, I worked on half at a time. When one side was finished, I set the eggs on a plastic grocery bag with the wet side up. The bag was a little crinkled, so the eggs didn’t roll over. It was the perfect surface because even if some of the wet glued pieces dried against the plastic bag, they still peeled up without ruining anything. When one side dried, I repeated the process, and let the other sides dry too. The eggs were pretty sturdy and held up really well once they dried.
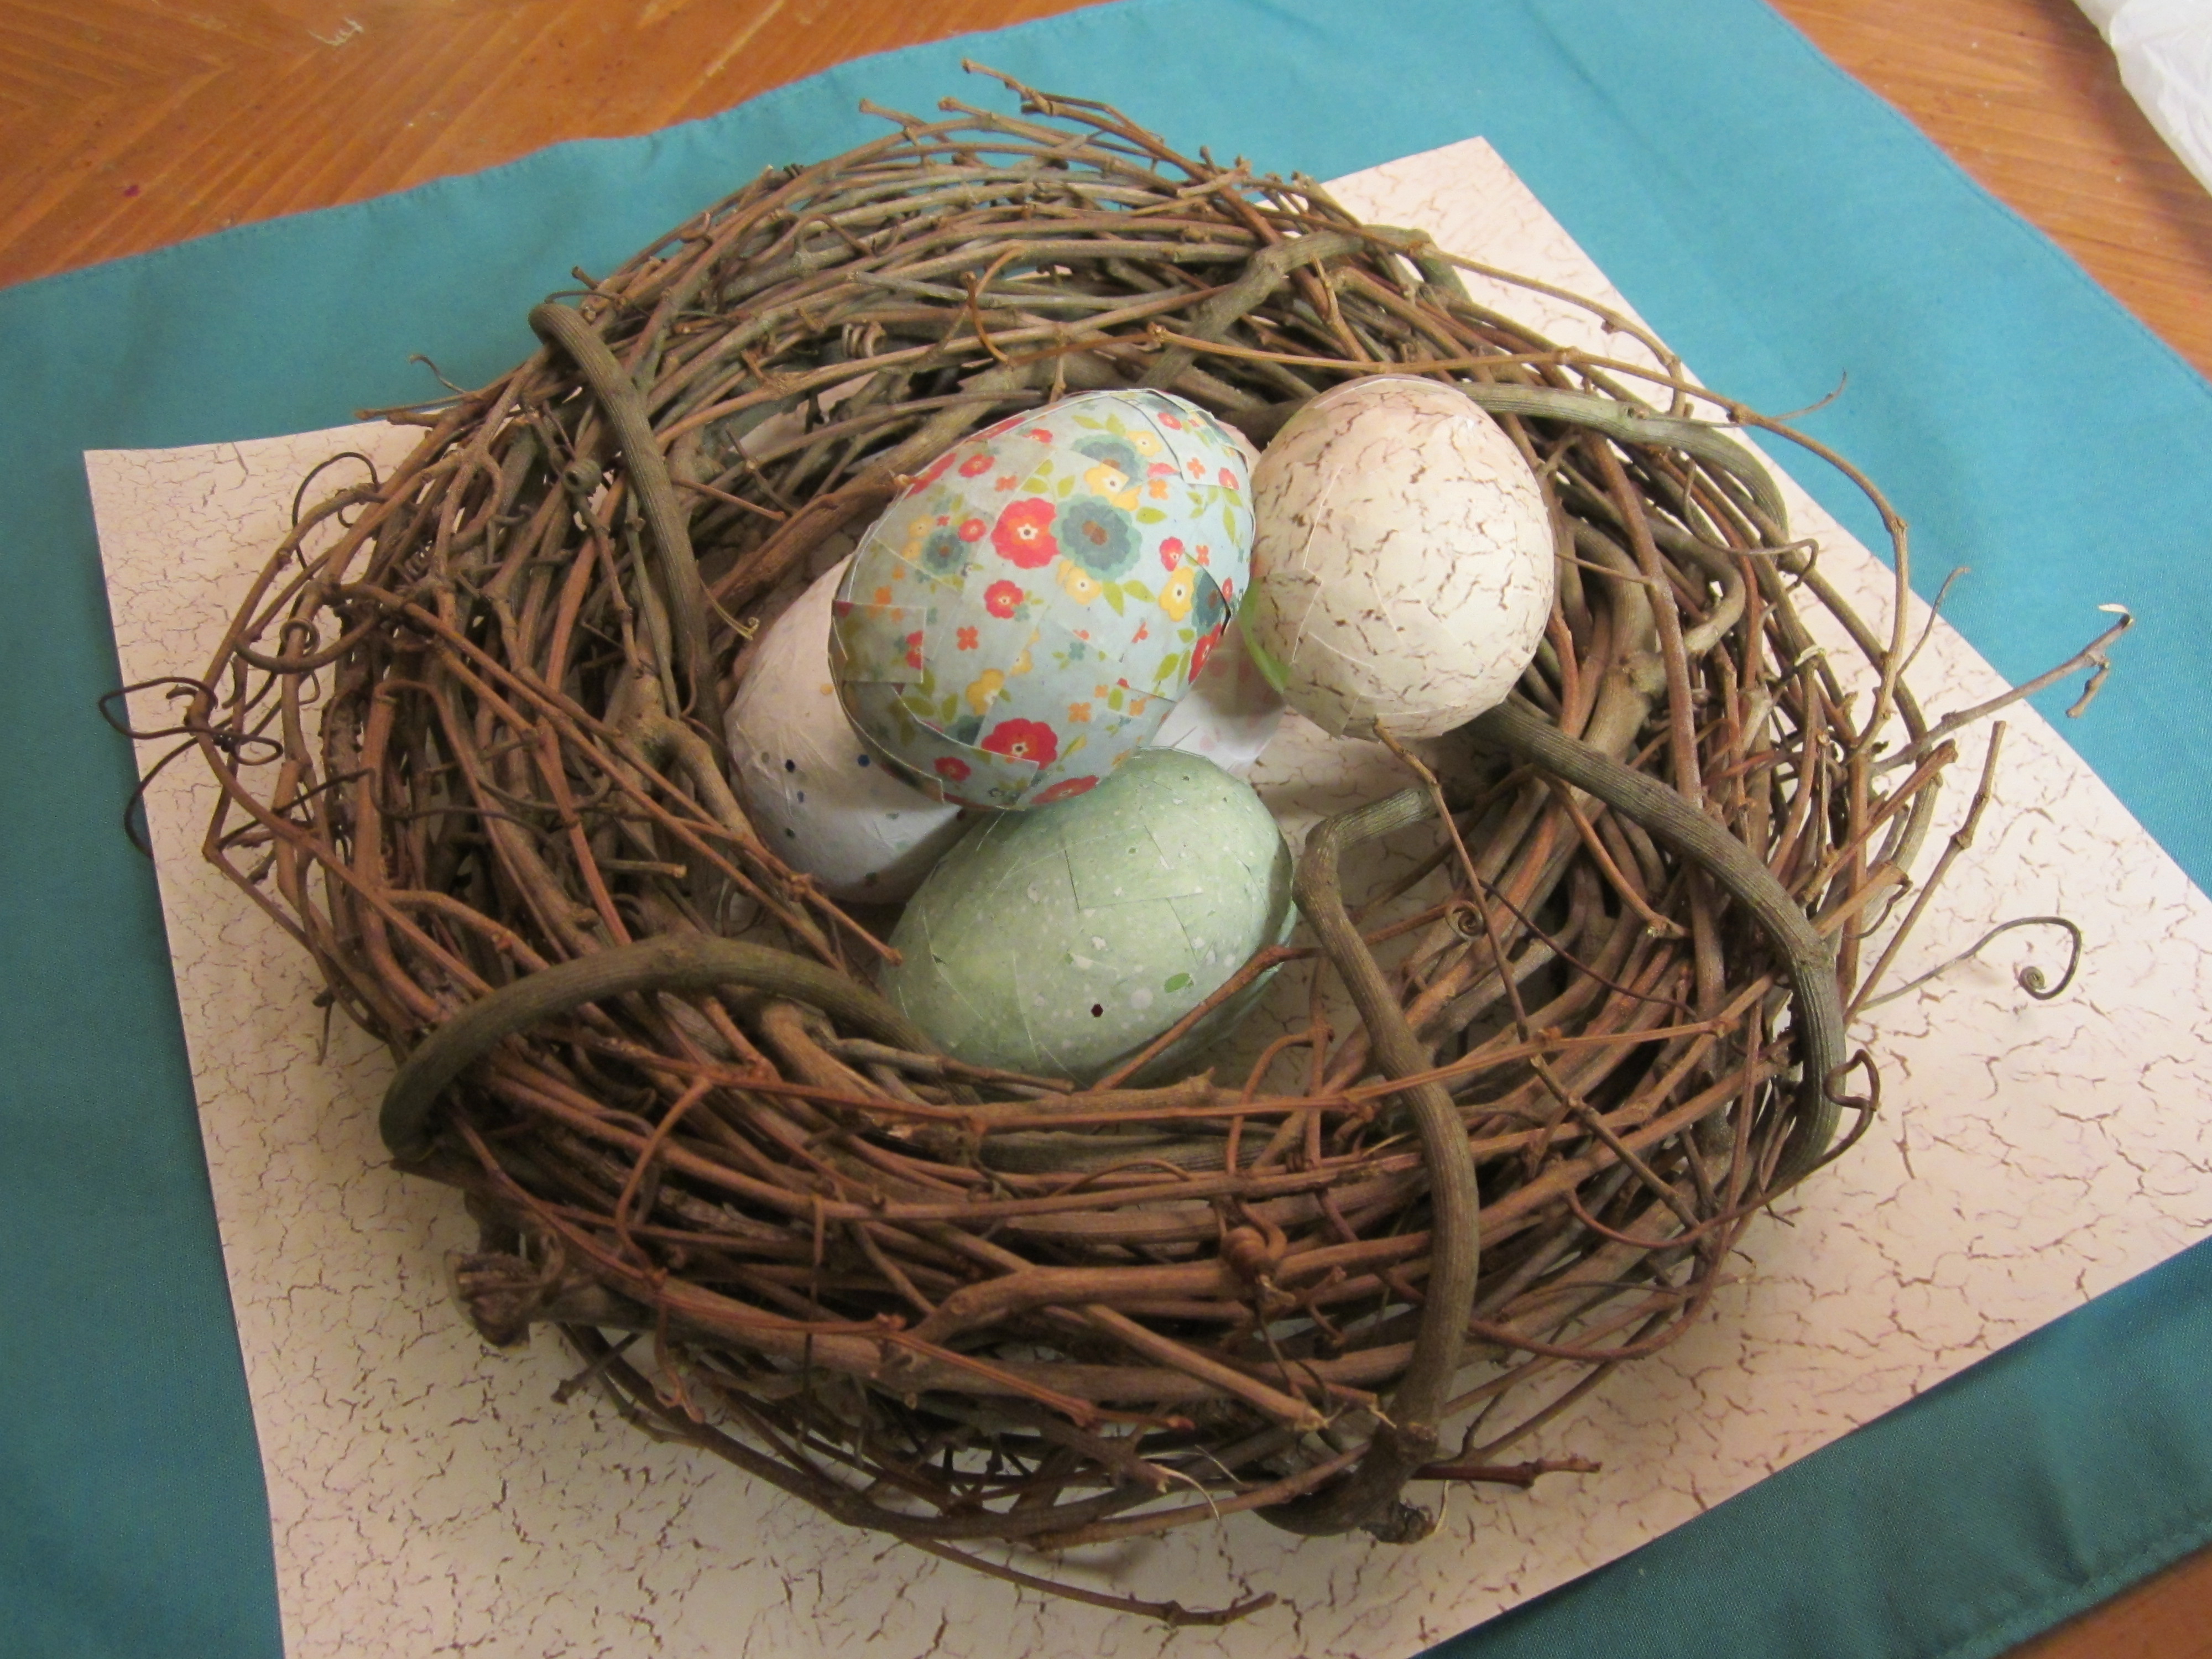
I liked how the tissue eggs had a different look than the scrapbook paper ones. It allowed me to mix textures and patterns. Then, for a cute display, get a small grapevine wreath and pile a few eggs in the middle. It made a cute little bird’s nest. I love the way it turned out. It can be an Easter decoration, or just a general spring decoration. I put mine on a place-mat to use as a centerpiece on my kitchen table. You could fill a clear glass vase with eggs. You could put them in a basket. There are so many ways. However you use it to decorate, I think you’ll have a lot of fun!

Comments
Leave a Reply
More Related Diys


Trending DIY Projects
- DIY
- Recipes
- Deals
- Blog


Report a Problem
Please select the problem you are facing with this deal:
- Price Increased
- Price Decreased
- No longer available
- Expired
- Link doesn't work
- Suggestion
- Compliment
- Other
Add more details:
Thank you for your feedback. We really appreciate it.
Enter your email address if you would like
to receive a follow up.
Please Try Again
Thanks for providing the email address.
We will reach out to you as soon as possible.


Popular
Recommended
About Us

At Fabulessly Frugal, our goal is to help you live HEALTHY, WEALTHY, and WISE! My team and I work hard to bring you the best, online deals, clean eating, DIY's, freezer meal recipes, and more! I LOVE coaching and inspiring people to improve their health in my fitness challenge! You should also check out my favorite cleanse! Learn more about me and the rest of my team.

Copyright © 2008–2024
Fabulessly Frugal: A Coupon Blog Sharing Gift Ideas, Amazon Deals, Printable Coupons, DIY, How to Extreme Coupon, and Make Ahead Meals. All rights reserved
Blow out the yolks and whites of the eggs and let them dry for a decoration you can save for years to come.
What a neat idea. That is a perfect alternative if you don’t want to buy the plastic ones. Thanks for sharing!
if you rip the paper instead of cutting the paper, the edges of the paper will lay flatter and the eggs will be smoother.
Good idea. Thanks for sharing!