DIY Thanksgiving Table Runner and Utensil Pouches
It’s almost thanksgiving!! Who’s ready? Are you in need of a quick, affordable way to dress up your Thanksgiving table? Making a cute table runner may be just the thing. This is a simple DIY craft project that will be easy to do whether you are decorating one or several tables.
DIY No Sew Thanksgiving Table Runner
It is that time of year already! Last week we shared with you our DIY Fall Candle Holder and so many of you loved that one so much, we decided to give you one more easy, quick DIY before Thanksgiving hits. This project is SUPER simple and is once again made out of things already found in your craft bucket. I did not purchase anything to do this project. All of it was done with items already found in my home.
Who’s Ready to Get Started?
This is a difficult part to address! With a DIY like this, everything is customizable. I am going to show you what I used, but that does not mean you have to do the exact same thing. All of these items were already found in my home. BUT, you can substitute any of the supplies for supplies you already have. Our goal is to give you DIYs that do not require you to go out and buy multiple items! This should be a cheap, fast, beautiful DIY that requires minimal effort.
You Will Need:
- Fabric (I used a drop cloth from my nieces wedding but you could use burlap, an old tablecloth, or anything else you have lying around your home!
- scissors
- fall craft leaves
- hot glue gun
- hot glue sticks
- buttons
- paint and paintbrush
- embroidery floss
- glitter
Like I said, this is just what I used, but you can substitute things as needed! Make this DIY your own!
How To Make Your Runner
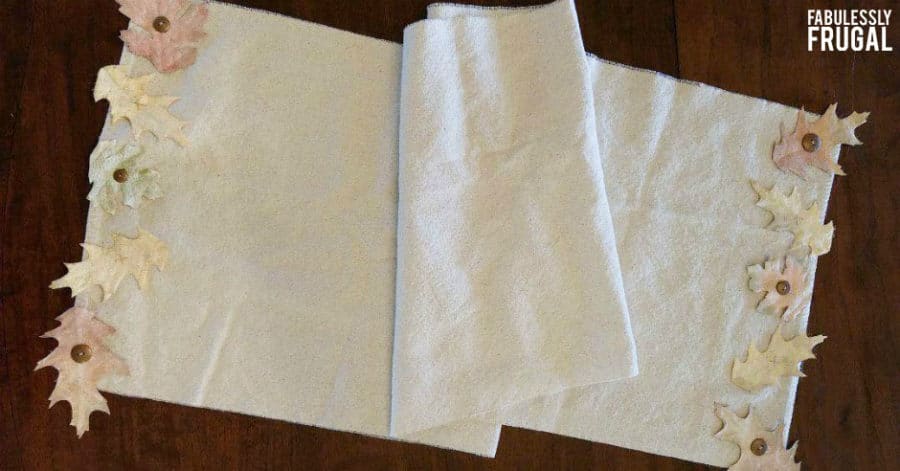
Pick your material
For the material, I used a drop cloth that I had from my niece’s wedding. I started by figuring out how wide I wanted my table runner to be. I went with 15″ wide by 57″ which was the length of the drop cloth. After you decide the length and width, adjust your material as needed so it fits your expectation. I would suggest using thicker fabric like a drop cloth or burlap, but if you have a festive old tablecloth lying around, that will work too!
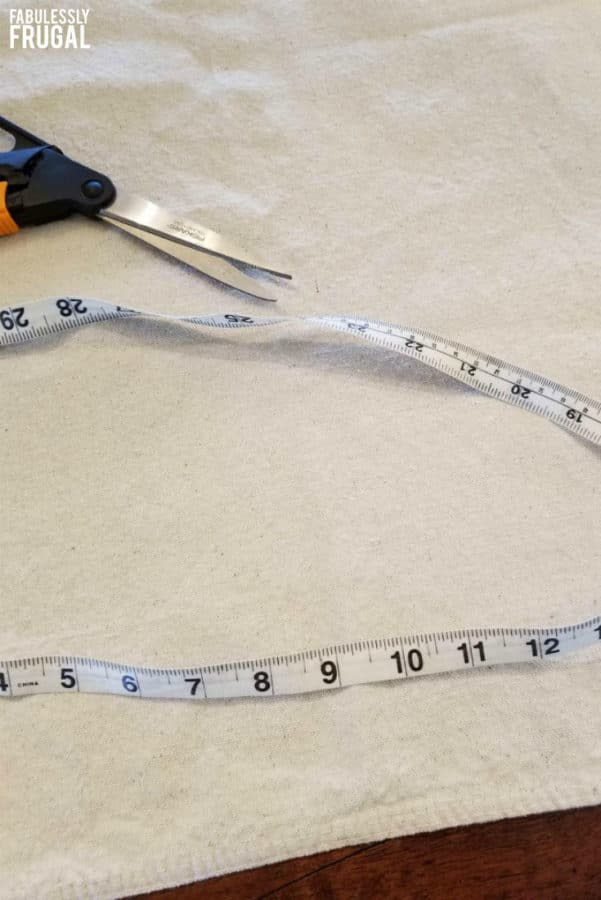
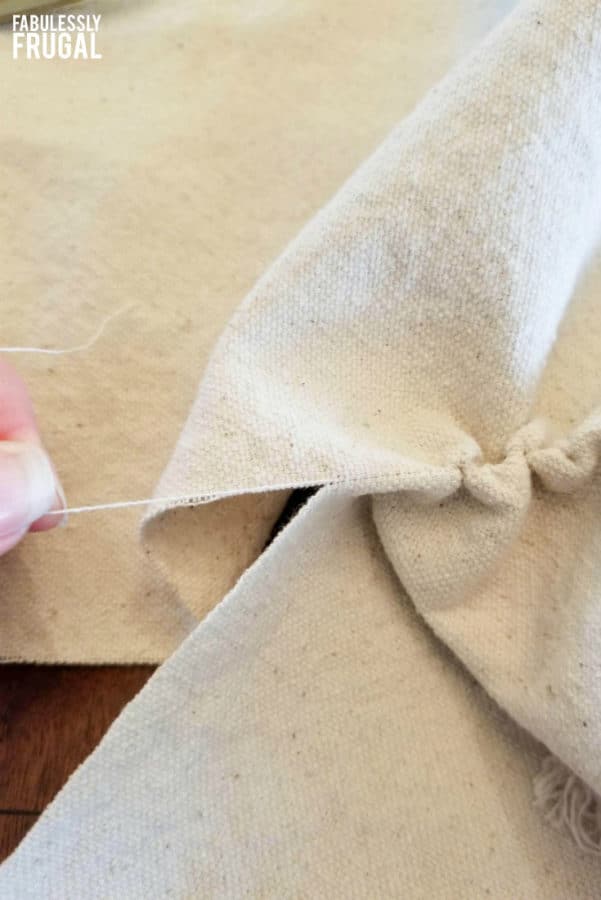
TIP: If you use a drop cloth, to cut straight lines I put a snip in the fabric and then grabbed a couple of pieces of thread and very gently and carefully pulled them when the threads broke you can see a line which tells you where to cut I kept doing that to cut on both sides of the drop cloth. They came out perfectly straight. Then I pulled a few more threads to give it a frayed look. You could also iron those edges over and put fabric glue or even machine sew but I decided to have a quick and simple project and left my edges frayed.
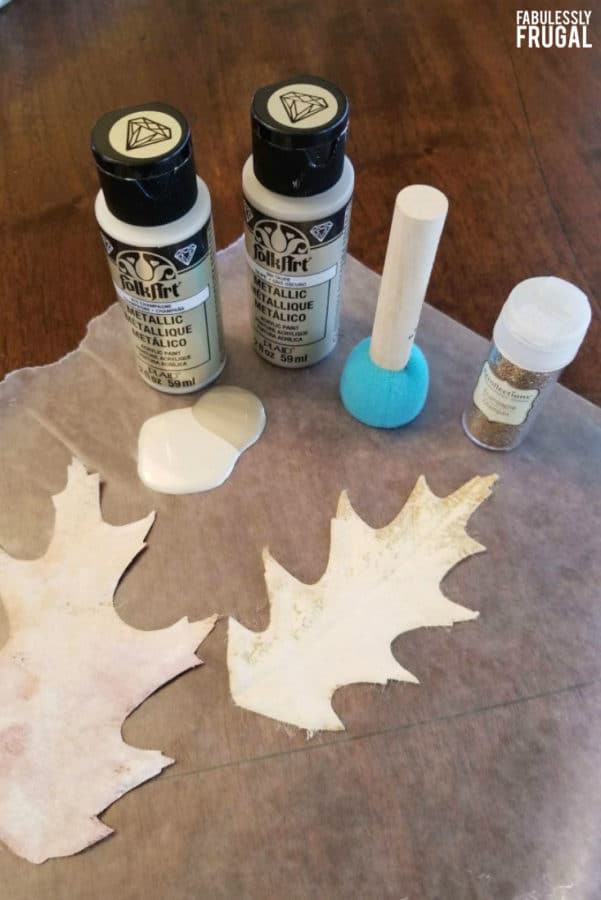
Paint the leaves
Your next step is to find the leaves you are wanting to use. The leaves I had in my craft closet were bright autumn colors and my house has more of a warm, neutral tone so I decided to just take these leaves I already had, and paint them! I used the same paint as I did in the DIY Candle Holder that was already in my cupboard. I used the warm white paint and then I went in with the metallic paints and sponged those colors on randomly. Then I finished it off by sprinkling a tiny bit of the glitter dust on each leaf. After the paint was dry I laid the leaves out on the edges of the runner where I wanted them.
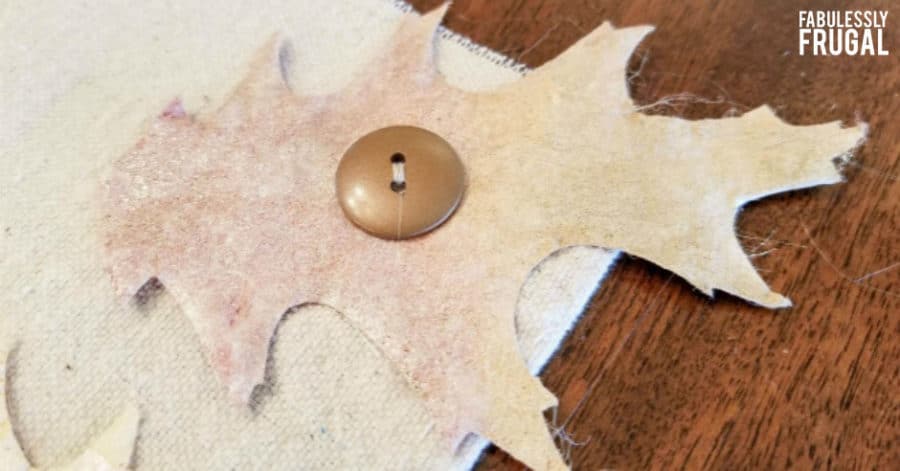
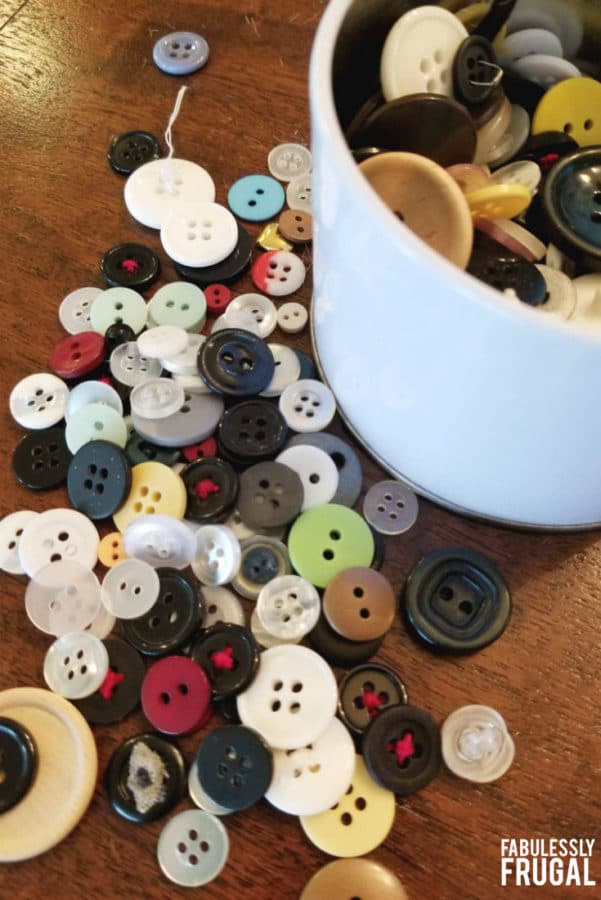
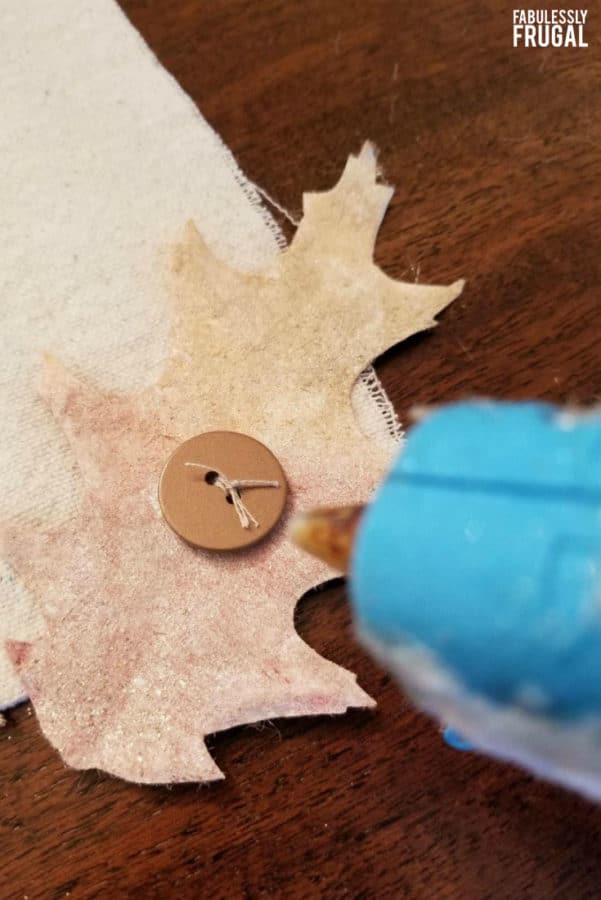
Add the buttons
Who doesn’t have buttons lying around their house? We had a ton! I thought adding a few buttons here and there would be an awesome way to add something to the leaves. I used some coordinating embroidery floss on the buttons. I just threaded it through the holes, but did not actually sew the button to the leaves. The floss was just for looks.
Add X’s to leaves
On the other leaves that did not have buttons, I just stitched an X on them with the embroidery floss. I was just going to leave them plain, but I wanted to add a little more to them. I did not want it to be TOO plain! This was a quick way to add some detail without wasting a bunch of time.
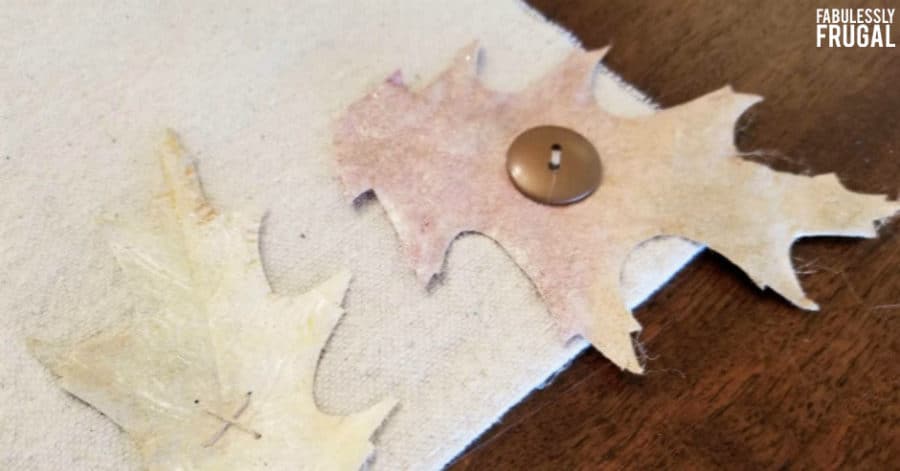
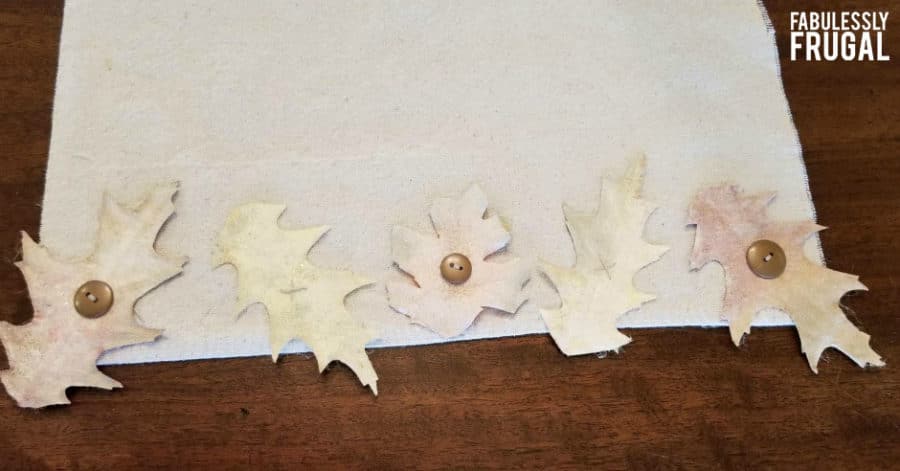
Glue buttons and leaves
Then I grabbed my trusty glue gun and glued the buttons on to the leaves and then glued each leaf right onto the table runner. So it was completely a no- sew project! And I had everything for this project already. Glue guns allow glue to dry fairly quickly and you can then immediately add the runner to your dining table!
What do you think?
Who is ready to try this one out? It is easy, adorable, and super affordable. I did not spend $1 on this project! You do not have to spend money to decorate everyone! You can use what you have to create something beautiful. I hope you all try this one out and see what you can create with items you already have!
Comments
Leave a Reply
More Related Diys


Trending DIY Projects
- DIY
- Recipes
- Deals
- Blog


Report a Problem
Please select the problem you are facing with this deal:
- Price Increased
- Price Decreased
- No longer available
- Expired
- Link doesn't work
- Suggestion
- Compliment
- Other
Add more details:
Thank you for your feedback. We really appreciate it.
Enter your email address if you would like
to receive a follow up.
Please Try Again
Thanks for providing the email address.
We will reach out to you as soon as possible.


Popular
Recommended
About Us

At Fabulessly Frugal, our goal is to help you live HEALTHY, WEALTHY, and WISE! My team and I work hard to bring you the best, online deals, clean eating, DIY's, freezer meal recipes, and more! I LOVE coaching and inspiring people to improve their health in my fitness challenge! You should also check out my favorite cleanse! Learn more about me and the rest of my team.

Copyright © 2008–2024
Fabulessly Frugal: A Coupon Blog Sharing Gift Ideas, Amazon Deals, Printable Coupons, DIY, How to Extreme Coupon, and Make Ahead Meals. All rights reserved
This is pretty cool DIY idea!!