
How to Build a DIY Garden Trellis
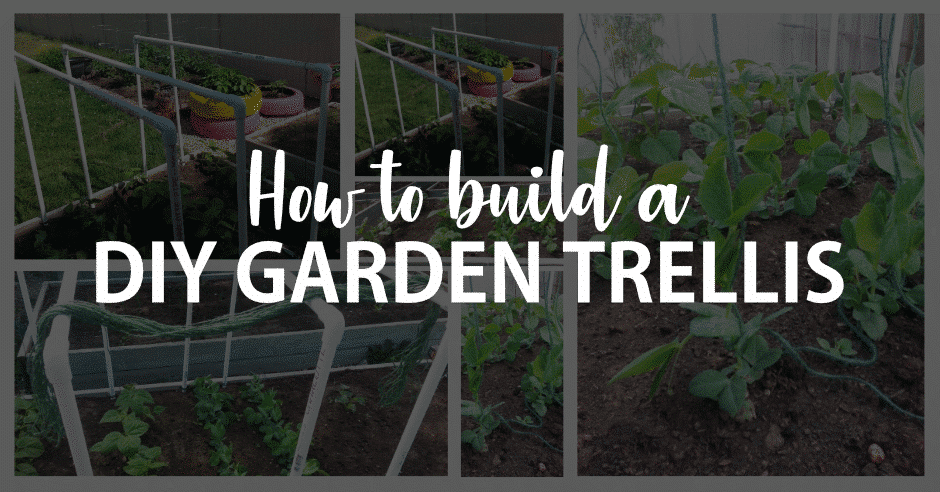
7-Step DIY PVC Trellis
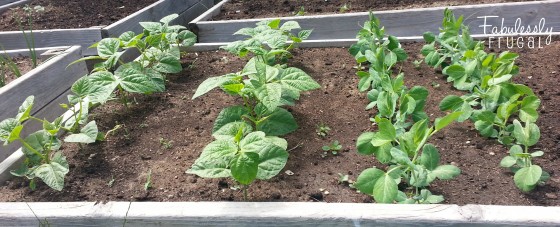
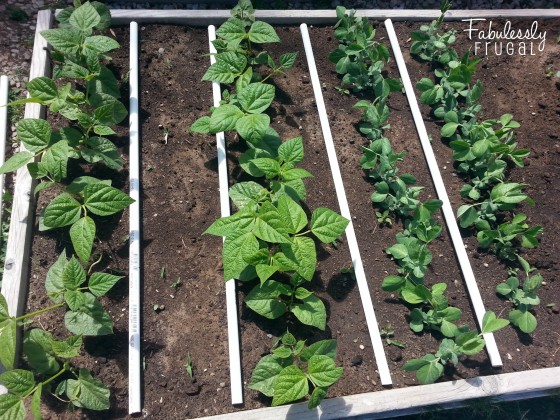
I don’t know about you, but my garden has just been growing like crazy! I have waited to put in a trellis for my beans and peas because I have been working on other projects and have been busy harvesting all of the berries that are ripening right now!
Anyway, I finally got around to making a DIY garden trellis for my bean plants and sugar snap peas. The peas have been trying to vine for a few days, and the beans are just getting there so I knew I had to get going on it quick.
Frugal living and frugal gardening has been a goal of mine this year, so I really like when I am able to do a DIY garden project! I wanted to share my project with you so you can see just how easy and inexpensive it is to make a PVC trellis in your own garden.
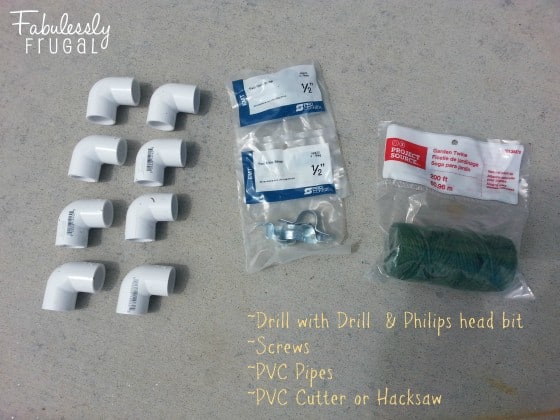
What you’ll need to make your DIY garden trellis:
(**Below I will tell you the amount and measurements of each material that I used based on the measurements of my garden boxes. You will need to make adjustments based on the measurements of your boxes.**)
- 1/2″ PVC Pipes (I needed 4: $6.88)
- 1/2″ Elbow joint PVC Connectors (I needed 8: $2.24)
- 1/2″ Two Hole Conduit Straps (I needed 8: $2.18)
- 1 1/4″ Screws (I already had these.)
- Garden Twine ($2.98)
- PVC pipe cutter or hack saw (I already had this.)
- Drill with drill bit & Philips head bit (I already had this.)
- Total cost for my trellises: $14.28!! I had originally thought about getting a metal one, but they were over $40 each, so this works really well for me! 🙂
Shop at Lowe’s and have your materials ready for pick up! Get started here!!
Step 1:
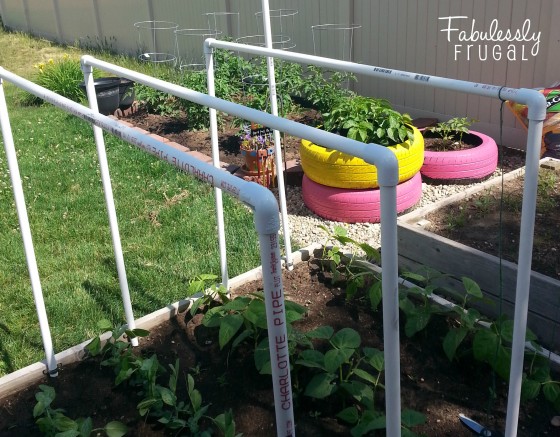
Gather materials and mark off measurements on PVC pipe. I wanted (3) trellises to sit 36″ high and 42″ wide & (1) trellis 48″ high and 42″ wide so marked them as following:
- Pipe 1 – 36″, 36″, 48″
- Pipe 2 – 36″, 36″, 48″
- Pipe 3 – 42″, 42″, 36″
- Pipe 4 – 42″, 42″, 36″
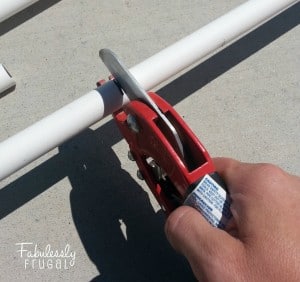
Step 2:
Use pipe cutter or hack saw to cut the pipes. **Use extreme caution and follow directions on how to use the cutter or saw!!**

Step 3:
After I cut the sections, I laid them out in the garden according to where I wanted them to go:
Step 4:
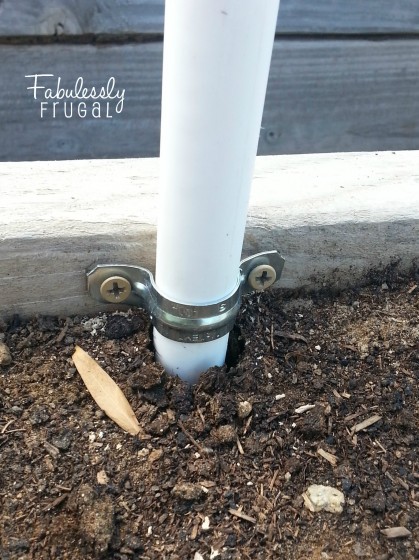
Pre-drill holes into the inside of the garden box and screw the conduit straps down just a little bit. Slide the (height section) pipe into the conduit strap.
Once the pipe is in place you can fasten the strap tightly. Repeat this step for all pairs of trellises that you are wanting to make.
Step 5:
Slide the Elbow joint connector onto the top of the height section of pipe. Once you have the elbows on, take the width piece and attach them together.
Step 6:
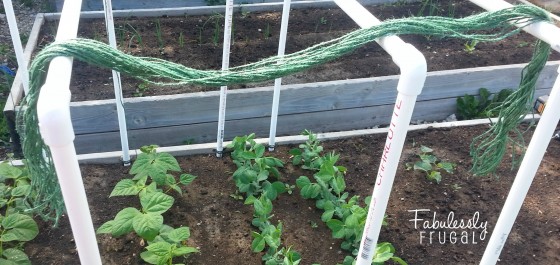
Cut pieces of garden twine and tie them onto the pipe so they hang down to the plant. I ended up measuring out one of the pieces and then used it as a guide and pre-cut several pieces so that I could work a little faster.
Step 7:
Gently wrap the plants around the twine to help guide them, or wrap the twine around a rock and place it on the soil if your plants are not ready to vine yet.

Your DIY Garden Trellis is Finished!
There you go!! This project took me about an hour from start to finish and tying the twine and wrapping them around the plants was the most time-consuming thing.
The nice thing about using twine is that at the end of the season you can just cut off the pieces at the top and have a quick garden clean up for your vine plants!!
More Gardening Tips:
- How to Make a DIY Compost Bin from Pallets
- How to Build a Lean-to Greenhouse for Under $100
- How to Make DIY Garden Markers with Wine Corks

Gardening Tools
Here are some great deals on tools to get you started on your own Garden Trellis and my favorite gardening book that is FULL of great information!
PVC Pipe Cutter, 1/2-Inch x 1-Inch
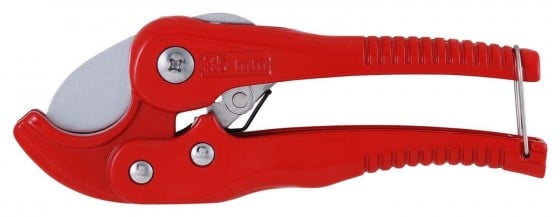
- Ships FREE with Prime!
- Tubing Cutter
- Cuts pipe sizes 1/2-Inch to 1-Inch
- Cuts PVC pipe, hose, and synthetic tubing
- Ratchet action
- Limited Lifetime Warranty
Stanley Solid Frame High Tension Hacksaw

- 12-Inch Fixed blade length, 4.375-Inch cutting depth
- 225-Pound blade tension
- 90-Degree and 180-Degree Adjustable blade angles allowing flush cuts
- All metal frame
- Large, comfortable tension knob with a full-grip handle
The Vegetable Gardener’s Bible, 2nd edition
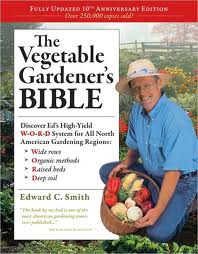
Ed Smith’s W-O-R-D system has helped countless gardeners grow an abundance of vegetables and herbs. And those tomatoes and zucchini and basil and cucumbers have nourished countless families, neighbors, and friends with delicious, fresh produce.
Comments
Leave a Reply
More Related Diys


Trending DIY Projects
- DIY
- Recipes
- Deals
- Blog


Report a Problem
Please select the problem you are facing with this deal:
- Price Increased
- Price Decreased
- No longer available
- Expired
- Link doesn't work
- Suggestion
- Compliment
- Other
Add more details:
Thank you for your feedback. We really appreciate it.
Enter your email address if you would like to receive a follow up.
Please Try Again
Thanks for providing the email address.
We will reach out to you as soon as possible.


Popular
Recommended
About Us

At Fabulessly Frugal, our goal is to help you live HEALTHY, WEALTHY, and WISE! My team and I work hard to bring you the best, online deals, clean eating, DIY's, freezer meal recipes, and more! I LOVE coaching and inspiring people to improve their health in my fitness challenge! You should also check out my favorite cleanse! Learn more about me and the rest of my team.


Copyright © 2008–2024
Fabulessly Frugal: A Coupon Blog Sharing Gift Ideas, Amazon Deals, Printable Coupons, DIY, How to Extreme Coupon, and Make Ahead Meals. All rights reserved
Have you planted bush variety or climbing variety of the peas and beans? If they are climbing, is this tall enough for them?
*New Gardener*
Hi Jill!
The peas are a bush variety, but they’ll still need a little help growing up, so that’s why the trellis is a bit shorter. Last year for my pole beans I used a wooden trellis that was 5′ high. I started with the shorter option but have the opportunity to add on to it with a T bracket and have it keep going up if needed.
Dude, can’t you just borrow the saw, or use some sticks for the trellis? That seems like a better way to make money.