
Deep Root Watering in Your Garden
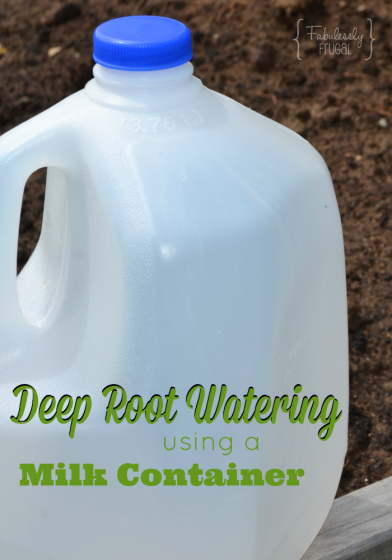
Use an Old Milk Container to Water your Garden
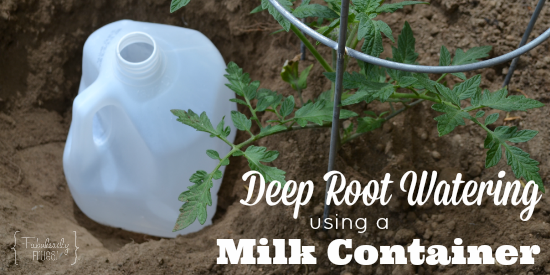
I have found there are different options for deep watering, and today I want to share with you how to use an old milk gallon jug to help your plants get the water they need! It’s a simple, fast, and frugal solution that you can do while you finish up planting your seeds and seed starts. If you are concerned about the plastic milk jug being used, you can also use a glass bottle instead; it will require a few more steps, but it is a great alternative!
Plastic Milk Container
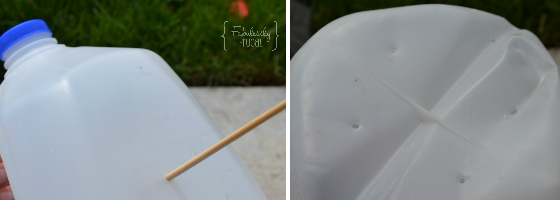
- Thoroughly rinse out the milk jug, then use a skewer or sharp object to poke holes in the side and bottom of the milk jug. Limit the number of holes to 4 per side and bottom so the water does not release too quickly.
- Dig a hole near the plant that needs deep watering. (I am placing my milk jug next to tomato plants because this area of our garden does not get watered heavily by the sprinkler system, and tomato plants love a deep water for better root growth.)
- Place the milk jug in the hole and then bury it up to the neck, leaving just enough above the soil to be able to fill up the container.
- Water plants as needed. *Bonus: when it’s time for plant food, you can mix the food with the water so it will help get to the roots more quickly!
Glass Milk Bottle
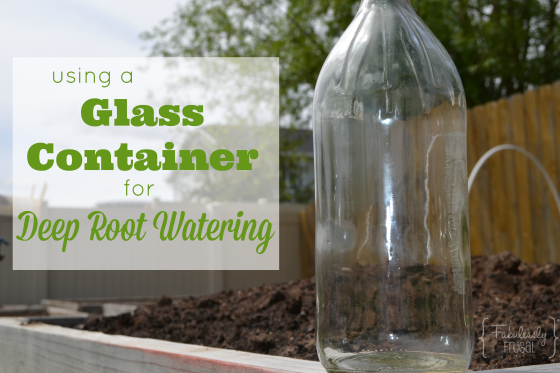
- Rinse out the glass bottle that you will be using. There are a few options for this if you are wanting a large container. Check the store for organic or farm fresh milk with glass milk bottles. Our local co-op has them available, so you would start there. (The one pictured is a vinegar bottle that I will use for a flower planter since it is a smaller bottle.)
To drill the holes in the glass bottle you will need:
- Rotary Drill (Preferably a cordless one like this because it will near water.)
- Diamond drill bit (Please make sure to check that these will fit with your rotary tool.)
- Safety goggles – **ALWAYS wear safety goggles while drilling glass!**
- Cut-resistant gloves – This is recommended to prevent cuts while drilling.
- Water: garage sink or outdoor hose.
- Towels & washcloth
**Before you begin drilling, please keep in mind that glass will most likely break if you apply too much pressure from the drill. So gentle pressure, keeping it wet, and the right tools is the key to successfully drilling the holes.
- Place a towel underneath the glass bottle so that it is not sitting on a hard surface, then turn on the water so it can run over the bottle continuously.
- Use soft pressure to start drilling the hole allowing the water to run over the area where you are drilling.
- Continue the process slowly so that the glass container does not break.
- Once the drill goes through the side of the container stop drilling right away.
- Remove the drill and use a damp washcloth to wipe down the bottle to remove all of the glass pieces.
- Sand the inside of the hole until the it feels smooth then wipe down the container again.
- Repeat this process until you have drilled the appropriate amount of holes for your container.
Once you have drilled the holes needed in your glass bottle you can place the bottle in the ground as described above.

I am eager to see the benefits of having a deep watering system in my garden where it tends to dry out the quickest – and I LOVE that it was so easy and frugal to do!
Thanks ehow
Comments
Leave a Reply
More Related Diys


Trending DIY Projects
- DIY
- Recipes
- Deals
- Blog


Report a Problem
Please select the problem you are facing with this deal:
- Price Increased
- Price Decreased
- No longer available
- Expired
- Link doesn't work
- Suggestion
- Compliment
- Other
Add more details:
Thank you for your feedback. We really appreciate it.
Enter your email address if you would like to receive a follow up.
Please Try Again
Thanks for providing the email address.
We will reach out to you as soon as possible.


Popular
Recommended
About Us

At Fabulessly Frugal, our goal is to help you live HEALTHY, WEALTHY, and WISE! My team and I work hard to bring you the best, online deals, clean eating, DIY's, freezer meal recipes, and more! I LOVE coaching and inspiring people to improve their health in my fitness challenge! You should also check out my favorite cleanse! Learn more about me and the rest of my team.


Copyright © 2008–2024
Fabulessly Frugal: A Coupon Blog Sharing Gift Ideas, Amazon Deals, Printable Coupons, DIY, How to Extreme Coupon, and Make Ahead Meals. All rights reserved
this is crapola. the bottle collapses as the water drains. it will be hard to rerill again.
Don’t put the lid on the jug. This is what makes it collapse. Drill very small holes in the jug so the water drains very slowly.