
DIY Bow Board Picture Tutorial {Easy Craft Idea}
Marji here with a fun and easy craft this week. I have 2 girls and we have a lot of bows around my house. I’m going to show you how to DIY a bow board to store your bows on. It makes a great shower gift for a mom to be and it doesn’t cost much to make. It took me about 15 minutes (not counting paint drying time) to make this. Here is what you need to make one:

{Pin This}
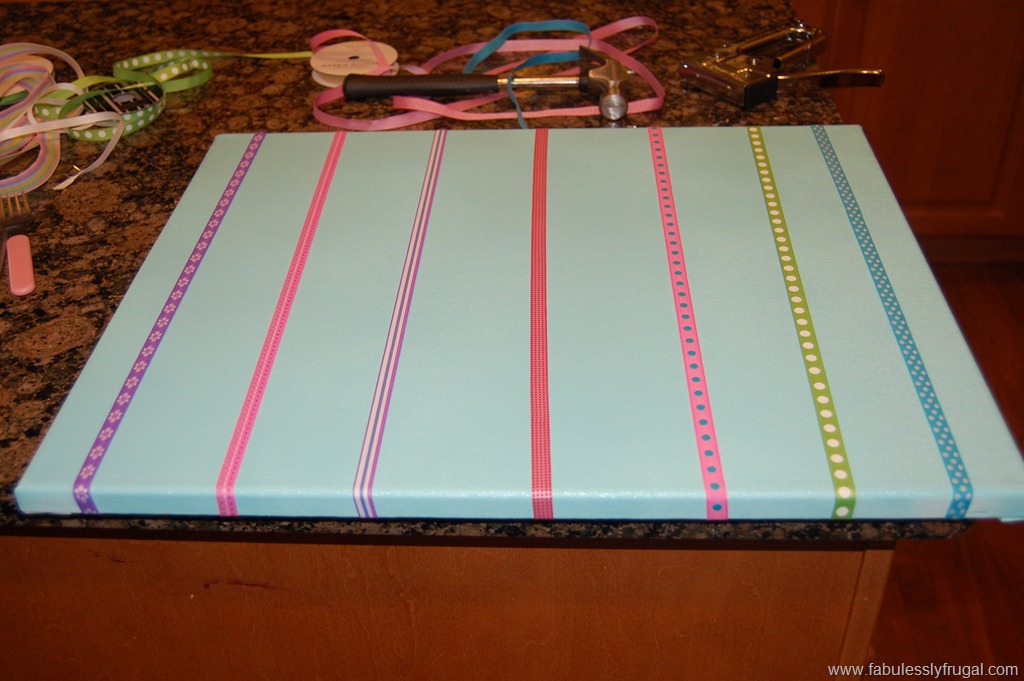
Canvas-I got a 16×20 {it was 7.99 for 2 at Hobby Lobby so I have another one for a gift}
Paint-Spray paint{I used Blue Ocean Breeze} or acrylic paint
Ribbon
A staple gun
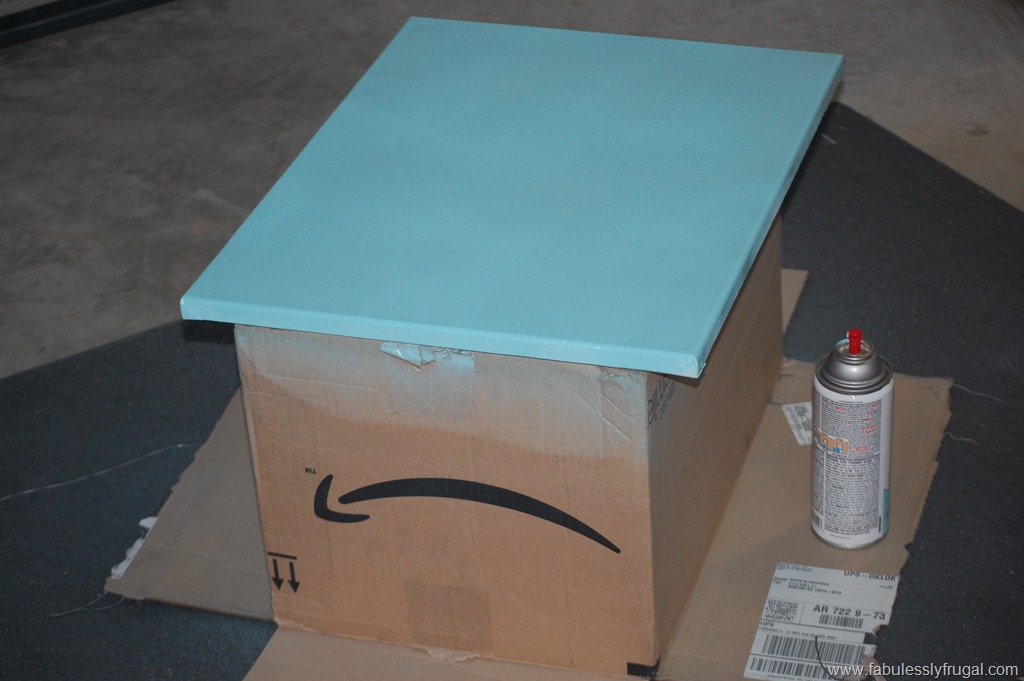
First paint your canvas, make sure you paint the sides too. {Make sure you buy a canvas that is stapled on the back} I think it is faster to spray paint it, than to use acrylic paint and a brush.
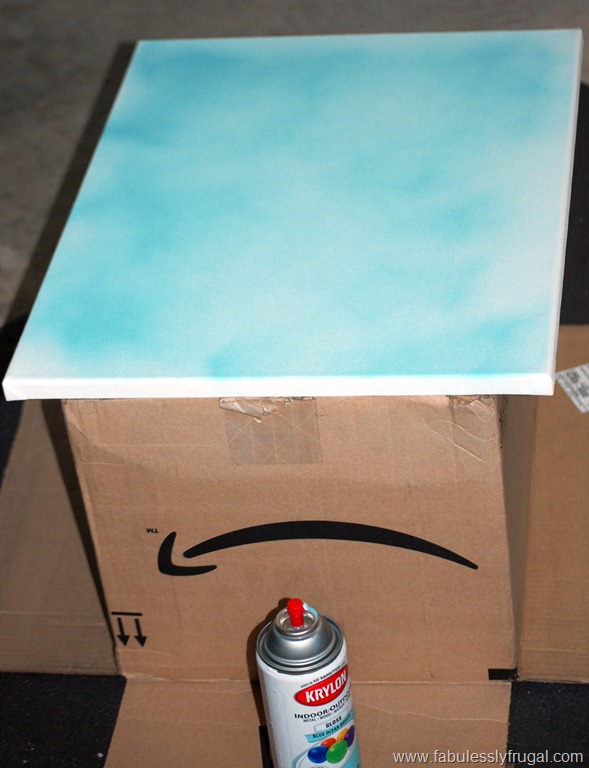
I sprayed about 2 coats on mine and let it dry for about 45 minutes
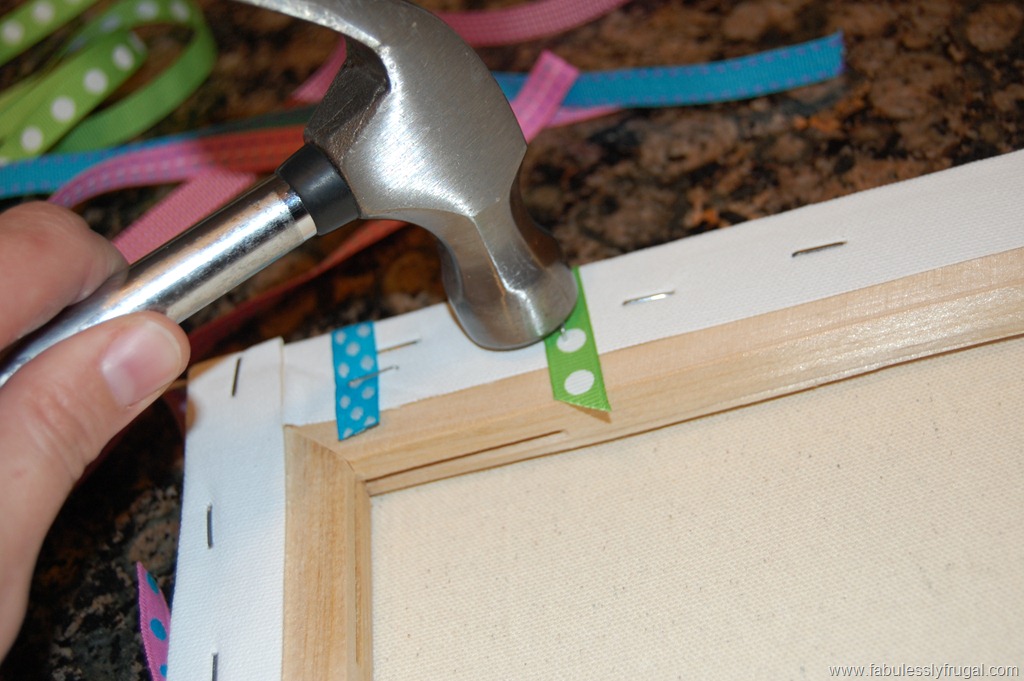
After it is dry, use your staple gun to staple your ribbons to the back of the canvas. I don’t measure the distance, I just eyeball it and spread the ribbon out every few inches.
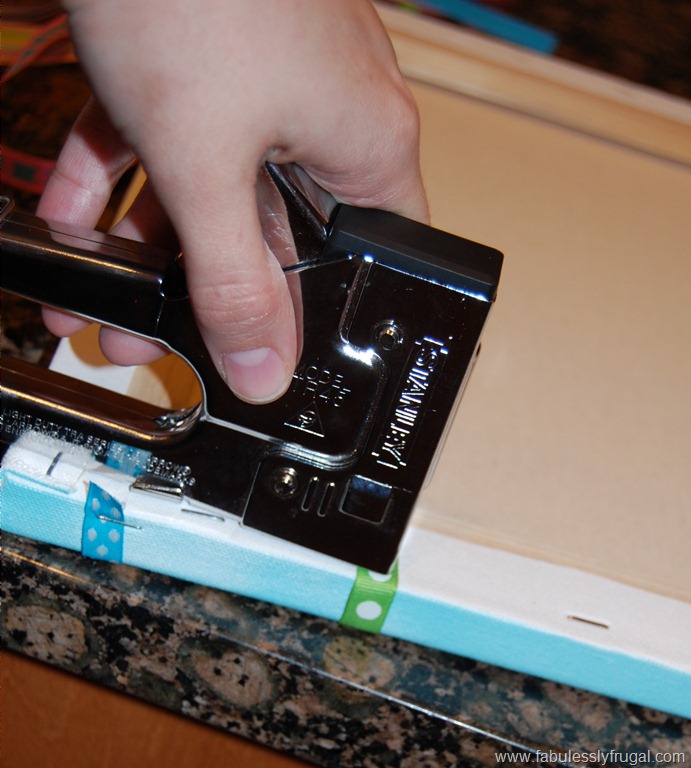
If the staple doesn’t go all the way in, just hammer it in all the way.
Once all the ribbons are on you are ready to hang it up.
{Pin This}
I hung mine up in the kids bathroom low enough so my girls can choose their own bow and put their bows away.

So there you go a quick easy way to keep all of those bows organized or an easy gift to make a mom to be!
{Pin This}
Comments
Leave a Reply
More Related Diys


Trending DIY Projects
- DIY
- Recipes
- Deals
- Blog


Report a Problem
Please select the problem you are facing with this deal:
- Price Increased
- Price Decreased
- No longer available
- Expired
- Link doesn't work
- Suggestion
- Compliment
- Other
Add more details:
Thank you for your feedback. We really appreciate it.
Enter your email address if you would like to receive a follow up.
Please Try Again
Thanks for providing the email address.
We will reach out to you as soon as possible.


Popular
Recommended
About Us

At Fabulessly Frugal, our goal is to help you live HEALTHY, WEALTHY, and WISE! My team and I work hard to bring you the best, online deals, clean eating, DIY's, freezer meal recipes, and more! I LOVE coaching and inspiring people to improve their health in my fitness challenge! You should also check out my favorite cleanse! Learn more about me and the rest of my team.


Copyright © 2008–2024
Fabulessly Frugal: A Coupon Blog Sharing Gift Ideas, Amazon Deals, Printable Coupons, DIY, How to Extreme Coupon, and Make Ahead Meals. All rights reserved
This is so simple, cute & creative! Awesome idea, thanks!!
For a more lightweight design, one can use foam board and cover it in fabric (using hot glue to adhere it to the back). I put mine on the back of my daughter’s bedroom door using a command hook.
I have been making these for years, with a slight difference. If you use a 16×20 canvas (don’t forget to use a coupon!), any fabric fat quarter will do (and looks super cute). You can staple gun it right on, or I prefer to use low-loft batting (hot glue a piece on the front). Then wrap your fabric over the top and side and staple gun it to the back. I also run a line of hot glue around the very edges of the fabric, let that cool, then staple gun it every 4 inches or so, and corners. I then use 7/8″ wide plain colored grosgrain ribbon and measure and mark on the back side of where I want to put my ribbons so they are all centered and spaced evenly. I also pick out a contrasting 3/8″ ribbon (I have used plain, patterned and sheer ribbon) to go over the top of the 7/8″ ribbon (but you don’t have to..just adds a little to it). Hot glue dot the ends down, then staple gun them. Then I run a 7/8″ ribbon piece from one top corner to the other (in the back, of course) and staple gun those down so it has a hanger. Have made these many many times for baby shower gifts, bday gifts, etc, and they are always a hit! For added bow storage space, you can extend ribbon pieces (I do about 18″ pieces) off the bottom of it…so it looks like the pieces that run down the board continue on down the wall. I then “v” cut and heat seal the ends and voila…extra storage without having to do another bow board. Easy peasy!! And there’s so many cute fabrics out there…it’s so fun!!
I did something similar to this once, but instead of a canvas I used a cookie sheet that I bought from the thrift store, and then I covered it with fabric, added the ribbons (used a hot glue gun to attach everything), and mounted in a picture frame. We didn’t use it for bows, though, more as a bulletin board (you could slide things under the ribbons to hold them, or use a magnet to stick them to the cookie sheet).
Great idea for the bows, though. I’m making my niece a bunch of hair clips and such for her birthday, this would be a great way to present them to her and give my sister somewhere to store them all. I think I would add some plastic clips or hooks along the bottom for headbands and pony-tail holders to hang from.